
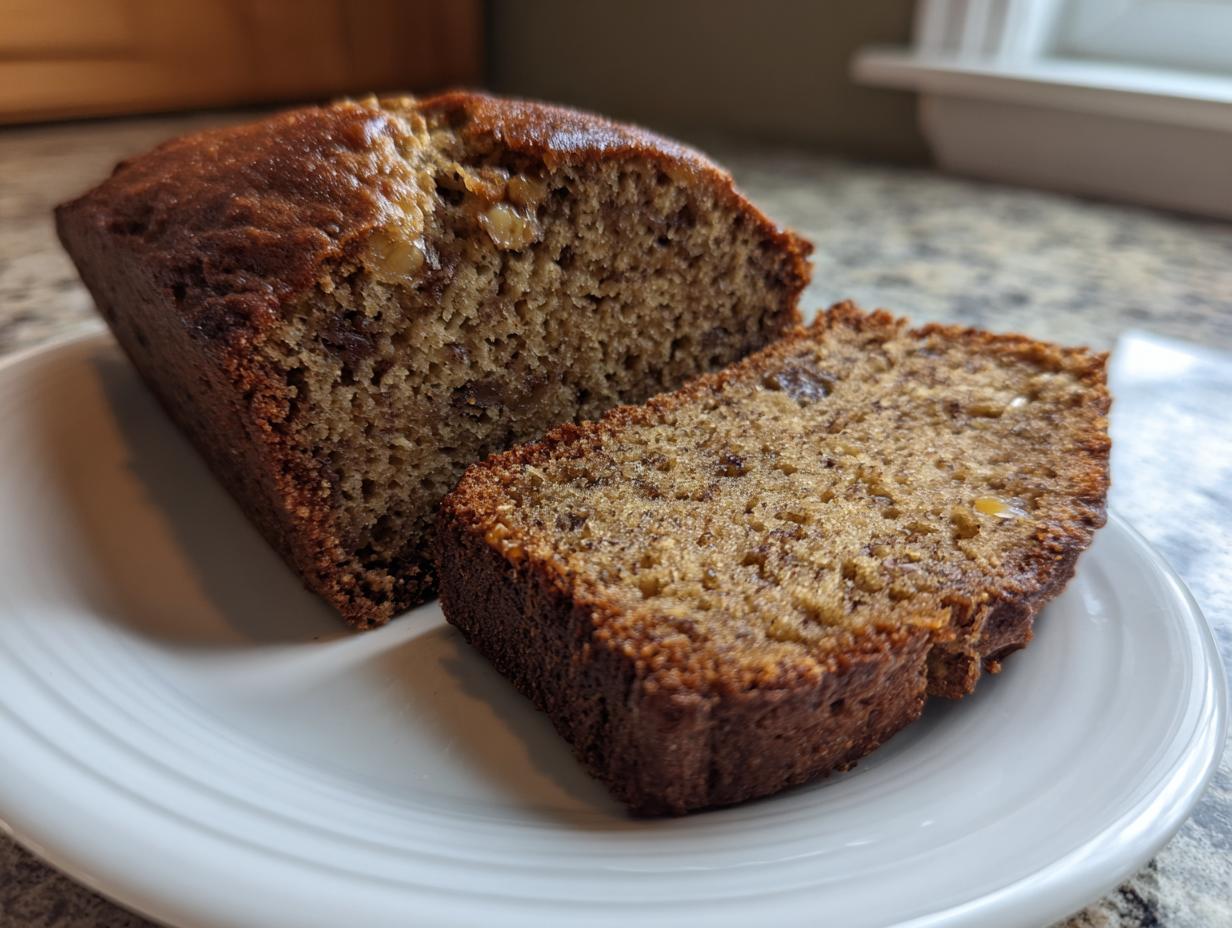
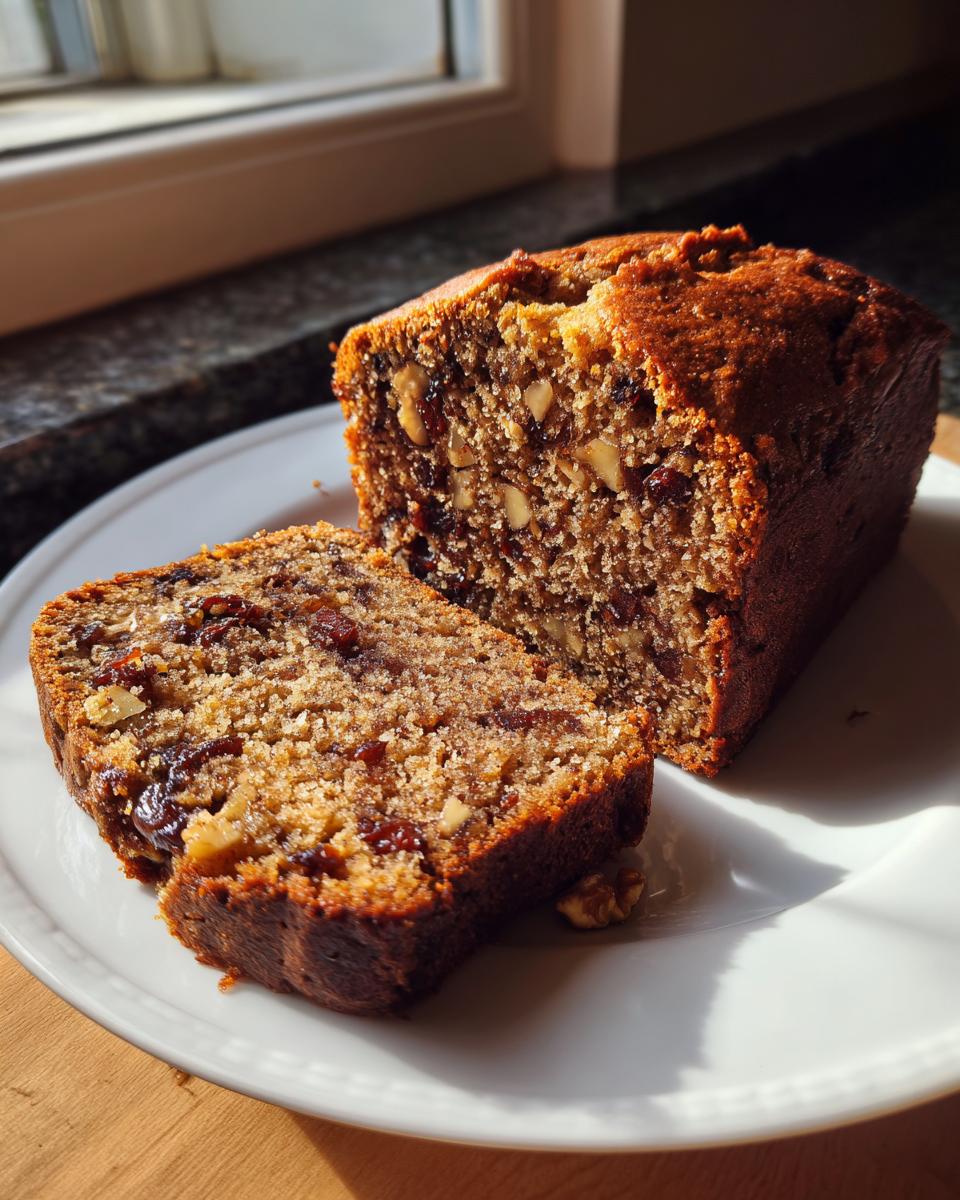
You know those recipes you see that just scream ‘cozy kitchen’ and ‘pure comfort’? This is it. Forget anything fussy; we’re diving headfirst into making the most wonderfully moist, **Easy, Moist, Old-Fashioned Date Nut Bread** you’ve ever tried. When I first started my journey here at Kitchenican, I was terrified of quick breads—I thought they’d collapse or turn out dense and heavy. But this recipe changed everything for me. It’s foolproof, uses basic ingredients, and banishes all that baking doubt! You can read more about my whole philosophy on taking the fear out of the kitchen over on our About Page.
This specific date nut bread recipe has become my go-to for holiday gifting because it’s just so reliably delicious and simple. It proves you don’t need complicated techniques to achieve that deep, nostalgic flavor everyone loves. Trust me, let’s get baking!
- Why This Easy Date Loaf Recipe Builds Confidence
- Gathering Ingredients for Your Date Nut Bread
- The Preparation Steps for Perfect Old Fashioned Nut Bread
- Baking and Cooling Your Date and Walnut Bread
- Tips for Success with Homemade Quick Breads
- Serving Suggestions for This Comfort Food Baking Classic
- Variations: Banana Date Nut Bread Variation and More
- Storage & Reheating Instructions for Your Date Nut Bread
- Frequently Asked Questions About This Best Date Nut Bread Recipe
- Serving Suggestions for This Comfort Food Baking Classic
- Variations: Banana Date Nut Bread Variation and More
- Storage & Reheating Instructions for Your Date Nut Bread
- Sharing Your Homemade Quick Breads Experience
Why This Easy Date Loaf Recipe Builds Confidence
I know why you clicked on this—you want that classic, comforting taste, but you don’t want to spend half a day waiting for dough to proof. That’s exactly what I love about this recipe. It’s designed to be fast, reliable, and unbelievably flavorful, which is essential when you’re trying to gain confidence in the kitchen.
Here’s the breakdown of why this loaf is such a winner for everyday success:
Quick Bread Baking Made Simple
Because this is a quick bread, we completely skip the yeast drama! There’s no kneading, no rising time, and virtually no fuss. You literally mix the wet items, add the dry items, and stir until they just meet. That’s it! It comes together faster than stirring up a boxed cake mix.
Secrets to Truly Moist Date Nut Bread
The absolute secret weapon for ensuring this is the most moist date nut bread you’ll ever bake is in the first step. We actually soak the dates in boiling water with baking soda. This hydrates them perfectly and keeps them from stealing moisture from your batter while it bakes. It guarantees a tender crumb every single time.
Gathering Ingredients for Your Date Nut Bread
If we’re going to nail that perfect loaf texture, we need to be precise with our ingredient list. This recipe relies on standard pantry items, but the way we handle the dates makes all the difference, just like Grandma did with her carrots years ago! Don’t substitute things willy-nilly here, especially the fat and leavening agents. For this Easy Date Loaf Recipe, make sure everything is measured exactly as listed.
Here is what you’ll need to pull together:
- 1 cup boiling water
- 1 cup packed pitted dates, chopped
- 1 teaspoon baking soda
- 1/2 cup (1 stick) unsalted butter, softened
- 1 cup granulated sugar
- 2 large eggs
- 1 teaspoon vanilla extract
- 1 3/4 cups all-purpose flour
- 1 teaspoon baking powder
- 1/2 teaspoon salt
- 1 cup chopped walnuts, plus extra for topping (optional)
Ingredient Notes and Ingredient Spotlight: Baking with Dates
When it comes to the dates, please, *please* make sure they are pitted! Nobody wants to bite into a pit. I always buy the pitted Mission dates, or sometimes the softer Medjool if I find them on sale, and then give them a rough chop. Because we are soaking them in the beginning, the type of date isn’t quite as crucial here as it might be in a raw treat, but chopping them helps them release all that stickiness into the water. That soaking process I mentioned earlier isn’t just for softening; it’s my way of baking moisture insurance right into the loaf. It’s a little step that pays off huge in the final texture.
The Preparation Steps for Perfect Old Fashioned Nut Bread
Okay, don’t let the ten minutes of soaking time fool you—this whole process moves pretty fast once you get rolling! Remember, for any Old Fashioned Nut Bread to turn out right, we need to stack our steps logically. Get your 9×5 loaf pan greased and floured first, and make sure that oven is up to 350°F, because we don’t want it waiting on us! The dates are the star here, and our first task sets the tone for the moistness we are aiming for.
Activating the Dates: The First Step for Date Nut Bread
This is where the magic starts. Take your chopped dates and put them in a bowl—a nice sturdy one that can handle heat. Pour that cup of boiling water right over them, and then stir in the baking soda. That soda is going to react with the dates and foam up a little bit, which is totally normal! You have to let that sit for a full 10 minutes. Don’t rush this! Letting the dates plump up and hydrate is absolutely key for the best date nut bread texture. Once those ten minutes are up, you move right into creaming the butter and sugar.
Mixing Wet and Dry Components for Your Easy Date Loaf Recipe
While the dates are chilling out, get your butter and sugar creamy—you want it fluffy, pale yellow, maybe four minutes with the hand mixer. Then eggs, one at a time, vanilla last. In a separate bowl, whisk up your flour, salt, and baking powder. This is my biggest tip for an Easy Date Loaf Recipe: never dump the dry ingredients all at once! Add the dry mix gradually, alternating it with that date liquid we prepared, mixing on low just until everything looks connected. The second you see no more flour streaks, STOP! Any extra mixing makes this tender loaf tough instead of soft.
Baking and Cooling Your Date and Walnut Bread
Now that we’ve mixed up that wonderfully thin batter—which is supposed to be thin, don’t panic!—it’s time to bake our beautiful Date and Walnut Bread. We’re aiming for that 350°F oven temperature we set earlier, and the baking time runs about 55 to 65 minutes. Since this is a Quick Bread, testing for doneness is where we really pay attention.
You want to start testing around the 55-minute mark. Slide a wooden skewer or a clean toothpick right into the center of the loaf. If it comes out clean, or maybe with just a few moist, sticky crumbs clinging to it—that’s our goal! If it comes out gooey, give it five more minutes and check again. Overbaking is the enemy of moisture, right?
Once it passes the skewer test, we have to honor the cooling process. Don’t just yank it out onto the counter! Let the Date and Walnut Bread cool right in that pan for 10 whole minutes. This lets the structure set up just enough so it won’t crumble when you try to flip it out. After those 10 minutes, carefully turn it out onto a wire rack to finish cooling completely. I always grab my cooling rack first; you need that air circulation all around!
Tips for Success with Homemade Quick Breads
Baking is about confidence, and confidence comes from knowing how to fix things when they don’t go quite as planned! Even though this is one of my easiest recipes, sometimes home ovens act up or we accidentally add a smidge too much liquid. Don’t throw that loaf away if it looks a little wonky right out of the oven—we can fix most things! These are the little bits of wisdom I picked up through years of testing and re-testing until I felt like I mastered the delicate balance of a perfect, tender quick bread.
Troubleshooting Common Issues in Date Nut Bread Baking
So, maybe your loaf came out looking a little sad? The top sank right in the middle? Usually, that means the internal structure wasn’t quite ready yet, which happens if you open the oven door too early or, more commonly, if you overmixed the batter. Remember how I stressed mixing only until *just* combined? Overmixing develops gluten, which weighs the bread down and prevents it from rising evenly. If you suspect dryness, it almost always points back to skipping step two: pouring that boiling water over the dates!
Another common snag is sticking, especially since this date nut bread holds so much moisture. If you check the Notes section again, you’ll see I recommend using homemade cake goop or parchment if you’re worried about your pan. A sticky loaf is a heartbreaker, so take those extra two minutes to prep the pan properly. Don’t let a little sticking rob you of enjoying this perfect treat!
Serving Suggestions for This Comfort Food Baking Classic
This loaf is so versatile; it really shines in so many moments throughout the day. Honestly, sometimes I just grab a slice standing over the sink while making coffee, and that’s perfectly acceptable! It’s designed to be satisfying whether you’re running out the door or settling in for a cozy afternoon.
When I have a little extra time, or if I’m packaging these loaves up to give away, I like to dress them up just a touch. A thick swipe of softened, good-quality salted butter is pure heaven—it melts right into the warm bread. If you prefer something tangier, a thin layer of cream cheese is fantastic, too! It cuts through the sweetness of the dates so nicely.
But if you want to make this feel truly special, especially for a brunch spread or a holiday morning, try serving it slightly warm alongside a hot cup of dark roast coffee or some spiced cider. That warmth really wakes up all those subtle spices in the loaf. You can find some wonderful ideas for holiday serving over on this site for extra inspiration!
Variations: Banana Date Nut Bread Variation and More
While this date nut bread recipe is, in my humble opinion, perfect as is—because it hits that nostalgic sweet spot—I totally get the urge to tweak things! We all have that random banana staring us down from the counter, or maybe we just want to sneak in a little extra fiber. Don’t sweat it! It’s easy to adapt this recipe a bit without losing that essential moist texture we worked so hard for.
If you’re looking for something a little different but just as comforting, I have a couple of go-to substitutions you absolutely have to try.
First up: the one variation people ask about constantly is the Banana Date Nut Bread Variation. This addition not only works beautifully with the sweetness of the dates but also guarantees an even *moister* crumb, which is saying something!
- If you want to make the switch, simply replace half (about 1/2 cup) of the boiling water/date mixture with very ripe, mashed banana. You can probably skip adding any extra liquid, but check the batter consistency—it should still feel thin, almost like pancake batter. If it looks too stiff, just add a tablespoon or two of milk to loosen it up. This gives you that classic banana bread flavor wrapped up in your favorite date loaf! You can see a great example of this at this site if you want visual inspiration!
- For a slightly healthier spin, especially if you’re making this for a wholesome snack bread situation, try swapping out a third of the all-purpose flour for whole wheat flour. Just remember, whole wheat absorbs a little more liquid, so make sure you don’t skip that vital date soaking step!
No matter how you adjust it, this delicious date nut bread remains a winner. It proves that embracing a recipe means making it your own while respecting the core techniques that made it great in the first place!
Storage & Reheating Instructions for Your Date Nut Bread
One of the best things about baking a beautiful loaf like this is knowing you don’t have to eat it all right away! I love making a double batch just so I can tuck one away for later. This is where knowing how to properly store your homemade quick bread really builds trust in your baking skills, because nobody wants a stale loaf hanging around.
For keeping things fresh on the counter, remember that because this loaf has such great moisture, it will stay nice and tender for about three days if you wrap it correctly. We aren’t trying to keep the air out completely, but we want to stop it from drying out.
- Short-Term (Counter): After the loaf has *completely* cooled—and I mean totally cool, otherwise you trap steam and get gummy bread—wrap it tightly first in plastic wrap, then follow that up with a layer of aluminum foil. Store it on the counter at room temperature.
If you’re like me and you like to have that comforting aroma of fresh bread waiting for you next week, freezing is the way to go! The recipe notes actually have this built right in, and it works like a charm.
For freezing this delicious treat, you need to follow the same double-wrapping protocol, but you’ll want to keep it frozen for up to three months. Just make sure that foil layer is secure to prevent any freezer burn from creeping in. I can’t tell you how amazing it is to pull a fully wrapped loaf out of the freezer on a chilly Saturday morning and know that I have fresh bread ready to go with just a tiny bit of time.
When you want to enjoy it from frozen, simply unwrap the loaf completely and let it thaw on the counter for a few hours. If you happen to be rushed, you can pop it into a very low oven—say, 250°F—wrapped in foil for about 15 minutes. It comes out tasting like it was just baked that morning!
Frequently Asked Questions About This Best Date Nut Bread Recipe
It’s always great when you have a few last-minute thoughts before you fill up that loaf pan! Cooking is all about feeling equipped, and having the answers to these common snags means you avoid those moments of panic halfway through the mix. I’ve gathered a few things folks ask me most often about getting the absolute best results from this Best Date Nut Bread Recipe, so you can feel totally relaxed walking into the kitchen!
Here are the quick answers before you head to the oven:
Is this the Best Date Nut Bread Recipe for Gifting?
Oh, absolutely! This date nut bread is fantastic for gifting. It travels really well, and because it’s a quick bread, it stays fresh longer than most cakes. If you want to make it extra special for a holiday gift, reference the notes section: mixing a little powdered sugar with milk creates a beautiful, simple glaze you can drizzle over the top once it’s cooled down. Even plain, folks love getting a slice of homemade comfort!
Can I use different nuts or add dried fruit?
You certainly can vary the nuts! Walnuts are classic, but pecans work just as well, giving it a slightly different buttery richness. If you want to try other dried fruits along with the dates, feel free. About half a cup of dried cherries or apricots chopped up and folded in with the walnuts works nicely. Just don’t load up on too many additions, or you risk weighing down your Easy Date Loaf Recipe!
Why is the batter so thin? Is something wrong?
Nope! This is one of the biggest surprises for bakers new to this specific date nut bread recipe. The batter *should* be quite thin, almost like a very thick pancake batter, because of that wonderful boiling water and date mixture we add in step two. If you’re worried, you can always check on the technique in the instructions, but trust me, a thin batter results in that signature tender crumb.
Can I use whole wheat flour instead of all-purpose?
Yes, you can definitely substitute some of the white flour for whole wheat flour to make it a more wholesome snack bread. I usually tell people to try swapping out about a third of the white flour for whole wheat. Just remember that whole grain flour absorbs liquid more aggressively, so if your final batter feels stiffer than you expect, don’t hesitate to add an extra splash of milk just to loosen it up before baking!
If you run into any trouble or just want to share your success story, please don’t hesitate to reach out—you can always contact me directly!
Serving Suggestions for This Comfort Food Baking Classic
This loaf is so versatile; it really shines in so many moments throughout the day. Honestly, sometimes I just grab a slice standing over the sink while making coffee, and that’s perfectly acceptable! It’s designed to be satisfying whether you’re running out the door or settling in for a cozy afternoon.
When I have a little extra time, or if I’m packaging these loaves up to give away, I like to dress them up just a touch. A thick swipe of softened, good-quality salted butter is pure heaven—it melts right into the warm bread. If you prefer something tangier, a thin layer of cream cheese is fantastic, too! It cuts through the sweetness of the dates so nicely.
But if you want to make this feel truly special, especially for a brunch spread or a holiday morning, try serving it slightly warm alongside a hot cup of dark roast coffee or some spiced cider. That warmth really wakes up all those subtle spices in the loaf. You can find some wonderful ideas for holiday serving over on this site for extra inspiration!
Variations: Banana Date Nut Bread Variation and More
While this date nut bread recipe is, in my humble opinion, perfect as is—because it hits that nostalgic sweet spot—I totally get the urge to tweak things! We all have that random banana staring us down from the counter, or maybe we just want to sneak in a little extra fiber. Don’t sweat it! It’s easy to adapt this recipe a bit without losing that essential moist texture we worked so hard for.
If you’re looking for something a little different but just as comforting, I have a couple of go-to substitutions you absolutely have to try.
First up: the one variation people ask about constantly is the Banana Date Nut Bread Variation. This addition not only works beautifully with the sweetness of the dates but also guarantees an even *moister* crumb, which is saying something!
- If you want to make the switch, simply replace half (about 1/2 cup) of the boiling water/date mixture with very ripe, mashed banana. You can probably skip adding any extra liquid, but check the batter consistency—it should still feel thin, almost like pancake batter. If it looks too stiff, just add a tablespoon or two of milk to loosen it up. This gives you that classic banana bread flavor wrapped up in your favorite date loaf! You can see a great example of this at this site if you want visual inspiration!
- For a slightly healthier spin, especially if you’re making this for a wholesome snack bread situation, try swapping out a third of the all-purpose flour for whole wheat flour. Just remember, whole wheat absorbs a little more liquid, so make sure you don’t skip that vital date soaking step!
No matter how you adjust it, this delicious date nut bread remains a winner. It proves that embracing a recipe means making it your own while respecting the core techniques that made it great in the first place!
Storage & Reheating Instructions for Your Date Nut Bread
One of the best things about baking a beautiful loaf like this is knowing you don’t have to eat it all right away! I love making a double batch just so I can tuck one away for later. This is where knowing how to properly store your homemade quick bread really builds trust in your baking skills, because nobody wants a stale loaf hanging around.
For keeping things fresh on the counter, remember that because this loaf has such great moisture, it will stay nice and tender for about three days if you wrap it correctly. We aren’t trying to keep the air out completely, but we want to stop it from drying out.
- Short-Term (Counter): After the loaf has *completely* cooled—and I mean totally cool, otherwise you trap steam and get gummy bread—wrap it tightly first in plastic wrap, then follow that up with a layer of aluminum foil. Store it on the counter at room temperature.
If you’re like me and you like to have that comforting aroma of fresh bread waiting for you next week, freezing is the way to go! The recipe notes actually have this built right in, and it works like a charm.
For freezing this delicious treat, you need to follow the same double-wrapping protocol, but you’ll want to keep it frozen for up to three months. Just make sure that foil layer is secure to prevent any freezer burn from creeping in. I can’t tell you how amazing it is to pull a fully wrapped loaf out of the freezer on a chilly Saturday morning and know that I have fresh bread ready to go with just a tiny bit of time.
When you want to enjoy it from frozen, simply unwrap the loaf completely and let it thaw on the counter for a few hours. If you happen to be rushed, you can pop it into a very low oven—say, 250°F—wrapped in foil for about 15 minutes. It comes out tasting like it was just baked that morning!
Sharing Your Homemade Quick Breads Experience
I truly hope you loved this recipe as much as I love baking it for my family. When you finally pull that perfect, deep brown loaf out of the oven, I want to hear all about it! Did you serve it warm with butter? Did you try the banana variation?
Please leave a star rating right below, and drop a comment telling me your biggest success or any little tweak that made it perfect for *your* kitchen. Sharing these stories is what building confidence is all about!
PrintEasy, Moist, Old-Fashioned Date Nut Bread
Bake a comforting, moist date nut bread loaf using this straightforward recipe. This classic quick bread is perfect for breakfast, snacking, or holiday sharing.
- Prep Time: 15 min
- Cook Time: 60 min
- Total Time: 75 min
- Yield: 1 loaf (about 10 servings) 1x
- Category: Quick Bread
- Method: Baking
- Cuisine: American
- Diet: Vegetarian
Ingredients
- 1 cup boiling water
- 1 cup packed pitted dates, chopped
- 1 teaspoon baking soda
- 1/2 cup (1 stick) unsalted butter, softened
- 1 cup granulated sugar
- 2 large eggs
- 1 teaspoon vanilla extract
- 1 3/4 cups all-purpose flour
- 1 teaspoon baking powder
- 1/2 teaspoon salt
- 1 cup chopped walnuts, plus extra for topping (optional)
Instructions
- Preheat your oven to 350°F (175°C). Grease and flour a 9×5 inch loaf pan.
- Place the chopped dates in a heatproof bowl. Pour 1 cup of boiling water over the dates and stir in the baking soda. Let this mixture stand for 10 minutes to soften the dates.
- In a large bowl, cream together the softened butter and granulated sugar until light and fluffy. Beat in the eggs one at a time, then mix in the vanilla extract.
- In a separate bowl, whisk together the flour, baking powder, and salt.
- Gradually add the dry ingredients to the wet ingredients, mixing just until combined. Do not overmix.
- Gently fold in the chopped walnuts and the date-water mixture. The batter will be thin.
- Pour the batter into the prepared loaf pan. Sprinkle the top with extra chopped walnuts if desired.
- Bake for 55 to 65 minutes, or until a wooden skewer inserted into the center comes out clean.
- Let the loaf cool in the pan for 10 minutes before turning it out onto a wire rack to cool completely.
Notes
- For an extra moist loaf, ensure you let the dates soak completely in the hot water mixture. This hydrates them before baking.
- This bread freezes well. Wrap the cooled loaf tightly in plastic wrap and then foil before freezing for up to three months.
- If you prefer a sweeter glaze for gifting, mix 1/2 cup powdered sugar with 1 tablespoon milk and drizzle over the cooled loaf.
Nutrition
- Serving Size: 1 slice
- Calories: 285
- Sugar: 30
- Sodium: 180
- Fat: 13
- Saturated Fat: 5
- Unsaturated Fat: 8
- Trans Fat: 0
- Carbohydrates: 40
- Fiber: 2
- Protein: 4
- Cholesterol: 55