
If you’ve ever walked out of a bakery thinking, “Wow, I wish I could make something that tastes that good at home,” I totally get it. For years, I thought incredible baking was only for professionals! But that’s exactly why I developed this recipe for the Best Moist & Fluffy Southern Coconut Cake. Seriously, this is the cake that flipped the switch for me; it’s proof that you can create something bakery-style and unbelievably delicious right in your own kitchen. This coconut cake is the one that turned my baking doubt into real, hard-earned confidence. I know you can do it too!
My journey, like yours maybe, started with wanting great food without the intimidation factor. Head over to my story if you want the full rundown, but trust me—this cake is simple magic. It delivers that rich, tropical flavor and that impossibly light texture every single time.
- Why This Southern Coconut Cake Recipe Builds Confidence
- Gathering Ingredients for Your Homemade Coconut Cake
- Essential Equipment for a Perfect Coconut Layer Cake
- Step-by-Step Instructions for the Coconut Cream Cake Recipe
- Tips for a Truly Bakery Style Coconut Cake
- Storage and Reheating Your Coconut Desserts for Holidays
- Frequently Asked Questions About This Coconut Cake
- Understanding the Nutrition in This Classic Coconut Dessert
- Share Your Experience Baking This Coconut Cake
Why This Southern Coconut Cake Recipe Builds Confidence
I built this recipe specifically to move you past the fear of dry, crumbly layers. This isn’t just some random cake; it’s structured to produce results that look and taste like they came straight from an amazing local shop. That’s why I know this moist coconut cake recipe works for everyone.
- It uses standard pantry baking ratios, meaning you don’t need fancy scales or unusual techniques.
- The combination of butter and coconut milk ensures a truly bakery style coconut cake that stays fresh longer.
- Every step is designed for maximum payoff without difficult steps.
Achieving Truly Fluffy Coconut Cake Layers
The fluffiness factor starts way back when we cream the butter and sugar—don’t rush that part! We are physically beating air into the batter by making sure the butter is perfectly softened, not melted. This trapped air expands in the oven, lifting those layers up and making them light. It’s basic science, but it makes all the difference between a dense brick and a truly fluffy coconut cake!
The Secret to the Best Coconut Cake Frosting
For the frosting, we lean on cream cheese alongside the butter. This is key. The cream cheese gives the frosting just the right amount of tang to cut through the sweetness of the shredded coconut, stabilizing the whole thing so it doesn’t just melt off the sides. It results in the richest coconut cream cake recipe frosting imaginable, making your whole coconut cake sing!
Gathering Ingredients for Your Homemade Coconut Cake
Okay, let’s talk about what you need to grab before you even think about turning on the mixer. When you’re aiming for a truly show-stopping coconut cake, the quality of your ingredients really shows through, especially in a recipe this focused on flavor. Don’t worry, everything here is easy to find at your regular grocery store. We’re keeping the components straightforward so you don’t get overwhelmed!
For the cake layers, you’ll need flour, sugar, baking powder, salt, butter, eggs, whole milk, vanilla, and that secret weapon—full-fat, unsweetened coconut milk. Then for the coating, just grab some extra shredded coconut. See how simple that is? No weird specialty flours needed here!
Ingredient Notes and Substitution Tips
Because this recipe relies on moisture, I have a few pro-tips. If you want the absolute best results, make sure you are using full-fat coconut milk for the cake batter; the low-fat versions just don’t deliver the necessary richness we’re after here. Also, check out the notes section later—I included a simple trick where you can brush the completely cooled layers with a little extra coconut milk and sugar right before frosting. It’s optional, but wow, does it amp up the moisture factor!
For the frosting, using room-temperature cream cheese and butter is non-negotiable if you want that smooth, dreamy texture we talked about.
Essential Equipment for a Perfect Coconut Layer Cake
This is where I pull you back from the brink of doubt! You don’t need a commercial kitchen to make this cake; you just need the right tools for the job. Having these pieces ready honestly cuts down on stress and helps everything flow better once you start mixing. I always lay everything out on the counter before I even open the pantry door—it’s part of my winning routine!
Here is the short list of what you absolutely need to make this happen:
- Two 8-inch round cake pans: This is non-negotiable for getting those signature even, beautiful layers. If you only have 9-inch, your layers will be a bit thinner, but they’ll still bake up lovely.
- An electric mixer (Handheld or stand mixer): While you *could* mix the frosting by hand, creaming the butter and sugar for the cake batter is so much easier and more effective with a machine to incorporate that crucial air.
- Parchment paper: This is my favorite insurance policy! You’ll need it to line the bottom of those 8-inch pans. It ensures your light fluffy cake layers release flawlessly, saving you serious tears later.
- A large mixing bowl and a medium mixing bowl: Standard stuff, but make sure the large one is big enough to handle all your cake ingredients without splattering when you turn the mixer on high!
- Wire cooling racks: You need airflow underneath the cakes so they cool evenly and don’t get soggy bottoms while waiting for the frosting.
- Offset spatula or butter knife: Handy for spreading that luscious frosting evenly over the cake layers and the exterior.
See? Totally accessible equipment! Focusing on having these tools clean and ready to go is half the battle won before you even measure the flour.
Step-by-Step Instructions for the Coconut Cream Cake Recipe
Alright, the setup is done, the ingredients are waiting! Now we get to the fun part—bringing this amazing coconut cream cake recipe to life. Baking is all about timing, so pay attention to those preheats and cooldowns, and I promise you, this cake will turn out picture-perfect. Don’t rush the cooling stage; that’s where most people accidentally mess up a gorgeous cake!
Mixing the Moist Coconut Cake Batter
First things first: preheat that oven to 350°F and get those 8-inch pans greased and lined with parchment paper. Now, in your big bowl, whisk together your dry stuff—flour, sugar, baking powder, and salt. Next, you add the butter, eggs, milks, and vanilla. Beat this on medium speed for a full two minutes until it looks smooth. My biggest tip here, straight from my trial-and-error days, is to stop the mixer once or twice and scrape down EVERYTHING on the sides and bottom of the bowl. You want everything incorporated perfectly for that moist coconut cake recipe texture!
Baking and Cooling the Light Fluffy Cake Layers
Once you’ve gently stirred in that extra cup of shredded coconut, divide the batter evenly between your two prepared pans. Pop them into the oven and bake for about 30 to 35 minutes. The magic moment is when a wooden pick comes out clean. Do not be tempted to frost them while warm! Once they pass the test, let them hang out in the pan for 10 minutes (no more, no less), and then carefully flip them onto a wire rack to cool COMPLETELY. If you frost warm cakes, you just get soup, and we are working towards those beautiful light fluffy cake layers!
Creating the Homemade Coconut Frosting
For the frosting, beat your softened cream cheese and butter together until they are dreamy and smooth—no lumps allowed! Slowly add in that sifted powdered sugar. Once that’s incorporated, mix in the coconut extract and heavy cream. If your kitchen is super humid (mine gets like that in the summer!), you might need to add a touch more powdered sugar to stiffen it up slightly. If you want a richer, more spreadable glaze, thin it slightly with a tiny splash more cream. This is how you nail that perfect coconut frosting homemade consistency!
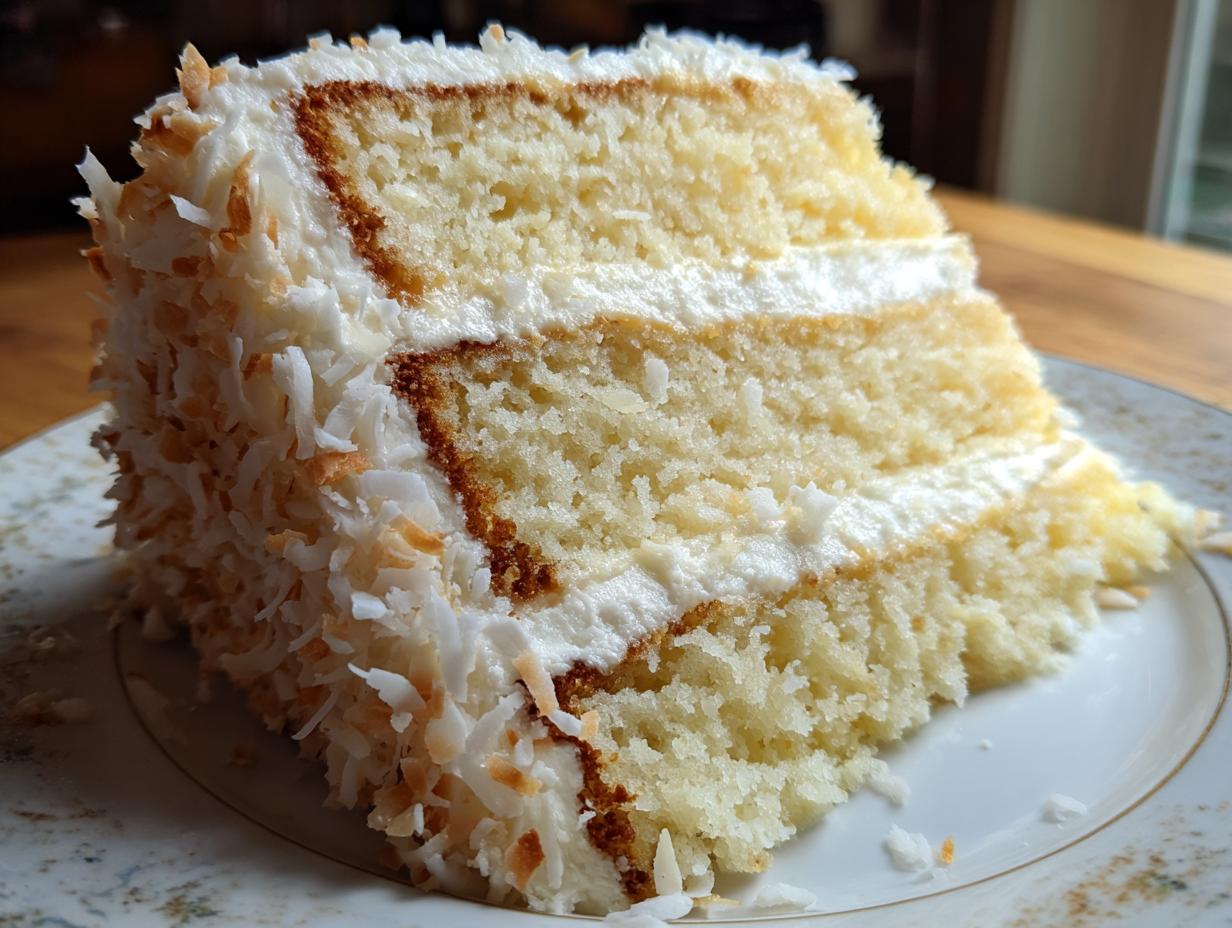
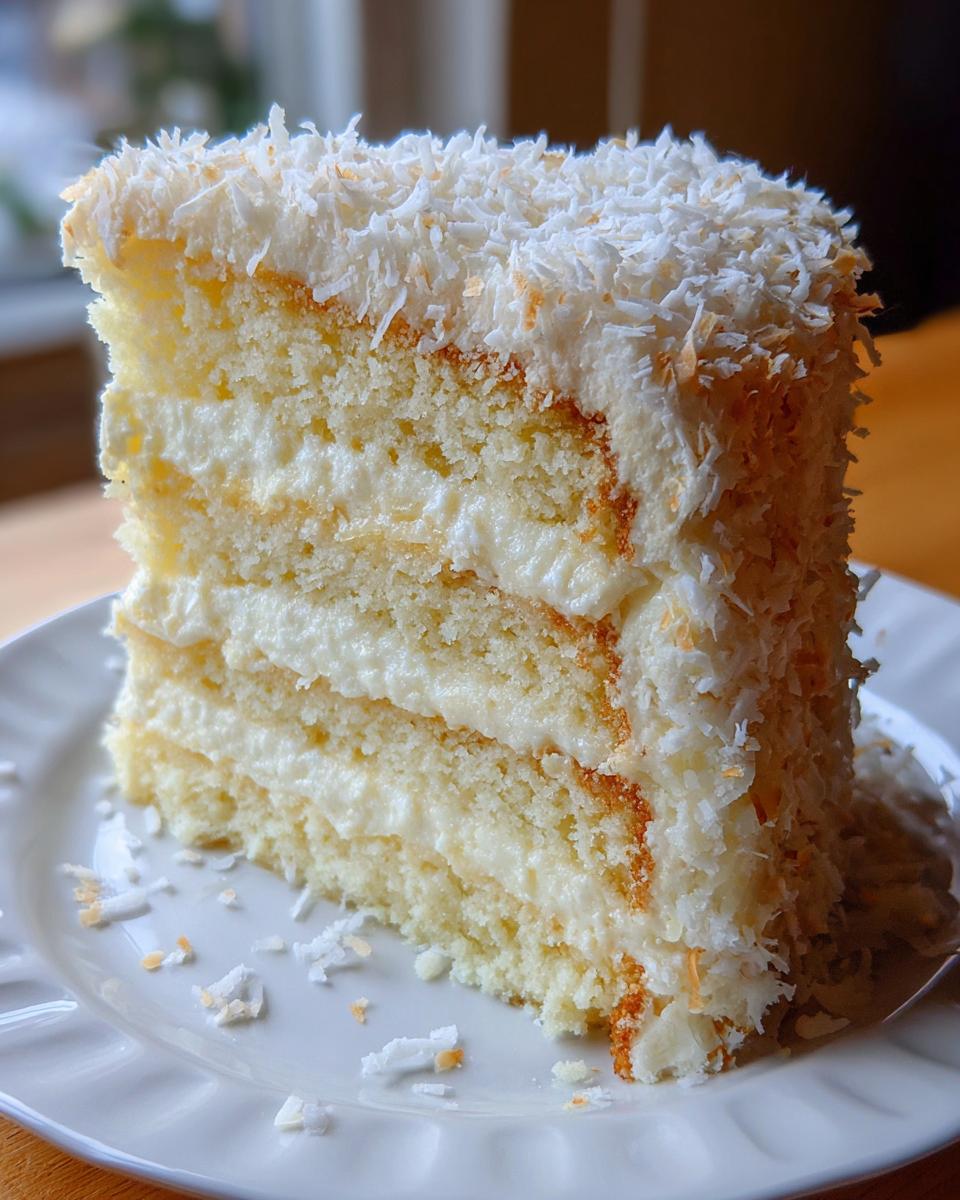
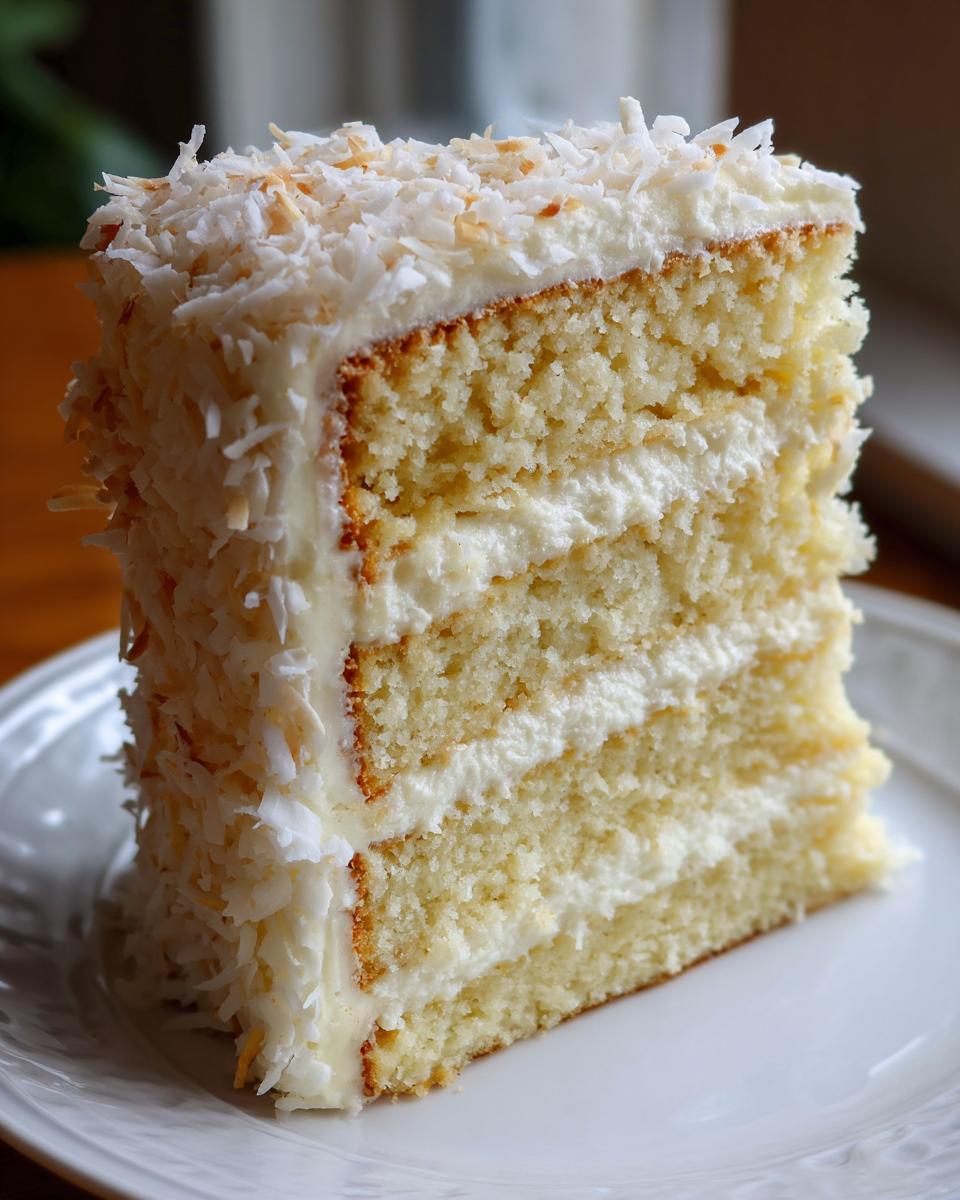
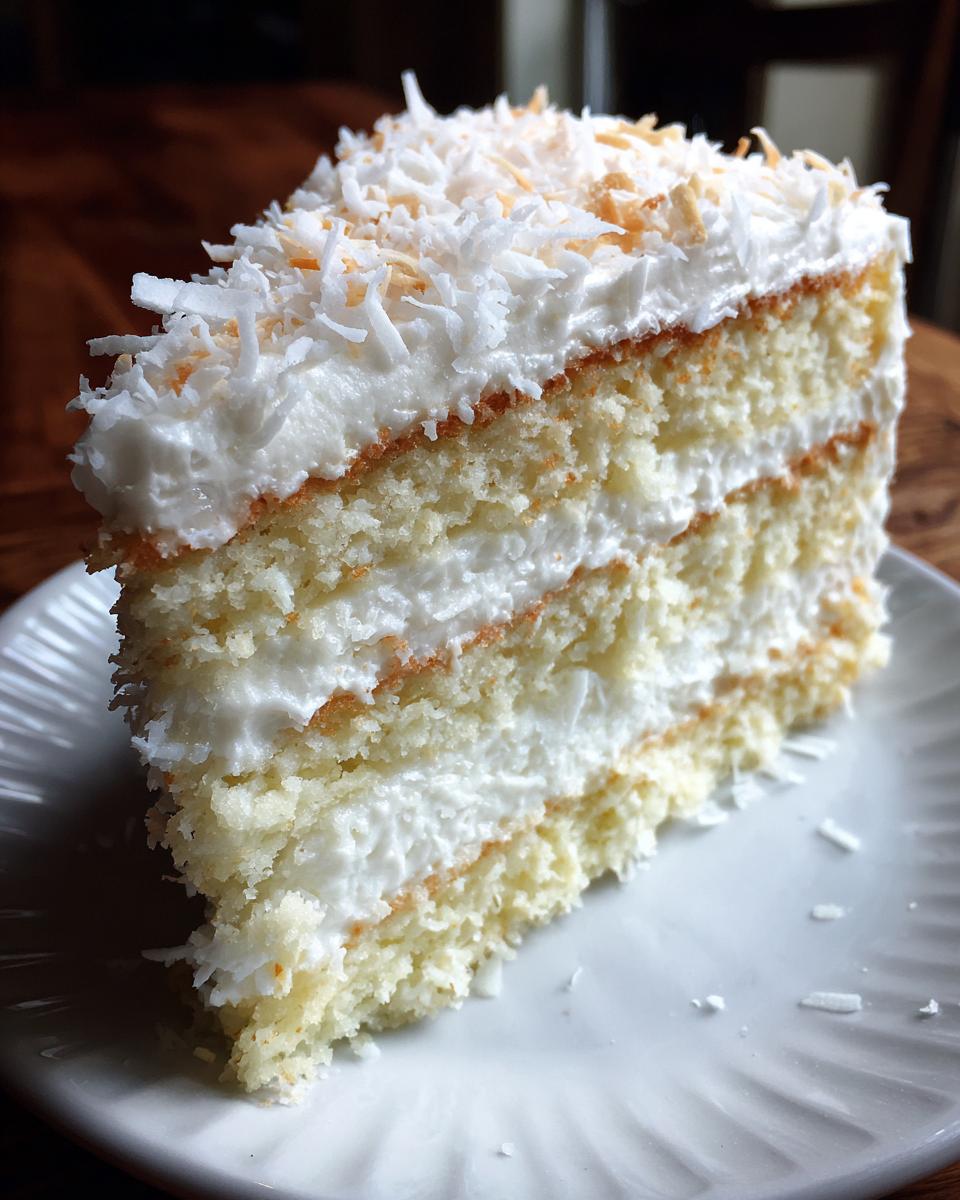
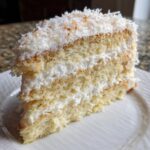
Assembling Your Show-Stopping Coconut Cake
Once those layers are stone-cold, you’re ready to build! Put the first layer down, spread a good layer of frosting, then top it with the second round. Now, cover the top and sides with the rest of that glorious frosting. This is the signature finish: grab your extra shredded coconut and gently press it all over the top and sides to get that gorgeous, snowy look everyone expects from a stunning coconut cake. Chill it for at least 30 minutes; this helps it set up perfectly before you slice into it!

Tips for a Truly Bakery Style Coconut Cake
We’ve made a fantastic cake, but if you want to elevate it from “really great homemade” to “I swear I bought this from a top-tier Southern bakery,” you need a couple of insider moves. I’ve picked up a few tricks over the years to guarantee that professional look and depth of flavor in every slice of this Southern coconut cake.
First up: toasting the coconut! Most recipes just throw the exterior coconut straight on, but trust me, gently toasting your finishing coconut flakes deepens that flavor profile immensely. Spread the extra coconut you reserved for coating onto a baking sheet and bake it at 325°F for just 5 to 7 minutes. Watch it like a hawk—it goes from golden to burnt in about 30 seconds flat! You want a light golden brown shade, not dark brown.
Next, let’s talk extracts, which is a big part of getting that signature bakery style coconut cake punch. The recipe already calls for coconut extract in the frosting, which is great, but for next-level flavor, try brushing the cooled layers with that simple coat of coconut milk mixture—you can find details on that trick in the notes section of the recipe. This little secret ensures maximum moisture saturation right into the cake crumb.
I also read a wonderful tip from a blogger who specializes in these incredibly moist recipes, and it’s something I now swear by for my own cakes. Check out their approach here: The Best Coconut Cake Recipe. They focus heavily on the creaming for lift, which we already do, but their final assembly approach is immaculate for clean edges!
Storage and Reheating Your Coconut Desserts for Holidays
Now, the hardest part: waiting to eat it! Because we used cream cheese in that lush frosting, this cake absolutely needs to live in the refrigerator, especially if you’re making it ahead for your big gathering or those upcoming coconut desserts for holidays. Cover the cake loosely with plastic wrap—don’t seal it airtight, or the moisture gets trapped weirdly. It’ll be good for about three to four days in the cold box.
If you want a slice that feels freshly baked, just pull it out about 30 minutes before serving to let the cream cheese frosting soften up a little. If you’re just grabbing a single piece later on, microwave it for just 10 or 15 seconds. Trust me, that little blast of warmth makes the coconut flavor explode without drying out the layers. It’s my go-to late-night snack!
Frequently Asked Questions About This Coconut Cake
I know when I start a new project, I always have a million little questions buzzing around my head! It’s smart to ask before you start mixing. I’ve gathered the most common things folks ask me about making this coconut cake so you can feel totally prepared to move forward. If you have any burning questions that aren’t listed here, please don’t hesitate to reach out via my contact page—I love hearing from you!
Can I use this recipe for a Coconut Bundt Cake instead?
Yes, absolutely! The beauty of this specific batter is its stability, which makes it forgiving enough for different pan shapes. If you switch to a coconut bundt cake—that gorgeous, fluted shape—you’ll need to increase the baking time quite a bit since the center is much deeper than our standard 8-inch rounds. Keep an eye on it; it might take anywhere from 50 to 65 minutes, depending on your specific pan. Start checking around the 50-minute mark with a wooden pick. Also, make sure you use a very good release agent (like my cake goop!) on that Bundt pan because those crevices can be tricky!
How do I make this an easy layer cake recipe?
If you’re looking to shave off a little time while still getting that amazing homemade flavor, I totally support finding shortcuts! To make this one of the fastest easy layer cake recipes you’ve ever made, use store-bought sweetened shredded coconut for the cake batter instead of measuring out the unsweetened version and adding it in. While it won’t be *quite* as moist as using the specified ingredients, it saves you a minute of measuring. Even better: make the frosting the day before! Keep it tightly covered in the fridge. When you’re ready to assemble, let it sit on the counter for about an hour to soften up before beating it briefly to restore its fluffiness. That simple step makes assembly so much faster!
Understanding the Nutrition in This Classic Coconut Dessert
I always feel a little conflicted sharing nutritional info because, honestly, when you’re deep into baking a spectacular Southern coconut cake, you aren’t usually thinking about the calories! But I know many of you want to keep track, and it’s only right that I give you a full picture of what you’re serving up. This information is based on the recipe as written, using standard supermarket ingredients.
Keep in mind these figures are estimates. The brand of butter you use, the exact size of your eggs, and whether you add that extra splash of heavy cream to the frosting can all shift these numbers around slightly. For the most precise tracking, you’d need to calculate based on the specific items in your cart—I always use the privacy policy page here as a good place to double-check my own assumptions!
Here is the breakdown per generous slice:
- Serving Size: 1 slice
- Calories: 450
- Sugar: 55g
- Sodium: 250mg
- Fat: 22g
- Saturated Fat: 14g
- Unsaturated Fat: 8g
- Trans Fat: 0.5g
- Carbohydrates: 60g
- Fiber: 2g
- Protein: 5g
- Cholesterol: 75mg
While it’s definitely a rich treat—we used real butter and cream cheese, after all!—it’s also packed with far more flavor than any box mix could ever deliver. It’s a dessert worth every bite!
Share Your Experience Baking This Coconut Cake
Now that you’ve mastered this coconut cake, I genuinely want to know how it went! Did you manage to get the layers perfectly fluffy? What was your favorite part—the tropical flavor in the cake or that rich homemade frosting? Please drop a rating below and tell me if you tried any variations. Happy baking!
PrintThe Best Moist & Fluffy Southern Coconut Cream Cake Recipe
You can bake a truly delicious, bakery-style coconut layer cake that is moist, fluffy, and full of tropical flavor. This recipe uses simple steps to create a show-stopping dessert perfect for any celebration.
- Prep Time: 25 min
- Cook Time: 35 min
- Total Time: 60 min
- Yield: 10 servings 1x
- Category: Dessert
- Method: Baking
- Cuisine: American
- Diet: Vegetarian
Ingredients
- 1 3/4 cups all-purpose flour
- 1 1/2 cups granulated sugar
- 1 tablespoon baking powder
- 1/2 teaspoon salt
- 1/2 cup unsalted butter, softened
- 3 large eggs
- 1 cup whole milk
- 1 teaspoon vanilla extract
- 1/2 cup unsweetened coconut milk (full fat)
- 1 cup sweetened shredded coconut, plus more for coating
- 1/2 cup cream cheese, softened
- 1/2 cup unsalted butter, softened (for frosting)
- 3 cups powdered sugar, sifted
- 1 teaspoon coconut extract
- 1/4 cup heavy cream
Instructions
- Preheat your oven to 350°F (175°C). Grease and flour two 8-inch round cake pans. Line the bottoms with parchment paper.
- In a large bowl, whisk together the flour, granulated sugar, baking powder, and salt.
- Add the 1/2 cup softened butter, eggs, whole milk, vanilla extract, and coconut milk to the dry ingredients. Beat with an electric mixer on medium speed for 2 minutes until the batter is smooth. Stir in the 1 cup of shredded coconut by hand.
- Divide the batter evenly between the prepared cake pans. Bake for 30 to 35 minutes, or until a wooden pick inserted into the center comes out clean.
- Let the cakes cool in the pans for 10 minutes before inverting them onto a wire rack to cool completely.
- Prepare the coconut cream frosting: In a medium bowl, beat the softened cream cheese and 1/2 cup softened butter until smooth. Gradually add the sifted powdered sugar, beating until combined.
- Mix in the coconut extract and heavy cream until the frosting is light and fluffy. Add more powdered sugar if you need a stiffer consistency, or more cream if you want it softer.
- Once the cakes are completely cool, place one layer on a serving plate. Spread about one-third of the frosting over the top. Place the second layer on top.
- Frost the top and sides of the entire cake with the remaining frosting.
- Press the extra shredded coconut onto the top and sides of the cake for a snowy finish. Chill the cake for at least 30 minutes before slicing and serving.
Notes
- For extra moist coconut cake layers, you can brush the cooled layers lightly with a mixture of 2 tablespoons of coconut milk and 1 teaspoon of sugar before frosting.
- Use high-quality, full-fat coconut milk for the best flavor in both the cake and the frosting.
- If you want a stronger coconut flavor, add 1 teaspoon of coconut extract to the cake batter as well.
Nutrition
- Serving Size: 1 slice
- Calories: 450
- Sugar: 55g
- Sodium: 250mg
- Fat: 22g
- Saturated Fat: 14g
- Unsaturated Fat: 8g
- Trans Fat: 0.5g
- Carbohydrates: 60g
- Fiber: 2g
- Protein: 5g
- Cholesterol: 75mg