
I know that feeling—staring at the takeout menus when you’re already exhausted, wondering if you have the energy or the expertise to make something truly satisfying at home. Well, I am here to tell you that you absolutely do! This recipe for Dutch Oven Crispy Skin braised chicken thighs is my secret weapon for those nights. It delivers that slow-cooked, fall-off-the-bone tenderness everyone craves, but here’s the magic trick: we get beautifully crispy skin while doing it, all in one pot. Seriously, forget feeling intimidated. This is real, comforting food made accessible. I believe cooking should empower you, and this dish is proof that you can create something incredible without needing chef training. Head over to our story to see why I started Kitchenican. Ready to conquer the weeknight dinner slump? Let’s get cooking!
- Why This Dutch Oven Crispy Skin Braised Chicken Thighs Recipe Works
- Ingredients for Flavorful Braised Chicken
- How to Prepare Easy Braised Chicken Thighs Dinner
- Tips for Success with Your Braised Chicken Thighs
- Serving Suggestions for Your Flavorful Braised Chicken
- Storage and Reheating Instructions for Leftover Braised Chicken Thighs
- Frequently Asked Questions About Dutch Oven Chicken Thighs
- Nutritional Estimates for Braised Chicken Thighs
- Share Your Chicken Thigh Main Course Success
Why This Dutch Oven Crispy Skin Braised Chicken Thighs Recipe Works
When you’re looking for a tender chicken thighs recipe that truly delivers comfort, you need a method that respects every layer of flavor and texture. This Dutch oven technique is brilliant because it’s actually two recipes in one: searing followed by slow braising. That initial sear is key; it builds a layer of deep, savory crust on the skin that you just can’t get from slow cooking alone. Trust me, using the right vessel helps us achieve that legendary fall off the bone chicken without drying out the meat underneath. It’s about control, which leads to amazing results, just like with my favorite pot roast here.
Achieving Crispy Skin Braised Chicken
Please don’t skip drying the skin! This is non-negotiable for that gorgeous, crackly top. Use paper towels until the skin feels absolutely bone-dry. Then, when you drop those seasoned thighs into hot oil in your Dutch oven, let them sit undisturbed for a full six to eight minutes. We aren’t checking them; we are letting the fat render out and that golden color develop. That initial crispness is what separates an okay braise from the best crispy skin braised chicken you’ve ever made.
Ingredients for Flavorful Braised Chicken
When we talk about creating deeply flavorful braised chicken, it really comes down to quality ingredients prepared correctly. I always lay out everything first. You’ll find that utilizing fresh aromatics makes a huge difference in the final sauce. This recipe is designed to be a complete, easy weeknight dinner, so having the hearty vegetables right there in the pot is just perfect.
Essential Components for Your Braised Chicken Thighs
Here is what you need for this wonderfully tender batch of braised chicken thighs. Remember, the bone-in, skin-on variety is what we are using here, so grab eight of those!
- 8 bone-in, skin-on chicken thighs
- 1 tablespoon olive oil
- 1 teaspoon salt
- 1/2 teaspoon black pepper
- 1 large yellow onion, chopped
- 3 cloves garlic, minced
- 1 pound small potatoes, quartered
- 1 pound carrots, peeled and cut into 1-inch pieces
- 1 cup chicken broth
- 1/2 cup dry white wine or extra broth
- 4 sprigs fresh thyme
- 1 tablespoon Dijon mustard
- 1 teaspoon dried rosemary
If you happen to be out of Dijon, you can check out some substitutes for savory applications in my garlic butter guide, but Dijon really brings a nice tang here!
How to Prepare Easy Braised Chicken Thighs Dinner
This is where the magic happens! If you have ever needed a truly simple recipe that feels like a massive accomplishment, this one pot chicken thighs dinner is it. We are moving straight from searing into the oven, making cleanup a breeze—the definition of easy weeknight comfort meals. Pay close attention to the order we do things, especially when it comes to temperature. Timing is everything here!
Step 1: Searing for Crispy Skin on Your Braised Chicken Thighs
Remember what I said about drying the skin? Go grab those paper towels again! Pat those beautiful braised chicken thighs until they feel almost tight. Season them up well, skin-side down first, into that slightly shimmering oil in your hot Dutch oven over medium-high heat. You need to hear that sizzle! Let them sit for a good six to eight minutes. Don’t touch them! We’re rendering out that fatty goodness, which is going to flavor everything else. Once they are deeply golden brown, pull them out and set them aside. Leave all that rendered fat right there; it’s liquid gold.
Step 2: Building the Flavor Base and Adding Vegetables
Now, drop the heat a bit to medium. Toss in your chopped onions and let them soften for about four minutes. That’s when you add your minced garlic for just one minute until your kitchen smells amazing. Use a wooden spoon to scrape up all those tasty browned spots stuck to the bottom—that’s called deglazing, and it adds massive depth! Next, dump in your chicken thighs with potatoes and carrots. Give everything a good stir so those veggies get coated in that flavorful fat before we move on to the braising liquid.
Step 3: The Braising Process for Tender Chicken Thighs Recipe
In a separate bowl, quickly whisk together the broth, wine (if using), and that Dijon mustard. Pour that right over the vegetables, toss in your thyme and rosemary sprigs, and then nestle your seared chicken thighs back in, making sure the skin is facing up and mostly out of the liquid. We only want the bottoms simmering. Pop that lid on tight! Transfer the whole Dutch oven into an oven already heated to 350 degrees Fahrenheit (175 degrees Celsius). Let it go for about 40 to 50 minutes. That slow, steady heat is exactly how to braise chicken thighs perfectly for that mouthwatering, tender texture every single time.
Check out more tips for making quick, amazing meals on my easy weeknight dinners page!
Tips for Success with Your Braised Chicken Thighs
Making the perfect braised chicken thighs isn’t just about following steps; it’s about knowing those little tricks that boost flavor and texture when you need them to. Since we are aiming for that ultimate fall off the bone experience, paying attention to a few details at the end makes all the difference. Don’t worry if you used the oven-safe skillet instead of a Dutch oven—it works just as well, provided it has a tight lid that seals in that steam!
Maximizing Tenderness in Braised Chicken Thighs
We already know the braising time gets us super tender meat, but if you want to sneak back a little bit of that crispness we worked so hard for in the beginning, try this quick trick. Once the chicken is fully cooked, carefully remove the thighs from the sauce and place them onto a small baking sheet. Pop them under your broiler for just two or three minutes. Yes, I mean *just* two or three! You have to watch them like a hawk; they can go from perfect to burnt in about ten seconds flat. This quick blast crisps up the skin just enough to contrast beautifully with the moist meat underneath! If you’re looking for more ways to get your vegetables perfectly cooked alongside your protein, check out my guide on roasting techniques.
Serving Suggestions for Your Flavorful Braised Chicken
Now that you have these incredibly flavorful braised chicken thighs, the absolute best part is that gorgeous pan sauce we’ve created with the vegetables, wine, and herbs. You want something standing by to soak up every single drop! I swear, you can’t let that liquid go to waste. If you need something creamy and comforting underneath, my stovetop grits recipe is a total winner. For something a bit different but equally luxurious, try my cheesy rice recipe.
Honestly, even if you just serve these over plain white rice, you’ve won the dinner game. If you’re looking for a sweet finish that’s unbelievably easy, who knew you could make creamy rice pudding on the stove? It’s so good!

Storage and Reheating Instructions for Leftover Braised Chicken Thighs
Even the best meals sometimes leave us with leftovers, which is great because these braised chicken thighs taste amazing the next day too! When you’re putting them away, try to keep the chicken separate from the vegetables if you can. Store everything in airtight containers in the fridge—they should be great for about three or four days.
Reheating is where you need to be careful, especially if you want to salvage any crispiness. I tend to gently reheat the vegetables and sauce on the stovetop first, then add the chicken back in just long enough to warm through, skin-side up. If you must use a microwave, use short bursts on lower power. Don’t expect the skin to be *crispy* anymore; braising liquids make the skin soft, but the meat inside will still be incredibly tender and flavorful!
Frequently Asked Questions About Dutch Oven Chicken Thighs
I totally get it; sometimes you run into a little snag or just wonder if you can tweak things. That’s the beauty of home cooking—you get to ask questions! Here are some of the ones I hear most often about making this easy braised chicken thighs recipe work perfectly in your kitchen.
Can I skip searing the skin for this braised chicken thighs recipe?
Technically, yes, you *can* skip searing the skin! If you’re really pressed for time, you can dump everything in and toss it straight into the oven. But honestly, you’d be skipping the single best step for flavor development. If you skip it, the skin will end up soft and a bit rubbery because it’s simmering in liquid the whole time, rather than getting that beautiful deep brown crust we worked so hard for. I highly recommend taking those extra 15 minutes to sear!
What is the best liquid substitute if I cannot use wine in my braised chicken thighs?
That’s common! We don’t all have wine lying around, and that’s totally fine. The wine mostly adds a touch of acidity to balance the richness of the chicken fat and broth. Your best bet is to just use an extra half cup of chicken broth. To keep that needed brightness, I suggest whisking in about a teaspoon of apple cider vinegar or even a splash of fresh lemon juice along with the broth. It lifts the flavor beautifully without tasting like vinegar or citrus.
If you want some great appetizer ideas to go with your dutch oven chicken thighs, check out my recipe for creamy dill pickle dip!
Nutritional Estimates for Braised Chicken Thighs
I always encourage you to cook nourishing food, but let’s be real—we stick to the flavor first! Since we all use slightly different brands and portion sizes, these numbers are just estimates based on making this recipe exactly as written. This gives you a ballpark idea of what you’re getting per serving of the chicken and vegetables.
- Serving Size: 1 thigh with vegetables
- Calories: 450
- Fat: 25g
- Carbohydrates: 25g
- Protein: 35g
Keep in mind that if you serve this over rice or grits, you’ll need to factor those components in! For more guidance on smart home eating, feel free to look at my guide for healthy dinner recipes. These estimates are just Option A; your real-life numbers might shift slightly based on what’s in your pantry!
Share Your Chicken Thigh Main Course Success
Okay, that’s the whole process! Seriously, I have so much faith in you pulling this off. This is totally achievable, even if you’ve never used a Dutch oven before. I really want to know how it went for you and your family when you served up this incredible **chicken thigh main course**.
Please take just a moment before you run off to eat—you deserve it!—to leave a rating right here on the recipe card. Five stars if it tasted like pure comfort, which I’m betting it will!
And even better? Drop a comment below and tell me what you chose to serve alongside those beautifully tender braised chicken thighs. Are you a rice person? Did you make creamy grits? Did you try the oven finish for extra crispiness? I love seeing how everyone adapts these core recipes to their own table. If you have any final questions after cooking, you can always reach out via my contact page. Happy cooking, friends!
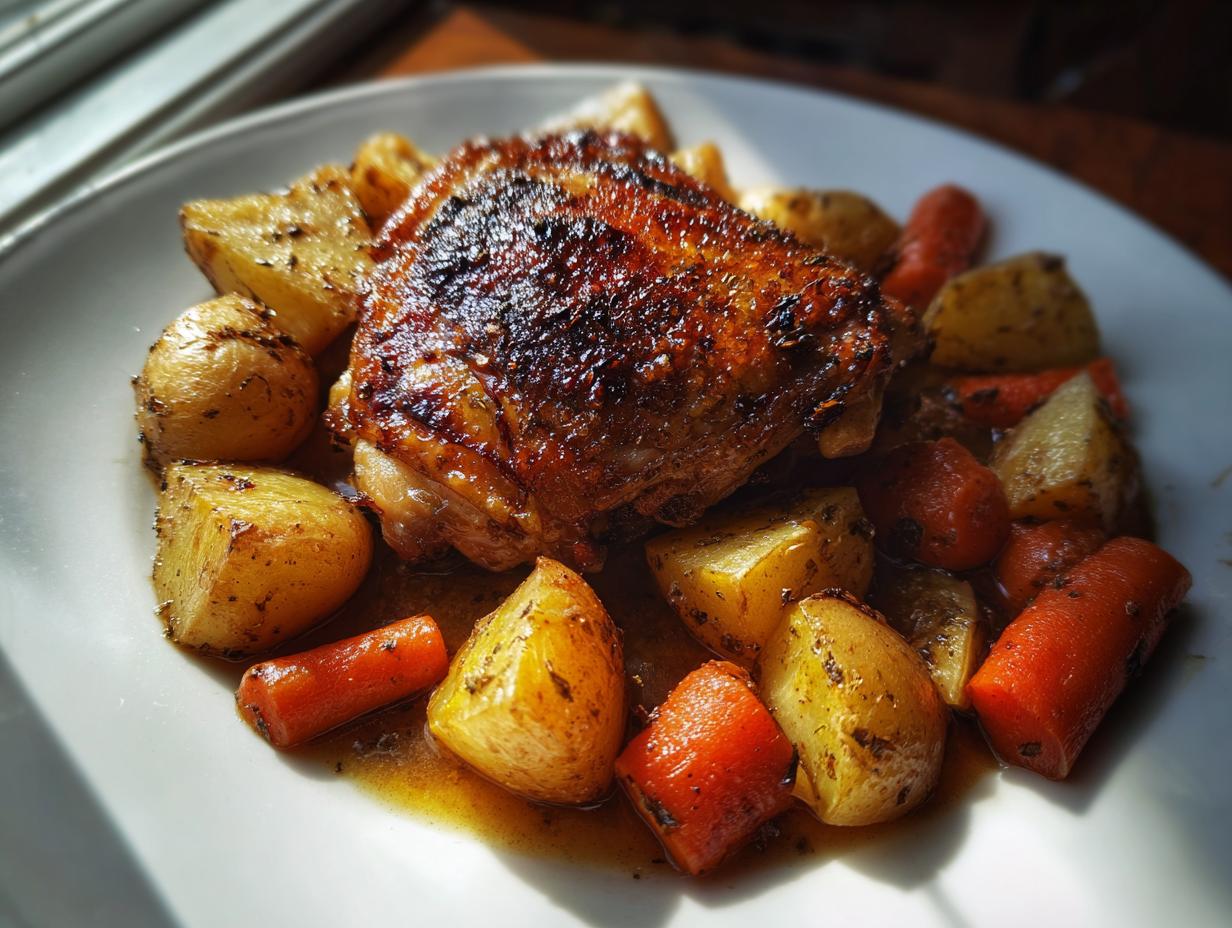
PrintDutch Oven Crispy Skin Braised Chicken Thighs with Root Vegetables

Make tender, flavorful braised chicken thighs with crispy skin using this straightforward Dutch oven method. This one-pot dinner includes potatoes and carrots for a complete, comforting weeknight meal.
- Prep Time: 15 min
- Cook Time: 60 min
- Total Time: 75 min
- Yield: 4 servings 1x
- Category: Dinner
- Method: Baking/Braising
- Cuisine: American
- Diet: Low Fat
Ingredients
- 8 bone-in, skin-on chicken thighs
- 1 tablespoon olive oil
- 1 teaspoon salt
- 1/2 teaspoon black pepper
- 1 large yellow onion, chopped
- 3 cloves garlic, minced
- 1 pound small potatoes, quartered
- 1 pound carrots, peeled and cut into 1-inch pieces
- 1 cup chicken broth
- 1/2 cup dry white wine or extra broth
- 4 sprigs fresh thyme
- 1 tablespoon Dijon mustard
- 1 teaspoon dried rosemary
Instructions
- Pat the chicken thighs completely dry with paper towels. This step helps achieve crispy skin. Season the skin side generously with salt and pepper.
- Place a large Dutch oven over medium-high heat and add the olive oil. When the oil shimmers, place the chicken thighs skin-side down in the pot. Do not overcrowd the pan; work in batches if necessary.
- Sear the chicken for 6 to 8 minutes until the skin is deeply golden brown and crisp. Remove the chicken from the pot and set aside, leaving the rendered fat in the Dutch oven.
- Reduce the heat to medium. Add the chopped onion to the pot and cook for 4 minutes until softened, scraping up any browned bits from the bottom. Add the minced garlic and cook for 1 minute until fragrant.
- Add the potatoes and carrots to the pot. Stir to coat them in the fat and aromatics.
- Whisk the Dijon mustard into the chicken broth and white wine (or extra broth). Pour this liquid mixture over the vegetables. Add the fresh thyme sprigs and rosemary.
- Nestle the seared chicken thighs back into the Dutch oven, skin-side up, ensuring the skin is mostly above the liquid level.
- Cover the Dutch oven with the lid and transfer it to a preheated oven at 350 degrees Fahrenheit (175 degrees Celsius).
- Braise for 40 to 50 minutes, or until the chicken is fall-off-the-bone tender and the vegetables are soft.
- Remove the lid for the last 10 minutes of cooking if you want to crisp the skin slightly more, though it will soften during braising.
- Remove the thyme sprigs before serving. Serve the chicken thighs directly from the pot with the vegetables and pan sauce spooned over top.
Notes
- For the crispiest skin possible, you can briefly place the chicken under the broiler for 2-3 minutes after braising, watching carefully to prevent burning.
- This recipe works well as a one-pot chicken thighs dinner when served over rice or creamy grits to soak up the flavorful sauce.
- If you do not have a Dutch oven, you can use a heavy, oven-safe skillet with a tight-fitting lid.
Nutrition
- Serving Size: 1 thigh with vegetables
- Calories: 450
- Sugar: 5
- Sodium: 450
- Fat: 25
- Saturated Fat: 7
- Unsaturated Fat: 18
- Trans Fat: 0
- Carbohydrates: 25
- Fiber: 4
- Protein: 35
- Cholesterol: 130