

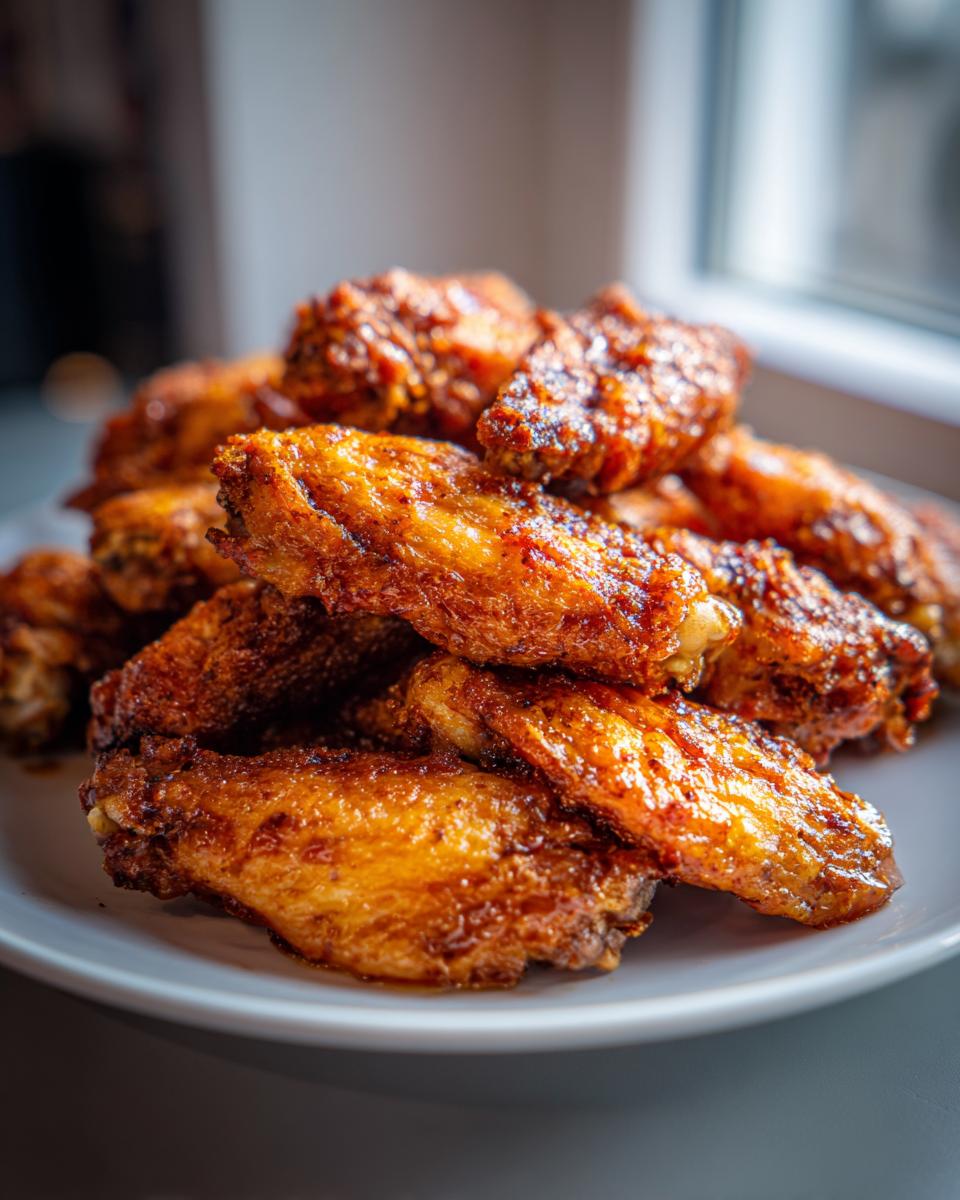
If you’ve ever sighed, looking at perfectly fried, shatteringly crisp wings on TV, and thought, “I can’t do that—I refuse to deal with that much oil,” I hear you! That’s exactly where I was when I started my journey into cooking. The goal was always to make amazing homemade chicken wings that crushed takeout, but without the fryer splattering grease everywhere. Trust me, for the longest time, my oven-baked attempts were just soggy disappointment.
But wow, did I crack the code! Ava Sinclair here, and I promise you, achieving truly Extra Crispy Baked Chicken Wings is totally within your reach. It all comes down to one simple, magical ingredient you probably have right now: baking powder. This technique strips away the need to deep fry, giving you that craveable crunch while keeping the inside wonderfully juicy. If you’re ready to swap doubt for deliciousness, let’s get cooking. You can read a little more about my own kitchen adventure over at our story page!
- Why You Will Master These Extra Crispy Baked Chicken Wings
- Essential Ingredients for Perfect Crispy Chicken Wings
- Step-by-Step Instructions for Oven Baked Wings
- Flavor Variations for Your Party Appetizer Wings
- Tips for Game Day Chicken Wings Success
- Storing and Reheating Your No Fry Chicken Wings
- Frequently Asked Questions About Crispy Chicken Wings
- Nutritional Information Estimate for Homemade Chicken Wings
- Share Your Cooking Journey
Why You Will Master These Extra Crispy Baked Chicken Wings
I’m being completely honest when I say this baked chicken wings technique is a game-changer. You don’t need a massive appliance or buckets of oil to get that satisfying crunch everyone craves. These benefits are why this recipe will become your go-to for every gathering!
- Juicy Inside Crispy Outside Wings Guarantee: The secret sauce—or rather, the dry rub—uses baking powder to completely change the skin’s texture. It raises the pH level, which helps dry out the skin during baking so you get that perfect snap.
- The Best Chicken Wing Technique for Weeknights: Even though they taste like they took all day, these are incredibly fast to prep. We toss everything in one bowl! This is your new secret weapon for a perfect Quick Chicken Wing Dinner without the cleanup stress.
Essential Ingredients for Perfect Crispy Chicken Wings
Okay, let’s talk about what you need, because I’ve learned the hard way that a perfect wing starts with respecting the ingredients. This isn’t complicated, but attention to detail here is what separates great wings from good ones. Remember, we’re aiming for the best flavor and that much-desired crunch. You’ll need two pounds of wings, split into flats and drumettes. Don’t skip separating them—it helps them cook evenly!
The most important things besides the wings themselves are salt, pepper, garlic powder, and the secret ingredient. Make sure you grab baking powder, and if you can find it, go for the aluminum-free variety. It just works a little cleaner, trust me.
Ingredient Notes and Substitution Guidance
The baking powder might seem strange for a savory dish, but it’s totally key! It gently raises the skin’s pH level during baking, which helps the skin release fat faster and lets it brown beautifully. That’s the science behind getting that shatteringly crispy result without deep frying.
A note on those parts: I always use a mix of flats and drumettes because they offer different textures—the flats get extra crunchy on the edges, and the drumettes are meatier. If you only have one type, that’s fine, just keep them on that wire rack we talked about. Also, don’t swap the salt for something like seasoned salt here; we want the baking powder to do its job without interference from other leaveners or too much moisture.
Step-by-Step Instructions for Oven Baked Wings
Now we get to the execution phase! This is where we turn those plain wings into golden, crunchy perfection. Remember, success hinges on managing moisture, especially when making crowd-pleasing party appetizer wings like these. Follow these steps exactly, and you’ll see why this Best Chicken Wing Technique is so effective.
Preparing the Chicken for Maximum Crispiness
First things first, get that oven hot! We need 425°F (220°C). While it heats up, prepare your sheet pan. I line mine with foil because cleanup would otherwise ruin my joyful cooking mood, right? Then, place a wire cooling rack right on top of that foil. This rack is non-negotiable—it allows air to circulate completely around every piece of the wing, which is essential for baking them evenly.
Next, the drying part. Grab a huge stack of paper towels because you need to pat those chicken wings completely dry. I mean bone dry! Any lingering moisture is the enemy of crispiness. Once they are dry, toss them in a bowl with your spice blend—the salt, pepper, garlic powder, and our magic baking powder.
Coating and Arranging Your Chicken Wings
Toss everything really well until every single surface of every wing looks dusty with that coating. Seriously, rub it in there! Then, carefully arrange the seasoned wings on your prepared rack. They must be in a single layer! If they are touching or piled up, they will steam instead of crisping, and we absolutely cannot have soggy wings.
Bake these babies for 25 minutes. They’ll look pale, but hang in there! Flip every single piece over, and then put them back in for another 20 to 25 minutes. That second bake time is where the magic really happens for that beautiful golden color. If you decide to toss them in a sauce, like a zesty flavor from someone making lemon pepper wings inspiration, do it right when they come out of the oven. Get in touch if you have any questions during the process; my DMs are always open at the contact page!
Flavor Variations for Your Party Appetizer Wings
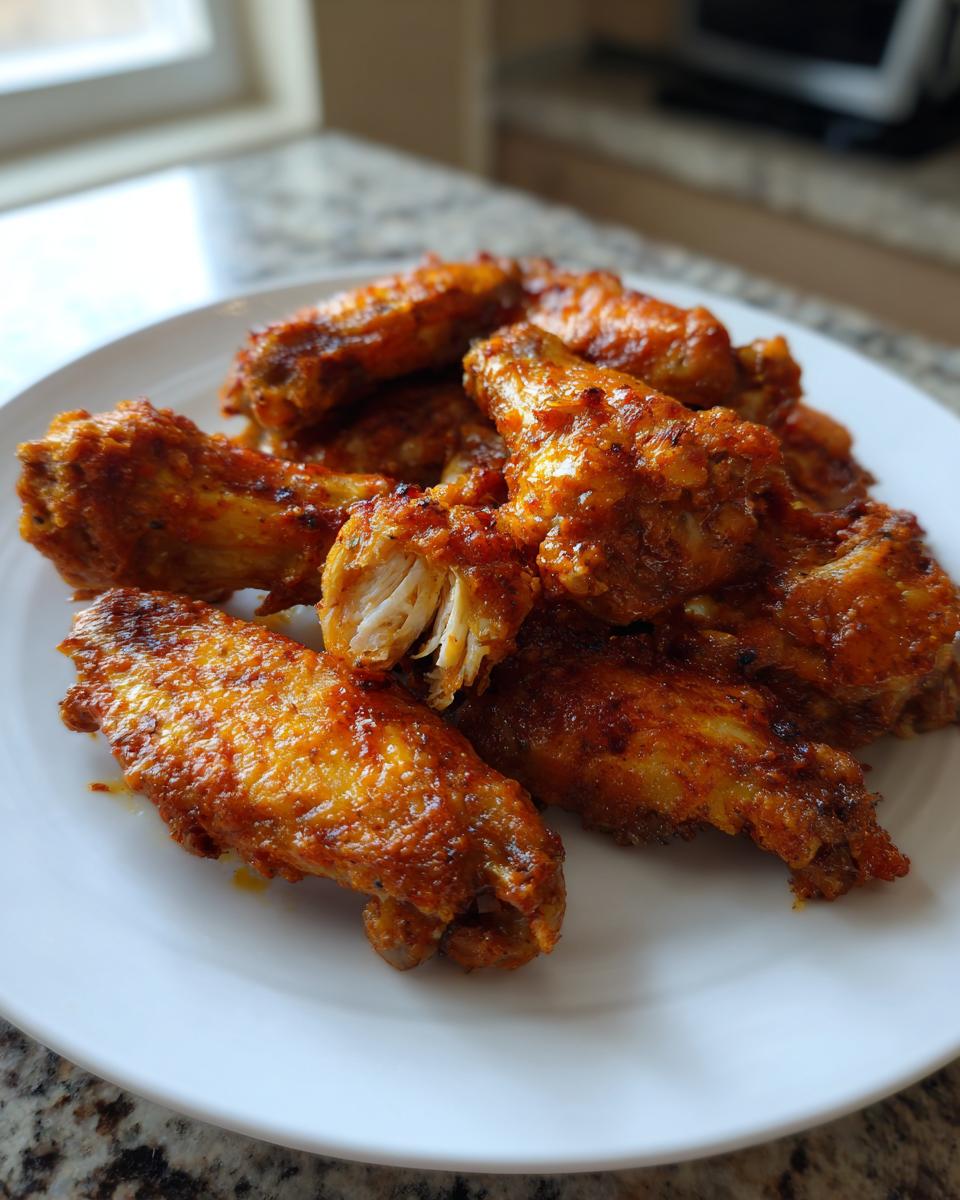
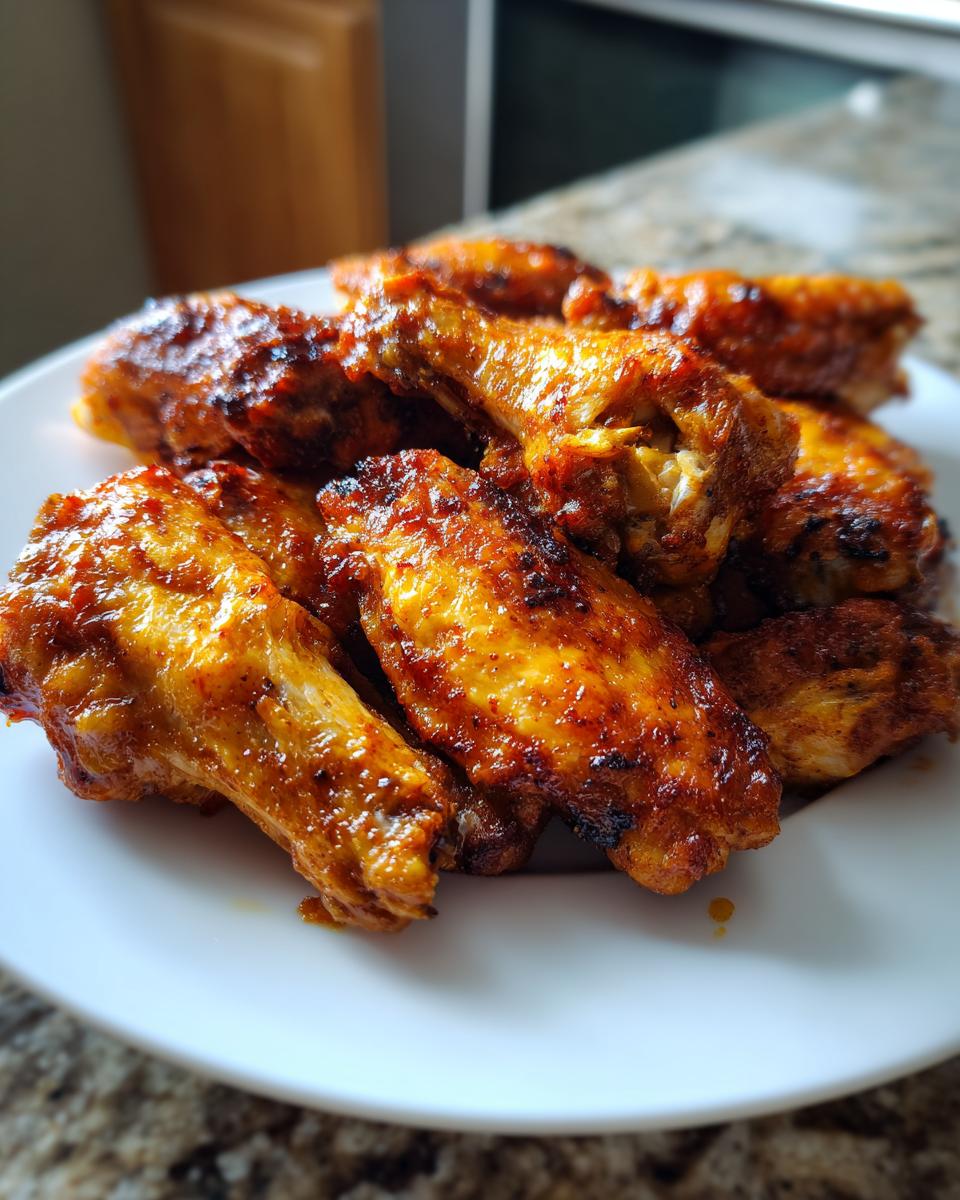
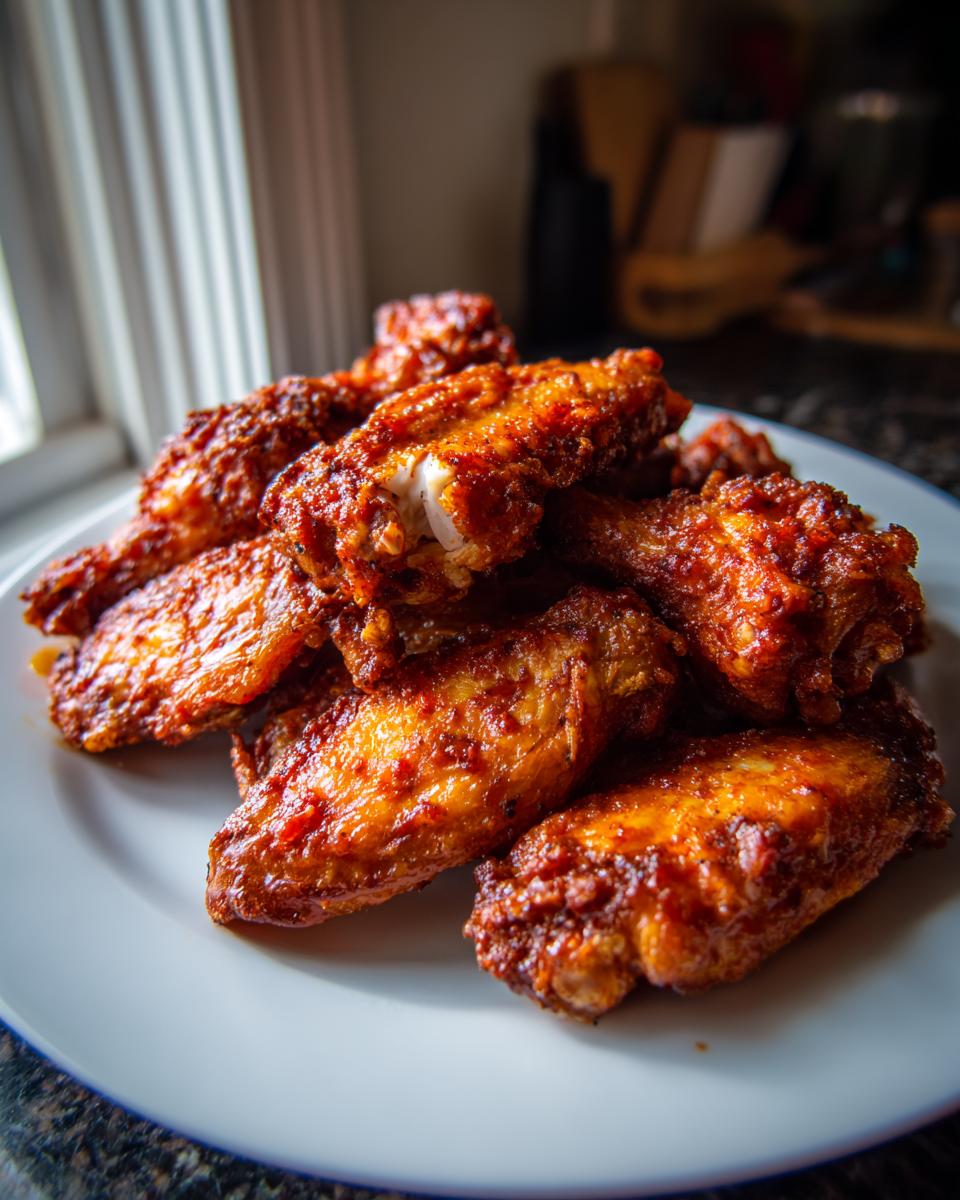
Okay, the baking powder trick gives you the crispiest canvas possible, but now we get to the really fun part—the flavor! Whether you need Game Day Chicken Wings that feed a crowd or just a simple appetizer, our base recipe is flexible enough for almost anything. The timing of when you add your flavor is everything, especially if you want those beautiful, crispy chicken wings to stay crunchy.
For wet sauces—like a spicy BBQ or maybe some sticky Honey Garlic Wings—you toss them right when they come out of the oven. The residual heat helps the sauce cling perfectly. If you are aiming for a dry rub flavor, like the intensely savory Ranch Wings Recipe, you apply that dry seasoning *before* they go into the oven. It really changes the game!
Creating Honey Garlic Wings or Ranch Wings Recipe
For luscious, saucy options like Honey Garlic or spicy Buffalo Wing Sauce, wait until those wings are perfectly golden and done baking. Whisk your sauce ingredients together, melt any butter content, and toss the hot wings in the sauce immediately. You want them coated but not swimming; we don’t want to soften that glorious crunch we just worked so hard for!
If you’re going for that bold, herby flavor of a Ranch Wings Recipe, you can actually make a dry ranch seasoning blend and toss the wings in it *before* baking, just like you do with salt and pepper. It adheres beautifully and bakes right onto the skin!
Lemon Pepper Wings Technique
The Lemon Pepper Wings Recipe is fantastic because it relies almost entirely on a dry application, which protects your crispiness best! You have two options here. You can mix the lemon pepper spice blend right in with the baking powder and salt before baking—this gives you a deeply flavored, slightly savory crust. Or, you can toss them in a small amount of melted butter mixed with a little lemon zest after they bake, and then sprinkle the dry lemon pepper seasoning over the top for a brighter, fresher hit of flavor.
If you want that spicy kick, check out some inspiration for Hot Honey Chicken Wings; they absolutely must be tossed in the glaze right after baking!
Tips for Game Day Chicken Wings Success
When you’re cooking for a big crowd, like for the big game, timing is everything, right? You don’t want to be frantically working the oven when everyone is arriving to watch the kickoff! The beautiful thing about these Game Day Chicken Wings is that we can bake them in stages or even prepare them almost entirely ahead of time. This recipe is built for efficiency, meaning less stress for you and more time enjoying the party as a guest, not just the chef. This will make you the undisputed champion of Crowd Pleaser Appetizers!
Make-Ahead and Freezer Tips for Easy Wing Recipes
Here is where we separate the pros from the panic-bakers! If you really want the absolute best, shatteringly crispy texture, you have to let the seasoned wings rest. We talked about patting them dry, but the real pro trick is seasoning them with the baking powder mix and then putting the tray (uncovered!) into the refrigerator. Letting them chill uncovered for 4 hours, or even better, overnight, allows the surface of the skin to dry out significantly. That extra dry surface is what guarantees the crunch.
If you’re planning way ahead, you can freeze them! You can freeze the seasoned, uncooked wings this way, too. Just arrange them on the rack in the freezer until solid, then transfer them to a freezer bag. When it’s Game Day, skip the thaw; just add 10-15 minutes to the initial baking time. If you want some flavor inspiration for your party lineup, check out some of the amazing ideas over at this collection! They will go fast, so make extra!
Storing and Reheating Your No Fry Chicken Wings
So, what happens when the party dies down and you have a few leftover chicken wings? This is the moment where most people resort to the microwave, and I am here to tell you: don’t you dare! If you take the time to get these wings ultra-crispy, you need to reheat them correctly to respect that hard work.
For the best results, you need dry heat again. Skip the microwave entirely; it just turns everything chewy and sad. Instead, place them on a wire rack set over a baking sheet—just like we did the first time! Pop them back into a 350°F oven for about 5 to 8 minutes. If you have an air fryer, even better! A quick 3-minute blast at 375°F works wonders to reactivate that crunch. They will taste almost as good as when they first came out of the oven, guaranteed!
Frequently Asked Questions About Crispy Chicken Wings
I always get a ton of questions once people try this method because it feels like cheating! It’s totally normal to wonder about adapting it or troubleshooting if things don’t look exactly right the first time. Here are some of the most common things I hear after someone tries making these No Fry Chicken Wings.
Can I use this method for Air Fryer Chicken Wings?
Absolutely! The baking powder trick works beautifully in the air fryer too, and it might even be faster. You still need to pat those wings super dry and coat them with the baking powder/spice mixture the exact same way. Just arrange them in a single layer in your air fryer basket—don’t overlap them! You’ll likely cook them at 400°F (200°C) for about 20 minutes total, flipping them halfway through. This lets you get those amazing Air Fryer Chicken Wings without fuss.
Why are my baked chicken wings not crispy?
Nine times out of ten, it comes down to moisture or overcrowding. Did you really, really pat them dry? If there’s any water on that skin, it turns into steam, and steam melts crispiness. That’s the first thing to check. The second culprit is overcrowding your wire rack. If the wings are touching, they steam each other instead of crisping up. For Oven Baked Wings to succeed, every single piece needs its own space to breathe in that hot air!
Nutritional Information Estimate for Homemade Chicken Wings
I always try to keep things real here on Kitchenican, which means acknowledging that while these wings are healthier because they skip the deep fryer, they are still wings! This information is based on the recipe yielded for 4 servings, with each serving being about 4 wings, seasoned only (before heavy sauce application).
Please remember this is just an estimate, Ava’s not a dietitian! For exact numbers based on your specific brand of baking powder or sauce additions, you’ll need to check the labels on your pantry items. But this gives you a great ballpark figure for planning your meal or managing your macros.
- Serving Size: 4 wings
- Calories: 280
- Fat: 18g (with 5g Saturated Fat)
- Carbohydrates: 1g
- Protein: 27g
- Sodium: 350mg (This will go up significantly once you douse them in store-bought Buffalo sauce, so keep that in mind!)
See? Not bad for something that tastes this indulgent! You’re getting a great bang for your buck in terms of satisfying protein without sacrificing that essential crispy texture we worked so hard to achieve.
Share Your Cooking Journey
Honestly, watching you move past the doubt and put this technique to work is the best part of my day. That’s what Kitchenican is all about—proving that you absolutely *can* create incredibly delicious, takeout-worthy food right in your own home, even if it’s just perfect little chicken wings.
I’m so eager to see how your batch turned out! Did they get that shatteringly crisp exterior we planned for? Did the kids devour every last one? Please take a snapshot of your wings—whether they’re swimming in Buffalo sauce or perfectly dry with Lemon Pepper seasoning—and share it with me!
Drop a comment below and let me know how it went. Tell me if you have any tricky oven quirks I should know about, or if you came up with a genius new sauce combo. Rate this recipe for me, too! Your feedback builds confidence not just for me, but for every new cook who reads this thinking, “Can *I* make crispy wings?” The answer is clearly yes, because you just did it!
PrintExtra Crispy Baked Chicken Wings (No Fry Technique)

You can achieve shatteringly crisp chicken wings in your oven without deep frying. This recipe uses a simple baking powder technique to render fat and create a crunchy exterior, perfect for game day or a quick dinner.
- Prep Time: 15 min
- Cook Time: 50 min
- Total Time: 65 min
- Yield: 4 servings 1x
- Category: Appetizer
- Method: Baking
- Cuisine: American
- Diet: Low Fat
Ingredients
- 2 lbs chicken wings (flats and drumettes separated)
- 1 tablespoon baking powder (aluminum-free preferred)
- 1 teaspoon salt
- 1/2 teaspoon black pepper
- 1/2 teaspoon garlic powder
- Optional: 1/4 cup your favorite wing sauce (like Buffalo or Honey Garlic)
Instructions
- Preheat your oven to 425°F (220°C). Line a large baking sheet with foil for easier cleanup, then place a wire cooling rack on top of the foil.
- Pat the chicken wings completely dry using paper towels. This step is crucial for crispiness.
- In a large bowl, combine the baking powder, salt, pepper, and garlic powder.
- Add the dried chicken wings to the bowl. Toss thoroughly until every piece is evenly coated with the dry mixture.
- Arrange the coated wings in a single layer on the wire rack, ensuring there is space between each wing for air circulation. Do not overcrowd the pan.
- Bake for 25 minutes.
- Flip each wing over. Return the pan to the oven and bake for another 20 to 25 minutes, or until the skin is deeply golden brown and very crispy.
- Remove the wings from the oven. If you are saucing them, place the hot wings immediately into a clean bowl. Drizzle with your sauce and toss to coat.
- Serve immediately as a crowd pleaser appetizer or main dish.
Notes
- For the absolute best results, let the seasoned wings rest uncovered in the refrigerator for at least 4 hours, or overnight, before baking. This dries the skin further.
- If you prefer a saucy finish, toss the wings in sauce immediately after they come out of the oven while they are still piping hot.
- This baking powder method works well for achieving that ‘juicy inside, crispy outside’ texture you want for game day chicken wings.
Nutrition
- Serving Size: 4 wings
- Calories: 280
- Sugar: 1
- Sodium: 350
- Fat: 18
- Saturated Fat: 5
- Unsaturated Fat: 13
- Trans Fat: 0
- Carbohydrates: 1
- Fiber: 0
- Protein: 27
- Cholesterol: 90