
I remember the first time I tried making bread entirely from scratch. Honestly, I was terrified. Store-bought rolls are so convenient, right? But they always taste a little… hollow. That’s why I’m so excited to share this recipe for what I genuinely believe are the ultimate soft and fluffy homemade dinner rolls. If you’ve ever doubted your ability to create bakery perfection in your own kitchen, this recipe is for you. I used to set the bag of store-bought rolls on the table just to save face, but not anymore. Trust me, once you pull these buttery beauties out of the oven, you’ll never look back. Making incredible dinner rolls is less about complicated techniques and more about a few simple, confident steps.
- Why You Will Make These Soft Dinner Rolls Recipe Every Time
- Essential Ingredients for Fluffy Homemade Bread
- Step-by-Step Guide to Perfect Dinner Rolls
- Tips for Success Making Your Best Homemade Rolls
- Dinner Roll Variations and Flavor Additions
- Make Ahead Dinner Rolls and Storage Instructions
- Frequently Asked Questions About Making Dinner Rolls
- Nutritional Estimates for These Buttery Yeast Rolls
- Share Your Homemade Dinner Rolls Experience
Why You Will Make These Soft Dinner Rolls Recipe Every Time
Forget everything you think you know about needing hours or special equipment for great bread. These dinner rolls are different. They deliver that comforting, melt-in-your-mouth experience that store-bought packages just can’t touch. I use this recipe constantly because it hits all the right notes:
- They are unbelievably soft—seriously, they practically disappear when you bite into them.
- The flavor is rich and deeply buttery yeast rolls quality, perfect for soaking up gravy or just eating plain.
- They are surprisingly better than anything you grab at the grocery store, even on a busy weeknight.
- They are sturdy enough to be the star of your Thanksgiving table, not just an afterthought.
Once you see how easy it is to make these best homemade rolls, you’ll never stress about side dishes again.
Essential Ingredients for Fluffy Homemade Bread
Listen, if you want truly amazing soft dinner rolls recipe results, we can’t skimp here. Every single item matters, especially their temperature and state. I’ve learned the hard way that sloppy ingredient prep means flat bread. Don’t worry! The list is short, and I’m walking you through exactly how to handle everything so your dough rises like a dream.
Ingredients for the Buttery Yeast Rolls Base
For the dough itself, we are keeping things classic and rich. Remember: the water temperature is everything! If it’s too cold, your yeast won’t wake up. Too hot, and you’ve killed it right away.
- 1 cup warm water (Make sure this hits 105-115°F—get a thermometer or use a little tap elbow test!)
- 2 1/4 teaspoons active dry yeast
- 1/4 cup granulated sugar
- 1/4 cup unsalted butter, melted, plus 2 tablespoons saved for brushing later
- 1 large egg, and I mean room temperature, please!
- 3 1/2 cups all-purpose flour, plus extra for dusting
- 1 teaspoon salt
Optional Topping for Texas Roadhouse Style Rolls Copycat
Now, if you want that famous, slightly sweet, cinnamon-kissed butter finish that makes everyone ask for the recipe, you need this little blend ready to go right when the rolls come out of the oven! This is pure comfort food baking magic.
- 1/4 cup unsalted butter, melted
- 1 teaspoon honey
- 1/2 teaspoon ground cinnamon
Step-by-Step Guide to Perfect Dinner Rolls
This is where the magic happens! Don’t rush anything here, especially the rising, because that is the secret sauce for truly fluffy homemade bread. Baking great dinner rolls is all about giving the yeast what it needs. Follow these steps exactly, and you’ll have the softest batch you’ve ever made.
Activating Yeast and Mixing the Dinner Rolls Dough
First things first: wake up that yeast! Take your warm water—remember, between 105 and 115 degrees—and sprinkle the yeast right on top with a pinch of that sugar. Give it a gentle stir and just leave it alone for about five minutes. If you see foam or bubbles forming, that means your yeast is alive and happy. Great job! Now, whisk in the rest of your sugar, the melted butter, and your room-temperature egg. See how easy that was? We’re building the flavor foundation for these rich buttery yeast rolls right now.
Kneading and the First Rise for Perfectly Risen Rolls
It’s time to bring in the flour and salt mixture. Add it gradually to your wet ingredients until it looks shaggy and messy. Now, turn it out onto a surface lightly dusted with flour. Get ready to knead! You need to work this dough for about six to eight minutes. You’re looking for smooth dough that bounces back slightly when you poke it—that means you’ve developed the gluten beautifully. Move it to an oiled bowl, cover it up, and tuck it away in a warm spot for about an hour and a half. We need these rolls to double in size to guarantee that light crumb.
Shaping and the Second Rise for Soft Dinner Rolls Recipe
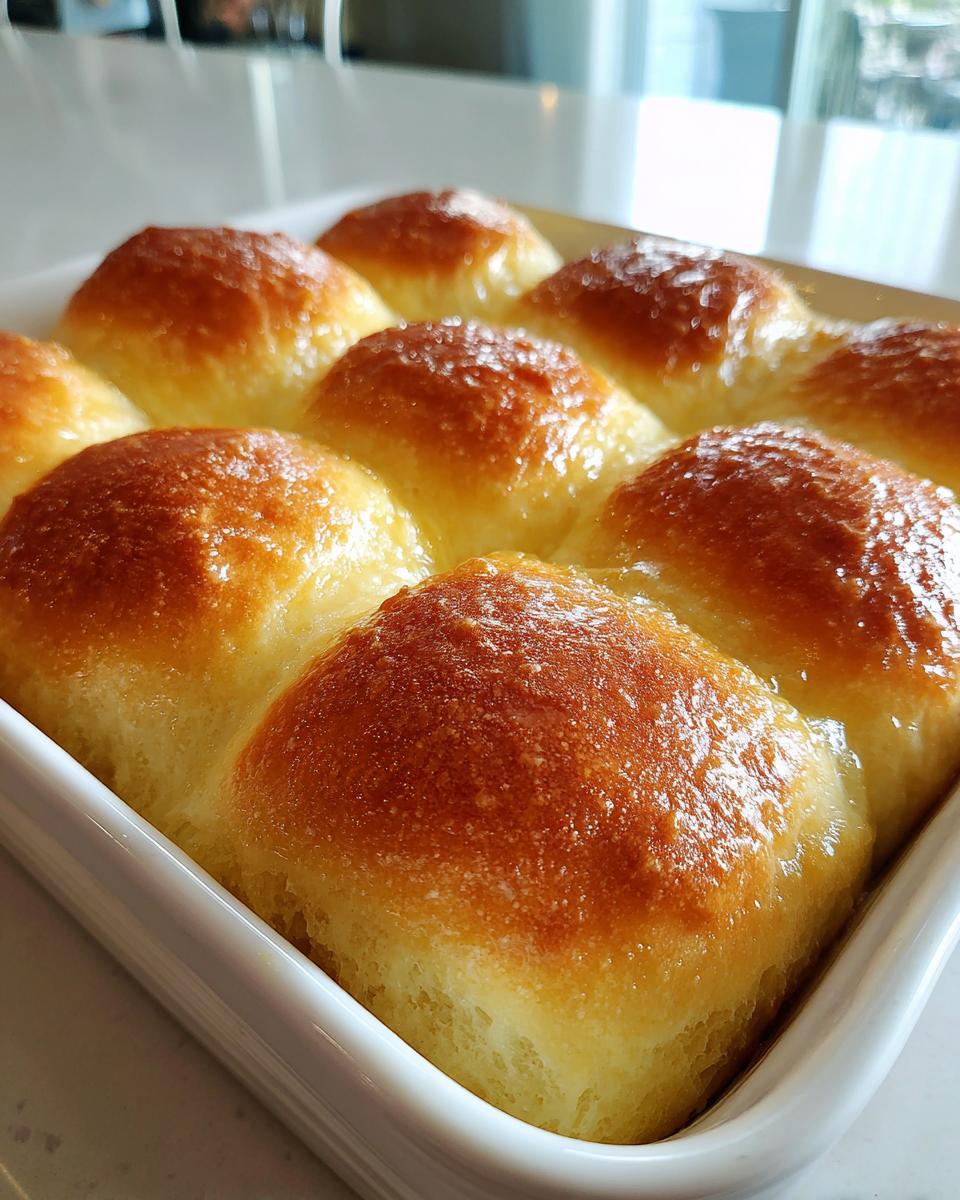
Once doubled, gently punch the air out—it’s oddly satisfying! Now, gently divide that dough into 12 equal portions. Roll each piece tightly between your hands until you form a smooth, tight ball. This tight shaping is key to those beautiful rounded tops. Arrange these 12 portions snuggly in your greased 9×13 inch pan. See how they are touching? This forces them to bake up soft on the sides! Cover them again and let them relax for another 30 to 45 minutes. They should look puffy and puffy again.
Baking and Applying the Buttery Yeast Rolls Finish
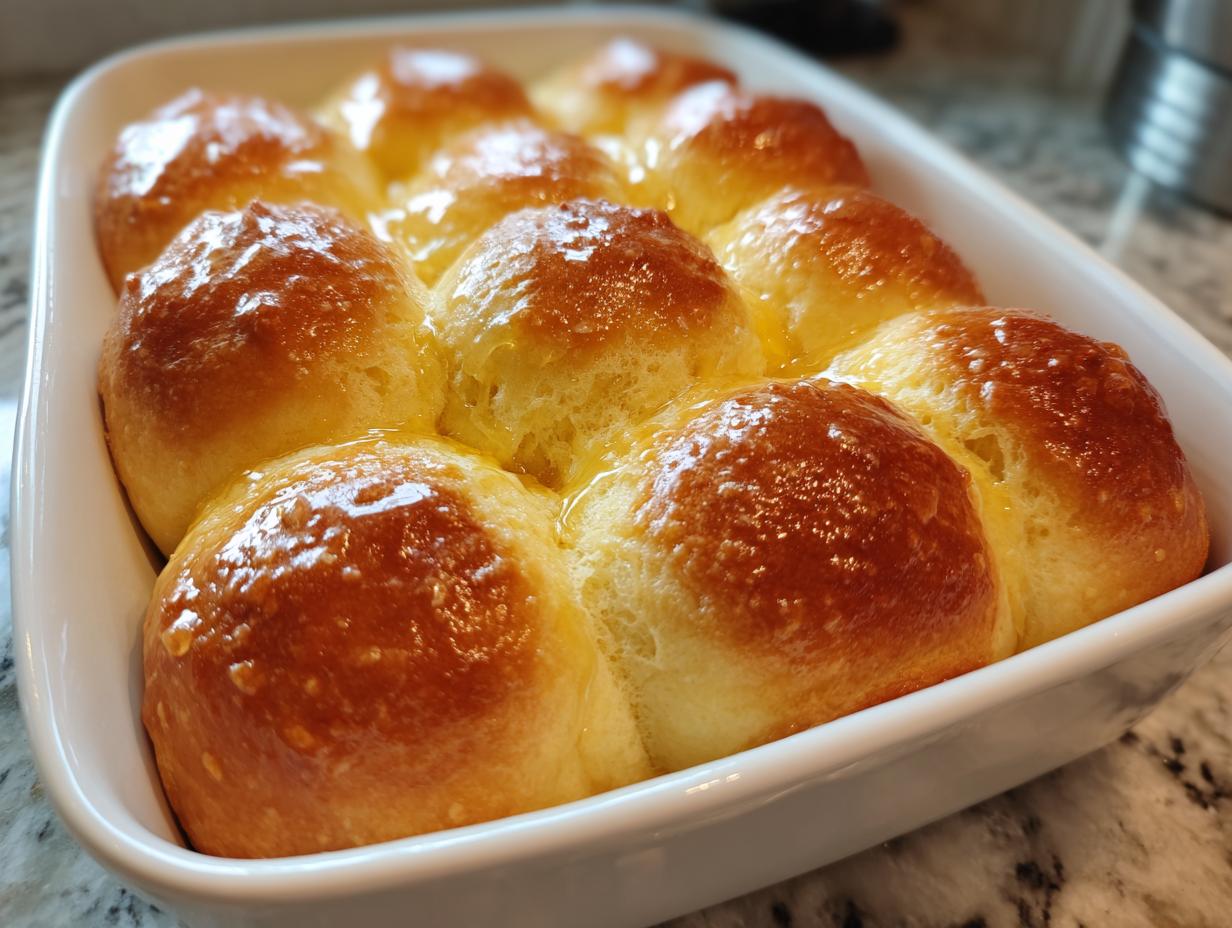
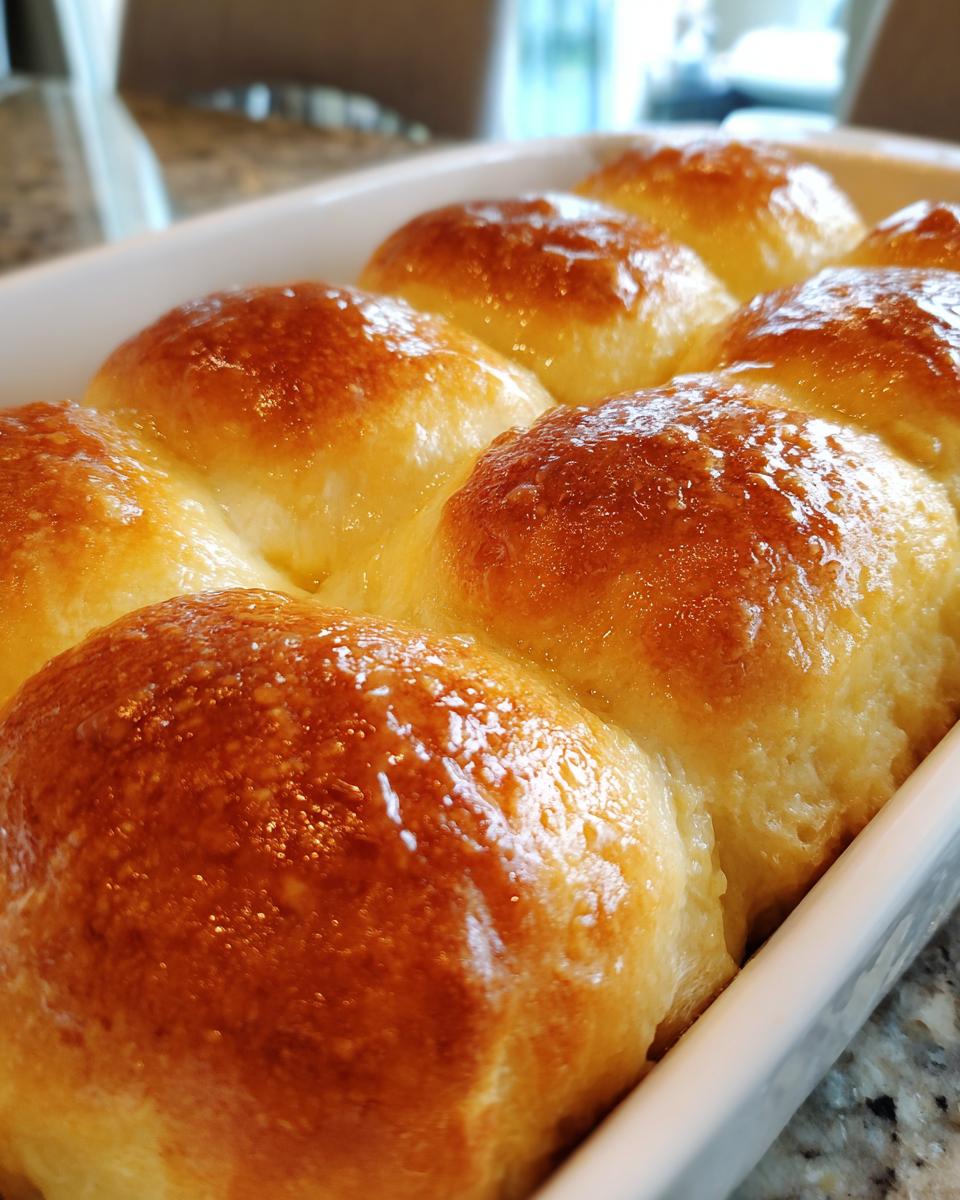
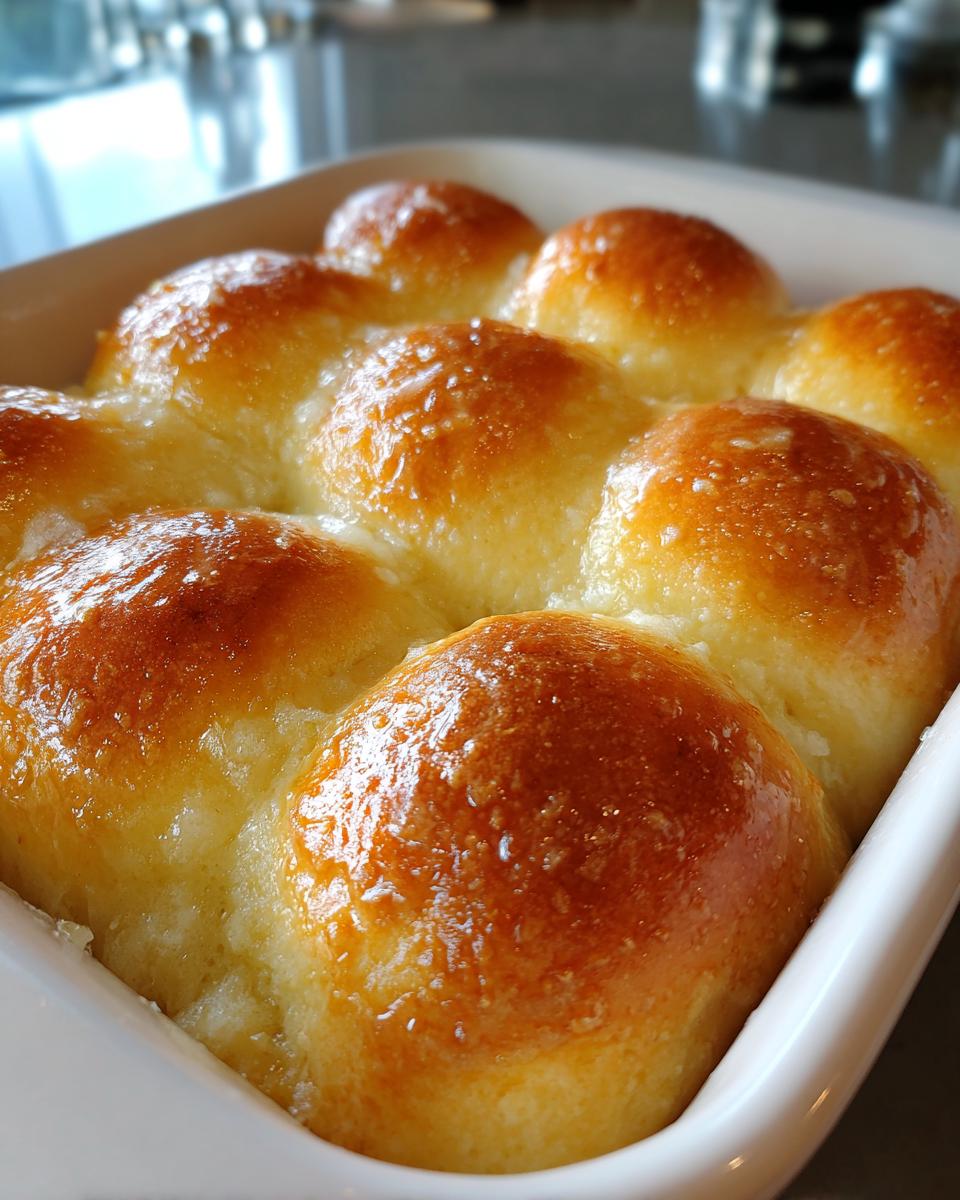
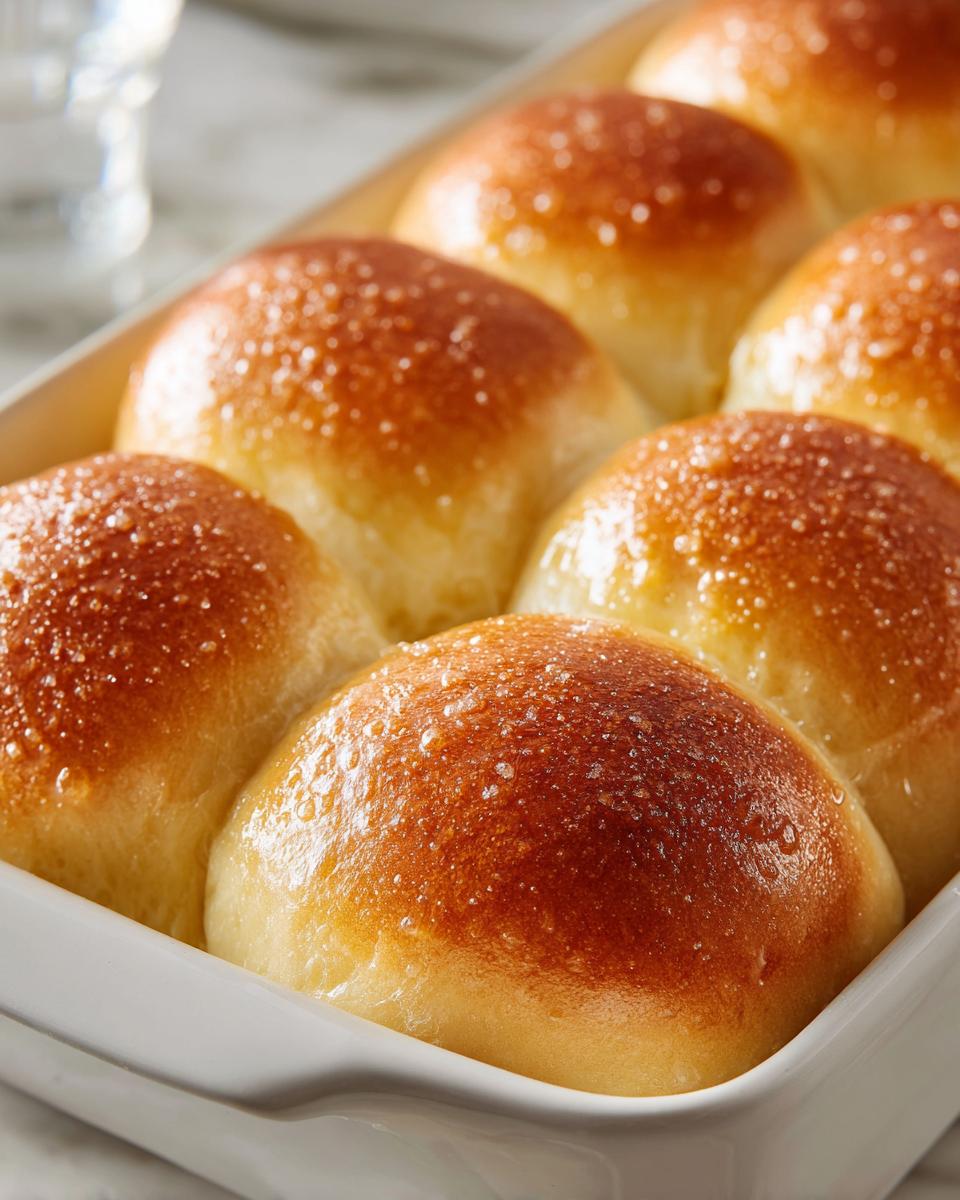
Preheat your oven to 375°F (190°C). Bake these beauties for just 15 to 18 minutes until they are a nice golden brown. The second they come out, you need to work fast! Melt that reserved 2 tablespoons of butter and brush it over the hot tops while they are still steaming. If you chose the Texas Roadhouse style rolls copycat topping, this is your moment! Whisk that extra melted butter, honey, and cinnamon together and pour it over immediately. That hot steam sucks up all that buttery goodness!
If you want to see my favorite way to get the dough ready the night before, check out my guide on my own journey to bread confidence!
Tips for Success Making Your Best Homemade Rolls
Even with the best recipe for dinner rolls, sometimes things go a little sideways, right? I’ve been there! My biggest early failure? I tried to rush the second rise one time because company was due any minute. I figured puffy enough was enough. Well, they baked up looking like little pancakes—dense, heavy, and definitely not the fluffy rolls I was aiming for. That taught me my most valuable lesson for these best homemade rolls: you absolutely cannot rush the proofing!
The secret to maintaining that heavenly, fluffy homemade bread texture happens in two crucial moments:
First, when you’re kneading, don’t just stop when it looks okay. You need the dough to feel satiny smooth. If you feel like you’ve kneaded enough, knead for one more minute. That extra minute builds the strength needed to hold the gas created by the yeast. If the gluten isn’t strong, it collapses during baking, and boom—flat bread.
Second, don’t cheat the second rise. This second proof (the one after you shape them) is what makes the sides of your rolls kiss together and bake up incredibly soft. I often check the recipe notes and see shortcuts, like those promises of quick dinner rolls ready in 30 minutes. While I love fast food sometimes, for truly superior buttery yeast rolls, patience is non-negotiable. Trust the process, let them double again, and you’ll be rewarded with the softest batch ever.
Dinner Roll Variations and Flavor Additions
Once you master the base recipe for these classic dinner rolls, the fun really starts! Baking from scratch gives you the freedom to customize, and these are perfect canvases for adding extra flavor. Why stick to just butter when you can upgrade them completely? This lets you match the bread perfectly to whatever you’re serving that night. Here are a couple of ways I like to mix things up when I’m feeling creative!
Creating Garlic Butter Rolls Recipe
If you have a roast or a rich stew planned, skipping the honey topping and going savory is the way to go. It’s so simple! While the rolls bake, set aside that final brushed butter. You just need to stir in some minced garlic—fresh is best, but powder works in a pinch—a little dried parsley for color, and just a tiny pinch of salt. Brush that fragrant mixture over the rolls the second they come out of the oven. The garlic blooms from the heat, creating these incredible garlic butter rolls recipe bites that smell divine.
Making Sweet Dinner Rolls
Sometimes, you want that slight sweetness that cuts through richer main dishes, like a perfect side for ham or spicy barbecue. For sweet dinner rolls, I don’t change the main dough much, but I make one small adjustment when mixing the wet ingredients. I usually bump that 1/4 cup of sugar up by about a tablespoon—just a hair more richness. Another fun trick? Add about a teaspoon of pure vanilla extract along with the egg. It subtly enhances the flavor of the flour and gives them that extra cozy, comforting touch without making them taste like actual dessert rolls.
Make Ahead Dinner Rolls and Storage Instructions
Okay, I know the holidays—or honestly, just any busy weeknight—means you need a break. That’s why I rely heavily on my ability to make these dinner rolls ahead of time! Baking from scratch doesn’t mean you have to be chained to your oven for the entire day. We can absolutely prep these for later and still get that legendary softness. This really helps me feel confident serving homemade bread when things get hectic.
You have two great options here: the fridge or the freezer. Both work perfectly for our Buttery Yeast Rolls, but the thawing and baking times change a little, so pay attention here for best results. It’s all about controlling the final rise, which is crucial for that fluffy texture we obsess over.
If you decide to chill them, make sure you’ve already done the shaping step and arranged them in the pan, but stop before the second rise. Cover that pan tight, like wrapping a mummy! You can stick these prepared dinner rolls in the refrigerator for up to 24 hours. When you’re ready to bake, pull them out, let them sit on the counter for about 30 minutes just to take the chill off their initial proofing, and then let them finish that second rise until puffy. Because they start slightly chilled, you might need to add about 5 extra minutes to the bake time.
For longer storage, freezing is your friend. You can freeze them either baked or unbaked. If you freeze them baked—which I often do after Thanksgiving—just wrap them really well in plastic wrap, then foil. When you want to eat them, pop them wrapped in foil in a 350°F oven for about 15 minutes. That little bit of steam trapped in the foil rehydrates them beautifully!
If you freeze them unbaked (shaped in the pan), cover the pan tightly with plastic wrap and then foil before freezing. They can stay good for up to three months! When it’s time to bake, take them straight from the freezer to a cozy spot on the counter to thaw and complete their second rise. I always double-check my storage methods against my kitchen confidentiality notes to make sure everything stays fresh!
If you want a great reminder on how to keep these recipes safe and sound, check out these storage tips for homemade baked goods. I always recommend reheating any leftovers wrapped in a slightly damp paper towel—it’s the EASIEST way to revive that day-old softness. No one needs a hard roll!
Frequently Asked Questions About Making Dinner Rolls
It’s natural to have questions when moving from store-bought to baking from scratch! When I first started making these dinner rolls, I had dozens of questions about yeast and rising times. It’s okay if you aren’t sure about every step—that’s why I’m here to help bridge that gap so you feel empowered to create the very best bread.
Can I make these Quick Dinner Rolls without waiting for two rises?
Oh, I know that feeling when you need buttery yeast rolls *now*! Technically, yes, you *could* skip the second rise and bake them after the first rest. However, I have to be honest with you: if you skip that second puff, you are sacrificing that next-level, cloud-like texture. Those quick dinner rolls just won’t achieve that glorious, fluffy result we are aiming for. If you are truly in a pinch, make sure the water you use for the yeast is on the warmer side (close to 115°F) to encourage the yeast to work faster, but I always advise patience for the best fluffy homemade bread.
What is the best way to reheat leftover dinner rolls?
This is the question that keeps amazing leftovers from going stale! Never, ever microwave these rolls unless you want a tough, chewy hockey puck. To restore that fresh-baked softness, the oven is your best friend. Wrap your leftover soft dinner rolls tightly in aluminum foil, or place them in a small baking dish covered snugly with foil. Heat them at 350°F for just 8 to 10 minutes. That trapped steam keeps them moist. If you’re only reheating one or two, you can wrap them in a slightly damp paper towel and microwave them for 10 seconds at a time. That trick works wonders for restoring moisture!
If you struggle with any part of this recipe—yeast troubleshooting, shaping, or anything else—please don’t hesitate to reach out to me via my contact page!
Nutritional Estimates for These Buttery Yeast Rolls
Now, I’m not a nutritionist by any means, and I always bake with real ingredients—which means we aren’t cutting corners on butter or sugar to keep these light! That’s what makes these Buttery Yeast Rolls so delicious and comforting, right? These numbers are just a general estimate based on the ingredients listed for one roll, assuming you use all 12 servings. They should give you a good baseline for keeping track if that’s important to you.
- Calories: About 185 per roll
- Fat: Roughly 6 grams
- Carbohydrates: Approximately 29 grams
- Protein: About 4 grams
- Sugar: Around 4 grams
Remember, these are just estimates! If you skip that amazing optional topping we talked about, your fat and sugar content will drop slightly. If you decide to add extra honey when you serve them, the numbers will certainly change! Basically, they are worth every single delicious bite, and that’s what matters most when it comes to phenomenal dinner rolls. You can check out my general guidelines on baking ingredients over on my terms of use page, though these specific numbers are just for this batch!
Share Your Homemade Dinner Rolls Experience
I truly hope you’ve found the confidence to step away from the bread aisle and into your own oven after following this guide! Making dinner rolls from scratch should feel rewarding, not stressful. Now that you’ve handled the yeast, kneaded the dough, and experienced that amazing buttery aroma filling your kitchen, I’d love to hear all about it.
Did they turn out as fluffy as you hoped? Maybe you tried the honey-cinnamon topping and now you’re hooked? Don’t keep that success a secret! Please take a minute to leave me a star rating right here on the recipe—it lets me know what recipes are truly working for you. If you ran into a hiccup or had a brilliant variation I didn’t mention, drop a comment below. Sharing our kitchen wins (and even our little baking oops moments!) is how we all get better.
I love seeing your beautiful, golden-brown creations pop up! Tag me on social media if you share a picture. Seeing the joy these simple, perfect soft homemade rolls bring to your family table makes all my trial-and-error worth it. Happy baking, friends!
PrintThe Ultimate Soft and Fluffy Homemade Dinner Rolls (Classic Buttery Recipe)
You can make incredibly soft, fluffy, and buttery dinner rolls from scratch. This recipe proves that homemade bread tastes much better than store-bought options for your family meals or holiday gatherings.
- Prep Time: 20 min
- Cook Time: 18 min
- Total Time: 1 hour 58 min
- Yield: 12 rolls 1x
- Category: Side Dish
- Method: Baking
- Cuisine: American
- Diet: Vegetarian
Ingredients
- 1 cup warm water (105-115°F)
- 2 1/4 teaspoons active dry yeast
- 1/4 cup granulated sugar
- 1/4 cup unsalted butter, melted, plus 2 tablespoons for brushing
- 1 large egg, room temperature
- 3 1/2 cups all-purpose flour, plus more for dusting
- 1 teaspoon salt
- For Topping (Optional Texas Roadhouse Style): 1/4 cup unsalted butter, melted, 1 teaspoon honey, 1/2 teaspoon ground cinnamon
Instructions
- Activate the yeast: In a large bowl, combine the warm water and yeast. Let it sit for 5 minutes until foamy.
- Mix wet ingredients: Add the 1/4 cup melted butter, sugar, and egg to the yeast mixture. Whisk until combined.
- Combine dry ingredients: In a separate bowl, whisk together 3 1/2 cups of flour and the salt.
- Form the dough: Gradually add the flour mixture to the wet ingredients, mixing until a shaggy dough forms.
- Knead: Turn the dough out onto a lightly floured surface. Knead for 6 to 8 minutes until the dough is smooth and elastic. If the dough is too sticky, add flour one tablespoon at a time.
- First Rise: Place the dough in a lightly oiled bowl, turning to coat. Cover the bowl with plastic wrap or a clean towel. Let it rise in a warm place for 1 to 1.5 hours, or until doubled in size.
- Shape the rolls: Gently punch down the risen dough. Divide the dough into 12 equal pieces. Roll each piece into a smooth ball. Place the balls close together in a greased 9×13 inch baking pan.
- Second Rise: Cover the pan loosely and let the rolls rise again in a warm place for 30 to 45 minutes, or until puffy.
- Bake: Preheat your oven to 375°F (190°C). Bake for 15 to 18 minutes, or until the tops are golden brown.
- Apply Butter Topping: While the rolls are still hot, melt the remaining 2 tablespoons of butter. Brush the tops generously with the melted butter.
- For Texas Roadhouse Style Finish (Optional): Whisk together the 1/4 cup melted butter, honey, and cinnamon. Brush this mixture over the hot rolls immediately after baking.
- Serve warm for the best soft, fluffy texture.
Notes
- For quick dinner rolls, ensure your water temperature is correct; water that is too hot will kill the yeast.
- You can make these ahead: Assemble the rolls in the pan, cover tightly, and refrigerate for up to 24 hours before baking. Add 5-10 minutes to the baking time if baking directly from the refrigerator.
- These rolls are excellent served with honey butter or garlic butter for added flavor.
Nutrition
- Serving Size: 1 roll
- Calories: 185
- Sugar: 4
- Sodium: 250
- Fat: 6
- Saturated Fat: 3.5
- Unsaturated Fat: 2.5
- Trans Fat: 0
- Carbohydrates: 29
- Fiber: 1
- Protein: 4
- Cholesterol: 25