
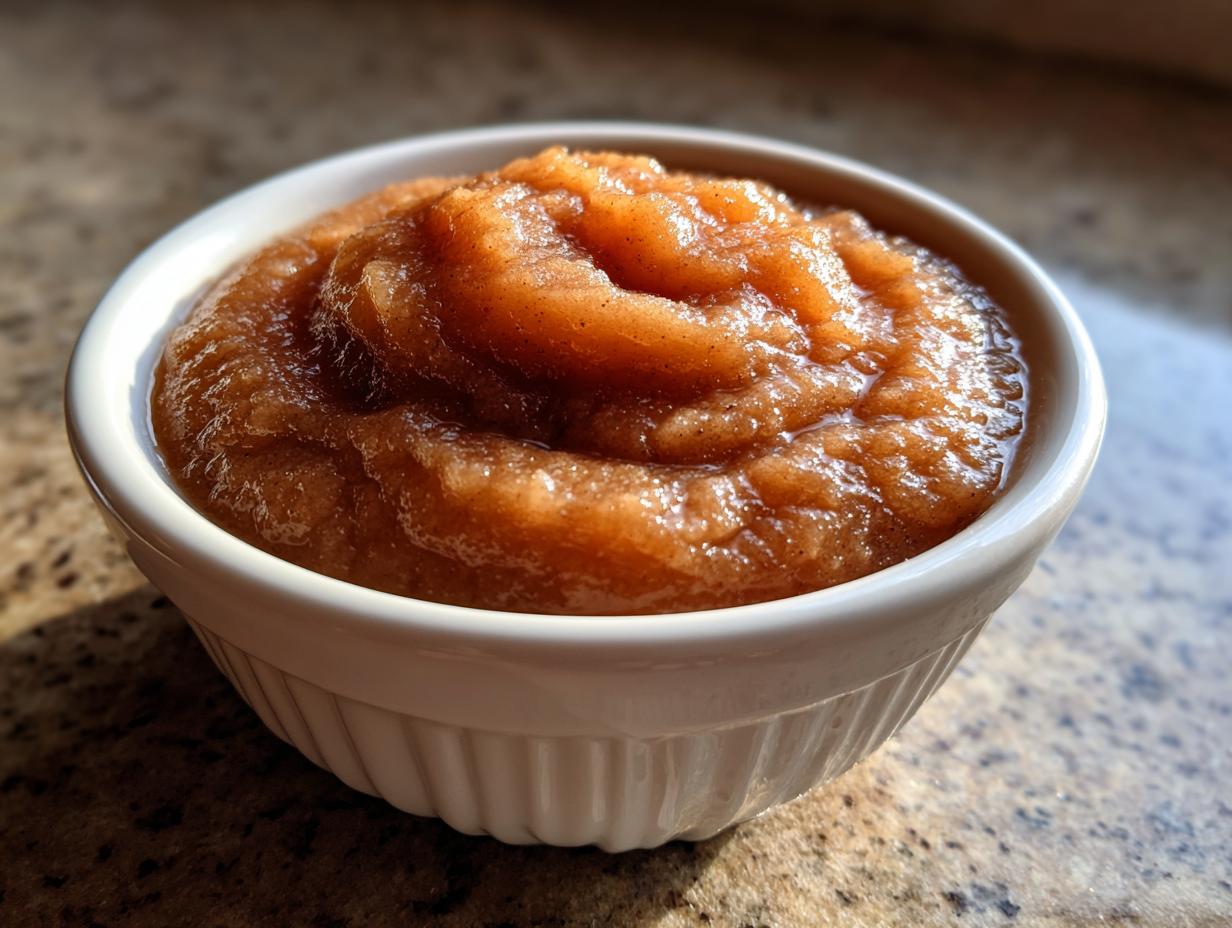
When you think of comfort food, does the scent of warm spices and sweet apples fill your head? I know it does for me! For so long, I thought making fantastic homemade applesauce was something that required hours of slow simmering or complicated peeling techniques. Oops, I was wrong! That’s the trap we fall into—thinking real flavor means real fuss. But trust me when I say, ditch that skepticism. This **Easy Applesauce** recipe proves that wholesome, delicious food is completely accessible. We are making this amazing stuff on the stovetop, and it comes together faster than you can decide which takeout menu to order from. You absolutely have the confidence to master this kitchen staple right now.
- Why This Stovetop Homemade Applesauce Recipe Builds Confidence
- Gathering Ingredients for Your Easy Applesauce
- Step-by-Step Stovetop Applesauce Instructions
- Tips for Perfect Cinnamon Applesauce Success
- Making Spiced Applesauce Variations
- How to Store and Reheat Your Homemade Applesauce
- Serving Suggestions for This Comfort Food Applesauce
- Frequently Asked Questions About Making Applesauce
- Nutritional Estimate for Homemade Applesauce
- Share Your Wholesome Apple Treat Experience
Why This Stovetop Homemade Applesauce Recipe Builds Confidence
This really is the recipe I turn to when I need real results without spending half my afternoon in the kitchen. Why? Because it strips away all the intimidating steps. It’s straightforward, it delivers massive flavor based on the quality of your apples, and it proves you don’t need fancy equipment for incredible flavor. This stovetop method is foolproof and fast, instantly boosting your cooking mojo. It’s proof that great flavor and simplicity aren’t mutually exclusive.
Quick Apple Recipe Ready in Under 30 Minutes
Seriously, look at the clock! You only need about 10 minutes of your time to chop and toss everything into one pot. Then, 20 minutes later, boom—you have about four cups of deliciousness. That fast turnaround time means you can whip up a batch of **Healthy Applesauce** right before dinner for a side dish, or even when you need a wholesome snack fast. It’s the perfect **Quick Apple Recipe** for those evenings when you feel too tired to cook.
The Appeal of Homemade Applesauce Over Store-Bought
When you buy jars off the shelf, you’re paying for preservatives and sometimes added sugars you just don’t need. With this recipe, you are in complete control. We rely on the natural sweetness of the fruit—if your apples are ripe, you might not even need sugar! That makes this incredible **homemade applesauce** a perfect **Natural Sweetener Snack**. It tastes cleaner, brighter, and honestly, just way more comforting than anything mass-produced.
Gathering Ingredients for Your Easy Applesauce
Okay, let’s talk supplies! One of the reasons this is such a fantastic and **easy applesauce** recipe is that you don’t need a huge shopping list. We are keeping this wonderfully simple. If you ever wanted to try a **Simple 3 Ingredient Applesauce** version, you could honestly just use apples and water, but trust me, adding a whisper of spice elevates it into something truly special. You need things you probably already have on hand!
- 3 lbs apples, peeled, cored, and chopped
- 1/2 cup water
- 1 teaspoon ground cinnamon
- 1/4 teaspoon ground nutmeg
- 1 tablespoon lemon juice (optional, for brightness)
See? I told you it’s minimal fuss. The lemon juice is optional, but I always sneak it in because it really wakes up the flavor of the cooked fruit. Think of it as a bright little highlighter for the sweet apples.
Selecting the Best Apples for Homemade Applesauce
This is where you can really control the final outcome! The type of apple you pick changes the texture and how much added sweetener you might need. Since we aren’t using a ton of sugar, the apple variety matters more than you think. For the absolute **best applesauce recipe**, I always steer people toward ones that hold their shape slightly but break down nicely.
My favorites are crisp, sweet varieties like Fuji or Gala. Honeycrisp works wonderfully too—they provide super sweet applesauce without needing much else. If you like a little more tartness, you can mix in a few Granny Smiths, but I find if you use all tart apples, you end up adding more sweetener than you intended. Pick apples you genuinely love the taste of raw, and you can’t go wrong!
Step-by-Step Stovetop Applesauce Instructions
Alright, here is where the magic actually happens! Don’t let the word “stovetop” fool you; this is hands-off cooking punctuated by a few quick checks. We are making **stovetop applesauce**, and the beauty is that it all happens in one pot, meaning cleanup is a breeze later. Remember, the goal isn’t to boil them into mush right away; it’s about gently coaxing the pectin and moisture out of those beautiful apples. Once you start, you’ll see how simple it is to build a foundational recipe for all your future apple needs.
Simmering the Apples for Perfect Tenderness
First things first: get everything—your chopped apples, that half-cup of water, and your spices—right into a large saucepan. Pop it on medium heat and put a lid on it. We want to bring it up to a gentle simmer. Once you see the steam start building, immediately drop that heat way down to low. Keep that lid snug! We’re simmering uncovered for about 15 to 20 minutes. Stir it occasionally just to make sure the apples aren’t sticking to the bottom. When they look completely floppy and you can easily mash one against the side of the pot with your wooden spoon, they are ready to come off the heat.
Achieving Your Ideal Homemade Applesauce Texture
Now for the fun part: deciding if you want this **homemade applesauce** chunky or perfectly smooth. If you are like me and prefer a super velvety texture for sauces or baking, pull out your immersion blender and gently blend right in the pot. Be careful with the hot liquid! If you are strictly team chunky—which is amazing when serving as a **homemade side dish**—just use a reliable potato masher. Mash away until you have those lovely little pieces mixed throughout. If you want it smoother than your masher can manage but don’t own an immersion blender, carefully scoop it into a regular blender in batches. Always taste test after mashing, because sometimes the fruit is so perfect, you skip the need for any added sugar!
If you want to see a few other ways people achieve this fall favorite, you can check out some great foundational methods right here.
Tips for Perfect Cinnamon Applesauce Success
We’ve got the core recipe down, but I want to give you a few little secrets from my kitchen notebook that turn this good recipe into your go-to **cinnamon applesauce**. Building confidence means getting consistent results, right? These small tweaks ensure your final batch is always top-notch, whether you’re serving it warm tonight or saving it for later.
First, let’s talk about peeling. In the recipe instructions, I mentioned peeling the apples. If you’re aiming for that classic, silky texture, definitely stick to peeling. However, if you are going to blend this **homemade applesauce** until it’s completely smooth—I mean perfectly velvety, no chunks at all—you can absolutely skip peeling! The skins break down entirely if you process them long enough. It saves about ten minutes of work, so use that to your advantage! Just know you won’t get that smoother, traditional mouthfeel.
For maximum cozy factor, especially if you’re doing this while the weather outside is getting crisp, try throwing a whole cinnamon stick into the pot along with your ground spices. This is a classic trick that really deepens the aroma. The ground cinnamon gives you the flavor right away, but that stick slowly releases a rounder, warmer background note as it simmers. Here’s the essential part: remember to fish that stick out before you start blending or mashing! Nobody wants a woody surprise in their snack.
Also, don’t be afraid to experiment with the spice level. If you like a bolder flavor, maybe add a tiny pinch of ground ginger—it adds such a lovely warming kick. If you’re looking for ways others have tweaked their favorite recipes, I always love seeing what other cooks are trying over at Averie Cooks!
Making Spiced Applesauce Variations
While the base recipe is already fantastic with just cinnamon and nutmeg, this is where you get to really make your **homemade applesauce** your own! Cooking is about adding your personality to the plate, and that means playing with flavors that you love. If you’re leaning into the cozy vibes, thinking about **fall apple recipes**, this is the perfect time to experiment with a slightly bolder **spiced applesauce** profile. Don’t be shy; apples are so adaptable!
The first thing I always try when I want a deeper flavor is to introduce a warming partner to the cinnamon. A tiny pinch of ground ginger works miracles here. It adds no heat, just this wonderful, subtle back note that feels very autumn. You only need about 1/8th of a teaspoon, by the way—too much ginger can suddenly make your snack taste medicinal, so start small!
Another great addition for complexity is allspice. My Aunt Clara swears by it. It combines notes of cinnamon, nutmeg, and cloves all in one tiny berry, which cuts down on the number of spice jars you need to open! It gives the final product a richer, almost molasses-like depth that pairs beautifully if you decide to eat your applesauce alongside pork chops or roasted chicken.
If you want to see how others pair their spices—especially cinnamon—to get that perfect comforting blend, this article on creating **cinnamon applesauce** variations is a great read: check it out here. Ultimately, the best spiced applesauce is the one that tastes perfect to *you*. Taste as you go, and enjoy making a truly custom batch!
How to Store and Reheat Your Homemade Applesauce
The absolute best part about making a big batch of **homemade applesauce** is that you’ve set yourself up for easy meals all week! Seriously, having this prepared is like opening the fridge and instantly having a healthy side dish ready to go. I always make sure to double the recipe because let’s be honest, storing it is almost easier than eating it all in one go.
If you aren’t planning on eating it within a day or two, storage is key. Transfer your cooled **applesauce** into airtight containers. Glass jars are my favorite because they seal up so nicely, but any good, sturdy container will do. You can safely keep this in the refrigerator for about one week. I’ve honestly stretched it to 10 days when the container hasn’t been opened, but a week is the safe mark I always stick to for guaranteed freshness and flavor.
Now, when you want to serve it, you have options! If you love that comforting, warm side dish feeling, reheating is super fast. You can heat up a single serving safely in the microwave. Just scoop out what you need into a microwave-safe bowl, cover it loosely, and zap it for 30 to 60 seconds until it’s steaming gently. For a larger portion, I just pop the whole sealed container onto the stovetop over very low heat, stirring occasionally until it’s warm through. If you prefer it chilled, well, that’s even easier—just pull it straight from the fridge. It’s truly a make-ahead winner!
Serving Suggestions for This Comfort Food Applesauce
The work is done, your **homemade applesauce** is cool, smooth, and spiced just right! Now comes my favorite part: figuring out *all* the ways we get to enjoy this masterpiece. If you think **applesauce** is just for toddlers, think again! This version is sophisticated enough to be a fantastic **homemade side dish**, but simple enough for a quick snack. I always try to make a bigger batch just so I don’t run out mid-week.
For dinner tonight, if you’re serving something hearty like roasted pork chops or even simple baked chicken breast, a warm spoonful of this spiced fruit feels incredibly comforting. It provides that perfect balance of sweet and acid that cuts through richer meats beautifully. It’s truly my go-to **comfort food applesauce** pairing when I want something classic on the plate.
But it doesn’t stop at dinner! This is incredible fuel for breakfast or lunch. Try stirring a big dollop into your morning oatmeal (it melts right in and adds sweetness!) or swirl it through plain Greek yogurt instead of reaching for sugary fruit cups. It makes a wonderful, **healthy apple recipe** topping for waffles or pancakes, too. Don’t forget its versatility in the pantry—it’s a fantastic fat replacer when you are getting into **applesauce for baking** things like muffins or moist quick breads. Seriously, once you have this on hand, you’ll find a million uses for it!
Frequently Asked Questions About Making Applesauce
I always get so many great questions when people try this recipe for the first time! It’s natural when you’re moving away from store-bought jars and trying something truly homemade. Don’t ever hesitate to reach out if you have another question—you can always find a way to connect with me over at the contact page. Here are a few things folks ask most often about making this simple fruit preparation.
Can I make this recipe in a Slow Cooker Applesauce style?
Absolutely, you can! If you want to transition this recipe into a **Slow Cooker Applesauce** preparation, it’s incredibly easy and saves you from having to monitor the stovetop. Just toss all your ingredients—apples, water, and spices—into your crockpot. Set it to LOW and let it go for about 4 to 6 hours, or until those apples are completely tender and falling apart. It gives you that wonderfully spiced aroma filling your whole house, too! Just follow the mashing steps at the end just like we discussed.
Is it possible to make this recipe without peeling the fruit?
That’s a fantastic way to save about ten minutes of prep time! The short answer is yes, you totally can skip the peeling step **if** you intend to blend your final batch until it is perfectly, uniformly smooth. If you like even tiny flecks of texture—or if you’re using a masher—I highly recommend peeling first. Why? Because while the skins break down when cooked for a long time, some bits can feel a little tougher or papery in the final texture when mashed by hand. If you’re going for that silky smooth texture, though, skip the peeler—you’ve got this!
What is the best way to naturally sweeten the finished product?
My biggest rule here is: always taste first! You’d be amazed how sweet the apples get once concentrated by the simmering process. If your apples were on the tart side, or if you just prefer a little more sweetness than nature provided for your **natural sweetener snack**, you have options that keep it wholesome. I usually stir in just a teaspoon or two of pure maple syrup until it hits the sweetness level I love. A bit of white or brown sugar works too, of course, but maple syrup adds a deeper, richer background flavor that complements the cinnamon so well!
Nutritional Estimate for Homemade Applesauce
Okay, let’s talk real talk for a second. We all want food that tastes amazing, but we also love knowing what we’re putting into our bodies, right? Since we are using fresh fruit and skipping all those mystery preservatives and high-fructose syrups found in store-bought jars, this **homemade applesauce** is already a win for healthy eating. It’s great as a **wholesome apple treat**!
Now, I have to be clear: because the final nutrition totally depends on the type of apple you choose (fuji vs. granny smith!), the cooking time, and whether or not you add any extra sugar or maple syrup at the end, these numbers are just an educated guess. Think of this as your baseline estimate for a standard batch made following the recipe exactly as written, assuming you taste it and decide it’s sweet enough on its own.
For a standard serving size of about 1/2 cup, here is the estimate based on our 3-pound recipe:
- Calories: 110
- Fat: Only 0.2g (That’s practically zero fat, folks!)
- Carbohydrates: 29g
- Protein: A tiny 0.3g
- Sugar: Approximately 22g (But remember, this is mostly natural fruit sugar!)
- Fiber: A solid 3g
- Sodium: Just 2mg
See? It’s naturally low in sodium and fat, and you get a nice little boost of fiber just by enjoying a simple snack. It’s easy to see why I push this recipe so hard for folks looking for simpler, cleaner swaps in their day-to-day eating!
Share Your Wholesome Apple Treat Experience
The best part of cooking, truly, is sharing the achievement! You successfully made **homemade applesauce** from scratch, and that is awesome. That feeling of replacing a processed jar with something you created with your own two hands? That’s building real cooking confidence, and I want to hear all about it.
So, what kind of apples did you use? Did you blend it perfectly smooth, or did you leave some lovely chunks behind? Did you stick to the cinnamon and nutmeg, or did you sneak in some ginger like I suggested?
Don’t keep that success quiet! Come down to the comments below and let me know how your pot of **homemade applesauce** turned out. Hearing about your experience—whether you served it warm with dinner or packed it for a healthy lunch—is the fuel that keeps me writing these simple, accessible recipes. Your success makes my day!
If you need to check out our guidelines on how we handle your shared information, you can always review the privacy policy here before leaving a comment. Go ahead, brag a little! You earned it.
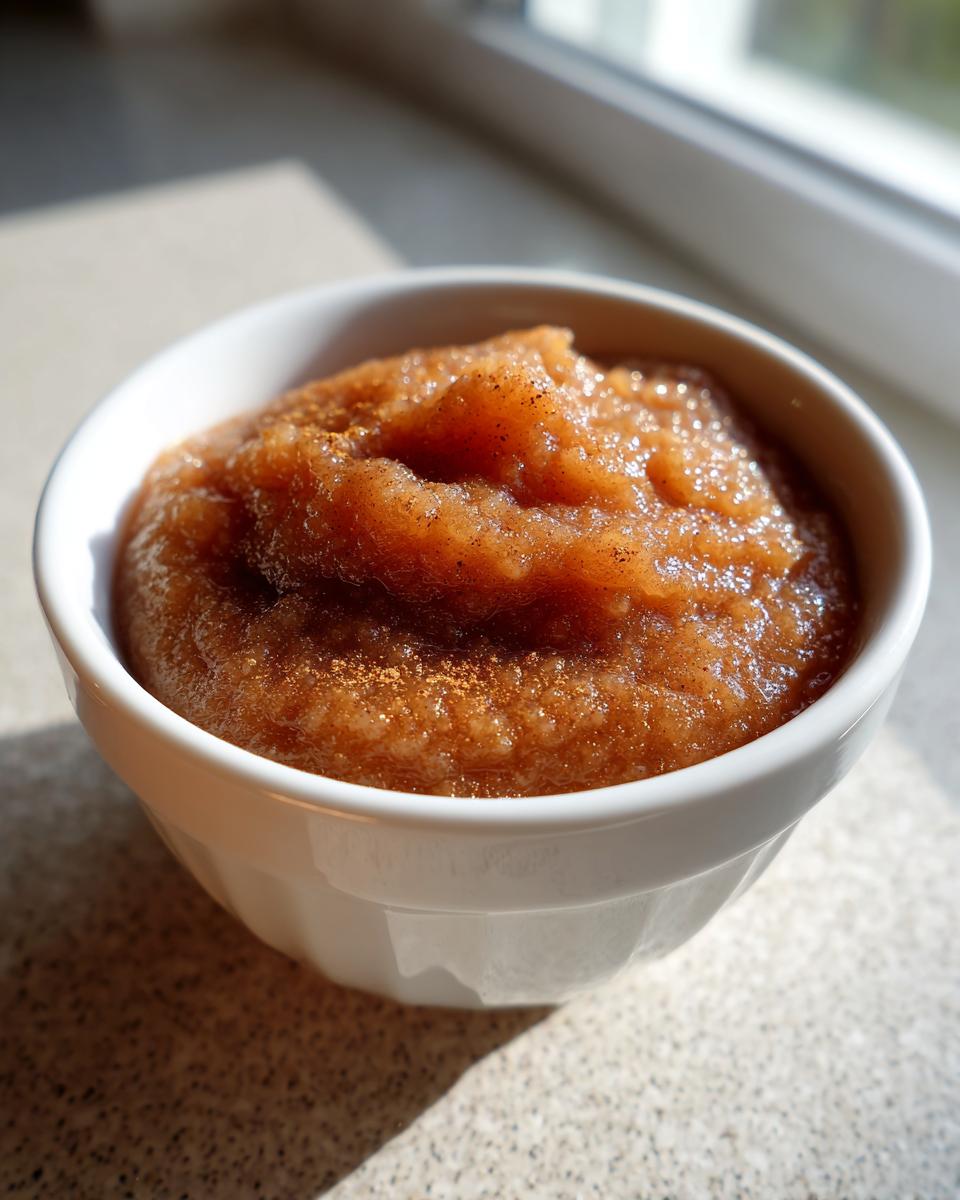
PrintEasy Stovetop Homemade Applesauce Recipe
Make naturally sweet, flavorful homemade applesauce on the stovetop. This quick recipe is perfect for snacks, side dishes, or baking applications.
- Prep Time: 10 min
- Cook Time: 20 min
- Total Time: 30 min
- Yield: About 4 cups 1x
- Category: Side Dish
- Method: Stovetop
- Cuisine: American
- Diet: Vegetarian
Ingredients
- 3 lbs apples (such as Fuji, Gala, or Honeycrisp), peeled, cored, and chopped
- 1/2 cup water
- 1 teaspoon ground cinnamon
- 1/4 teaspoon ground nutmeg
- 1 tablespoon lemon juice (optional, for brightness)
Instructions
- Place the chopped apples, water, cinnamon, and nutmeg into a large saucepan. If you want a brighter flavor, add the lemon juice now.
- Cover the saucepan and bring the mixture to a simmer over medium heat.
- Reduce the heat to low, cover, and cook for 15 to 20 minutes, stirring occasionally. The apples are done when they are very tender and easily mashable.
- Remove the pan from the heat.
- For smooth applesauce, use an immersion blender or transfer the mixture in batches to a standard blender and process until smooth. For chunky applesauce, mash the apples with a potato masher until you reach your desired consistency.
- Taste the applesauce. If you need more sweetness, add a small amount of sugar or maple syrup, though the fruit often provides enough natural sweetness.
- Serve the homemade applesauce warm or chill it completely before storing.
Notes
- You do not need to peel the apples if you plan to blend the sauce very smooth, but peeling gives a more traditional texture.
- This recipe works well for meal prep; store leftovers in an airtight container in the refrigerator for up to one week.
- For a cozy fall aroma, add one small cinnamon stick during cooking and remove it before blending.
Nutrition
- Serving Size: 1/2 cup
- Calories: 110
- Sugar: 22g
- Sodium: 2mg
- Fat: 0.2g
- Saturated Fat: 0g
- Unsaturated Fat: 0.1g
- Trans Fat: 0g
- Carbohydrates: 29g
- Fiber: 3g
- Protein: 0.3g
- Cholesterol: 0mg