
Oh, you know how some smells just instantly take you back? For me, it’s that sweet, unmistakable aroma of melted sugar and roasted peanuts. That’s why I’m convinced that the best Peanut Butter Rice Krispie Treats are the ones we make ourselves, right on the stovetop. Forget anything complicated—this recipe is pure chemistry dialed down to the easiest possible setting. When I started my journey learning to cook, these **Easy No Bake Treats** were my absolute first win. They proved to me that I didn’t need fancy techniques; I just needed the courage to melt something in a pan! If you’ve ever felt intimidated by baking, making these gooey, soft bars is where you claim your first piece of kitchen confidence. Trust me, these are genuinely the ultimate soft & chewy peanut butter rice krispie treats.
- Why These Peanut Butter Rice Krispie Treats Are Your New Family Favorite Snacks
- Gathering Ingredients for Ultimate Peanut Butter Rice Krispie Treats
- Simple Steps to Make Soft & Chewy Peanut Butter Rice Krispie Treats
- Expert Tips for Perfect Peanut Butter Rice Krispie Treats Every Time
- Ingredient Notes and Substitutions for Peanut Butter Marshmallow Bars
- Serving Suggestions for These Quick Sweet Snack Bars
- Storage and Reheating Instructions for Peanut Butter Rice Krispie Treats
- Frequently Asked Questions About Peanut Butter Cereal Bars
- Nutrition Estimates for Peanut Butter Goodies
- Share Your Kitchen Confidence
Why These Peanut Butter Rice Krispie Treats Are Your New Family Favorite Snacks
Honestly, these bars disappear faster than anything else I make. They hit that perfect intersection of nostalgic craving and zero effort, which is exactly what I look for in my go-to snacks. You need these in your repertoire for busy weeknights or when you need a last-minute **Party Dessert Idea**.
Here’s why you’re going to fall in love with this specific recipe:
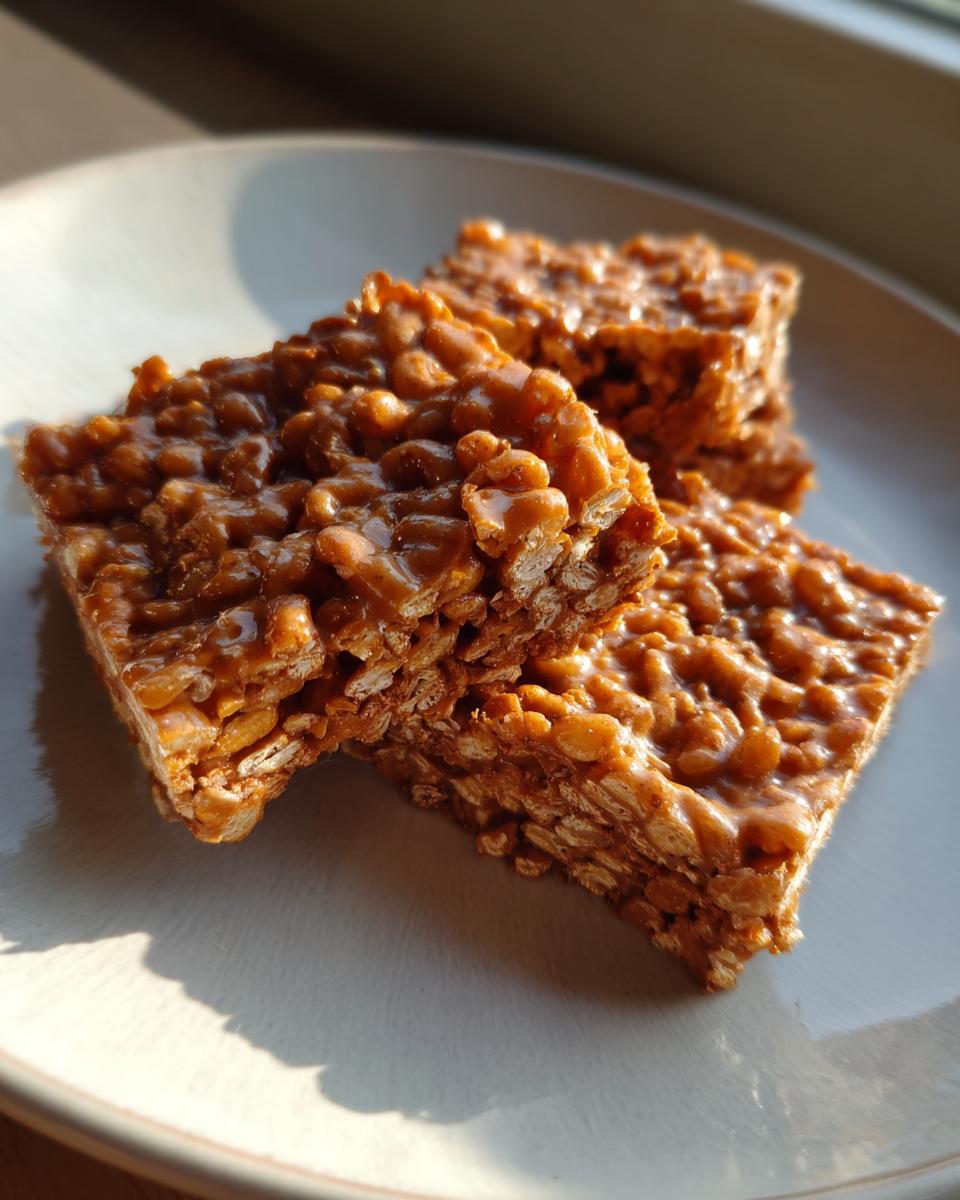
- They are unbelievably **gooey and chewy**—not stiff or crunchy! That’s our secret goal.
- It’s a true **No Oven Required Dessert** adventure, meaning you can whip these up when the weather is too hot or you’re short on time.
- The ingredient list is wonderfully short. We’re talking about a super simple **5 Ingredient Dessert** base here!
- They travel beautifully for picnics or packing into lunchboxes, making them excellent **Kid Friendly Snacks**.
If you’re looking for a **Quick Sweet Snack** that tastes like childhood magic, stop looking. This is it!
Gathering Ingredients for Ultimate Peanut Butter Rice Krispie Treats
Okay, let’s talk supplies. Because these are **Peanut Butter Desserts** at their most basic, we absolutely need good quality ingredients. If you skip anything here, the texture suffers, and that’s just unacceptable when we are aiming for ultimate chewiness! Don’t worry, everything here is easy to find at any standard grocery store, which keeps this firmly in the accessible category.
For the Peanut Butter Cereal Bars:
- 6 tablespoons unsalted butter
- 1 cup creamy peanut butter
- 1 (10 ounce) package marshmallows (use fresh ones, trust me!)
- 6 cups crispy rice cereal
- 1 teaspoon vanilla extract
Optional Chocolate Peanut Butter Bars Topping:
If you are upgrading these babies to hit that **Chocolate Peanut Butter Bars** level, you’ll want this optional add-in right here. You only need:
- 1 cup semi-sweet chocolate chips
Simple Steps to Make Soft & Chewy Peanut Butter Rice Krispie Treats
This is the best part, you guys! Forget your oven; we are keeping this an **Easy No Bake Treat** marathon from start to finish. Follow these steps exactly, especially the heat management, and you will nail the perfect **Peanut Butter Rice Krispie Treats** texture every single time. It’s about patience when melting, and gentleness when mixing!
Preparing Your Pan and Melting the Base for Peanut Butter Rice Krispie Treats
First things first, get your 9×13 pan lined with parchment paper, making sure you leave some overhang—that’s our built-in handle for lifting them out later. Now, head to the stove. Use a large saucepan over medium-low heat. We need to melt the butter slowly, and then stir in that full cup of creamy peanut butter until it’s just one beautiful, smooth, uniform mixture. Remember, low and slow is the key here! We don’t want the peanut butter to scorch on the bottom; we just want it warm and perfectly blended with the butter.
Incorporating Marshmallows and Cereal for Chewy Cereal Treats
As soon as that base is smooth, pull the entire pan off the heat. This is non-negotiable! Add your marshmallows and stir constantly until they turn into a glossy, stretchy goo. Once they are fully melted, stir in that teaspoon of vanilla extract. Now for the cereal—add the 6 cups of crispy rice cereal and use a spatula to *gently* fold everything together. We are folding, not mixing aggressively. This keeps them light! This gentle touch is what separates these from rock-hard **Chewy Cereal Treats** and keeps them wonderfully soft.
Pressing and Setting Your Homemade Crispy Squares
Transfer the whole beautiful mess into your prepared pan. Here is my biggest secret for staying gooey: do not pack them down! Use a piece of wax paper lightly coated with non-stick spray or butter, and just *gently* press until the mixture is evenly distributed in the pan. If you press too hard, they get dense. If you choose the chocolate topper, melt those chips until smooth and spread or swirl that right over the top now. Let them cool completely, and then, slice them up into perfect **Homemade Crispy Squares**.
Expert Tips for Perfect Peanut Butter Rice Krispie Treats Every Time
I’ve made batches of these **Peanut Butter Rice Krispie Treats** that were honestly kind of sad—rock hard, crumbly, or sticking everywhere. But that’s how you learn, right? After lots of trial and error, I figured out the little nuances that keep these bars soft and gooey, just like they should be. These aren’t just suggestions; they are the rules I live by when making my favorite **Peanut Butter Squares**.
For starters, we have to talk about marshmallows. Don’t use the ones that have been sitting in your pantry since last Halloween! Stale or dried-out marshmallows are the number one reason people end up with stiff, brittle bars. You want the freshest, softest marshmallows you can find. When they melt, they act like the glue of these **Gooey Dessert Recipes**, and if they’re already hard, you’ll never get that satisfying chew.
Another mistake I see folks make is using too high of a heat when melting the butter and peanut butter. If you crank that stove up, you risk scorching the peanut butter, which gives the final treat a slightly bitter, off-flavor. Keep it on medium-low. We just want things melted and combined, not simmering furiously. It takes maybe 30 extra seconds, but it saves the entire batch.
Then there’s the pressing stage we talked about, but it bears repeating because it’s so important for these **Family Favorite Snacks**. When you transfer the mixture to the prepared pan, use a piece of wax paper or a lightly greased spatula to *gently* guide the mixture into place. If you use your hands or a standard spatula and press down hard, you are compacting all those lovely air bubbles we created when we incorporated the cereal. That compaction is what turns a chewy bar into a brick!
Finally, if you find they are sticking to your knife while cutting, just pop the pan into the freezer for about 10 minutes before slicing. A little chill firms them up just enough so you get those clean, perfect squares. They firm up again at room temperature, so you aren’t sacrificing any of that soft texture!
Ingredient Notes and Substitutions for Peanut Butter Marshmallow Bars
When we talk about making the absolute best **Peanut Butter Marshmallow Bars**, the ingredients really matter, even when it’s a recipe this simple. I know some of you rely on what you already have in the pantry, which is great, but let’s talk about where you might want to spend a little extra attention to guarantee that perfect, soft finish.
First up: the peanut butter itself. My recipe calls for creamy, and here’s why. Creamy peanut butter blends seamlessly into the melted marshmallow and butter, creating that smooth, cohesive binder that holds everything together beautifully. If you try to use crunchy peanut butter, you’ll get those little hard nut pieces throughout. If you love that texture, go for it! It’s still *delicious*, but it won’t be quite as “gooey” on the melt, so keep your expectations adjusted for a bit more crunch.
Now, about those **Scotcharoos Recipe** people! You are already halfway there. A genuine Scotcharoos bar is basically a Peanut Butter Rice Krispie Treat base, and then you top it with a mixture of melted chocolate chips AND butterscotch chips. If you want that classic, slightly salty-sweet, firm topping, just grab a bag of butterscotch chips and melt them down with your semi-sweet chocolate. It adds such a depth of flavor that makes these **Peanut Butter Goodies** next level for any holiday tray or bake sale.
We mentioned fresh marshmallows already, but just to reiterate—the fresher the bag, the better the melt. If your marshmallows are dry, they won’t dissolve properly, and you’ll end up with little pockets of hard sugar in your finished bars, which defeats the whole purpose of soft, **Chewy Cereal Treats**!
Serving Suggestions for These Quick Sweet Snack Bars
So, you’ve made the perfect batch of **Peanut Butter Rice Krispie Treats**—now what? The best part about these squares is how flexible they are! They’re absolutely essential for any last-minute **Party Dessert Ideas** because they require zero chilling time before serving.
For the kids’ lunchboxes, cutting them into smaller rectangles makes them a perfect **Lunchbox Treat**. If you decide to use that chocolate topping, make sure you spread it thinly so it cuts cleanly. Honestly, these pair perfectly with a super cold glass of milk or even a hot cup of coffee for an afternoon break. Honestly, sometimes I just grab a square and eat it standing over the sink! Don’t forget to check out some other amazing inspiration for classic no-bake treats over at Crazy for Crust when you have a moment!
Storage and Reheating Instructions for Peanut Butter Rice Krispie Treats
These **Peanut Butter Rice Krispie Treats** are designed to be devoured immediately, let’s be real! But if you actually manage to have leftovers—maybe you kept a few hidden from your family—you need to store them correctly to keep that coveted gooey texture we worked so hard for.
The absolute golden rule here is the container. You must store them in an airtight container. If you just throw them in a Ziploc bag, the air will sneak in and dry out those marshmallows, and suddenly your soft bar is turning into a crisp cracker. Line your container with a piece of parchment paper first, then place the bars inside, and top with another sheet of parchment before sealing the lid tight. This layering keeps them from sticking to each other too!
At room temperature, they usually stay perfectly soft and chewy for about three days. If your kitchen is super warm, they might get a little softer and stickier, though. I usually keep mine on the counter, tucked away somewhere safe!
Now, can you freeze them? Yes, you absolutely can freeze **Peanut Butter Rice Krispie Treats**! If you’re making a huge batch for a bake sale or holiday tray, this is a lifesaver. Wrap the individual squares tightly in plastic wrap first, then put those wrapped bars into a freezer-safe, airtight container. They should last beautifully for up to a month. When you want to eat one, just let it thaw on the counter for about 20 minutes. They come right back to that perfect chewy state with zero fuss!
Frequently Asked Questions About Peanut Butter Cereal Bars
I totally get it—when a recipe is this simple, you start wondering about all the tiny ways you could mess it up! Don’t stress, though. Most issues are easily fixed, and I’ve answered the questions I usually get about making the perfect **Peanut Butter Cereal Bars**.
Are these the same as a Scotcharoos Recipe?
That’s a fantastic question, especially since both are legendary **Peanut Butter Desserts**! This recipe here focuses on creating the softest, chewiest peanut butter base possible. A true **Scotcharoos Recipe** *always* has that specific, firm topping made from melted chocolate chips and butterscotch chips layered on top of the peanut butter base. So, if you follow our optional chocolate topping instruction, you are basically making a Scotcharoo hybrid! If you want the classic butterscotch flavor, you’ll need those extra chips.
Can I use natural peanut butter in this recipe?
This is where I have to be firm: please, please stick to conventional, creamy peanut butter for this recipe. Natural peanut butter—the kind that separates into a layer of oil on top—is a total game-changer in a bad way here. That liquid oil will break down the marshmallow binding system we rely on. It makes the entire mixture too runny, and when it sets, your **Peanut Butter Rice Krispie Treats** will likely be oily, crumbly, or refuse to hold together at all. Stick to Jif or Skippy style for the best, most reliable results!
If you ever need to reach out with even more baking questions or troubleshooting tips, don’t hesitate to send me a message over on the contact page. I’m always here to cheer you on!
Nutrition Estimates for Peanut Butter Goodies
Now, I’m not a nutritionist—I’m just someone who loves making delicious **Peanut Butter Goodies**! But because I know some of you track your macros, I wanted to share the general estimate for one bar based on the primary ingredients. Please remember these are just ballpark figures; using a different brand of peanut butter or adding a thick layer of chocolate will change these numbers!
For one bar, you can generally expect the following from these **Quick Sweet Snacks**:
- Calories: Around 250
- Sugar: About 18g
- Fat: Roughly 12g
- Protein: Approximately 5g
These estimates assume you make 12 large squares and do not include heavy toppings. Enjoy them guilt-free, knowing you made them with love!
Share Your Kitchen Confidence
I am just so excited for you to try these **Peanut Butter Rice Krispie Treats**! Seriously, if you make this recipe, I want to hear all about it. Did you press too hard? Did you sneak a piece before they cooled? Tell me everything!
The whole point of Kitchenican is proving that you *can* master these straightforward, ridiculously satisfying recipes. So please, don’t be shy! Drop a rating for the recipe right here on the page. A star rating tells me if I nailed the texture goals, and it helps other home cooks who are maybe feeling a little hesitant to start.
If you share photos of your beautiful, gooey creations on social media, tag me! Seeing you build confidence and create something delicious is truly what gets me excited to step into my kitchen every morning. Remember, this space is about celebrating those little wins. We conquered the mixing stove, we avoided burning the peanut butter, and now we have portable, perfect **Easy No Bake Treats**. That’s a huge accomplishment!
If you have questions that popped up while you were working, drop them in the comments below. We can troubleshoot together! And just a reminder that we take your privacy seriously, which is why we always link our Privacy Policy right here at the bottom of our guides.
PrintUltimate Soft & Chewy Peanut Butter Rice Krispie Treats
Make the best no-bake Peanut Butter Rice Krispie Treats using simple ingredients. These bars are soft, chewy, and ready in minutes, perfect for a quick sweet snack or party dessert.
- Prep Time: 10 min
- Cook Time: 5 min
- Total Time: 15 min
- Yield: 12 large bars 1x
- Category: Dessert
- Method: No Bake
- Cuisine: American
- Diet: Vegetarian
Ingredients
- 6 tablespoons unsalted butter
- 1 cup creamy peanut butter
- 1 (10 ounce) package marshmallows
- 6 cups crispy rice cereal
- 1 teaspoon vanilla extract
- Optional: 1 cup semi-sweet chocolate chips for topping
Instructions
- Lightly grease a 9×13 inch baking pan or line it with parchment paper, leaving an overhang for easy removal.
- In a large saucepan over medium-low heat, melt the butter.
- Add the peanut butter to the melted butter and stir until completely smooth. Remove the pan from the heat.
- Add the marshmallows to the peanut butter mixture. Stir constantly until the marshmallows are fully melted and the mixture is smooth. Do not overheat the marshmallows.
- Stir in the vanilla extract.
- Add the crispy rice cereal to the marshmallow mixture. Fold gently until the cereal is evenly coated.
- Transfer the mixture to your prepared pan. Lightly press the mixture into the pan using a piece of wax paper or lightly buttered spatula. Do not press too firmly, as this makes the treats hard.
- If using the chocolate topping, melt the chocolate chips in a microwave-safe bowl in 30-second intervals, stirring until smooth. Spread or drizzle the melted chocolate over the top of the treats.
- Allow the treats to cool and set completely before cutting into squares.
Notes
- For extra soft treats, use fresh marshmallows. Stale marshmallows result in a harder bar.
- If you want a Scotcharoos style topping, melt 1 cup of semi-sweet chocolate chips with 1/2 cup of butterscotch chips together for the topping instead of just chocolate chips.
- To prevent sticking while pressing the mixture into the pan, lightly grease your hands or the spatula you use.
Nutrition
- Serving Size: 1 bar
- Calories: 250
- Sugar: 18g
- Sodium: 150mg
- Fat: 12g
- Saturated Fat: 4g
- Unsaturated Fat: 8g
- Trans Fat: 0g
- Carbohydrates: 34g
- Fiber: 1g
- Protein: 5g
- Cholesterol: 5mg