
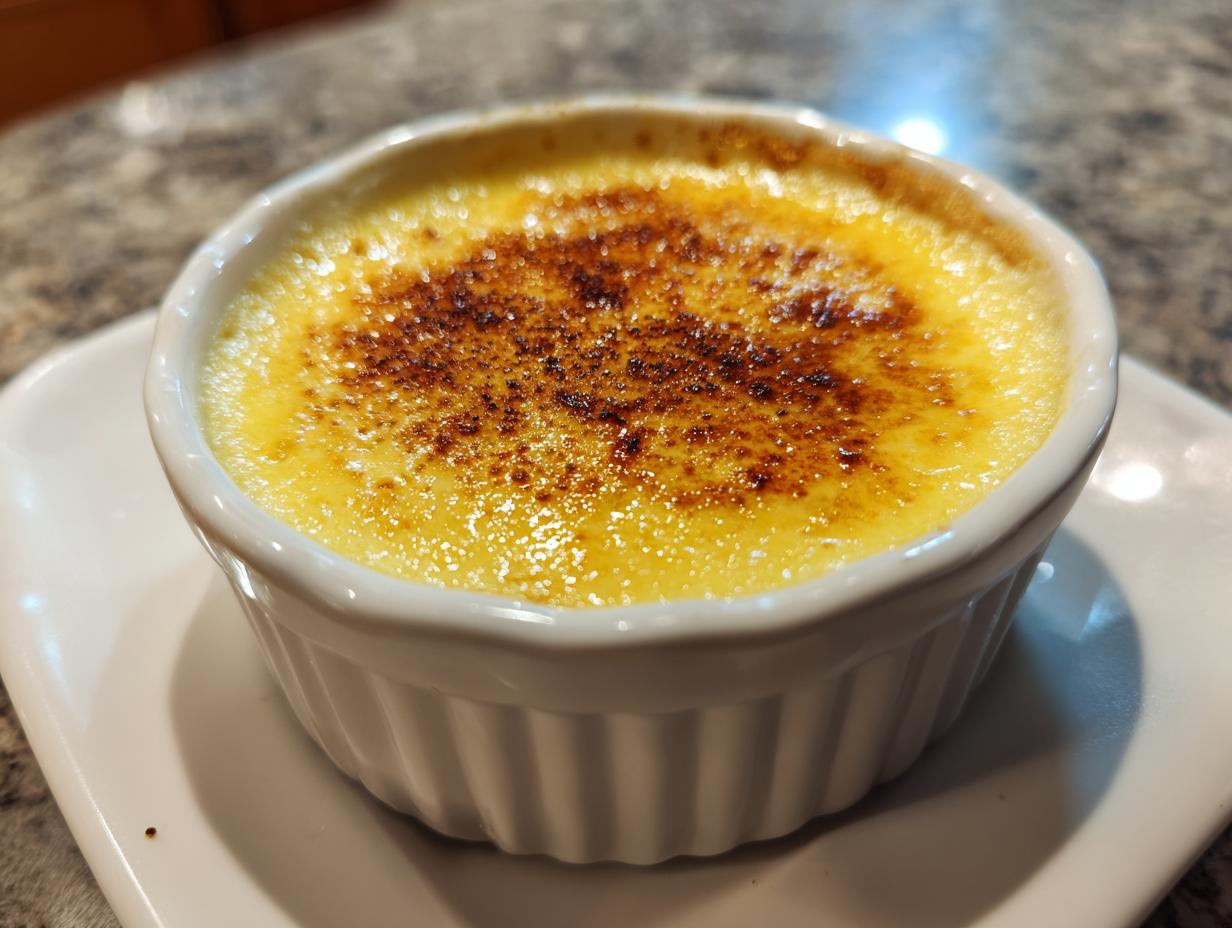
When I think about true comfort food desserts, I immediately go back to the classics—those simple, sweet things our grandmothers made that tasted like pure nostalgia. But let’s be honest, making a beautiful baked egg custard can feel intimidating. You worry about the surface cracking or the inside turning grainy instead of that perfect, silky smooth dessert texture we crave. That’s exactly where I was when I started my journey here at Kitchenican! I spent countless attempts until I finally cracked the code on the Fail-Proof Classic Baked Egg Custard. Trust me, achieving that beautiful, creamy result without a single crack is totally possible, and I’m going to show you the exact steps Ava Sinclair uses to make sure it works every single time.
- Why This Fail-Proof Egg Custard Recipe Works (The Secrets to Silky Smooth Dessert)
- Ingredients for Your Classic Egg Custard Recipe
- How to Prepare Your Homemade Creamy Custard Step-by-Step
- Tips for Success with This Easy Baked Custard
- Variations on the Old Fashioned Custard
- Serving Suggestions for Your Simple Egg Milk Sugar Dessert
- Storage and Reheating Instructions for Perfect Egg Custard
- Frequently Asked Questions About Making Egg Custard
- Nutritional Estimates for This Simple Homemade Pudding
- Share Your Success with This Comfort Food Dessert
Why This Fail-Proof Egg Custard Recipe Works (The Secrets to Silky Smooth Dessert)
The reason this recipe is so dependable is that we’re not just throwing ingredients together; we’re being gentle! Most people ruin their gorgeous egg custard by rushing or overheating. We’re aiming for a silky smooth dessert here, not scrambled eggs suspended in sweet milk, right? That takes just a couple of focused techniques that take zero extra time to implement.
Here are the non-negotiable steps that guarantee that amazing, homemade creamy custard texture:
- Gentle whisking only—we want to avoid bubbles!
- Warming the milk first (tempering).
- Using that essential water bath.
Follow these three rules, and you’ve got yourself a lifelong keeper for easy egg desserts.
Avoiding Curdling: The Importance of Tempering for Perfect Egg Custard
This is where the magic happens to prevent curdling. You can’t just dump your hot milk right into those beautiful eggs; they’ll turn immediately! Tempering means you slowly introduce the warm milk mixture to the eggs while whisking constantly. You pour in just a tiny stream at first while you whisk like mad, gradually increasing the speed of the stream as the eggs adjust to the heat. This gentle process raises the egg temperature evenly, ensuring a smooth melt.
Achieving Custard Without Cracking: Mastering the Water Bath
If you want that classic, custard without cracking surface, you absolutely need the water bath, or bain-marie. What this does is surround your baking dish with a cozy layer of warm, steamy water in the oven. The water acts like a buffer, keeping the heat around the custard gentle and consistent. This prevents the edges from setting way faster than the middle! If you are making a traditional old fashioned custard pie filling, you’d use this exact method inside a shell.
Ingredients for Your Classic Egg Custard Recipe
Okay, you guys know I’m all about making my recipes accessible, and that’s the beauty of this classic egg custard recipe. We’re using just a handful of basic pantry staples to create something seriously luxurious. You won’t need anything strange, just the good stuff! Remember, precision matters here, so go ahead and measure everything out before you start mixing.
- 4 large eggs
- 1/2 cup granulated sugar
- 1/4 teaspoon salt
- 1/4 teaspoon ground nutmeg (don’t skip this scent!)
- 2 cups whole milk
- 1 cup heavy cream
- 1 teaspoon vanilla extract
That’s it! Feel good about having everything ready to rock. This simple egg milk sugar dessert base is what gives us that incredible texture later on.
How to Prepare Your Homemade Creamy Custard Step-by-Step
Alright, let’s get baking! This is the hands-on part, and I want you to take your time here. Remember, we’re building happiness, not hurrying a science project. Make sure you’ve got your oven set to 325°F and that kettle boiling for the water bath we talked about. I also like to grease my baking dish—or ramekins if I’m making individual servings—at the very beginning so it’s ready to go!
We’re going to follow the instructions precisely because they are designed to give you that perfect texture. Don’t worry if you have to re-read a step; that’s exactly what I did when I first started mastering this easy baked custard.
Preparing the Base for a Silky Smooth Dessert
Start by whisking those four eggs in a large bowl—but here’s the trick: whisk gently. We are trying to combine them, not incorporate a ton of air, which leads to bubbles later! Once they are just mixed, whisk in the sugar until it mostly disappears. Then, gently warm up your milk and cream on the stove. Just bring it to the point where steam is rising. Seriously, do not let it boil! That scorching heat will scramble your eggs instantly.
The Crucial Step: Straining the Egg Custard Mixture
This might seem fussy, but this is the real secret weapon for that stunning, silky smooth dessert result! After you’ve slowly poured the warm milk into your eggs (while whisking, remember?), stir in the vanilla. Then, you must pour the whole mixture through a fine-mesh sieve right into a measuring cup. This catches any little bits of egg that might have cooked along the edge or any chalazae fibers left over from the yolks. It’s the pro move for a flawless finish!
Now you just pour that gorgeous liquid into your prepared dish. Next comes the water bath setup, which is what keeps this from becoming a cracked disaster. Carefully place your dish into the larger roasting pan, and then pour that boiling water in almost halfway up the sides of your custard dish. Pop it into the oven and let the gentle heat do its work for about 45 to 60 minutes. When they come out, let them cool down, and then you must chill them for at least four hours—overnight is best for the ultimate homemade creamy custard experience!
For more easy techniques that build your skills, check out my guide to making blender Hollandaise sauce; it’s all about simple tools doing big jobs!
Tips for Success with This Easy Baked Custard
I know that when you see words like “tempering” and “water bath,” you might start to doubt you can make this a fail proof dessert, but I promise you, these are the simple keys to success! My goal here is to build your confidence, whether you’re making a single serving or a big batch of this easy baked custard.
The most important safety net we have is that water bath. Please, don’t skip it! If you try to bake this rich egg custard directly in the oven, you’re definitely going to see it curdle or crack, and that’s just not the smooth finish we want. The gentle, steamy environment is the reason this stays creamy.
Also, remember how we warmed the milk? Make sure it’s warm, not hot. If you use milk straight from the fridge, the tempering process takes forever and you risk over-whisking the eggs while you wait. A little bit of preparation goes a long way to creating that truly luxurious mouthfeel you’d expect from this classic dish. For a great savory dish that follows similar gentle cooking rules, check out my tips for my creamy garlic pizza sauce!
Variations on the Old Fashioned Custard
Part of the fun with a recipe this foundational is seeing how it transforms! This base for a classic egg custard recipe is so versatile. If you used this exact mixture poured into a pre-baked pie shell, you instantly have a gorgeous, traditional filling. It’s the perfect template, really!
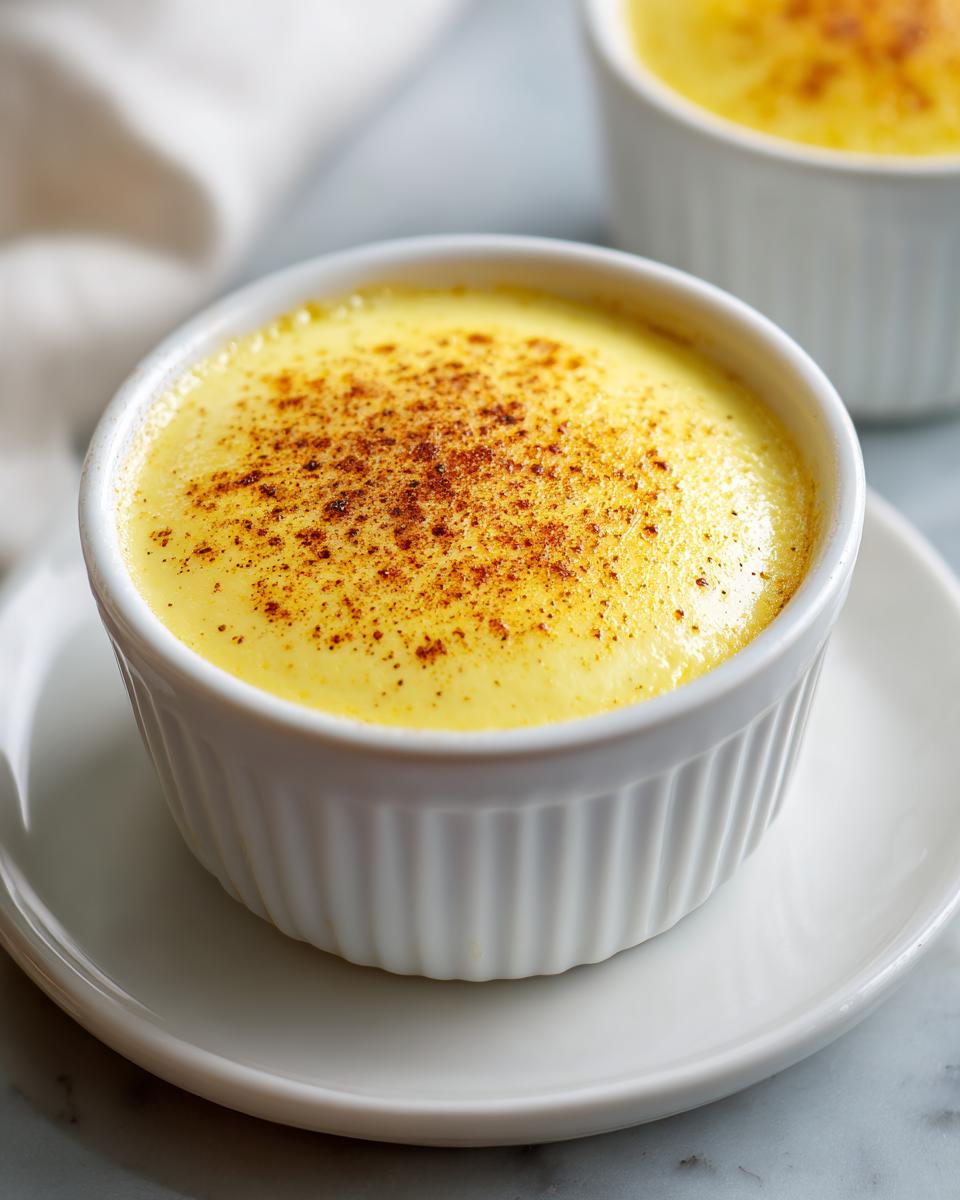
For those who love a fuss-free clean-up, or maybe need this for a breakfast option, you can easily turn this into a delicious crustless egg custard. Just pour the strained mixture straight into greased ramekins and bake as directed. The water bath technique ensures it sets up beautifully without needing a crust at all!
I’ve also seen people swap out about half a cup of the whole milk for buttermilk! That gives you a slightly tangy, almost melt-in-your-mouth flavor that is divine. If you like to learn about other amazing old fashioned custard style recipes that use simple ingredients, you might want to check out how I make my old-fashioned bread pudding too!
Serving Suggestions for Your Simple Egg Milk Sugar Dessert
Now that you’ve mastered making a perfect, creamy, homemade creamy custard, how should you serve this gorgeous simple egg milk sugar dessert? Honestly, it’s perfection all on its own, but a small flourish really takes it over the top!
Since the flavor is so beautifully subtle, I love topping it with something bright. A light dusting of cinnamon or freshly grated nutmeg is the most traditional way, reflecting that old fashioned custard style. If you want a little added flavor without making a heavy sauce, try a spoonful of fresh berries—raspberries work beautifully against the vanilla background.
For a slightly richer option, a drizzle of caramel or a spoonful of warm Bananas Foster sauce is divine! But remember, the real star here is that silky texture, so don’t overdo the toppings.
Storage and Reheating Instructions for Perfect Egg Custard
This is great news: once you’ve made this incredible egg custard, it tastes even better the next day! You must serve it chilled. Once cooled to room temperature, cover your dishes tightly with plastic wrap and tuck them in the fridge. They are good for up to four days, which makes them such a handy make-ahead dessert. Please, please do not try to reheat this in the microwave or oven! Any high heat will shock the delicate structure we worked so hard to create, ruining that beautiful creamy texture.
Frequently Asked Questions About Making Egg Custard
I get so many questions about this recipe, which just proves how popular this cozy comfort food dessert is! It’s totally normal to have questions when you’re aiming for a perfect result, especially when dealing with something as delicate as a baked custard. Don’t sweat it—we’re going to walk through the tricky spots right here!
Can I use half-and-half instead of whole milk and heavy cream for this egg custard?
You certainly can try, but I have to warn you: the texture won’t be quite the same luxurious, silky smooth dessert we’re aiming for. Whole milk and heavy cream together give you that incredible richness because of the higher fat content. Half-and-half is much leaner. If you substitute it completely, your final egg custard will likely be a little softer and perhaps a bit watery rather than beautifully creamy. Keep the fat high for the best results!
How do I know when my baked egg custard is truly done?
This is the million-dollar question for learning how to make perfect custard! Don’t rely just on a toothpick test here; that only tells you if the liquid has turned solid, not if it’s perfectly set. You want to gently nudge the baking dish after about 45 minutes. If the edges look firm but the dead center still has a noticeable, gentle jiggle—like unset gelatin—it’s done! It will firm up completely as it cools down. Remember that slight jiggle is your ticket to a not-overcooked result.
If you’re looking for other easy recipes that rely on a little visual check, my guide to creamy fruit dip has some fast ways to tell when your mixture looks just right. Happy baking!
Nutritional Estimates for This Simple Homemade Pudding
I always tell people not to stress too much about the exact numbers when you’re making comfort food, but I know some of you are curious! Here are the estimates for one single serving of our wonderful egg custard. Please remember, since this is a deeply homemade dish, these numbers are based on using the exact quantities listed. They are just a guide for you!
- Serving Size: 1 serving
- Calories: 250
- Sugar: 20g
- Protein: 10g
- Fat: 14g
It’s a sweet treat, for sure, but packed with some great protein from all those eggs!
Share Your Success with This Comfort Food Dessert
I really, truly hope you give this comfort food dessert a try! Seriously, if you were intimidated by making a perfect egg custard before, I hope this guide changed your mind. Remember what I, Ava Sinclair, always say: the most important ingredient is the confidence to start. Please come back and leave me a rating below if you loved how easily you mastered this recipe. Telling me about your perfectly silky batch builds trust for other cooks!
Don’t forget to check out the About Me page to see more about my own simple cooking journey!
PrintFail-Proof Classic Baked Egg Custard: Achieve Silky Smooth Texture

This recipe shows you how to make a truly fail-proof classic egg custard. You will achieve a silky, creamy, old-fashioned dessert texture every time by using simple ingredients and the correct baking method.
- Prep Time: 15 min
- Cook Time: 50 min
- Total Time: 5 hr 5 min
- Yield: 6 servings 1x
- Category: Dessert
- Method: Baking
- Cuisine: American
- Diet: Vegetarian
Ingredients
- 4 large eggs
- 1/2 cup granulated sugar
- 1/4 teaspoon salt
- 1/4 teaspoon ground nutmeg
- 2 cups whole milk
- 1 cup heavy cream
- 1 teaspoon vanilla extract
Instructions
- Preheat your oven to 325°F (160°C). Bring a kettle of water to a boil for the water bath.
- Lightly grease a 1.5-quart baking dish or six 6-ounce ramekins.
- In a large bowl, whisk the eggs gently until just combined. Do not over-whisk; you want to avoid incorporating too much air.
- Whisk in the sugar, salt, and nutmeg until the sugar mostly dissolves.
- In a separate saucepan, warm the milk and heavy cream over medium heat until steam rises, but do not let it boil.
- Slowly pour the warm milk mixture into the egg mixture while whisking constantly and gently. This tempering step prevents the eggs from scrambling.
- Stir in the vanilla extract.
- Strain the custard mixture through a fine-mesh sieve into a measuring cup with a spout. This removes any chalazae or small bits of cooked egg, ensuring a silky smooth dessert.
- Place the baking dish or ramekins into a large roasting pan. Pour the strained custard mixture into the prepared dishes.
- Carefully pour the boiling water into the roasting pan until the water reaches halfway up the sides of the custard dishes. This water bath is the secret to custard without cracking.
- Bake for 45 to 60 minutes, or until the edges are set but the center still jiggles slightly when gently nudged. For ramekins, check around 40 minutes.
- Carefully remove the dishes from the water bath using tongs. Let them cool completely on a wire rack.
- Chill the egg custard in the refrigerator for at least 4 hours, or preferably overnight, before serving.
Notes
- For a truly fail proof dessert, never let the milk mixture boil; warmth is enough to incorporate it smoothly.
- If you skip the water bath, you risk curdling or cracking the surface of your homemade creamy custard.
- For an old fashioned custard pie filling, pour this mixture into a pre-baked pie crust before baking.
Nutrition
- Serving Size: 1 serving
- Calories: 250
- Sugar: 20g
- Sodium: 120mg
- Fat: 14g
- Saturated Fat: 8g
- Unsaturated Fat: 6g
- Trans Fat: 0.5g
- Carbohydrates: 21g
- Fiber: 0g
- Protein: 10g
- Cholesterol: 180mg