
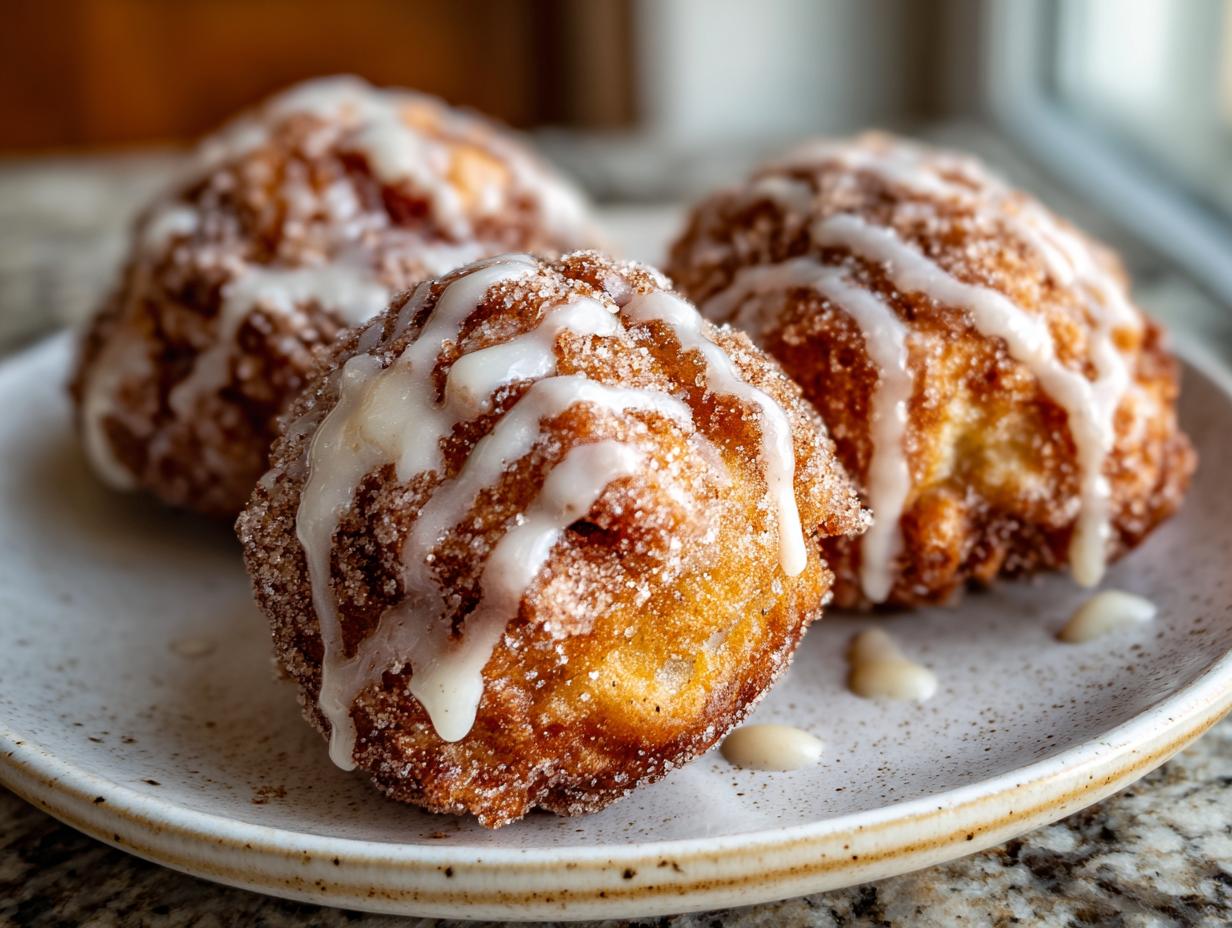
I completely get it. You have that deep, cozy craving for a classic apple fritter—you know, those glorious, spiced bites you get at the fair. But then you look at the deep fryer sitting in the cupboard, and suddenly, the craving vanishes thanks to the cleanup involved! That’s exactly why I perfected these baked apple fritters. I wanted the warmth, the cinnamon, and that soft, tender interior without making my whole kitchen smell like a doughnut shop for three days.
Listen, there’s a real doubt that creeps in when you try to bake something that’s traditionally fried. You worry it’ll turn out dense or dry, right? Don’t sweat it! This recipe proves you can achieve that almost-magical donut texture right in your muffin tin. We are turning this into a genuinely easy, Healthier Apple Dessert that gives you fluffy centers and a gorgeous sweet glaze, usually ready before your coffee is even finished brewing.
- Why You Will Love This Easy Apple Fritters Recipe
- Gathering Ingredients for Perfect Baked Apple Fritters
- Essential Equipment for Oven Baked Fritters
- Step-by-Step Instructions for Tender Baked Apple Treats
- Tips for Crispy Baked Fritters Tips and Texture Control
- Ingredient Notes and Substitutions for Easy Apple Fritters
- Storage and Reheating Instructions for Your Baked Apple Fritters
- Frequently Asked Questions About Baked Apple Fritters Recipe
- Share Your Apple Cinnamon Baked Goods Experience
Why You Will Love This Easy Apple Fritters Recipe
I’ve been in the kitchen long enough to know that baking should bring joy, not added stress. We’re ditching the oil and steam for a much more straightforward approach. These baked apple fritters tick all the boxes for a weeknight treat or a weekend brunch star.
- It’s a Healthier Apple Dessert Alternative: Seriously, who needs all that extra grease? Baking gives you that warm, comforting flavor we crave, but without the heavy lifting of deep frying. It’s guilt-lightened comfort food, and I am here for it! This is perfect for those mornings when you want a treat but don’t want to feel sluggish afterwards.
- Super Quick Prep Time: You’ve got 15 minutes to toss everything together before the oven does the heavy lifting. Total time comes in under 40 minutes, which means you can satisfy that apple cinnamon craving before deciding you need to tackle that pile of laundry.
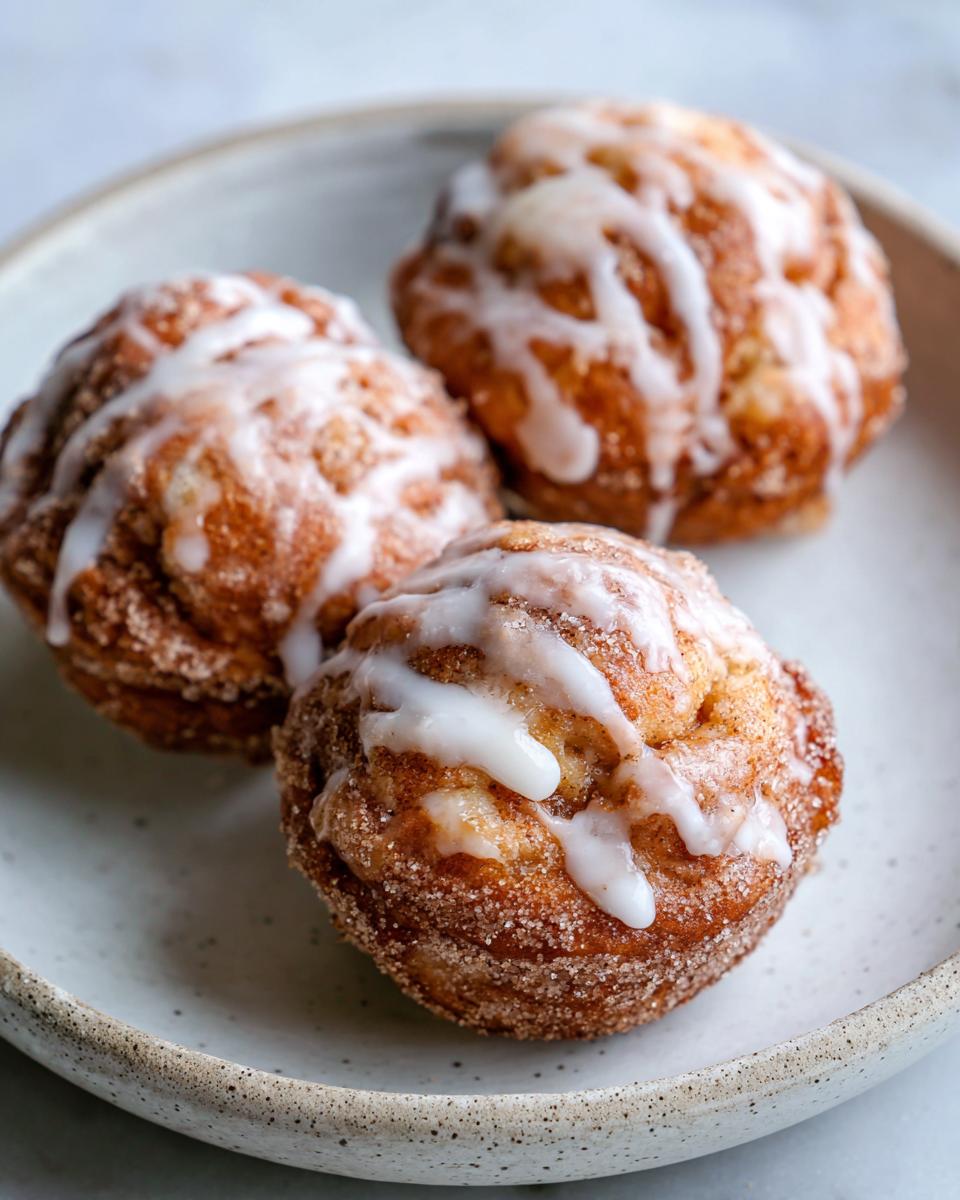
- Incredibly Tender Texture: This is the real magic trick! You might worry that oven baking results in something cakey or dry, but trust me, we mix this batter just enough to keep those centers unbelievably soft and moist. They are practically Apple Fritter Donuts when they come out.
- Uses Simple Ingredients: You don’t need to run to a specialty store for rare spices! Everything here—flour, sugar, apples, and cinnamon—is standard pantry fare. It’s proof that amazing flavor doesn’t require a complicated shopping list.
Gathering Ingredients for Perfect Baked Apple Fritters
Okay, let’s get our station set up! Before we dive into the mixing, laying everything out (we call this mise en place, but I just call it not losing my mind!) is crucial for keeping this recipe fast. We need three main groups of ingredients: the core batter, the sugary coating that gives it that classic taste, and the final drizzle of sweet goodness.
Remember, the type of apple really matters here for texture. We want those pieces to hold up during baking, not dissolve into mush. Stick to firm types!
For the Tender Apple Fritter Batter
- 2 medium apples, peels removed, cored, and diced nice and small—remember, small means they cook evenly!
- 1 1/2 cups all-purpose flour
- 1 teaspoon baking soda (this helps them rise a little without getting too airy)
- 1/2 teaspoon ground cinnamon
- 1/4 teaspoon ground nutmeg (don’t skip this, it’s the cozy smell!)
- 1/4 teaspoon salt
- 1/2 cup granulated sugar (for the batter itself)
- 1 large egg
- 1/2 cup milk (Buttermilk works great too, see later!)
- 2 tablespoons unsalted butter, melted (make sure it’s not scorching hot when you add it!)
- 1 teaspoon vanilla extract
For the Cinnamon Sugar Topping
This is what makes them taste like they came straight from the fair booth. You need just two things here for that perfect, crunchy coating on top.
- 1/4 cup granulated sugar
- 1 teaspoon ground cinnamon
For the Sweet Vanilla Glaze
This is the grand finale! We mix this up while the fritters are cooling slightly. Precision matters here so we don’t end up with soup.
- 1 cup powdered sugar (the good, fine kind, please!)
- 2 tablespoons milk (You might need a tiny splash more, but only a drop at a time!)
- 1/2 teaspoon vanilla extract
Essential Equipment for Oven Baked Fritters
Before we even think about touching the apples, we need to make sure the kitchen is ready for action! Since we are baking these instead of dealing with hot oil, our equipment list is much friendlier and requires way less deep cleaning later on. This is definitely one of the perks of choosing an oven baked fritters approach!
Having the right gear on hand means you can move quickly when the batter is mixed, which is key to getting that soft center.
- A Muffin Tin: This is our secret weapon for making perfect fritter bites recipe shapes. You’ll want a standard 12-cup tin. Seriously, don’t try to eyeball this on a baking sheet; the tin keeps them perfectly cupped and uniform!
- Mixing Bowls: You’ll need at least three bowls—one for your dry ingredients, one for your wet ingredients, and one medium bowl just for tossing the apples in sugar before they hit the main mixture.
- Whisk and Rubber Spatula: A whisk is great for getting the dry ingredients fluffy and combining the wet ones without developing tons of gluten. Then, you’ll switch to a rubber spatula for that gentle final fold.
- Wire Cooling Rack: Essential! Once these are warm and sugared, they need to sit on a rack. This allows air to circulate underneath so the bottoms don’t steam and get soggy while you’re making the glaze.
- Shallow Dish: When they pop out of the oven, we need a shallow plate or dish ready to go, filled with that glorious cinnamon sugar topping, so we can dunk the tops right away.
Step-by-Step Instructions for Tender Baked Apple Treats
Now that all our beautiful ingredients are ready, it’s time for the fun part—bringing them together! Remember what I always say: baking is chemistry, but we’re making the kind of chemistry that tastes amazing. Follow these steps exactly, especially around mixing, and you’ll forget these aren’t fried!
If you ever want to make homemade apple butter to serve alongside these, I share my favorite simple recipe over here: easy homemade applesauce recipe. It’s just as easy!
Preparing the Apples and Oven
First things first, we need heat! Go ahead and set your oven right now to 375°F (190°C). While that’s warming up, get your standard 12-cup muffin tin ready. I recommend spraying it lightly with non-stick spray, or lining it with paper liners if you prefer that easier cleanup.
Next, grab those beautifully diced apples. In a medium bowl, toss them with half a cup of your granulated sugar. That sugar helps draw out a tiny bit of moisture while the oven heats up, which is exactly what we want so they don’t make the final batter too wet. Set this apple mixture aside.
Mixing the Batter for Your Baked Apple Fritters
Time for the dry stuff. In a large bowl, whisk together your flour, baking soda, cinnamon, nutmeg, and salt. Whisking aerates the flour, which is important when we aren’t adding tons of leavening—it helps us get that good structure. Set that aside, too!
In a separate bowl, mix your wet ingredients: the rest of that 1/4 cup of sugar, your egg, milk, melted butter, and that teaspoon of vanilla. Whisk this until it looks good and combined.
Here is the crucial moment for texture: Pour the wet mix into the dry mix. Now, switch to your rubber spatula. I mean it—fold this *gently* until you see barely no more flour streaks. If you overmix, you’ll develop gluten, and that turns our baked apple fritters into little tough hockey pucks instead of tender crumbs. Stop mixing when it looks *shaggy*.
Finally, fold in those sugared apple pieces. Just enough stirs so they are scattered throughout the batter, and that’s it! We move fast now.
Baking and Applying the Cinnamon Sugar
Spoon your batter evenly into the prepared muffin cups. Don’t jam it in there; you want them about two-thirds full so they have room to puff up into those lovely little donut shapes. Bake these for only 18 to 20 minutes. Test them with a toothpick; it should come out clean when they’re done.
While they bake, mix your topping: the 1/4 cup sugar and 1 teaspoon cinnamon in a shallow dish. As soon as they come out of the oven, let them rest *in the pan* for just five minutes. Any longer and they start to stick or steam themselves soggy.
After five minutes, carefully pop them out onto the wire rack. While they are still warm—this is essential for the sugar to stick—flip the tops gently into that cinnamon sugar mixture and roll them around just enough to coat. Transfer them back to the rack to cool down a bit.

Finishing Your Fritters with Sweet Glaze
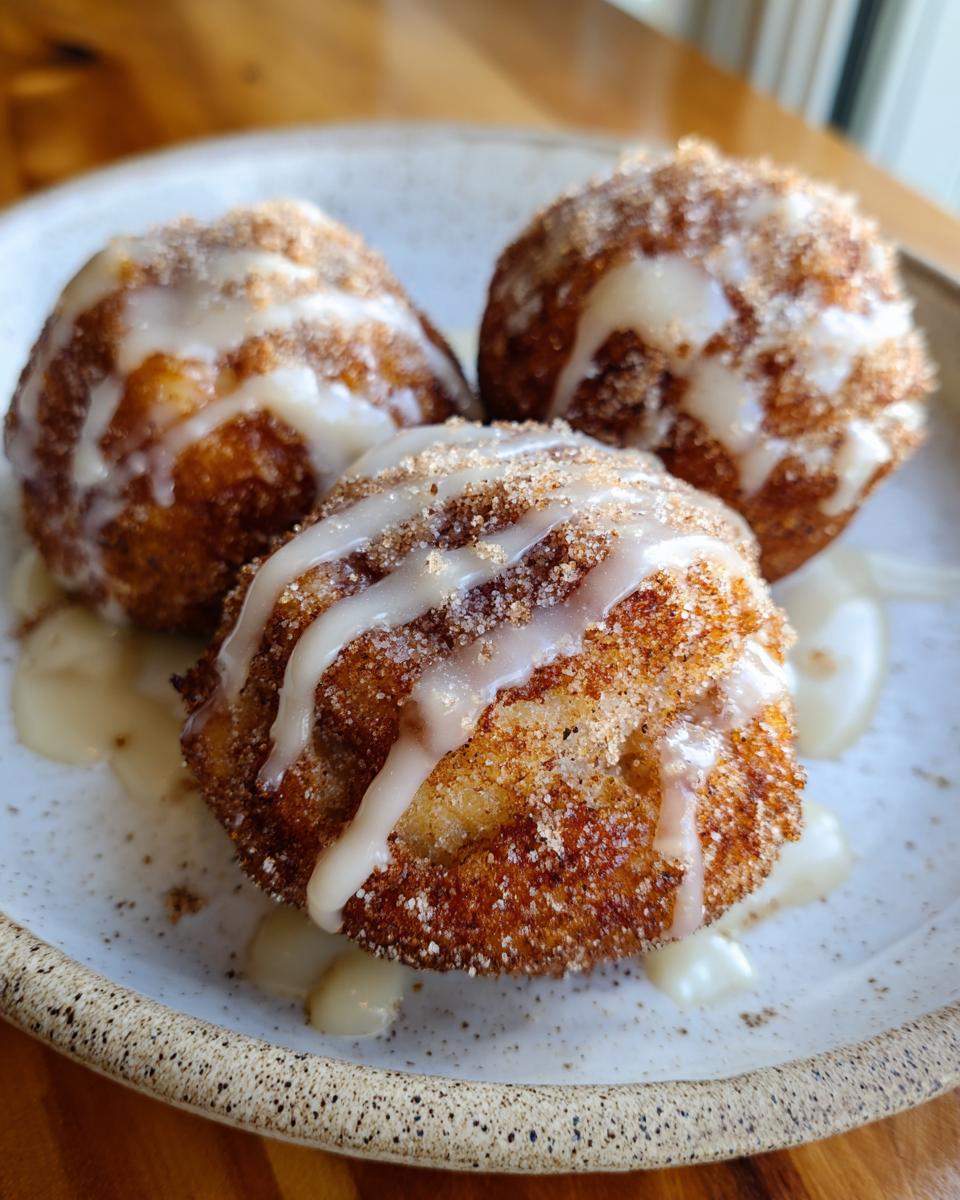
Once they’ve cooled down a bit more, it’s glaze time! This final touch really elevates these from being just a nice breakfast item to a real dessert treat. Whisk together the powdered sugar, vanilla, and the 2 tablespoons of milk. Keep whisking until it’s smooth and pourable. If it looks too thick, add milk just one drop at a time until it drizzles nicely off your spoon! You want that perfect sweet finish for your Fritters with Sweet Glaze.
Drizzle that glaze generously over the tops of your fritters. I like to let the glaze set up for about ten minutes before I actually eat one. Trust me; waiting that little bit makes the texture much better!
Tips for Crispy Baked Fritters Tips and Texture Control
When we talk about making these baked apple fritters, the balance between that soft, warm inside and a slightly crisp, delicious edge is everything. Since we aren’t dunking them in oil, we have to trick the oven into giving us a little crunch! This isn’t about making them hard; it’s about giving you that satisfying texture contrast everyone loves in a great fritter.
I want these to feel like a treat, so don’t skip these little hacks. If you’re looking for other easy baked goods to switch up your morning routine, you might love checking out my tips on quick, healthy breakfasts—sometimes you just need less fuss overall!
Here are my go-to moves to get that beautiful texture when baking:
- The Pre-Bake Spray: Remember in the ingredients list how I mentioned spraying the tops of the batter lightly with cooking spray? Do that right before the tin goes into the oven! This little bit of fat hitting the heat helps the very top surface brown and crisp up nicely while the inside stays steamy and soft. It’s a tiny step with a huge payoff for that textural difference.
- Don’t Skip the Cinnamon Sugar Timing: The rolling in the cinnamon sugar has to happen while the fritters are still very warm, not piping hot, but definitely warm enough that the butter residue is soft. That slight moisture and the heat make the sugar adhere, forming a beautiful, slightly crisp crust that protects the tenderness underneath. If you wait until they cool completely, the sugar just falls off.
- Watch Your Oven Temp: Since these are essentially like a thick batter baked in cups, oven temperature precision is key! If your oven runs hot, you might end up with dry edges that feel like they are burning before the center is done. Keep your oven calibrated, or check them right at the 18-minute mark. We are aiming for fully baked, not overdone.
- The Glaze Effect: While the glaze obviously adds sweetness, it also adds a bit of surface moisture back onto the cinnamon sugar shell right before serving. If you prefer a *mostly* crispy exterior, wait until the fritters are completely cool before drizzling the vanilla glaze on top, or just use less glaze overall.
The goal here is tender centers that melt in your mouth, contrasted with a slight resistance on the outside. That balance is what makes these oven baked fritters feel special!
Ingredient Notes and Substitutions for Easy Apple Fritters
I know that life happens, and sometimes you’re staring into the pantry, realizing you are one ingredient short of perfection! That’s totally fine. The beauty of a straightforward recipe like this is that you can swap out a few things without ruining the whole batch. We want to keep that comforting flavor profile, but we can be a little flexible with the nuts and bolts.
Part of building confidence in the kitchen is knowing when a substitution will work and when it might change the texture too much. Don’t worry, I’ve tested a few alternatives over the years when I was making these for impromptu brunch gatherings.
Swapping Out Apple Varieties
When it comes to picking the apple, stick to something firm that won’t turn to applesauce in the oven. Granny Smith is my absolute favorite because I love that little tart bite it gives against the sweet glaze. If you want something sweeter, try Honeycrisp or Fuji, but make sure you dice them just as small as you would the Granny Smiths.
If you happen to have leftover baked apples or even good quality homemade applesauce, you can *replace* up to half of the diced apples with that, but I wouldn’t recommend going fully applesauce. You lose that lovely texture when you bake those chunks in there, and we really want those flavorful pieces throughout our easy apple fritters.
Dairy Flexibility: Milk and Butter
If you are out of regular milk, whole milk is always best, but 2% works fine in a pinch. My favorite substitution, though, is using buttermilk! If you swap that 1/2 cup of milk for buttermilk, you get a slightly tangy, richer batter because of the acid. It reacts beautifully with the baking soda and gives the fritters a fantastic subtle depth. Just be aware that buttermilk might require you to mix *even less*—fold until you see almost no streaks.
Butter is non-negotiable for flavor, but if you must, you can use an equal amount of good quality coconut oil in place of the melted butter. Just make sure it’s cooled down a bit before mixing with the egg so you don’t accidentally scramble it!
Adjusting the Spices
The cinnamon and nutmeg combo is classic comfort, but sometimes my spice rack is low on one or the other. If you’re missing nutmeg, I’d suggest bumping the cinnamon up slightly, maybe to 3/4 teaspoon total, and adding a tiny pinch of ground cloves if you have them. Cloves are powerful, so go slow! If you want a bit more zip, a tiny bit of fresh grated ginger actually works wonders with apple and cinnamon, though it’s not traditional for fritters.
If you’re looking for other ways to shake up your breakfast routine without sacrificing that home-cooked feel, check out some of my quick, healthy breakfasts ideas. Sometimes swapping flour for oats changes everything!
Storage and Reheating Instructions for Your Baked Apple Fritters
So, you made a whole batch of these glorious baked apple fritters, and now you’re wondering how to make the magic last past breakfast. Don’t you dare let these yummy, tender treats go stale! They hold up surprisingly well, but the key to keeping that soft center intact is making sure they are stored correctly. We definitely want to avoid that hard, dry texture that can happen if they sit out uncovered.
For longer storage, you need an airtight container—that’s non-negotiable. I keep mine on the counter, not in the fridge because the chill can sometimes accelerate staling, especially with the glaze on top. If you made them without the vanilla drizzle, they can hang out at room temperature for about three days just fine. If you used the glaze, I’d give them about two days on the counter before chilling them if they haven’t been eaten.
If you can’t stop thinking about them and need a few more ideas for weeknights—maybe something savory next time—I have a whole section on easy weeknight dinners you might want to bookmark for later!
Keeping That Tender Texture When Storing
When storing them in an airtight container, make sure they are completely cool first before you seal them up. If you trap warm air in the container after baking, you create steam, and steam equals soggy bottoms! Nobody wants a soggy bottom on their fritter, right?
If you find your glazed fritters are sticking to each other after being stored, try placing a small piece of parchment paper or wax paper between the layers when stacking them in the container. This keeps those lovely sweet glazes from fusing together.
The Best Way to Reheat Fritters
Reheating requires a little finesse. You have to be careful not to blast them so hard that you dry out the apple centers, but you do want to wake up those warming spices.
- The Oven Reheat (My Favorite Way): This method is best if you have several to revive or if they’ve been chilled. Set your oven to a low temperature, maybe 300°F (150°C). Place the fritters on a baking sheet (you can skip the parchment here). Heat them for just 5 to 8 minutes. This gently warms them through and brings back any hint of crispness on the edges without drying the middle out at all.
- The Microwave Quick Fix (If You’re In a Rush): I usually avoid the microwave, but if you need one fritter *right now*, here’s the trick: place the fritter on a microwave-safe plate and drape a slightly damp paper towel over it. Microwave on 50% power for about 15 to 20 seconds. The moisture from the towel helps prevent it from turning rubbery instantly. It won’t get crispy, but it will get warm and soft, which is pretty good in a pinch!
Enjoy these tasty treats knowing you don’t have to rush to eat them all in one day!
Frequently Asked Questions About Baked Apple Fritters Recipe
I know you probably have a few last-minute thoughts spinning around, which is totally normal when trying a new recipe, especially one that promises the comfort of fried food without the fryer! Let’s tackle those common curveballs so you can walk into the kitchen feeling totally confident. Remember, this is your kitchen, and you’ve already conquered the toughest part: deciding to bake them!
Can I make these No Fry Apple Fritters ahead of time?
Yes, you absolutely can! They are best enjoyed the day they are made because that glaze is freshest, but they hold up really well, making them excellent for weekend brunch prep. The one thing I strongly recommend holding off on is the vanilla glaze. The glaze tends to get sticky and weep a bit if it sits on the fritter for more than 24 hours.
My advice is to bake the fritters, roll them in the cinnamon sugar while warm, and then let them cool completely. Store them in that airtight container. You can mix up the glaze right before you plan to serve them the next day and drizzle it on then. This keeps them tasting the freshest. If you make them totally plain, they’re great for up to three days!
What apples work best for these baked apple fritters?
For any baked apple treat, you need apples that are firm enough to keep their shape when exposed to heat. If you use a softer apple, like a Red Delicious, they tend to break down completely, and you end up with just apple-flavored cake instead of distinct fruit pieces. We want texture!
I always reach for Granny Smith because I love the tartness contrasting with the sweet glaze—it just sings! If you prefer something less tart, Fuji or Honeycrisp are sturdy choices that bake beautifully. Just make sure you dice them consistently small, about the size of a pencil eraser. We want them tender, not chunky.
If you are curious about other wonderful ways to use apples, I have a whole roster of delicious dessert recipes that might inspire you next!
How do I make the glaze thicker or thinner?
This is all about adjusting that milk ratio! Remember, we start with 2 tablespoons of milk for the cup of powdered sugar, which usually creates a beautiful, pourable drizzle—ideal for that nice look on top of your Apple Fritter Donuts.
- To Thicken It Up: If you accidentally added too much milk and your glaze is running everywhere, just whisk in more powdered sugar, about a tablespoon at a time, until you see resistance again. That sugar is the structure!
- To Thin It Out: If you want a thinner consistency, maybe for dipping instead of drizzling, add more milk, but do it slowly—seriously, use a teaspoon or even just a few drops. It takes very little liquid to change it from thick to runny. Keep whisking until it flows smoothly off the spoon coating the back of it.
Don’t stress if it’s not perfect the first time. You are mastering an **easy apple fritters recipe**, and a slightly runnier glaze just means you have more delicious vanilla goodness soaking into the top!
Share Your Apple Cinnamon Baked Goods Experience
Baking is so much better when we can share the results, right? Honestly, nothing makes me happier than hearing that one of my recipes made your day a little cozier or solved a tough weeknight dilemma. Now that you’ve mastered these baked apple fritters—turning simple apples into something that tastes like fall comfort—I want to hear all about it!
Did you manage to get that slightly crispy edge we talked about, or did the vanilla glaze disappear before you could even snap a photo? Did you try the buttermilk swap? I’m genuinely curious how these turned out in *your* kitchen!
Please take a moment to leave a rating right below this post—even a five-star rating speaks volumes to others who might be hesitant to try oven-baked versions. If you ran into a snag or had a brilliant adaptation that I missed, drop a comment below. That’s how we all get better at this, together!
And if you shared your beautiful platter of golden, glistening apple cinnamon baked goods on social media, tag me! Seeing your success is truly the best part of this whole process. Happy baking, friends!
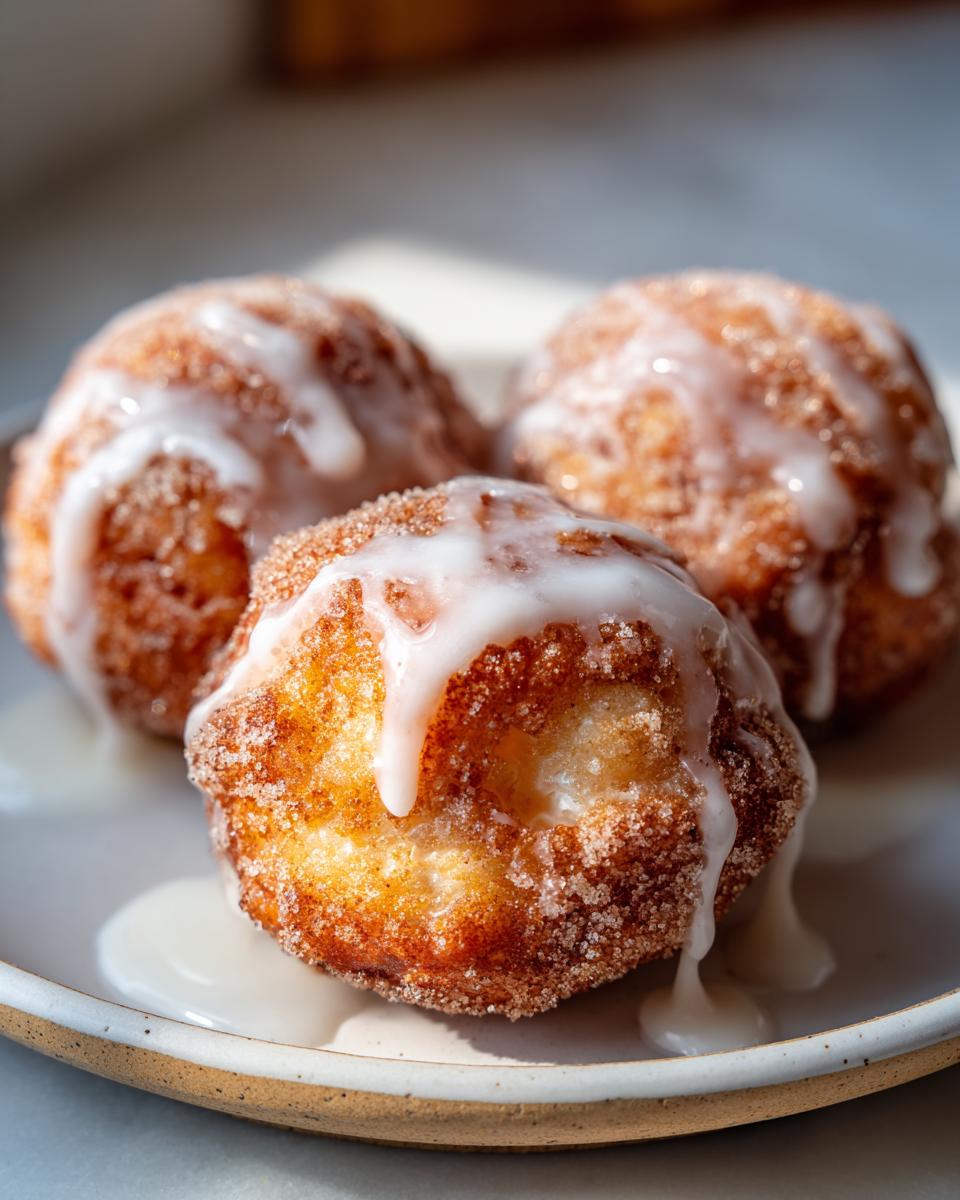
PrintEasy Baked Apple Fritters with Cinnamon Sugar and Vanilla Glaze
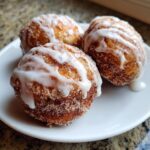
You can make these baked apple fritters to get the comfort of the classic treat without deep frying. This recipe gives you tender centers and a sweet glaze, perfect for a simple breakfast or dessert.
- Prep Time: 15 min
- Cook Time: 20 min
- Total Time: 35 min
- Yield: 12 fritters 1x
- Category: Dessert
- Method: Baking
- Cuisine: American
- Diet: Vegetarian
Ingredients
- 2 medium apples, peeled, cored, and diced small
- 1 1/2 cups all-purpose flour
- 1 teaspoon baking soda
- 1/2 teaspoon ground cinnamon
- 1/4 teaspoon ground nutmeg
- 1/4 teaspoon salt
- 1/2 cup granulated sugar
- 1 large egg
- 1/2 cup milk
- 2 tablespoons melted unsalted butter
- 1 teaspoon vanilla extract
- For the Cinnamon Sugar Topping: 1/4 cup granulated sugar
- 1 teaspoon ground cinnamon
- For the Vanilla Glaze: 1 cup powdered sugar
- 2 tablespoons milk
- 1/2 teaspoon vanilla extract
Instructions
- Preheat your oven to 375°F (190°C). Lightly grease a standard 12-cup muffin tin or line it with paper liners.
- In a medium bowl, combine the diced apples with 1/2 cup of the granulated sugar. Set this aside.
- In a separate large bowl, whisk together the flour, baking soda, cinnamon, nutmeg, and salt.
- In a third bowl, whisk the remaining 1/4 cup of granulated sugar, the egg, milk, melted butter, and vanilla extract until combined.
- Pour the wet ingredients into the dry ingredients. Mix gently until just combined; do not overmix the batter.
- Fold the sugared diced apples into the batter until they are evenly distributed.
- Spoon the batter evenly into the prepared muffin cups, filling each about two-thirds full.
- Bake for 18 to 20 minutes, or until a toothpick inserted into the center comes out clean.
- While the fritters bake, prepare the cinnamon sugar topping by mixing 1/4 cup sugar and 1 teaspoon cinnamon in a shallow dish.
- Once the fritters are done, let them cool in the pan for 5 minutes. Carefully remove them and immediately roll the tops in the cinnamon sugar mixture. Place them on a wire rack to cool further.
- Prepare the glaze by whisking together the powdered sugar, 2 tablespoons milk, and 1/2 teaspoon vanilla extract until smooth. Add more milk, a drop at a time, if the glaze is too thick.
- Drizzle the vanilla glaze over the warm or cooled fritters before serving.
Notes
- For a slightly crispier edge, you can lightly spray the tops of the batter with cooking spray before baking.
- If you want a stronger apple flavor, use slightly smaller apple pieces.
- You can substitute buttermilk for regular milk for a slightly tangier flavor in the batter.
Nutrition
- Serving Size: 1 fritter
- Calories: 240
- Sugar: 30g
- Sodium: 180mg
- Fat: 7g
- Saturated Fat: 4g
- Unsaturated Fat: 3g
- Trans Fat: 0g
- Carbohydrates: 43g
- Fiber: 1g
- Protein: 3g
- Cholesterol: 30mg