

Weeknights hit, that craving for something rich and cheesy hits, but then you remember the deep fryer? Absolutely not! I’ve been there, staring down a tray of frozen chimichangas, knowing fried is delicious but feeling sluggish afterward. When I started Kitchenican, my main goal was replacing those takeout boxes with meals that felt indulgent but were genuinely easy and didn’t leave me needing a nap. That quest led me straight to perfecting my Crispy Baked Chicken Chimichangas. Trust me, achieving that satisfying, crunchy, golden exterior you get at a restaurant—all right there in your oven—is simpler than you think. We’re talking rich flavor, minimal oil, maximum satisfaction.
- Why You Will Love These Baked Chicken Chimichangas Recipe
- The Secret to Crispy Baked Chicken Chimichangas
- Ingredients for Your Homemade Baked Chimichangas
- Step-by-Step Instructions for Easy Weeknight Chicken Dinner
- Tips for Making Restaurant Style Chimichangas at Home
- Serving Suggestions for Your Baked Chicken Chimichangas
- Storage and Reheating Instructions for Leftover Baked Chimichangas
- Frequently Asked Questions About Baked Chimichangas
- Nutritional Estimates for This Healthy Mexican Recipe
Why You Will Love These Baked Chicken Chimichangas Recipe
When I finally cracked the code on getting that perfect crunch without submerging them in oil, I knew I had a winner. This recipe isn’t just good; it fits right into a busy life that still deserves delicious Tex-Mex. If you’re tired of greasy cleanup but love that authentic taste, you need this in your rotation!
- Seriously Crispy Texture: Yes, I mean it! These are truly Crispy Baked Chicken wraps. We achieve that satisfying crunch that makes a chimichanga worth it, all thanks to a little olive oil spray and high heat.
- Guilt Free Chimichangas: As someone who is always looking for Healthy Mexican Recipes that actually taste great, this low-oil method is my go-to. You get all the flavor, none of the deep-fry guilt.
- Ready in Under 45 Minutes: If you’re searching for Easy Weeknight Chicken Dinners, stop searching! From prep to plate, these Baked Chicken Chimichangas come together in about 35 minutes total.
- Simple Chimichanga Filling: The filling uses basic pantry spices and shredded chicken, meaning you aren’t hunting down specialized ingredients before you can eat.
- Family Approved Every Time: These turn out as beautiful, Golden Brown Chimichangas that even my picky nephew happily devours. It’s a guaranteed win for Family Friendly Mexican Meals.
- Perfect Make-Ahead Base: You can quickly assemble the wraps and save them for later, making them an excellent option for easy weeknight dinners when time is tight.
The Secret to Crispy Baked Chicken Chimichangas
Okay, here is where most people go wrong trying to make Baked Chicken Chimichangas Recipe work. They either use an oven that isn’t hot enough or they skip the essential step of lightly coating the tortillas. Trust me on this: high heat is your friend! We need that 400°F heat to start crisping the exterior before the filling has a chance to steam everything soggy. That little bit of olive oil, or a good spray of cooking oil, acts like the fryer, helping the flour tortillas turn spectacularly golden brown.
And don’t forget the flip! About halfway through baking, you need to give them a quick turn. This ensures both sides get that radiant oven heat and results in the crunchiest, most delicious bite. It mimics how you’d turn items in a deep fryer, giving you that evenly textured result. For more tips on getting that crunch without the oil, check out my guide on crispy baked chicken.
Essential Equipment for Perfect Baked Chimichangas
You don’t need fancy gadgets here, which is just one reason I love this recipe so much. It’s all about maximizing what you already have in your kitchen.
- A large mixing bowl for mixing up that flavorful chicken filling.
- A sturdy rimmed baking sheet. Lined is best!
- Parchment paper for easy cleanup—I always use it, because who needs stuck-on cheese disaster?
- A pastry brush or a good quality cooking oil spray bottle. This is non-negotiable for crispiness!
Ingredients for Your Homemade Baked Chimichangas
I call this part the assembly line, because once you get your ingredients ready, putting these Baked Chicken Chimichangas together takes just minutes. This recipe is perfect because it uses simple ingredients to create an amazing base for Shredded Chicken Chimichangas that tastes anything but simple. You’ll have everything you need right here.
- 2 cups cooked, shredded chicken (I often grab a rotisserie chicken to save serious time!)
- 1 teaspoon chili powder
- 1/2 teaspoon cumin
- 1/2 teaspoon garlic powder
- 1/4 teaspoon salt
- 1/4 teaspoon black pepper
- 1 (4 ounce) can green chiles, drained
- 1 cup shredded Monterey Jack cheese
- 1 cup shredded cheddar cheese
- 8 large (10-inch) flour tortillas
- 1 tablespoon olive oil or cooking spray
Ingredient Notes and Substitutions
The chicken gets seasoned right in the bowl, but I want to tell you about speeding things up. You absolutely don’t need to boil and shred chicken breast if you’re racing a clock. A store-bought rotisserie chicken is a game-changer here, and it adds great flavor too.
For the cheese, mixing the Monterey Jack and cheddar gives you that perfect melt factor and flavor profile that screams restaurant quality. Don’t skip the blend!
Now, if you wanted to lean even further into the Low Oil Mexican Food category and have an air fryer, you can definitely switch tactics! After assembling and folding them tightly, you can cook them in the air fryer basket, just like I do with my pork chops. You’ll want to spray them really well before cooking, often popping them in for about 8 to 10 minutes total. Check out my tips for air frying—the principle of getting that heat direct to the surface is the same!
Step-by-Step Instructions for Easy Weeknight Chicken Dinner
This is where the magic happens! Since we are aiming for an Easy Weeknight Chicken Dinner, I structured these steps to be as fast as possible. First things first: crank that oven up to 400°F (200°C). You need that high heat for the crisping action we talked about. Get your baking sheet ready—I insist on lining it with parchment paper here, even though we are oiling the tops, because cleanup should never stop you from cooking! I share more tips on making chicken dinners fast in another post!
Follow these steps carefully, and you’ll have Baked Chicken Chimichangas ready before you know it. The entire cooking time is super quick, but the prep is where we lock in that restaurant-quality texture.
Preparing the Simple Chimichanga Filling
We need to make sure every single shred of chicken is coated perfectly. Grab that bowl and toss in your cooked, shredded chicken. Then, get in those core spices: chili powder, cumin, garlic powder, salt, and pepper. Mix it all up until the chicken looks beautifully seasoned. Don’t forget to stir in those drained green chiles—they bring a little zing! Now, split your cheese blend evenly among the 8 portions of chicken. This makes for the very Simple Chimichanga Filling we need.
Rolling and Prepping for Golden Brown Chimichangas
Lay out your 10-inch flour tortillas. Spoon the chicken and cheese mix onto the center of each one, leaving a good border on the sides. Now, the rolling technique: fold those two sides in first, just enough to cover the edges of the filling. Then, tuck the bottom edge tightly over the filling and roll it up firmly toward the top like a burrito. Seam-side down is critical, so place them right onto that prepared baking sheet.
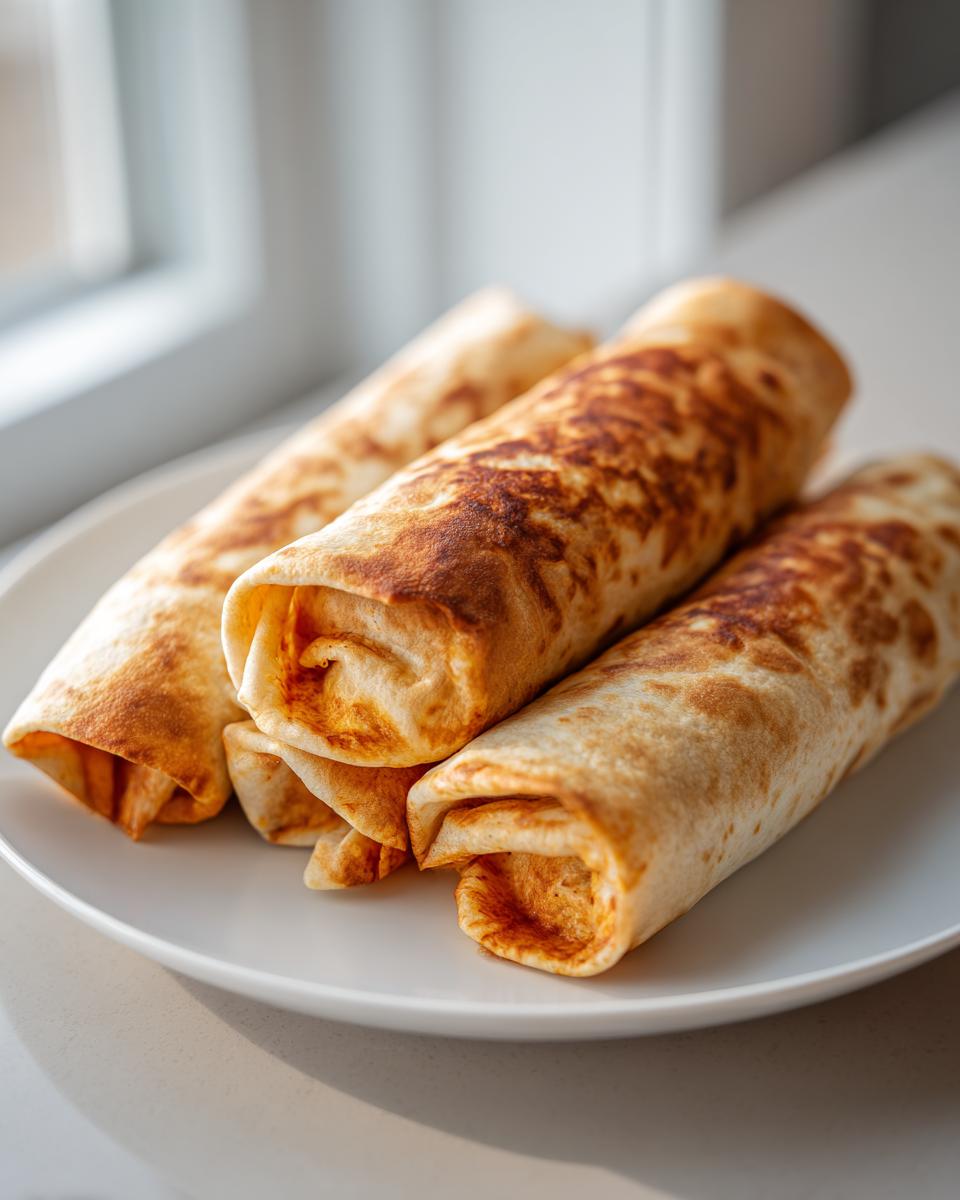
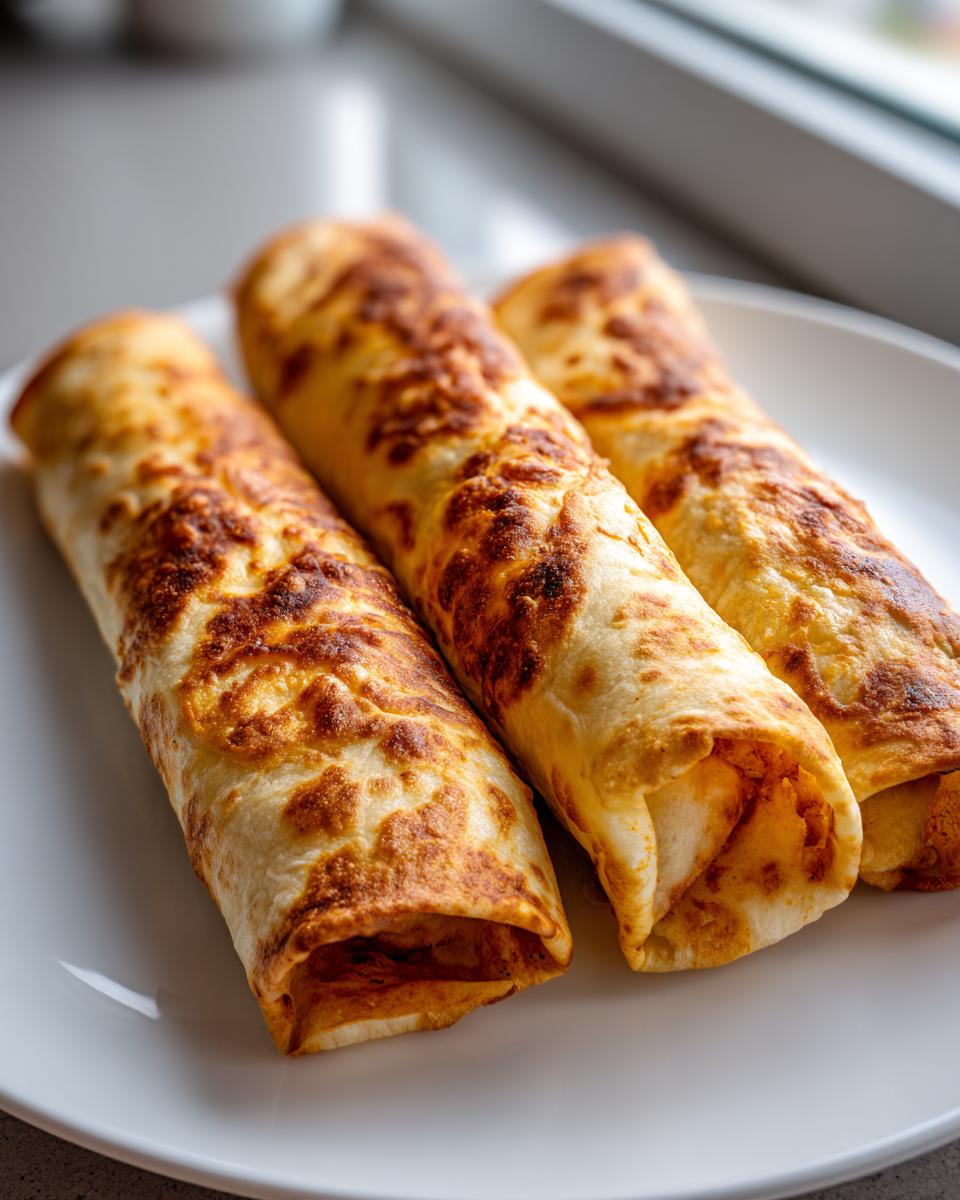
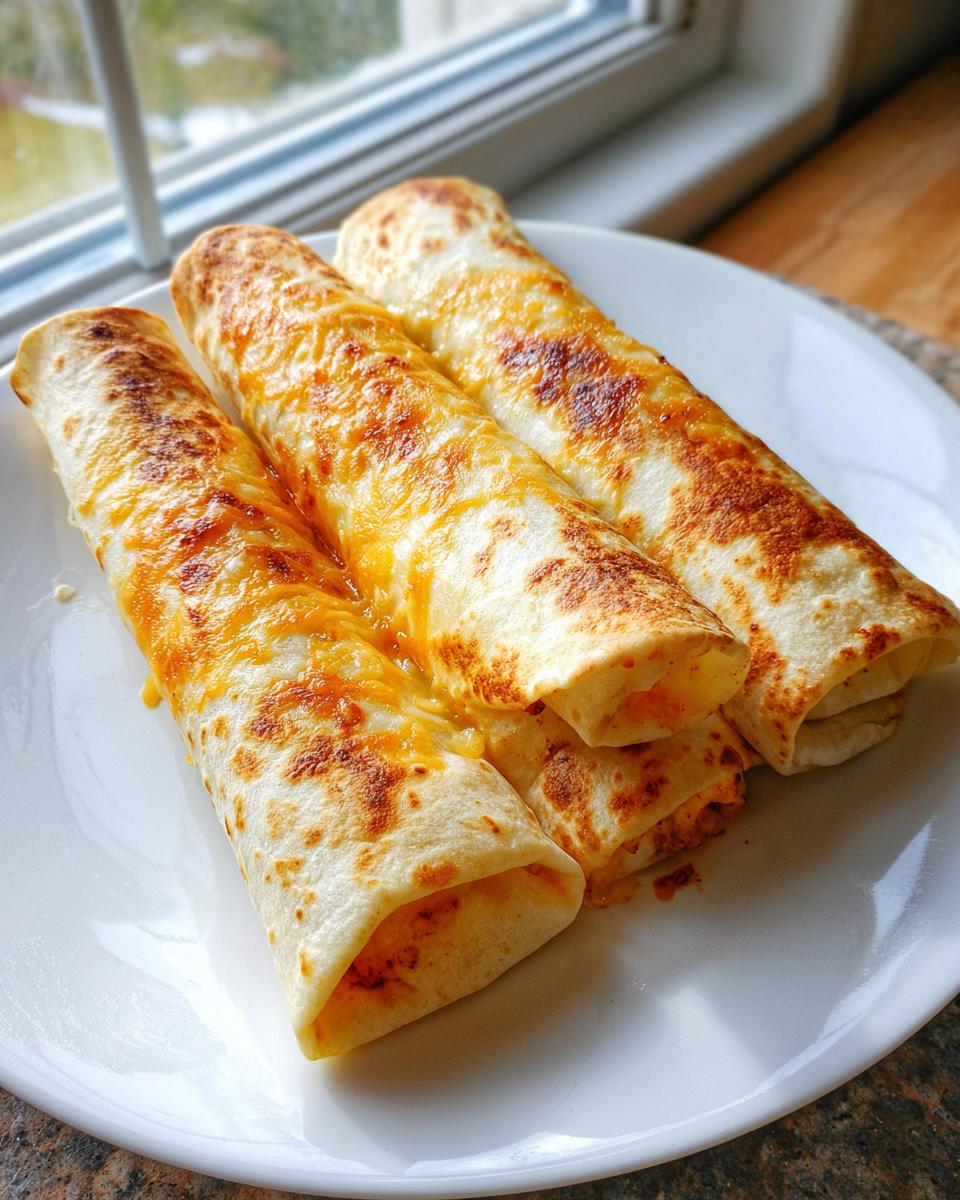
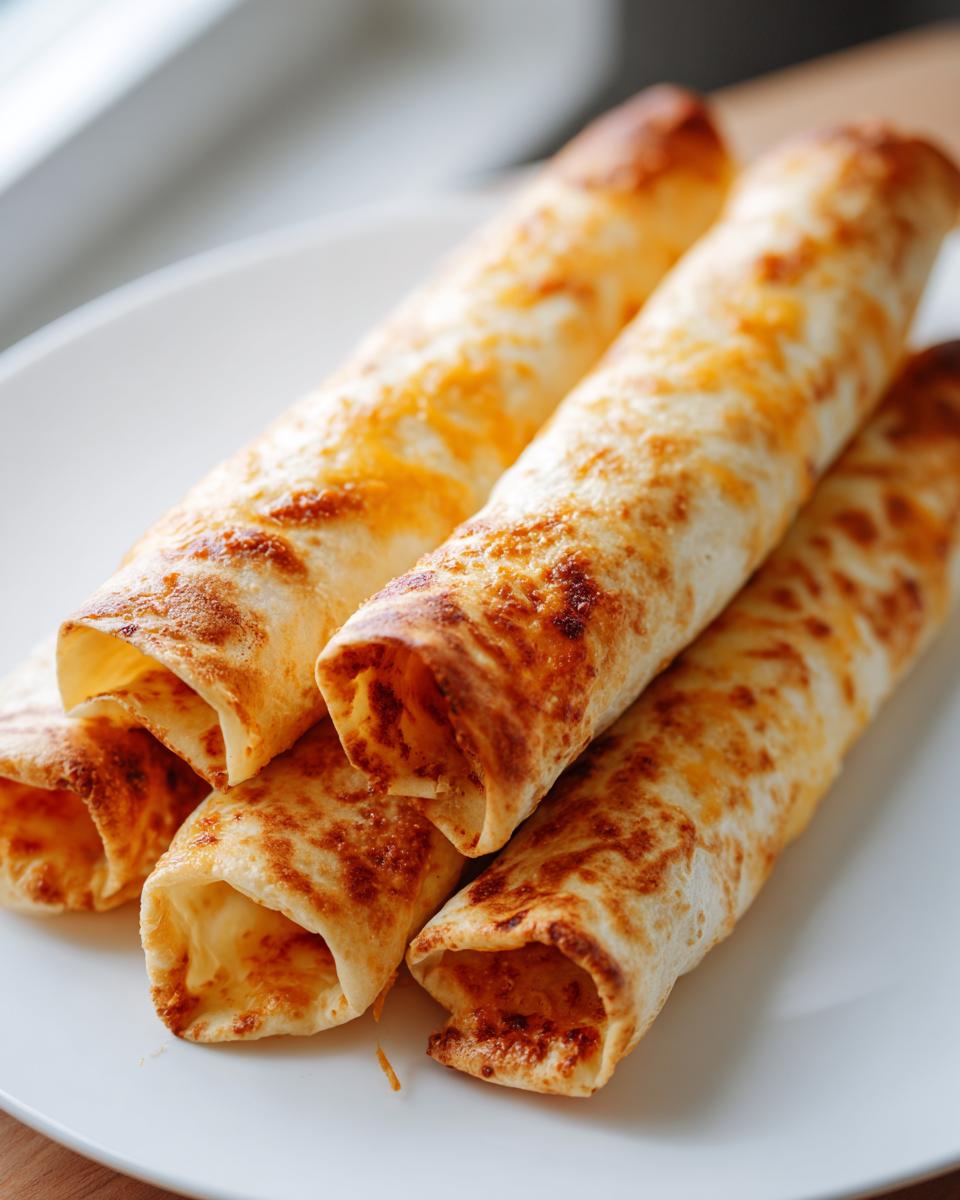
Here is the payoff step for achieving Golden Brown Chimichangas: take your tablespoon of olive oil or your cooking spray and coat the tops and sides generously. I mean, really coat them! This is what makes them crunchy. Bake them for 15 minutes, flip them over gently, and bake for 5 more minutes. If you want extra cheesy tops, sprinkle the rest of the cheese on after the 20 minutes are up, pop them back in for 2 minutes, and get ready to eat!
Tips for Making Restaurant Style Chimichangas at Home
When I first tried this at home, my tortillas cracked every single time! It was infuriating because the filling was fantastic, but the look was a flop. The biggest game-changer for getting that tight, beautiful presentation—the one that makes them look like true Restaurant Style Chimichangas at Home—was warming the tortillas first. Seriously, 15 seconds in the microwave before you try to fill and roll them works wonders.
This warmth makes the flour tortillas super pliable—they stretch instead of snapping when you roll them tightly. Also, and this is crucial: don’t overstuff them! My early attempts had too much chicken mix, and the chimichangas would explode in the oven. You only need about a quarter-cup of filling for those big 10-inch rounds. Keep the filling line just shy of the edges, fold those sides in snuggly, and roll it tight. It’s all about technique to keep that filling contained while baking.
If you want to see another speedy, flavorful meal I rely on during busy weeks, you should check out my Chicken Marsala post. But honestly, for quick Tex-Mex flavor, these baked chimichangas are hard to beat. For even more quick ideas on achieving that crispy baked texture, you can check out the tips over at Top Kin Kitchen!
Serving Suggestions for Your Baked Chicken Chimichangas
You’ve just pulled these perfectly crispy, golden beauties out of the oven, and now comes the fun part: turning them into a complete feast! While the filling is already packed with seasoned chicken and cheese, these chimichangas really sing when paired with fresh, cool toppings. We’re making a Family Friendly Mexican Meal here, and that means giving everyone the chance to customize their plate!
For me, it’s all about balance. After all that wonderful baked crunch, you want something cool and creamy to balance the spice. I always set out bowls of classic Tex-Mex essentials. You can’t go wrong with a dollop of sour cream, fresh pico de gallo, or, my absolute favorite, some good guacamole.
If you happen to have some extra time and want to step up the dipping game, you know I’m going to encourage you to make my super easy dip! You can find the recipe for the Cottage Cheese Queso—it’s wonderfully creamy and uses healthier swaps, which fits right into our Guilt Free Chimichangas vibe perfectly.
And don’t forget a simple side dish! Since the chimichangas are hearty, I usually skip heavy rice and opt for something light like a quick side salad dressed with lime vinaigrette, or maybe some seasoned black beans. Keep it simple, keep it quick, and enjoy your hard work!
Storage and Reheating Instructions for Leftover Baked Chimichangas
Now, the real test of a fantastic recipe: how well does it reheat? Because these Baked Chicken Chimichangas come together so fast, they are incredible for meal prepping lunches or saving extras for a late-night snack later in the week. The goal here is always to bring back that crispiness we worked so hard to achieve in the oven the first time around.
For storage, you have two options. If you plan to eat them within four days, wrapping them individually in plastic wrap and then placing them in an airtight container in the fridge works perfectly. If you want something truly make-ahead, let them cool completely first, then wrap them tightly in foil and place them in a freezer-safe bag. They freeze really well for up to two months!
Restoring Crispiness After Storing
Listen to me: never, ever default to the microwave for reheating chimichangas if you want them crunchy. The microwave is a soggy tortilla machine, and we simply won’t allow it! If they are refrigerated, just brush them lightly with a bit more oil or spray and pop them back into a 375°F oven for about 10 to 12 minutes. That low temperature gives the inside time to warm up before the outside gets too dark.
If they are coming straight from frozen, give them a bit more time in the oven, maybe 18 to 20 minutes. However, if you are like me and own an air fryer, that is actually the fastest path back to perfection! If you want the absolute best result for reheating, use that appliance. I have a whole guide on reheating shrimp in the air fryer that explains the general science that applies here: circulating dry heat is what brings that crunch back. Pop those frozen chimichangas in the air fryer at 375°F for about 8 minutes, shaking halfway through, and they will taste just as good as when they came out of the oven the first time!
Frequently Asked Questions About Baked Chimichangas
You know, when I first started figuring out how to make these at home, I had so many questions that the recipe card just didn’t cover. It’s really about getting that texture right without the deep fryer mess. I rounded up some of the most common things people ask me about turning these into a regular part of their rotation, especially for those busy times when you’re looking for healthy dinner recipes that are quick!
Can I use corn tortillas for these Baked Chicken Chimichangas?
Oh, I wouldn’t recommend it, sweetie. Corn tortillas are lovely for tacos or enchiladas, but when you try to roll them into a tight chimichanga shape, they tend to crack and break apart, especially when they hit that high oven heat. For this specific Baked Chimichangas Recipe, you absolutely need the flexibility of large flour tortillas. They roll up tight, hold that filling in place, and, most importantly, they crisp up beautifully when sprayed with oil!
How do I ensure my Baked Chicken Chimichangas are crispy and not soggy?
This is the million-dollar question, right? Crispiness is non-negotiable! Remember, we are baking, not frying, so we have to cheat a little bit. First, make sure you are using a high heat—400°F is where we start. Second, and this is crucial, you must coat the exterior liberally with oil or spray. Think of it like giving the tortilla a protective, crunchy shell. If you can, placing them on a wire rack set over your baking sheet helps air circulate underneath, which is the ultimate insurance against sogginess. If you don’t have a rack, flipping them halfway through baking is essential for giving both sides that dry heat exposure!
If you’re still curious about how others are approaching this, I saw a great recipe breakdown on how to handle the classic Chi-Chi’s version over at Taste With Elise—it’s always good to see different approaches to technique!
Can I make these ahead of time for meal prep?
Yes, you totally can! As I mentioned in the storage section, assembling these ahead of time means you have a ready-to-bake meal sitting in the fridge or freezer. If you are preparing them for a large crowd or just want to save time, simply roll them tightly, keep them seam-side down, and refrigerate them under lightly plastic wrap for up to a day. Remember to give them that extra oil spray right before they go into the hot oven, and adjust your baking time slightly longer since they’ll be cold!
Nutritional Estimates for This Healthy Mexican Recipe
I always try to keep things transparent around here because knowing what goes into your fuel is important, especially when we are focusing on making this a healthier twist on Tex-Mex classics. Since we skipped the deep fryer entirely, these Guilt Free Chimichangas are much lighter than your usual takeout order!
I ran the numbers based on the ingredients listed above, assuming two chimichangas make one serving. Take these figures as a great starting point! Because every brand of cheese or type of shredded chicken has tiny variations, your counts might shift just a little bit, but this gives you a solid overview.
Here’s what you can generally expect from two of these delicious, crunchy wraps:
- Calories: About 410 per serving
- Protein: A whopping 25g! That’s a great boost for a weeknight meal.
- Fat: Around 18g total, which is drastically lower than fried versions where fat doubles easily.
- Carbohydrates: About 38g
- Sodium: 550mg (We keep this relatively moderate because we use seasoned, pre-cooked chicken, but remember your toppings—salsa can add a lot!).
Look at that protein count! That’s what I love about using lean shredded chicken and cheese; it keeps you feeling full and satisfied without leaving you with that heavy feeling after dinner. It really proves that an Easy Weeknight Chicken Dinner can also be a well-balanced one if you just skip that frying step!
PrintThe Crispiest Guilt-Free Baked Chicken Chimichangas (Restaurant Style)

You can make restaurant-style chicken chimichangas at home using this easy, oven-baked method. This recipe delivers a golden, crunchy exterior and a juicy, seasoned filling without deep frying, making it a healthier choice for your weeknight dinner.
- Prep Time: 15 min
- Cook Time: 20 min
- Total Time: 35 min
- Yield: 4 servings 1x
- Category: Dinner
- Method: Baking
- Cuisine: Tex-Mex
- Diet: Vegetarian
Ingredients
- 2 cups cooked, shredded chicken
- 1 teaspoon chili powder
- 1/2 teaspoon cumin
- 1/2 teaspoon garlic powder
- 1/4 teaspoon salt
- 1/4 teaspoon black pepper
- 1 (4 ounce) can green chiles, drained
- 1 cup shredded Monterey Jack cheese
- 1 cup shredded cheddar cheese
- 8 large (10-inch) flour tortillas
- 1 tablespoon olive oil or cooking spray
Instructions
- Preheat your oven to 400°F (200°C). Lightly grease a baking sheet or line it with parchment paper.
- In a medium bowl, combine the shredded chicken, chili powder, cumin, garlic powder, salt, and pepper. Mix well to coat the chicken evenly with the spices.
- Stir in the drained green chiles into the chicken mixture.
- Divide the chicken filling evenly among the 8 tortillas, placing the filling slightly off-center. Sprinkle about 2 tablespoons of the cheese blend over the chicken in each tortilla.
- Fold the sides of the tortilla inward over the filling, then tightly roll the tortilla up from the bottom edge, creating a compact cylinder. Place the chimichanga seam-side down on the prepared baking sheet. Repeat with the remaining tortillas.
- Lightly brush the tops and sides of the rolled chimichangas with olive oil or spray them thoroughly with cooking spray. This step helps achieve a golden brown, crispy texture.
- Bake for 15 to 20 minutes, flipping them halfway through the baking time, until they are golden brown and crisp.
- Remove from the oven. Sprinkle the remaining cheese over the tops of the hot chimichangas if desired, and return to the oven for 2 minutes until the cheese melts.
- Serve immediately with your favorite toppings like salsa, sour cream, or guacamole.
Notes
- To make the tortillas more pliable for rolling, warm them briefly in the microwave for 15 seconds.
- For the best crispy baked chicken chimichangas result, ensure you spray or brush the tortillas generously with oil before baking.
- You can prepare the chicken filling ahead of time and store it in the refrigerator for up to 3 days.
Nutrition
- Serving Size: 2 chimichangas
- Calories: 410
- Sugar: 3
- Sodium: 550
- Fat: 18
- Saturated Fat: 8
- Unsaturated Fat: 10
- Trans Fat: 0
- Carbohydrates: 38
- Fiber: 2
- Protein: 25
- Cholesterol: 75