
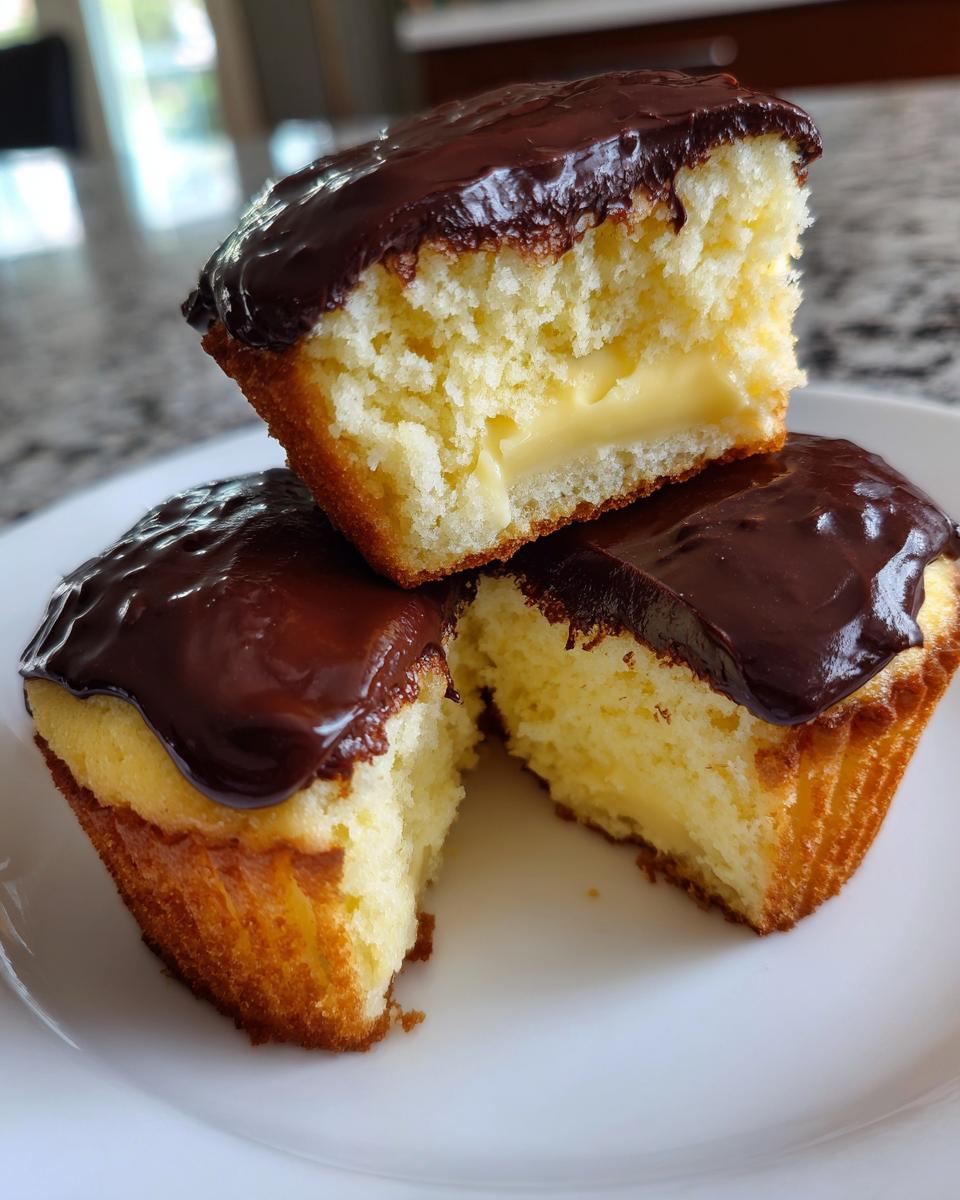
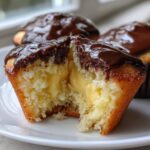
Forget those sad, dry cakes you settled for last week! I remember looking at those gorgeous Boston bakeries, thinking I could never recreate that magic. But here’s the secret: you absolutely can make bakery-quality treats right on your counter. These boston cream pie cupcakes are the answer—they give you that perfect, individual serving of classic flavor without needing a huge springform pan. My journey, learning as Ava Sinclair here at Kitchenican, taught me that intimidating desserts are just steps piled on top of each other. You already know how to mix; now I’ll show you how to turn that simple batter into the most luscious copycat Boston Cream Pie dessert you’ve ever tasted.
- Why This Boston Cream Pie Cupcakes Recipe Builds Confidence
- Essential Components for Perfect Boston Cream Pie Cupcakes
- Gathering Ingredients for Your Boston Cream Pie Cupcakes Recipe
- Step-by-Step Instructions for Classic Boston Cream Pie Cupcakes
- Tips for Success with Your Copycat Boston Cream Pie Dessert
- Storage and Reheating Instructions for Custard Filled Mini Cakes
- Frequently Asked Questions About Boston Cream Pie Cupcakes
- Nutritional Estimate for These Chocolate Glazed Cupcakes
- Share Your Experience Making These Boston Cream Pie Cupcakes
Why This Boston Cream Pie Cupcakes Recipe Builds Confidence
When you nail a flavor this iconic, your baking confidence just skyrockets. Seriously! These aren’t just desserts; they are proofs of concept that you can handle the layers required for something special. You’ll find these are fantastic easy baking dessert ideas because they look complex but use straightforward methods.
- Perfectly portioned—no slicing stress! They are superb desserts for parties.
- The filling and ganache are surprisingly simple once you see them done step-by-step.
- You get that classic bakery taste without needing years of professional training.
Essential Components for Perfect Boston Cream Pie Cupcakes
To nail these boston cream pie cupcakes, we have to treat the three layers like champions. If you want to know more about why I believe every home cook can conquer this, check out my journey over on the About Page! It’s all about breaking down the complexity.
Moist Vanilla Cake Recipe Base
This has to be the perfect, light vanilla cupcake foundation. My number one rule for keeping your moist vanilla cake recipe from tasting dry is all about that creaming step. Don’t rush beating the butter and sugar until it looks fluffy—that’s where you trap the air that keeps the final product light!
Homemade Pastry Cream Filling for Cupcake Recipes with Pastry Cream
We are taking the filling seriously here. Yes, it sounds fancy, but making pastry cream yourself is what separates these from any plain cupcake. For any great cupcake recipes with pastry cream, chilling is non-negotiable. That cold custard needs to be firm before you even think about piping it in.
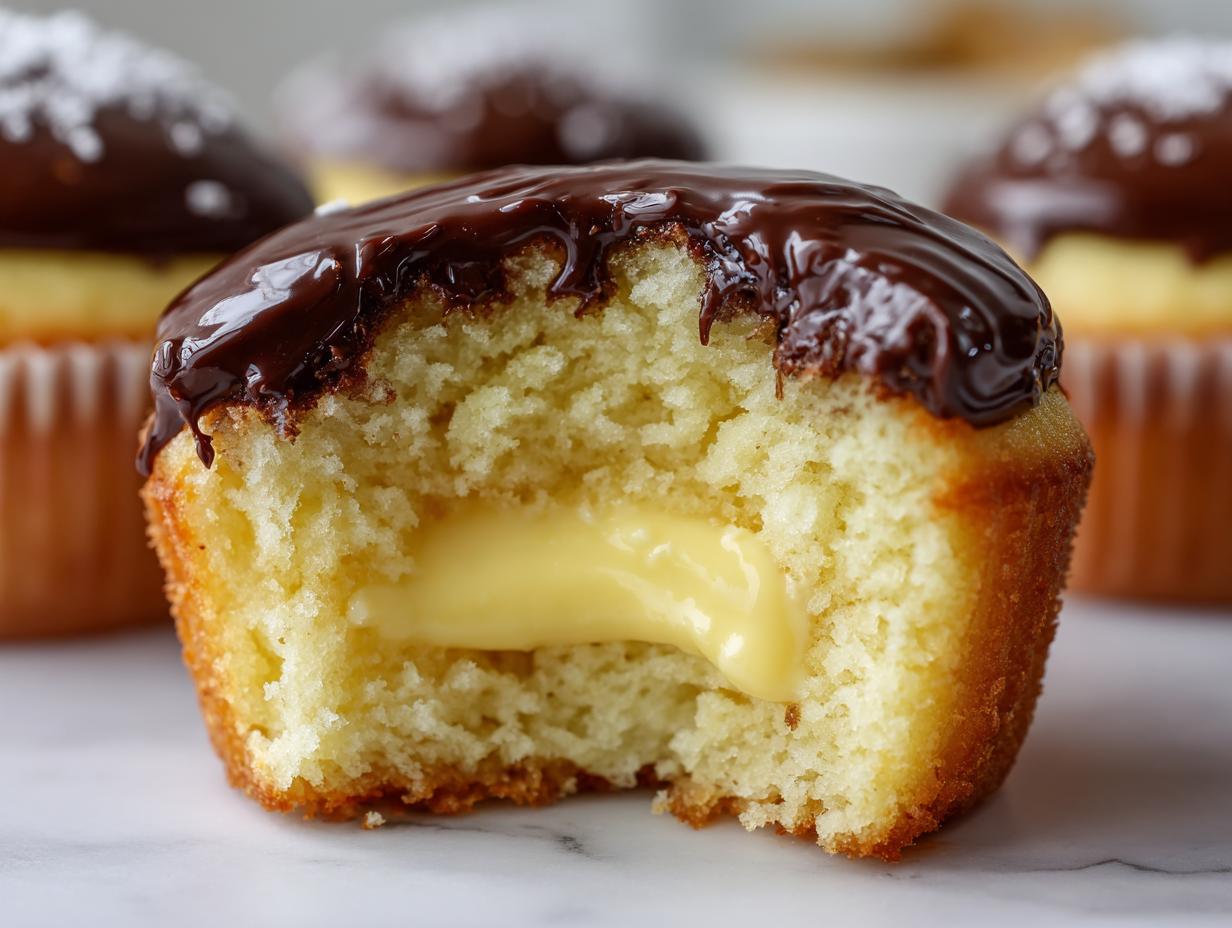
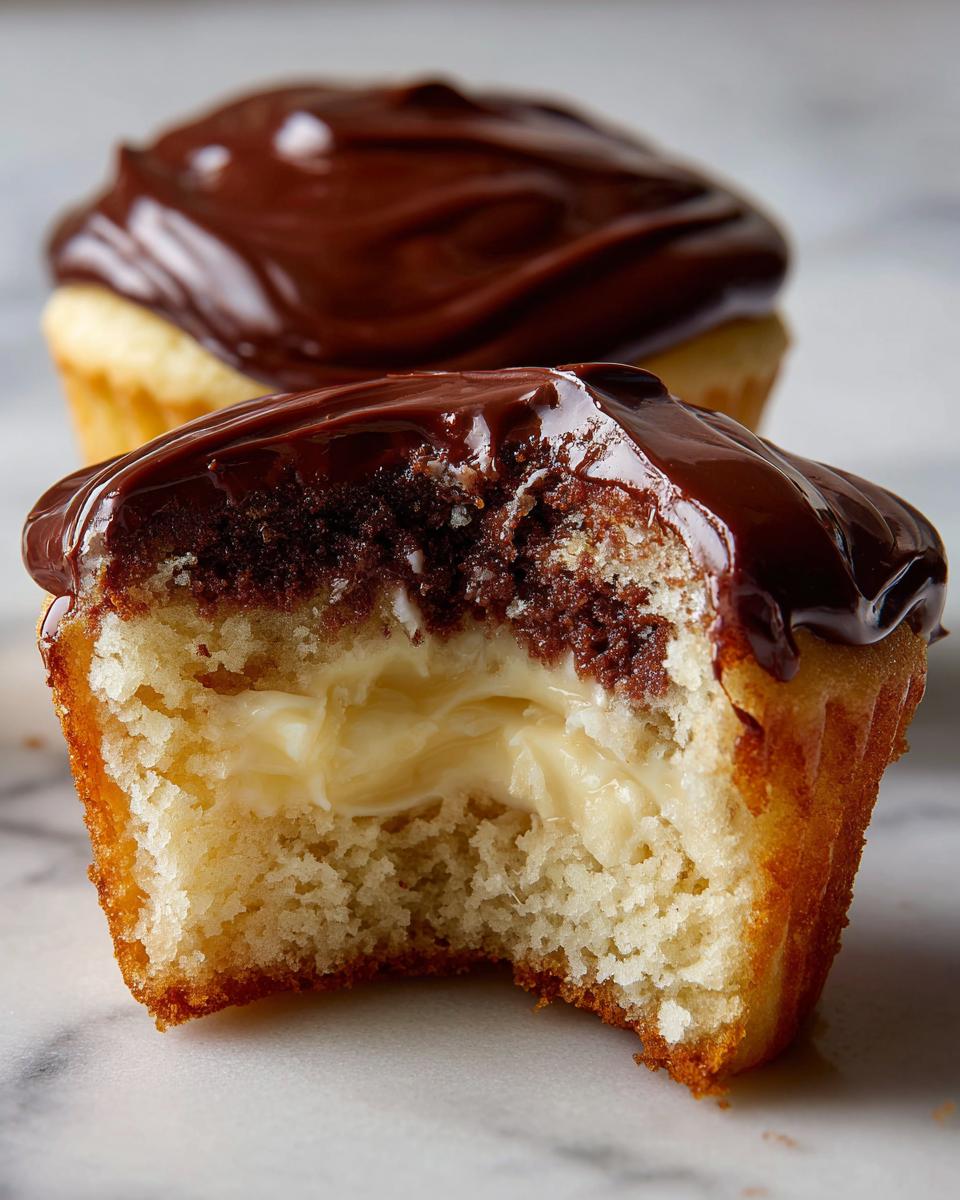
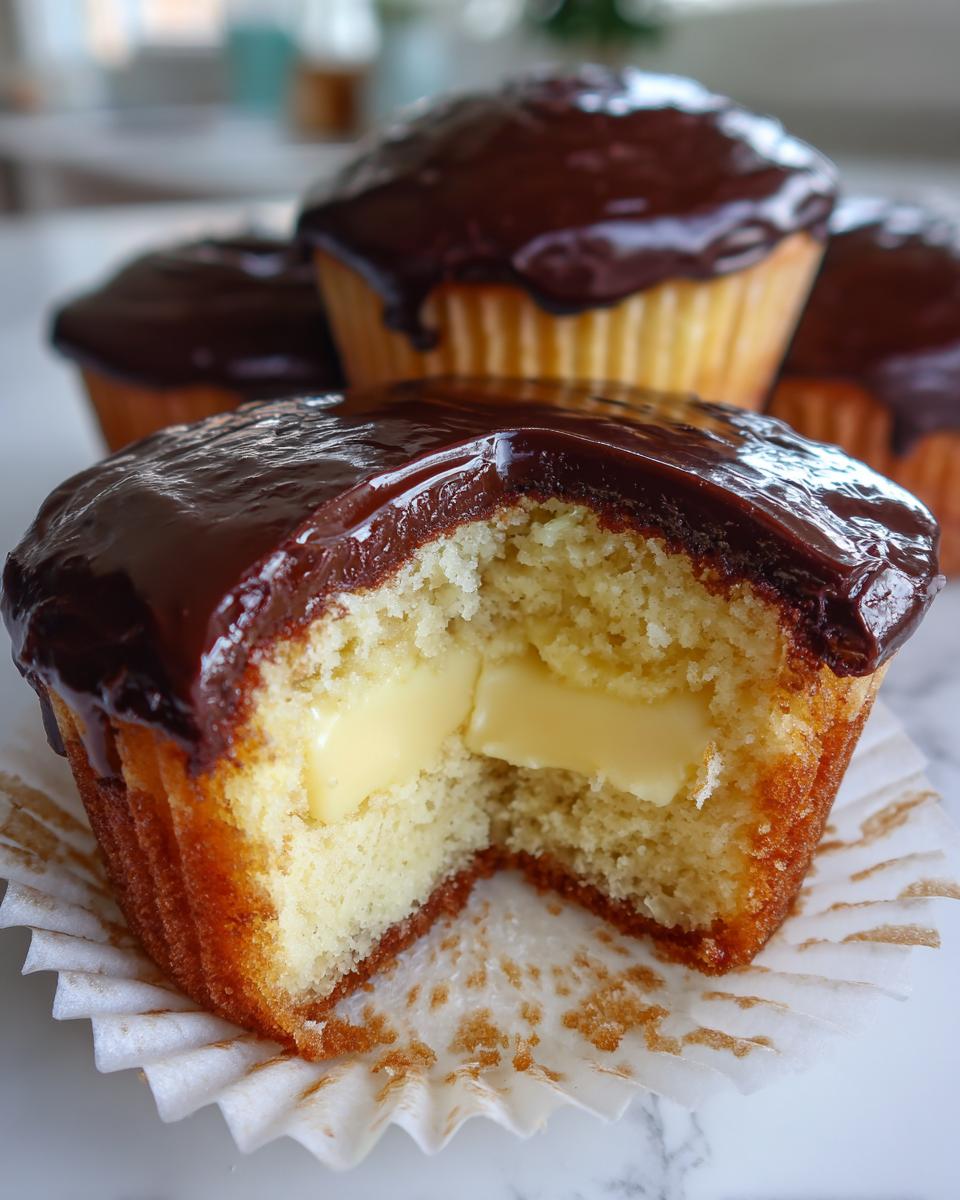
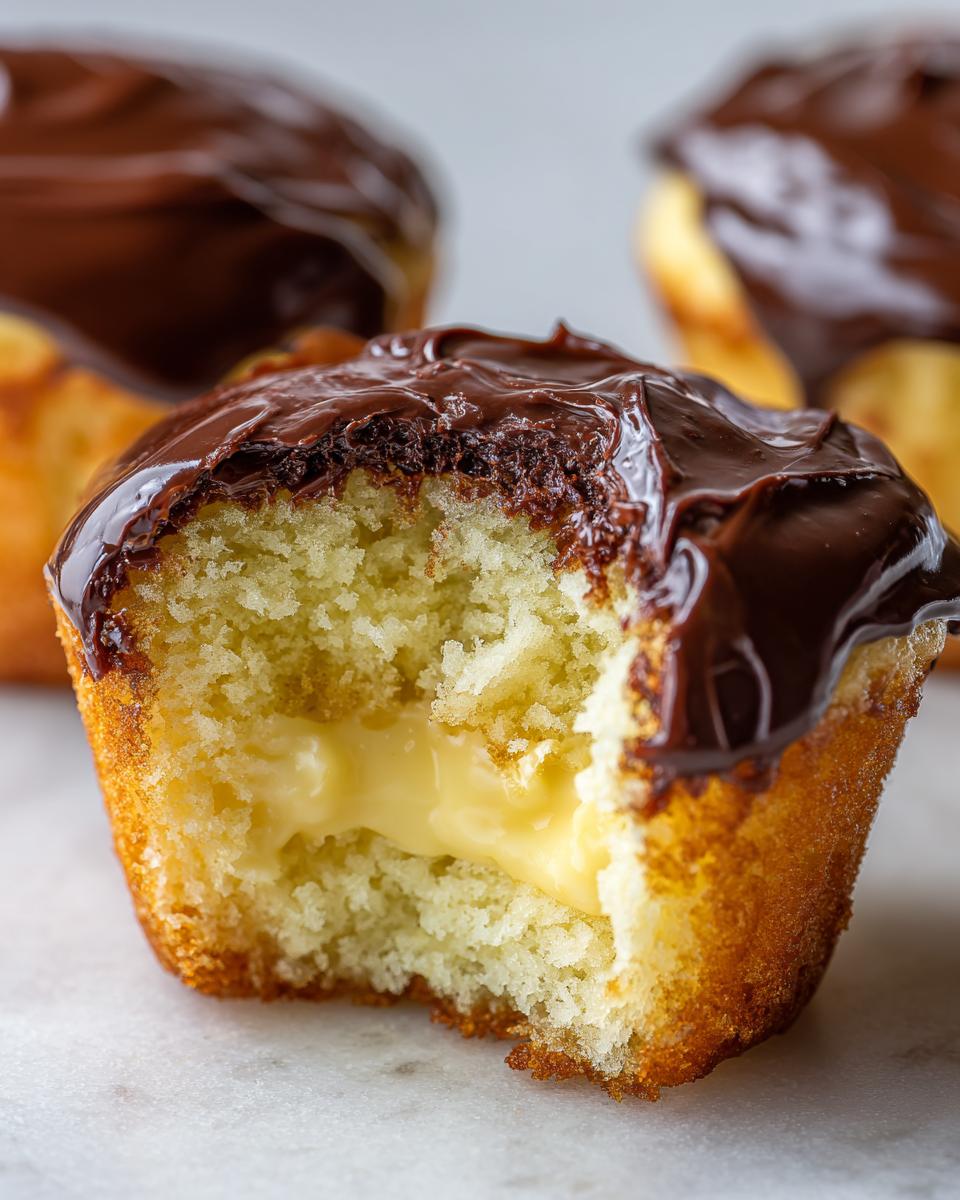
Rich Chocolate Ganache Topped Desserts
The topping is the crowning glory, right? For these chocolate ganache topped desserts, skip the chips and use real chopped chocolate. It melts so much cleaner! Also, wait until that ganache is just slightly cooled and thickened before pouring—if it’s scalding hot, it just runs right off the cake and disappears!
Gathering Ingredients for Your Boston Cream Pie Cupcakes Recipe
Okay, we’re moving from theory to action! Getting your ingredients lined up first is a total game-changer. It really helps keep the flow going once you start mixing, and trust me, you don’t want to be hunting for egg yolks while your milk is boiling over! These three components require very different things, so I’ve broken down exactly what you need to pull those classic bakery flavors together.
For the Moist Vanilla Cupcakes
For the cake itself, you’re going to need 1 1/2 cups all-purpose flour, 1 1/2 teaspoons baking powder, and 1/2 teaspoon salt whisked together. Then for the wet side, grab 1/2 cup unsalted butter that’s softened up perfectly, 1 cup granulated sugar, 2 large eggs, 1 teaspoon vanilla extract, and 1/2 cup regular milk.
For the Silky Pastry Cream Filling
This is where the magic happens! For that luxurious custard, make sure you have 1 cup granulated sugar, 1/4 cup cornstarch, and 1/4 teaspoon salt measured out. The liquids are crucial here: you must use 1 1/2 cups of whole milk for the richest texture. Then you’ll need 2 large egg yolks, 2 tablespoons unsalted butter, and 1 teaspoon vanilla extract at the end.
For the Chocolate Ganache Glaze
To get that shiny, perfect chocolate finish, we keep this simple but high quality. You need 4 ounces of semi-sweet chocolate, chopped up fine, and 1/2 cup of heavy cream. That’s it! The quality of the chocolate really shines through on these chocolate glazed cupcakes.
Step-by-Step Instructions for Classic Boston Cream Pie Cupcakes
Now for the fun part: assembling your amazing boston cream pie cupcakes! We’re moving in order from the cake to the filling and finally that glossy top coat. The key here is patience, especially during the chilling stages, but the steps themselves are straightforward when you take them one at a time.
Baking the Vanilla Cupcakes
First things first, crank that oven up to 350°F (175°C) and get those paper liners ready in your muffin tin. Remember what I said about creaming? Beat your butter and sugar until it’s pale and fluffy—that’s crucial for texture! Then, mix in the eggs one by one. When you add the dry ingredients (flour mix) and the milk, alternate them, starting and ending with dry. Mix *just* until you don’t see streaks of flour anymore—seriously, stop mixing right there! Fill them about two-thirds full and bake for 18 to 20 minutes until a toothpick comes out clean.
Preparing and Chilling the Pastry Cream
While those bake, whisk your sugar, cornstarch, and salt together in a pan, then slowly add the milk. You need to stir constantly over medium heat until it gets thick and starts bubbling gently. Cook it for that full minute more, then take it off the heat. This next part is important: temper your yolks! Whisk about half a cup of the hot milk mixture into your separated egg yolks really slowly, then pour that yolk blend back into the saucepan. Cook it again until it boils for a minute. Stir in your butter and vanilla right off the heat. Pop plastic wrap directly onto the surface of that cream and chill it in the fridge for a minimum of two hours. It has to be firm!
Filling Your Homemade Cream-Filled Cupcakes
Once the cakes are totally cool and your pastry cream is chilled and ready, it’s time to fill! Use a small knife to carve out a plug or cone right from the center of each cupcake. Transfer that cold pastry cream into a piping bag—a zip-top bag with the corner snipped works just fine if you don’t have a fancy tip. Pipe that creamy goodness right into the hole you made. You can pop the little cake piece you cut out back on top, or just leave the cream slightly visible!
Making and Applying the Chocolate Glazed Cupcakes Topping
For the glorious chocolate finish, put your chopped chocolate in a bowl. Heat your heavy cream until it’s just simmering at the edges—don’t let it go wild! Pour that hot cream right over the chocolate and just let it sit there, totally undisturbed, for five whole minutes. After waiting, whisk gently until it’s glossy and smooth. Let it sit for maybe five more minutes. You want it thick enough to coat the top nicely without immediately sliding down the sides like water.
Tips for Success with Your Copycat Boston Cream Pie Dessert
I know these steps seem detailed, but sticking to a few key things will ensure this turns out exactly like the professional copycat Boston Cream Pie dessert you’re dreaming of. My biggest piece of advice comes straight from the recipe notes: please use whole milk for the pastry cream. Switching to anything lower fat just won’t give you that rich, authentic texture we are aiming for!
Also, remember that ganache consistency tip? It’s huge. If you pour it on when it’s too hot, it’s wasted. Let it cool just enough that when you dip a spoon in, it coats the back nicely before you drizzle it over the filled cupcakes. If you have questions about sharing your results online or how we handle information from comments, you can always check out our Privacy Policy page. We keep things secure so you can focus on baking!
Storage and Reheating Instructions for Custard Filled Mini Cakes
Because we made these incredible custard filled mini cakes with real milk and egg yolks, we have to treat them right in the fridge! Trust me, you can make parts ahead, but assembly and storage have rules. Since the pastry cream is dairy-based, you absolutely must keep these refrigerated. Don’t leave them sitting out at room temperature for more than two hours, especially if you have a party going on!
I find these are best eaten within two days. The cake stays moist, and the filling stays perfectly set. If you want to store the components separately—which I sometimes do when I’m prepping for a big weekend—that works great. You can keep the cooled vanilla cupcakes in an airtight container on the counter for a day. The pastry cream needs to be covered tightly with plastic wrap (touching the surface!) in the fridge for up to three days.
When you’re ready to assemble, just fill the cakes and top them with the ganache. Do I reheat these? Nope! These are designed to be eaten cool or at a soft room temperature. Reheating involves cooking that beautiful custard filling again, and we definitely don’t want that. Just pull them out of the fridge about 30 minutes before serving so the cake softens up just a little. Honestly, they are perfect straight from that cold environment!
Frequently Asked Questions About Boston Cream Pie Cupcakes
Can I use instant pudding instead of pastry cream in these cupcakes?
You absolutely can, if you need a time-saver! I mentioned in the notes that if you’re really against making the stovetop custard, you can absolutely use a high-quality vanilla pudding mix prepared according to the package directions. Just know that the texture won’t be quite as rich or silky smooth as the genuine pastry cream. If you go this route, make sure that pudding is well-chilled before you try to fill your homemade cream-filled cupcakes!
How far in advance can I make these Individual Boston Cream Pie treats?
That’s a great question for planning ahead! Since these are filled with fresh custard, you want to assemble them close to serving time. I can totally bake the vanilla cake bases one day ahead of time and keep them sealed tight on the counter. The pastry cream needs chilling anyway, so you can make that the day before, too. But I’d only fill and top them within 4-5 hours of serving them at your party to keep that ganache looking perfect!
What makes these the Best Cupcake Recipes for parties?
What I love about these boston cream pie cupcakes for a party setting is the portion control! Everyone gets their own perfect little cake. You get the structure and richness of a full pie, but presented beautifully. These are among the best cupcake recipes because they look impressive—that shiny chocolate top makes people think you spent ages in a professional kitchen, but you and I know the secret is just a quick simmer and a gentle pour!
If you run into any trouble while tweaking this recipe or just want to let me know how amazing they turned out, feel free to reach out to me directly via the Contact Page. Happy baking!
Nutritional Estimate for These Chocolate Glazed Cupcakes
Now, baking for joy is my main goal, but sometimes we want a rough idea of what we’re eating, right? Please remember, since we’re making everything fresh here, this is just an estimate based on the recipe proportions I’ve detailed. These amazing chocolate glazed cupcakes deliver big flavor!
Per cupcake, you’re looking at approximately 380 Calories, 50g of Carbohydrates, 35g of Sugar, 19g of Fat, and 5g of Protein. You can see all the specifics from my breakdown here if you want to dive deeper into where those numbers come from. Enjoy every bite—you earned it!
Share Your Experience Making These Boston Cream Pie Cupcakes
I truly hope you feel that surge of confidence after conquering these layers! You’ve turned simple ingredients into something truly special, something that tastes exactly like a classic bakery treat. Now, don’t stop here—this community thrives on sharing what works and what made your treats unique.
Take a moment to rate this recipe below; it helps me know what’s resonating with you all, and honestly, it shows me that the time spent demystifying this process was worth it! If you snapped a picture of your finished boston cream pie cupcakes, I would absolutely love to see them! Tag me or drop a photo link in the comments.
We want to build a space where everyone feels capable, and your feedback is essential to that. If you had a small tweak that worked magic for you, share it! Just remember to keep things positive and helpful when sharing your success stories or ideas, as we all agree to stick to our established terms, which you can review here for context on community sharing.
PrintClassic Boston Cream Pie Cupcakes with Homemade Pastry Cream and Chocolate Ganache
Make these Boston Cream Pie Cupcakes for a perfect bite-sized version of the classic dessert. You get moist vanilla cake, smooth pastry cream filling, and a rich chocolate glaze topping.
- Prep Time: 45 min
- Cook Time: 20 min
- Total Time: 165 min
- Yield: 12 servings 1x
- Category: Dessert
- Method: Baking and Chilling
- Cuisine: American
- Diet: Vegetarian
Ingredients
- 1 1/2 cups all-purpose flour
- 1 1/2 teaspoons baking powder
- 1/2 teaspoon salt
- 1/2 cup unsalted butter, softened
- 1 cup granulated sugar
- 2 large eggs
- 1 teaspoon vanilla extract
- 1/2 cup milk
- 1 cup granulated sugar (for pastry cream)
- 1/4 cup cornstarch
- 1/4 teaspoon salt (for pastry cream)
- 2 large egg yolks
- 1 1/2 cups whole milk (for pastry cream)
- 2 tablespoons unsalted butter (for pastry cream)
- 1 teaspoon vanilla extract (for pastry cream)
- 4 ounces semi-sweet chocolate, chopped (for ganache)
- 1/2 cup heavy cream (for ganache)
Instructions
- Prepare the Vanilla Cupcakes: Preheat your oven to 350°F (175°C). Line a standard 12-cup muffin tin with paper liners.
- In a medium bowl, whisk together the flour, baking powder, and salt. Set aside.
- In a large bowl, cream the softened butter and 1 cup of sugar together until light and fluffy. Beat in the eggs one at a time, then mix in the vanilla extract.
- Gradually add the dry ingredients to the wet ingredients, alternating with the milk, beginning and ending with the dry mixture. Mix until just combined; do not overmix.
- Divide the batter evenly among the 12 cupcake liners, filling each about two-thirds full.
- Bake for 18 to 20 minutes, or until a toothpick inserted into the center comes out clean. Let the cupcakes cool in the pan for 5 minutes before transferring them to a wire rack to cool completely.
- Make the Pastry Cream Filling: In a medium saucepan, whisk together 1 cup sugar, cornstarch, and 1/4 teaspoon salt. Gradually whisk in the 1 1/2 cups of whole milk until smooth.
- Cook the mixture over medium heat, stirring constantly, until it thickens significantly and begins to bubble. Cook for 1 minute more, still stirring.
- Remove the pan from the heat. In a small bowl, whisk the 2 egg yolks. Temper the yolks by slowly whisking about 1/2 cup of the hot milk mixture into the yolks.
- Pour the tempered yolk mixture back into the saucepan with the remaining milk mixture. Return to medium heat and cook, stirring constantly, until the custard thickens again and boils for 1 minute.
- Remove from heat. Stir in the 2 tablespoons of butter and 1 teaspoon of vanilla extract until smooth.
- Transfer the pastry cream to a clean bowl. Press plastic wrap directly onto the surface of the cream to prevent a skin from forming. Chill in the refrigerator for at least 2 hours, or until completely cold and firm.
- Fill the Cupcakes: Once the cupcakes are cool, use a small knife or a cupcake corer to remove a small cone or plug from the center of each cupcake.
- Transfer the chilled pastry cream to a piping bag fitted with a round tip (or use a zip-top bag with a corner snipped off). Fill the hollowed center of each cupcake with the pastry cream. Replace the cake piece you removed, if desired.
- Prepare the Chocolate Ganache: Place the chopped chocolate in a heatproof bowl.
- Heat the heavy cream in a small saucepan until it just begins to simmer around the edges. Do not let it boil rapidly.
- Pour the hot cream over the chopped chocolate. Let it sit undisturbed for 5 minutes.
- Whisk the mixture gently until the chocolate is completely melted and the ganache is smooth and glossy. Let the ganache cool slightly until it thickens enough to coat the top of the cupcakes without immediately running off.
- Top the Cupcakes: Spoon or drizzle the chocolate ganache over the filled cupcakes. Allow the ganache to set before serving.
Notes
- For the best results with the pastry cream, use whole milk for a richer texture.
- If you want a faster filling, you can substitute the homemade pastry cream with a high-quality vanilla pudding mix prepared according to package directions, but chill it well first.
- Make the ganache slightly warm when pouring; if it cools too much, it will be too thick to spread evenly.
Nutrition
- Serving Size: 1 cupcake
- Calories: 380
- Sugar: 35g
- Sodium: 180mg
- Fat: 19g
- Saturated Fat: 11g
- Unsaturated Fat: 8g
- Trans Fat: 0.5g
- Carbohydrates: 50g
- Fiber: 1g
- Protein: 5g
- Cholesterol: 90mg