
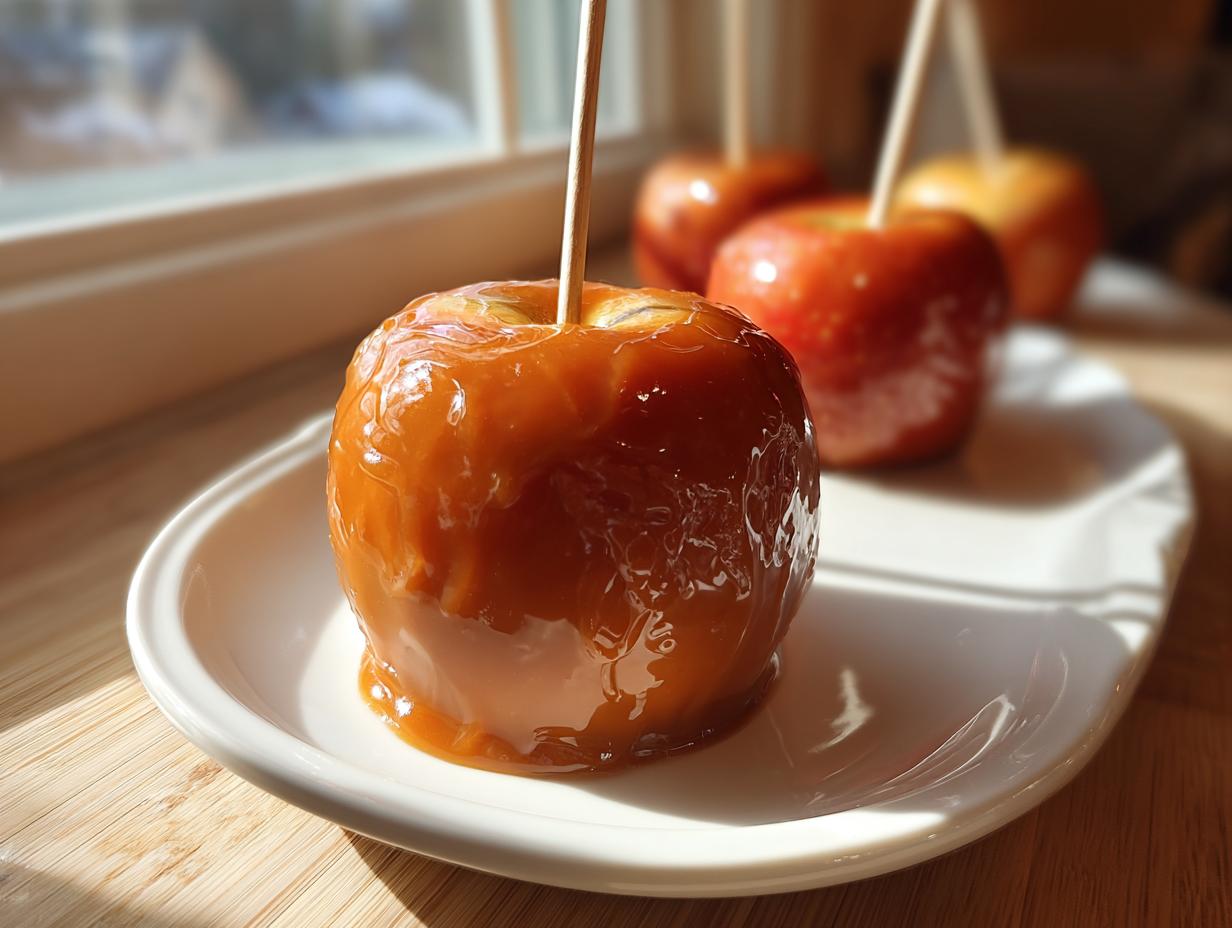
Oh, those first crisp days of fall—they always make me crave something sticky, sweet, and perfectly messy! If you’ve ever chased the dream of making perfect homemade caramel apples only to end up with a puddle of goo, trust me, I’ve been there. For the longest time, I thought a truly great caramel coating was some kind of culinary magic reserved for fairs. I remember one disastrous batch that required an entire roll of paper towels just for cleanup!
But I learned the secrets! This recipe is my absolute foolproof method for achieving that chewy, rich caramel that actually sticks—the kind that never slides down the apple. Mastering this recipe was a huge confidence boost for me back when I was just starting out in the kitchen. If you’re curious about my overall philosophy on demystifying cooking, you can always read more on my About Page. Forget the worry; get ready for the best autumn treat you’ve ever made.
- Why This Is the Best Caramel Apple Recipe: Chewy Caramel That Sticks
- Ingredients for Foolproof Homemade Caramel Apples
- The Caramel Apple Dipping Guide: Step-by-Step Instructions
- Essential Caramel Apple Tips and Tricks for Success
- Easy Caramel Apple Recipe Variations: Slices and Chocolate Drizzle Caramel Apples
- Storage and Serving Suggestions for Your Caramel Apples
- Understanding the Science Behind the Caramel Apple Coating
- Frequently Asked Questions About Making Caramel Apples
- Time, Yield, and Nutritional Snapshot for Your Caramel Apples
Why This Is the Best Caramel Apple Recipe: Chewy Caramel That Sticks
What’s the difference between this batch and that runny disaster from last year? It all comes down to the science, honestly, but I’ll explain it simply! This is the best caramel apple recipe because we aren’t guessing. We focus on the two big things: drying the apples out completely and hitting that sweet spot temperature for the caramel. If you follow these steps, you get that rich, chewy texture without needing an endless loop of dipping and waiting for that dreaded no slide caramel apple coating. For more on achieving that perfect foolproof texture, check out this great guide on foolproof chewy caramel.
Quick Look at Making Caramel Apples
Here’s the quick version so you know where we are headed. First, we prep the apples so they are bone dry. Next, we melt down the caramels slowly until they are perfectly smooth. Then, we dip quickly while everything is warm. Finally, we let them cool down completely until they are firm and ready to eat. See? Totally approachable!
Ingredients for Foolproof Homemade Caramel Apples
If you want successful homemade caramel apples, the starting lineup matters a lot! You need apples that hold their shape and don’t get mushy when they meet warm caramel. That means reaching for crisp varieties like Granny Smith or Honeycrisp. Get your sticks ready, because we are about to make the best coating ever!
Essential Components for the Caramel Coating
For the caramel itself, keep it simple but effective. You’ll need about 10 unwrapped soft caramels—and trust me, unwrapped saves you so much peeling time! We thin that richness out with just 2 tablespoons of milk or heavy cream so it flows nicely when dipping. Don’t skimp on the quality of the caramels here; it really affects the final chew!
Gourmet Caramel Apples Topping Ideas
Once you have your smooth coating, this is where you get to play dress-up! We keep the base recipe simple, but you can totally level up. Have some chopped nuts ready, or maybe some fun sprinkles if you’re making these for the kids. Melted chocolate chips are always a winner for a fancy drizzle later on. It’s all about making them yours!
The Caramel Apple Dipping Guide: Step-by-Step Instructions
Alright, deep breaths! This is the fun part, but we have to move fast once the caramel is ready. Remember, success with these caramel apples hinges on making sure the coating sets up perfectly chewy and doesn’t slide off when someone tries to take a bite. Pay close attention to these small steps; they make a huge difference!
Preparing Apples: The Key to No Slide Caramel Apple Coating
Step one is all about preparation, and it’s non-negotiable! You have to wash those apples really well to get rid of any natural wax the store might have put on them. Then, pull those stems right out and shove your stick deep into the center. Now for the major expert tip: moisture is the absolute enemy! You need to wipe every single apple until it’s completely, totally dry—I mean bone dry. If there’s even a hint of dampness, you’ve guaranteed yourself an issue with no slide caramel apple coating later on. Don’t skip this!
Making the Perfect Chewy Caramel Apples Tutorial
Next, we make the magic sauce. Combine your caramels and milk in a saucepan over medium-low heat. Keep stirring constantly! Seriously, don’t walk away; burnt caramel smells awful. You are aiming for that perfect soft-ball stage, which is 245°F on a candy thermometer. Hitting that temperature is what gives you the chewy caramel apples tutorial results we want. If you don’t have a thermometer, don’t panic! Just cook it until it thickens up nicely and starts pulling away from the bottom of the pan when you move your spoon through it. Pull it off the heat right then.
Dipping and Setting Your Caramel Apples
Once it’s off the heat, you have to work fast because that caramel hardens up quickly! Tilt the pan slightly so you have a nice pool of caramel rolling around one side. Dip the apple in and give it a quick spin to coat it evenly, letting the extra drip back in. This is when you immediately roll it in your toppings if you are using any. Then, place those gorgeous apples on your prepared sheet. They need at least an hour to cool totally undisturbed at room temperature. If you were making something like a dip, the process is different, but for these apples, setting time is everything! You can look up how to make easy whipped ricotta dip later for a totally different kind of treat.
Essential Caramel Apple Tips and Tricks for Success
Making a perfect caramel apple batch relies on knowing how to troubleshoot little hiccups along the way. These caramel apple tips and tricks are what separate the good batches from the truly great ones, and they are learned through trial and error, believe me!
If your caramel starts getting too thick while you’re still dipping, don’t panic! Just pop the pan back over the absolute lowest heat setting for maybe 15 or 20 seconds, just enough to loosen it up again. Remember that temperature goal we talked about? Staying close to that 245°F mark is crucial for that soft-ball chewiness. If you forgot to dry your apples, the caramel will slide right off, so make sure you are using a completely dry surface, like the advice you can find over at Adventures of a DIY Mom suggests.
One final thing: don’t rush the cooling! Letting them set naturally at room temperature ensures the caramel stays chewy, not rock-hard. That patience pays off!
Easy Caramel Apple Recipe Variations: Slices and Chocolate Drizzle Caramel Apples
While nothing beats the classic look of a whole apple on a stick, sometimes you need something a little less messy, especially if you’re serving a crowd or worried about little hands!
That’s where the caramel apple slices recipe comes in handy. My favorite way to tackle this is actually to dip the slice *after* you’ve cut the apple and inserted the stick, but you have to move really fast then! You can find excellent instructions on how to approach those caramel apple slices from Chop Notch if you want to try that route.
If you stick to the whole apple, you can easily upgrade to chocolate drizzle caramel apples. Once the initial caramel layer is set, just melt down some good quality semi-sweet chocolate chips—or grab the recipe for my vanilla buttercream frosting as a base if you want to make white chocolate!—and drizzle it crisscross style over the top. A quick trip to Striped Spatula might give you some drizzling inspiration!
Storage and Serving Suggestions for Your Caramel Apples
Okay, now that you’ve made these beautiful, sticky masterpieces, you need to treat them right! The biggest mistake people make with fall apple desserts is sticking them straight into the fridge. Don’t do it! The cold air makes that beautiful chewy caramel turn hard as a rock. You want to keep them wrapped loosely in plastic wrap at a cool room temperature for up to a week. That keeps the texture just right.
For serving at your next Halloween party treats gathering, keeping them on the sticks is the easiest, most fun way to go. If you do want to serve them plated, let them come to room temperature first so everyone gets that perfect gooey bite. If you’re looking for other great handheld holiday sweets, check out my ideas for easy holiday candy apples!
Understanding the Science Behind the Caramel Apple Coating
I know, I know—talking science when we should be eating candy seems a little serious! But understanding just *why* this works makes you a more confident cook, which is what Kitchenican is all about, right?
The secret to that chewy texture that actually sticks is that magic number: 245°F. When we hit that temperature, we’ve cooked off just the right amount of water from the sugar and milk mixture. This concentrates the sugar enough so that when it cools, it forms large, stable crystals that give you that wonderful chew. If you pull it off the heat too early—say, around 235°F—you have too much water left, and you end up with a soft, runny mess that runs right off the apple!
This precision at the right temperature ensures that the caramel hardens up beautifully as it cools, giving you that satisfying bite, rather than just a sticky, sugary slide. It’s just a little bit of kitchen magic, easily achieved!
Frequently Asked Questions About Making Caramel Apples
I always get the same questions after people try this recipe for the first time because they want to make sure they nailed that perfect texture! Here are the biggest things people ask me about keeping their homemade caramel apples looking bakery-perfect.
Why does my caramel always slide right off the apple?
Oh, this is the number one question! The answer is almost always moisture lingering on the apple’s skin. Whether it’s water from washing or just the natural wax coating from the grocery store, if the apple isn’t bone dry, the caramel has nothing to grip onto. You have to wipe them down until they feel slightly tacky—that’s your key to a great bond! If you need something slightly different to dip, I have a great, simple creamy fruit dip recipe, but remember, apples need to be dry for caramel!
Can I use different types of apples besides Granny Smith?
You absolutely can! Granny Smith is my go-to because it’s tart and holds up really well, but Honeycrisp works wonderfully too. The main thing to look for is a crisp apple with low water content that won’t instantly get mushy when dipped in warm caramel. Avoid soft apples altogether, or you’ll end up with a strange texture!
How do I handle dipping if I don’t have parchment paper?
Parchment paper is definitely the easiest way to let them set, but if you’re stuck, don’t fret. You can lightly grease a cutting board or a baking sheet with a tiny bit of softened butter or shortening. Just make sure you use very little, or the caramel will slide around on the grease instead of setting on the apple. For more tips on avoiding adhesion issues, check out this great advice from Peter’s Food Adventures on making caramel apples.
Can I store my finished caramel apples in the fridge?
I actually advise against it! Refrigeration makes that beautiful, chewy caramel turn hard and sometimes brittle. For the best eating experience, store your finished apples loosely wrapped at a cool room temperature. They should be good for about a week like that.
Time, Yield, and Nutritional Snapshot for Your Caramel Apples
I like to keep things totally transparent around here, especially when we are dealing with homemade candy! It’s good to know exactly how much time you should block out for these treats and what you can generally expect nutritionally if you’re planning ahead for a party or just watching your intake.
Recipe Timing and Yield
Even though we are making something that tastes gourmet, the actual active time is really short. See? It’s all about setting yourself up for success!
- Prep Time: 15 minutes
- Cook Time: 10 minutes
- Total Time: 1 hour 25 minutes (This includes that mandatory cooling time!)
- Yield: 4 servings
Nutritional Disclaimer
Just a quick note on the numbers you see for calories and sugar—these are estimates based on the standard ingredients listed in the recipe. Since we all use slightly different brands of caramels or may add extra toppings, the exact figures will vary based on your additions. Think of this as a general guideline, not a precise calculation!
PrintFoolproof Homemade Caramel Apples: The Chewy, No-Slide Recipe

Make the best homemade caramel apples with this easy recipe. You will learn the secrets to a chewy caramel coating that sticks perfectly every time, ideal for fall parties or Halloween treats.
- Prep Time: 15 min
- Cook Time: 10 min
- Total Time: 1 hour 25 min
- Yield: 4 servings 1x
- Category: Dessert
- Method: Stovetop Cooking
- Cuisine: American
- Diet: Vegetarian
Ingredients
- 6 medium crisp apples (like Granny Smith or Honeycrisp)
- 10 unwrapped soft caramels
- 2 tablespoons milk or heavy cream
- 4 wooden or candy apple sticks
- Optional: 1 cup chopped nuts, chocolate chips, or sprinkles for topping
Instructions
- Prepare the apples: Wash the apples well. Remove the stems and insert the wooden sticks firmly into the core of each apple. Wipe the apples completely dry with a paper towel; moisture prevents the caramel from sticking.
- Prepare for dipping: Line a baking sheet with parchment paper or a silicone mat. If using toppings, spread them out on separate plates now.
- Make the caramel: In a medium saucepan over medium-low heat, combine the caramels and milk. Stir constantly until the caramels are completely melted and the mixture is smooth. Do not let it boil rapidly.
- Check the temperature (for best results): If you have a candy thermometer, cook the mixture, stirring gently, until it reaches 245°F (soft-ball stage). This step helps create a chewy, no-slide coating. Remove from heat immediately once the temperature is reached.
- Dip the apples: Working quickly while the caramel is warm, tilt the pan slightly and dip each apple into the caramel. Rotate the apple to coat it evenly, allowing excess caramel to drip off back into the pan.
- Add toppings (optional): Immediately roll the coated apple in your chosen toppings or drizzle with melted chocolate.
- Set the caramel: Place the coated apples onto the prepared baking sheet. Let them cool and set completely at room temperature for at least 1 hour before serving or storing.
Notes
- For a no-slide coating, ensure your apples are completely dry before dipping. Any water or wax residue will cause the caramel to slide off as it cools.
- If you do not have a candy thermometer, cook the caramel until it thickens significantly and pulls away from the sides of the pan when stirred.
- If the caramel becomes too stiff while dipping, return the pan to very low heat for a few seconds to loosen it.
- Store finished caramel apples loosely wrapped in plastic wrap at cool room temperature for up to one week. Avoid refrigeration, as this can make the caramel hard.
Nutrition
- Serving Size: 1 apple
- Calories: 350
- Sugar: 45g
- Sodium: 120mg
- Fat: 18g
- Saturated Fat: 10g
- Unsaturated Fat: 8g
- Trans Fat: 0g
- Carbohydrates: 48g
- Fiber: 2g
- Protein: 3g
- Cholesterol: 35mg