
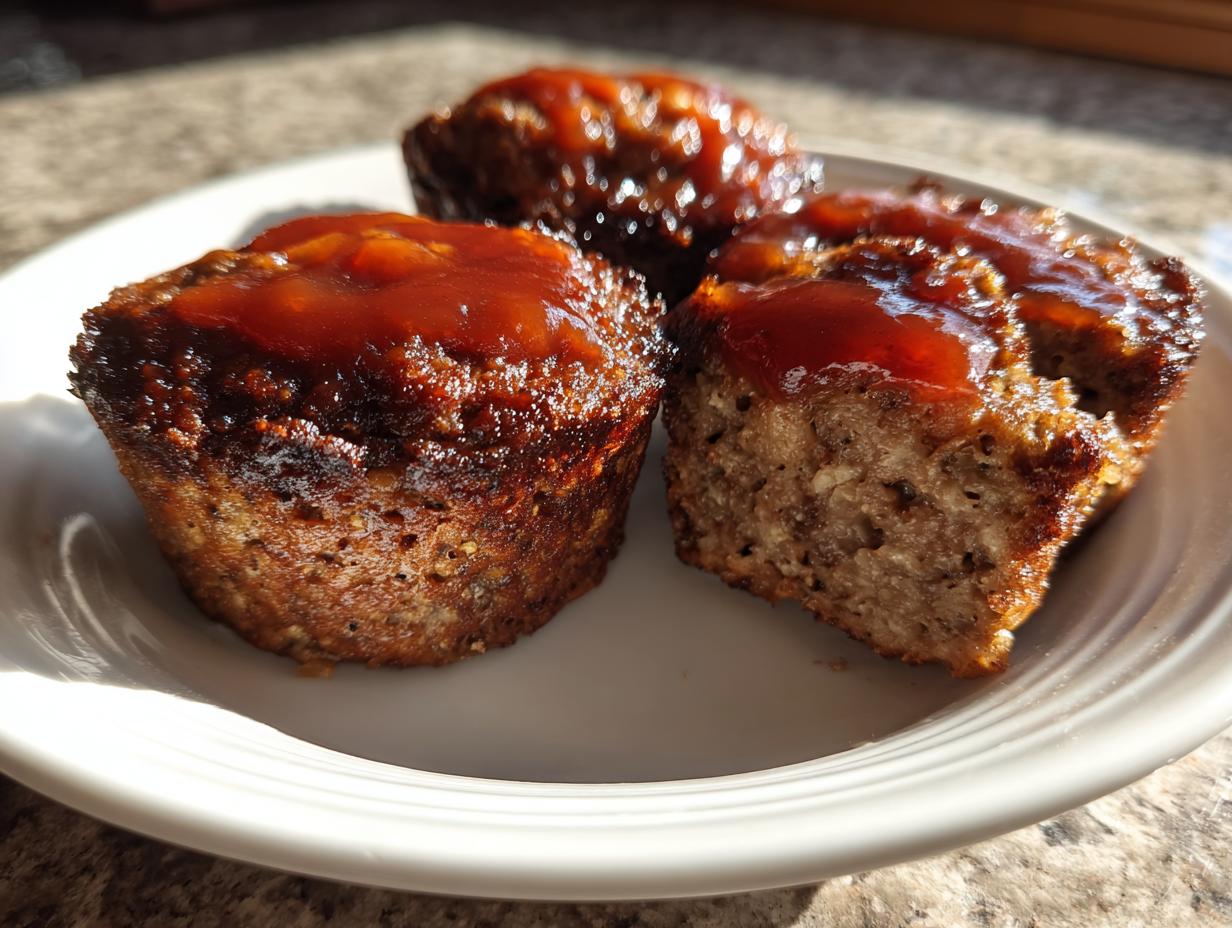
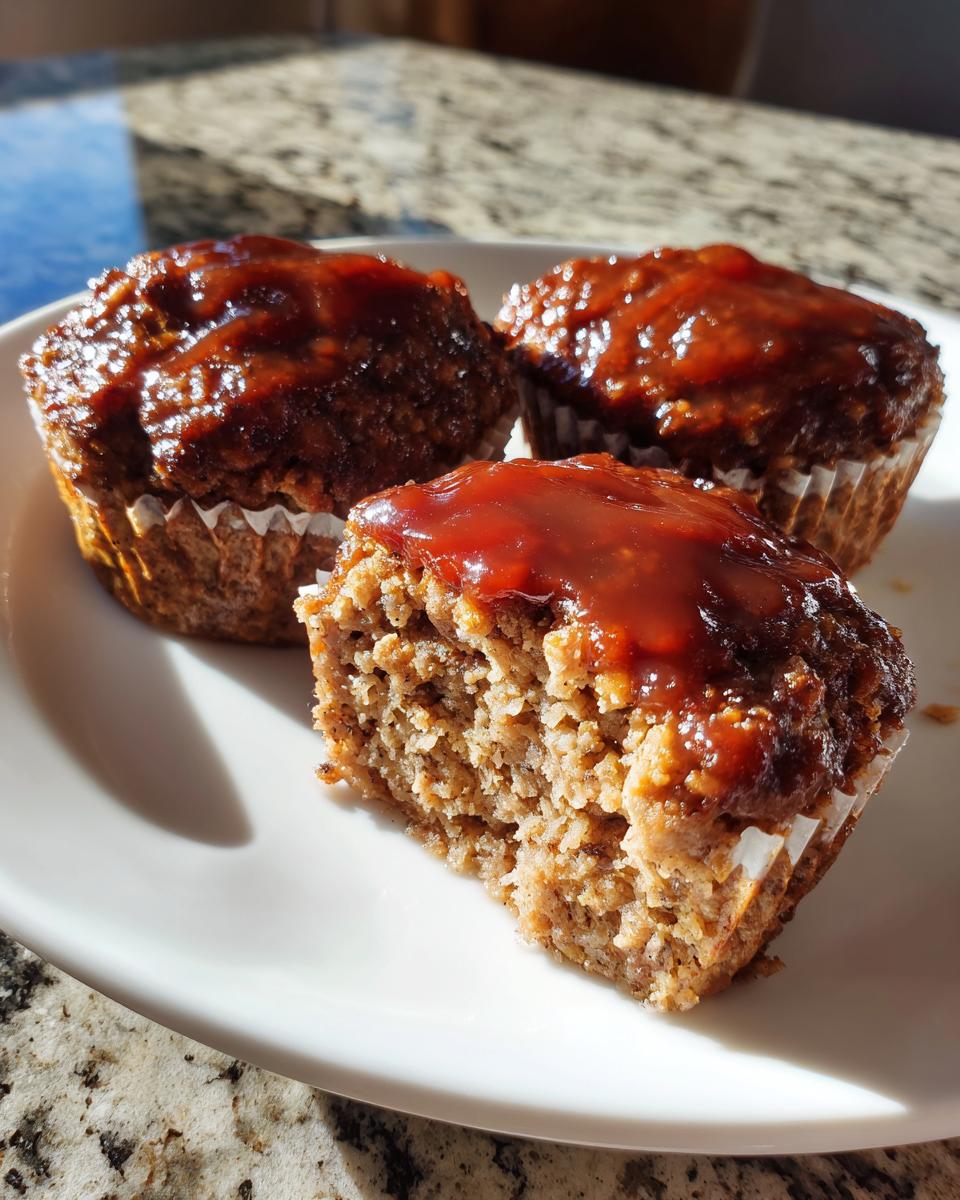
Oh, the weeknight scramble! You know the feeling—it’s 5:30 PM, everyone is hungry, and the thought of tackling a huge, messy loaf that takes an hour to bake just feels impossible. Trust me; I’ve been there more times than I want to admit when I was first learning to cook, which is why I started Kitchenican in the first place! That’s why I had to share this absolute game-changer: the **mini meatloaf**. We’re talking about classic comfort food flavor, but baked right into perfectly portioned little cups. This isn’t some fancy, complicated undertaking; this is an **easy meatloaf recipe** designed for real life. When you master this, you’ll realize that building confidence in the kitchen really just comes down to finding the right format. Get ready to see how simple satisfying dinners can be!
- Why This Mini Meatloaf Recipe Is Your New Weeknight Hero
- Gathering What You Need for Mini Meatloaf Muffins
- Step-by-Step Guide to Perfect Mini Meatloaf Cups
- Expert Tips for Making the Best Easy Meatloaf Recipe
- Making Mini Meatloaf Your Go-To for Freezer Friendly Dinners
- Serving Suggestions for Your Comfort Food Recipes
- Frequently Asked Questions About Mini Meatloaf
- Understanding the Nutrition in This Classic Meatloaf Twist
- Share Your Success with This Mini Meatloaf Recipe
Why This Mini Meatloaf Recipe Is Your New Weeknight Hero
When you’re facing down a chaotic evening, you need a recipe that works *for* you, not against you. That’s what these **meatloaf muffins** deliver. They hit all the right notes for anyone looking for reliable, delicious solutions without adding stress to their evening. I promise, these are going to become one of your go-to **quick dinner ideas**!
- They pack all the nostalgia and flavor of your favorite Sunday dinner into a fast package.
- They are incredibly **family friendly meals** because who doesn’t love eating out of a muffin tin?
Speed and Simplicity: Fast Cooking Meatloaf
The single biggest win here is time. Because we separate the meat mixture into 12 small cups instead of forming one big loaf, the heat penetrates super fast. You aren’t sacrificing flavor, you’re just giving it a boost! We’re talking 10 minutes of prep and only 25 minutes in the oven. That means you can have this hearty, comforting dish ready from start to finish in just 35 minutes. It’s the definition of a **quick baked meal**.
Perfect Portions for Portion Controlled Meals
I love seeing how much people enjoy these for meal prep, and that’s because they are naturally **portion controlled meals**. There’s no guesswork, no sawing away at a giant loaf with a dull knife, and no leftovers that might go dry by Wednesday. Everyone gets one beautiful, juicy portion. They’re also great for packing up the next day for lunch—just grab one or two of these **individual meatloaf servings**!
Gathering What You Need for Mini Meatloaf Muffins
Before we jump into the mixing—which, believe me, you’ll want to do with your hands, not a mixer!—let’s talk about ingredients. This is where the confidence really starts building because you don’t need to run to a specialty store. Everything here is rock-solid, dependable pantry fare that cooks up beautifully fast. When I first developed this **easy meatloaf recipe**, I focused on making sure the core items were easy to find so you could make this on a whim.
Remember, we are aiming for flavor and texture, and the ratios here are key to making sure these **mini meatloaf cups** stay moist instead of turning dry and crumbly. Here’s exactly what you need to pull together for a dozen perfect servings.
Essential Ingredients for the Mini Meatloaf Base
This is the core of our savory beef bites! Get your large bowl ready:
- 1.5 lbs ground beef (Please use 80/20. The fat is essential for juicy results!)
- 1 cup breadcrumbs (Panko is great, but regular works just fine too)
- 1/2 cup milk
- 1 large egg, lightly beaten
- 1/4 cup finely chopped onion (make sure it’s chopped small so it melts away nicely during cooking)
- 1 teaspoon salt
- 1/2 teaspoon black pepper
- 1/4 cup ketchup (This goes *in* the mix to give it that classic tang!)
Crafting the Simple Meatloaf with Glaze Topping
The glaze is what really shines once it caramelizes on top. It’s sweet, tangy, and mandatory, in my book! Whisk these together in a separate little bowl so they are ready to go the second the meat is shaped:
- 1/4 cup packed brown sugar (The packed part matters for sweetness!)
- 2 tablespoons apple cider vinegar
- 2 tablespoons ketchup (This is the glaze ketchup, separate from the ketchup mixed in!)
Step-by-Step Guide to Perfect Mini Meatloaf Cups
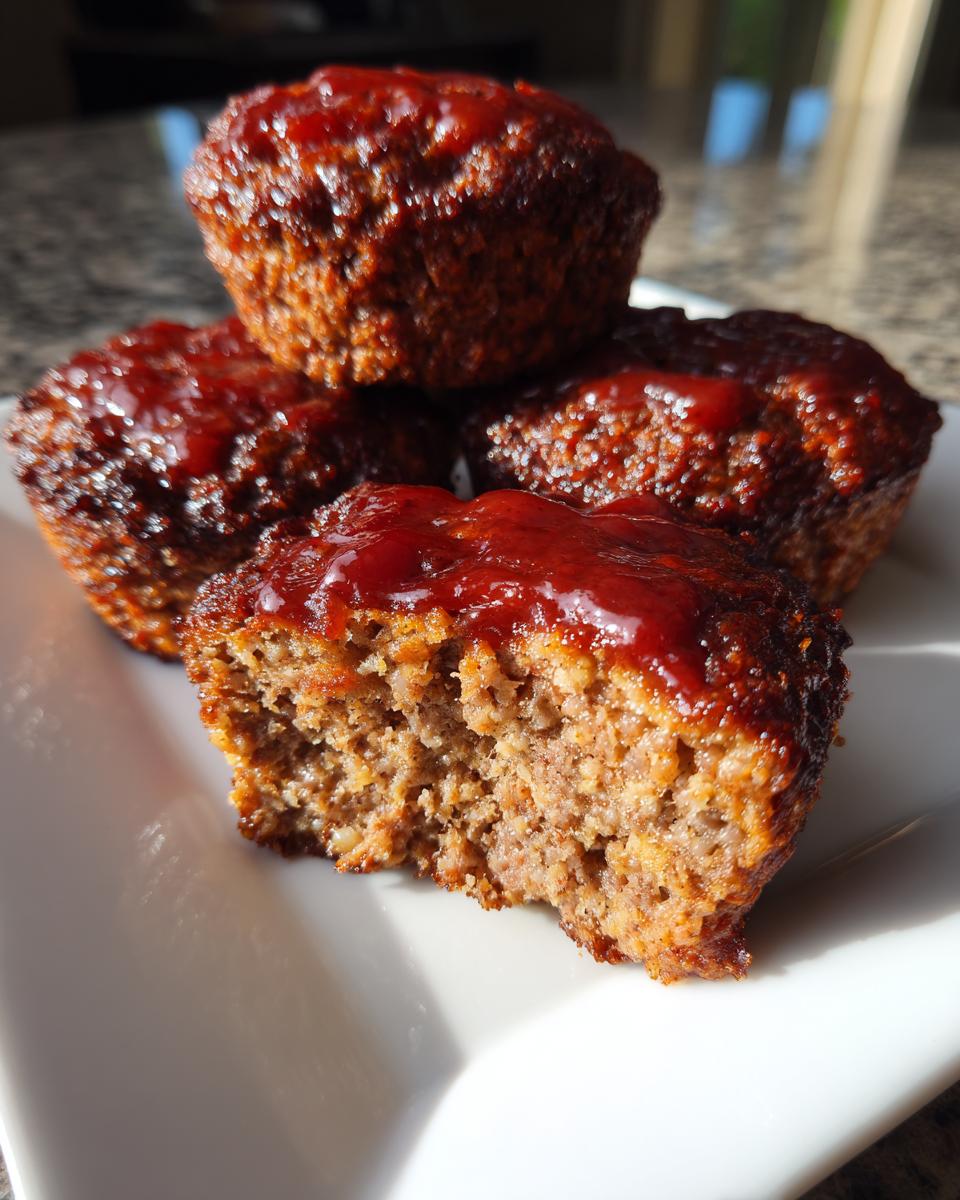
Okay, we have all our components ready—the meat mix waiting patiently and the sweet-and-tangy glaze done. Now it’s time for the fun part where we transform ingredients into those fantastic **mini meatloaf cups**! The key here, and I mean the absolute key for tender meatloaf every time, is being gentle. Overworking the meat is how you turn a classic **comfort food recipe** into shoe leather. We want tender, not tough!
Preparing Your Muffin Tin Recipes Surface
First thing, before you touch the meat: get that oven hot! Preheat to 400 degrees Fahrenheit. Since we are using a standard 12-cup muffin tin, you need to treat it right so these pop out easily later. Don’t skip this step, or you’ll struggle getting those beautiful individual servings out. Lightly grease every single cup. I usually use a spray, but a little bit of solid shortening brushed onto the bottom and sides works miracles too.
Mixing and Forming the Kid Friendly Meatloaf Mixture
Grab your biggest bowl. Dump in all those base ingredients we just talked about: the beef, the breadcrumbs, the milk, the egg, the finely chopped onion, salt, pepper, and that smaller portion of ketchup. Now, put your hands in there. I know, I know, it’s messy, but you need to feel it. Mix everything gently until it’s *just* combined. You should still see some definition in the meat, not a paste. Stop mixing almost as soon as you can’t see dry pockets of breadcrumbs anymore. That’s my biggest pro tip for amazing **kid friendly meatloaf**!
Next, divide the meat evenly among those 12 greased cups. You want 12 servings, so be fair! Gently press the mixture down into the bottom of the cup. Don’t pack it down like you’re preparing for winter storage, but press it enough so it holds its shape and doesn’t crumble when you serve it later. We want them looking neat and uniform.
Baking and Glazing Your Mini Meatloaf
Time for that glaze! Take the mixture you whisked earlier and spoon about one teaspoon right over the top of each shaped meatloaf. It’s going to look a little thin, but trust the process; it will thicken up beautifully as it bakes.
Pop the tin into that 400°F oven for about 20 to 25 minutes. For safety, and because this is vital for authority in the kitchen, always check the internal temperature. You are looking for 160 degrees Fahrenheit. If you don’t have a remote thermometer, you can test one by sticking a knife in the center—the juices should run clear. Once they hit that temp, pull them out. Let the **mini meatloaf** rest right in that hot tin for a quick five minutes. This little break firms them up, making removal much cleaner!
Expert Tips for Making the Best Easy Meatloaf Recipe
Now that you’ve mastered the basic assembly of these wonderful **mini meatloaf cups**, I want to share a couple of things I learned the hard way. When I first started making these, I got overzealous with my mixing bowl. I thought maybe if I just blended it a little longer, it would be *extra* smooth. Big mistake! I ended up with a batch of meat that was so dense and tight, they tasted almost like seasoned hamburger patties, not fluffy **easy meatloaf recipe** goodness. I learned that gentle is powerful here. You’re just trying to bring the ingredients together, not develop gluten in the breadcrumbs!
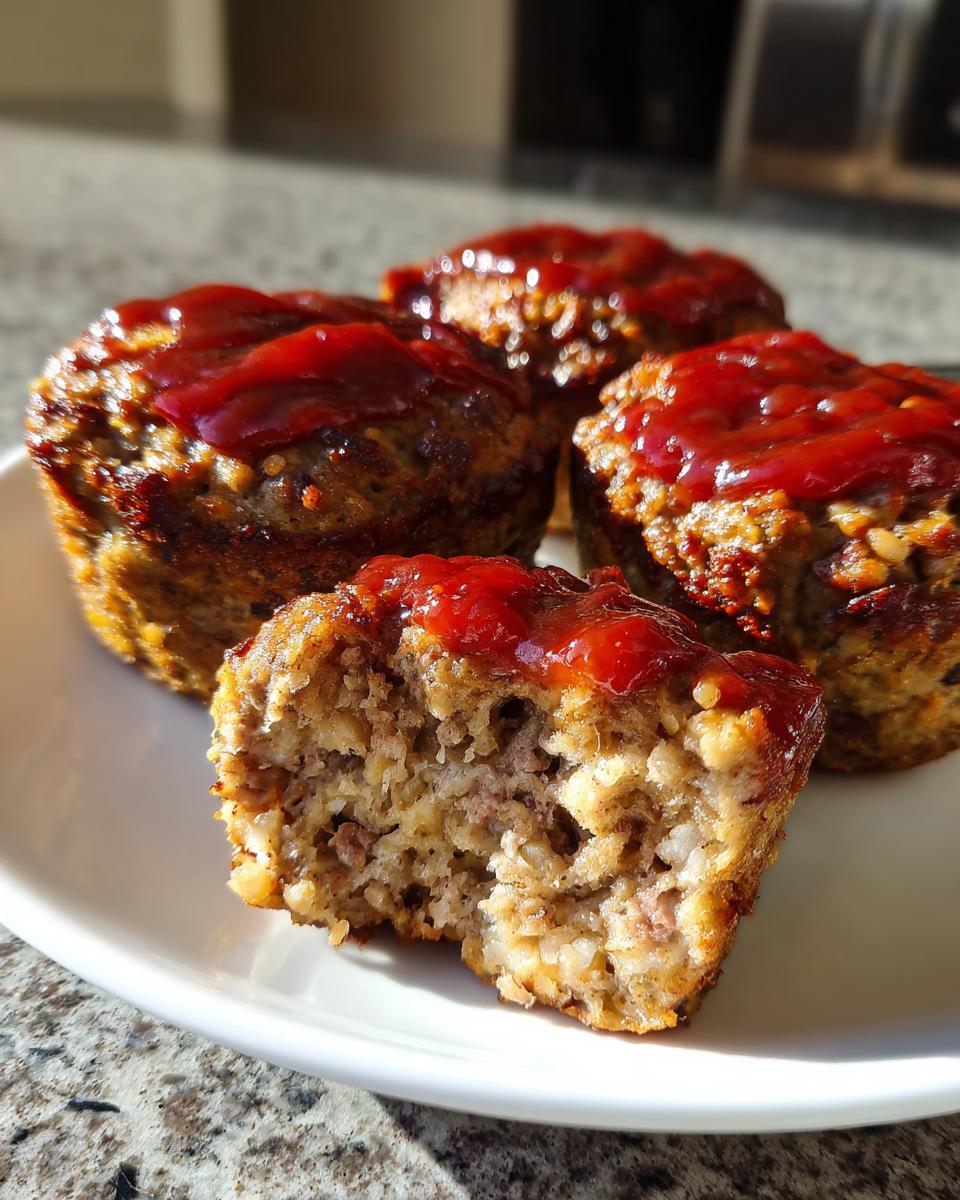
The payoff for sticking to that gentle mixing rule—and these other little tricks—is that you get amazing, perfectly seasoned **savory beef bites** every single time. We want to keep the flavor fresh and fun, so don’t hesitate to play around once you nail the basic technique. You can see how popular these little servings are just by checking out other cooks who love them, like this recipe.
Ingredient Swaps for Flavor Variations
The beauty of a **classic meatloaf twist** is how easily you can adapt it based on what you have or what you’re craving. If you are out of ground beef or just want something lighter, ground turkey works beautifully here. Just be aware that turkey is leaner, so you might want to add an extra drizzle of milk or use 90/10 beef instead of 80/20 if you go that route, just to keep them juicy.
And the glaze! Oh, the glaze can change the whole mood of the meal. The brown sugar and vinegar glaze is my favorite because it’s quick, but feel free to experiment. A good dollop of your favorite tangy BBQ sauce instead of the glaze ingredients works wonders. Or, try whisking together Dijon mustard, a little maple syrup, and some garlic powder. It turns your **mini meatloaf** into something totally different but still incredibly easy.
Using Different Ground Beef Dinners Cuts
I strongly recommend 80/20 ground beef because that little bit of fat melts during the bake time, keeping everything tender. But let’s say you only have 90/10 or even leaner ground chuck for your **ground beef dinners**. That’s fine! You just have to be more mindful of moisture.
If you feel like your meat mixture is looking a little bit dry after mixing, before you even portion it out, add just one extra tablespoon of milk or even a tablespoon of beef broth. That small boost of liquid will compensate for the lower fat content and ensure those **savory beef bites** don’t feel dry when they come out of the oven. It’s all about adjusting for what you have on hand!
Making Mini Meatloaf Your Go-To for Freezer Friendly Dinners
This is where these little guys really shine for me! When I know I have a killer week coming up, I always double the batch. Why? Because planning ahead is the secret to stress-free eating, and these bake up just as beautifully from frozen as they do fresh. Knowing I have a few ready-to-go **mini meatloaf** portions tucked away makes me feel like I’ve won the whole week.
If you are using these for **freezer friendly dinners**, the cooling step is non-negotiable. Do not try to pack them up warm, or you’ll have a soggy mess. Let the baked **meatloaf muffins** cool completely on a wire rack. Once they are cold—and I mean truly room temperature cold—you can start packing them up for future meals. It’s so easy!
Here’s my tried-and-true method for making sure these individual servings are perfect when you pull them out later. You can find more great freezer ideas over at this other great resource, but this is how I handle them:
- Cool Completely: Seriously, they need to be cold. No shortcuts here!
- Wrap Individually: Take each cooled **mini meatloaf cup** and wrap it tightly in a small piece of plastic wrap or parchment paper. This prevents them from sticking together when you bag them.
- Bag It Up: Place the wrapped portions into a heavy-duty zip-top freezer bag or an airtight freezer container. Try to squeeze out as much air as you can before sealing.
- Label and Freeze: I always write the date and the reheating instructions right on the bag with a permanent marker! They hold up great for about two to three months.
When you need a quick meal, reheating is a breeze. For the best texture, I pull them out of the freezer the day before and let them thaw in the fridge. Then, just pop them into a 350°F oven for about 10 minutes until they are heated through, and you’ve got a perfect, hearty dinner with minimal effort!
Serving Suggestions for Your Comfort Food Recipes
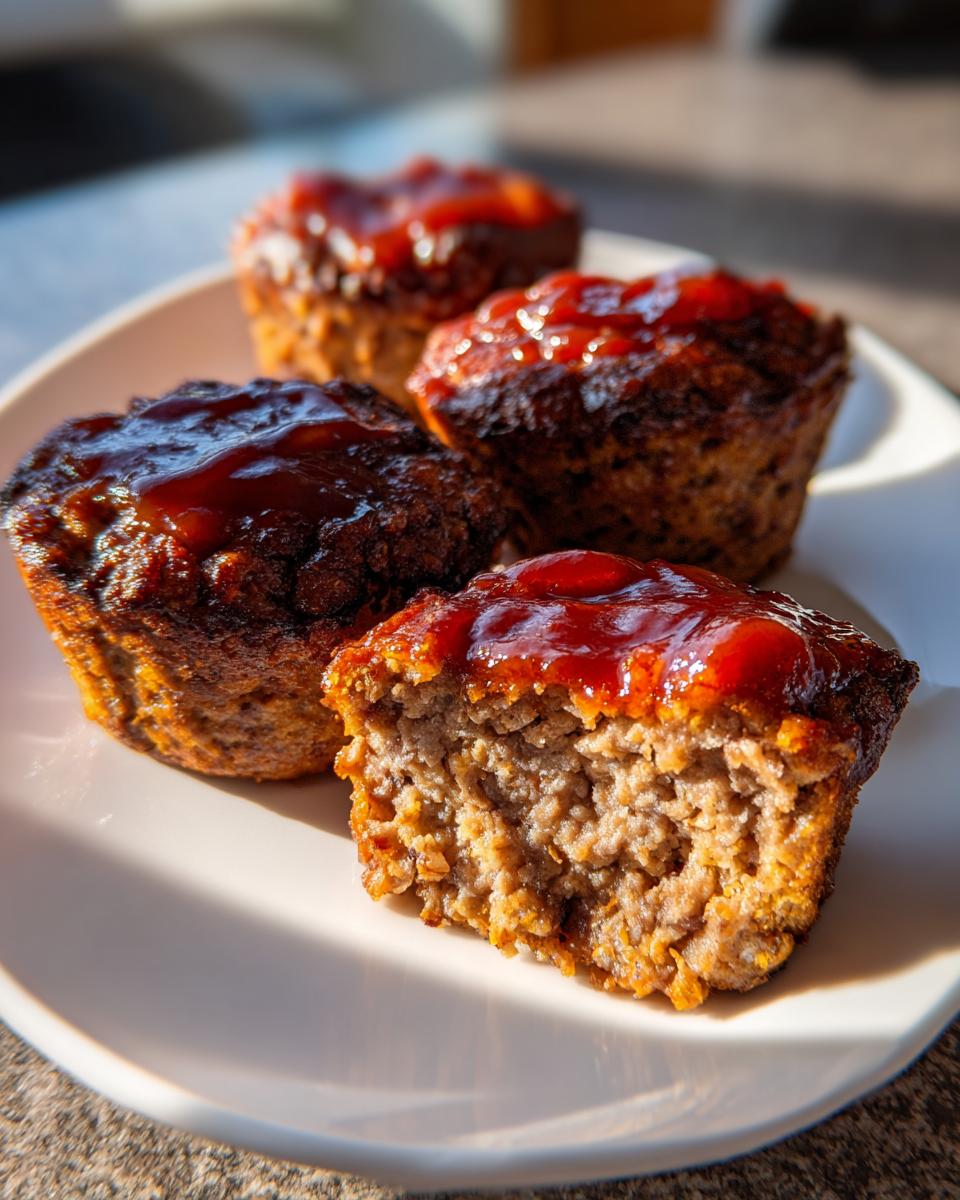
Okay, the star of the show—the perfectly glazed **mini meatloaf**—is cooked, rested, and ready. But let’s be real, comfort food isn’t complete without a couple of easy-going side dishes, right? Since the whole point of making these in muffin tins was to speed things up, we certainly aren’t going to spend another hour roasting vegetables.
These **comfort food recipes** are all about simplicity, which means we lean into sides that are just as hands-off as the main course. I always aim for something creamy and something green to round out the plate. Seriously, having two sides ready in the time it takes your meatloaf to reheat is a big victory!
Here are a few of my favorite fast pairings that go perfectly with that sweet, tangy glaze:
- Instant Fluffy Potatoes: Don’t feel guilty! A box of instant mashed potatoes whipped up with a little extra milk and butter is the absolute classic move for soaking up that extra glaze runoff. It’s fast, and it’s exactly what you want when you crave meatloaf.
- Garlic Butter Green Beans: If you use frozen green beans, you can cook them right in the microwave—seriously! Toss them into a microwave-safe bowl, add a tablespoon of water, a pat of butter, and a little garlic powder, cover, and zap for about 4 minutes. They turn bright green and tender-crisp fast.
- Simple Roasted Carrots: If you have an extra 15 minutes while the meatloaf is baking, toss some baby carrots with olive oil, salt, and pepper and slide them onto a little corner of a baking sheet. They roast beautifully and don’t require much fuss at all.
- Canned Corn Upgrade: Not all canned corn is created equal! Drain a can, but before you reheat it, stir in a teaspoon of honey and a tiny pinch of chili powder. It gives standard canned corn an unexpected freshness that cuts through the richness of the **individual meatloaf servings**.
Remember, these little meatloaf bites are very satisfying on their own, which is why keeping the sides simple helps seal the deal on making this an **easy weeknight recipe**!
Frequently Asked Questions About Mini Meatloaf
I get so many delightful notes after people try this recipe for the first time, and usually, they have just a couple of quick questions before they start! It’s natural when trying a new format for a classic like this. I want to make sure you feel totally prepared to make these the best **mini meatloaf** meal ever. If you try these out and have a lingering thought, don’t hesitate to reach out to me over at the contact page!
How long do I bake the meatloaf muffins if I use turkey?
That’s a great swap if you’re looking to lighten things up or change the flavor profile! When you use ground turkey instead of the 80/20 beef for your **meatloaf muffins**, you have to be a little more cautious because turkey doesn’t have as much inherent fat to keep things tender. In fact, turkey cooks up just a tiny bit faster sometimes. I would still start checking the internal temperature right around the 18-minute mark. You still need to hit that safe 160°F, but since it’s leaner, it can dry out if you leave it in too long with the sugar glaze bubbling away. It’s a trade-off for speed and leanness!
Can I skip the glaze on these individual meatloaf servings?
You absolutely *can* skip the glaze, but oh boy, are you missing the best part! I’m serious, that sweet-and-tangy topping really balances the savory meat and helps lock in moisture on top of your **individual meatloaf servings**. If you absolutely must skip it—maybe you’re serving picky eaters who only like ketchup—I highly recommend you compensate just a little bit. Try mixing half a tablespoon of Worcestershire sauce into the meat mixture itself, or just add a few extra drops of milk to keep that binding liquid content high. Doing that will help keep them from feeling dry once they are baked.
What is the best way to reheat these mini meatloaf cups?
This is the best question for anyone who is prepping lunches! If you need something instantly, the microwave works fine, maybe 45 seconds for one or two cold **mini meatloaf cups**. But if you want that glaze to firm up just right and the meat to feel juicy again, the oven is king. Let the meatloaf thaw on the counter for about 15 minutes if you are reheating from frozen, then pop them onto a small baking sheet at 350°F for about 8 to 10 minutes. They come out tasting almost as good as fresh. It’s the perfect make-ahead strategy for **quick dinner ideas**!
Understanding the Nutrition in This Classic Meatloaf Twist
I know that when we focus on making things easy and quick for our families, we still care deeply about what we’re feeding them. Since these **mini meatloaf** portions are so distinct, I took the time to break down the estimated nutrition right here for you. It helps me keep track, especially when I’m thinking about making these for meal prep!
Keep in mind, because we are using slightly fattier ground beef (80/20 is my standard for flavor), some of those numbers are a bit higher, but that’s where the moisture comes from! Always remember, these figures are estimates based on the exact recipe yield (12 servings). If you alter the meat cut or use twice the brown sugar in the glaze, the numbers, of course, change! This breakdown is just to give you a reliable general idea of what’s in one of these wonderful **savory beef bites**.
- Serving Size: 1 meatloaf cup
- Calories: 240
- Fat: 13g (Watch that Saturated Fat at 5g, which is standard for ground beef)
- Carbohydrates: 12g (Most of this comes from the breadcrumbs and that delicious glaze!)
- Protein: 19g (That’s why these **ground beef dinners** are so satisfying!)
- Sugar: 8g
- Sodium: 350mg
- Cholesterol: 65mg
See? Not bad at all for a satisfying **comfort food recipe** that took less than half an hour to cook! It’s a great balance when you look at the protein content compared to the carbs. It really proves that you don’t need complicated ingredients to get high-quality flavor and decent nutrition in your **easy weeknight recipes**.
Share Your Success with This Mini Meatloaf Recipe
I truly hope that seeing how simple these **mini meatloaf cups** are has given you that little confidence boost I was talking about when I first started Kitchenican! For me, the greatest joy isn’t just eating a great dinner; it’s knowing that *you* created it easily and without any kitchen stress. That’s why I put so much effort into making these instructions clear.
Now that you’ve whipped up your own batch of this fantastic **classic meatloaf twist**, I would absolutely love to hear about it! Did you try the turkey swap? Did you use a smoky BBQ glaze instead of my standard recipe? Don’t keep those delicious results to yourself!
Head down to the comments section below and leave a rating. If you have a picture of your beautiful, perfectly portioned **individual meatloaf servings**, snap a photo and share it on social media! Tag me so I can celebrate your success. Hearing how this **easy meatloaf recipe** fits into your busy life is the reason I share everything I learn in the kitchen. Remember, every time you choose to cook something delicious for yourself or your family, you are building that confidence. You absolutely can do this!
If you decided to keep a few of these tucked away in the freezer, make sure you check out our official Kitchenican policies page when you get a chance. Now go enjoy your **fast cooking meatloaf**!
PrintEasy Mini Meatloaf Muffins for Quick Dinners
Make these perfectly portioned mini meatloaf cups for a fast, family-friendly dinner. This easy meatloaf recipe cooks quickly in a muffin tin, making it ideal for weeknights or meal prep.
- Prep Time: 10 min
- Cook Time: 25 min
- Total Time: 35 min
- Yield: 12 servings 1x
- Category: Dinner
- Method: Baking
- Cuisine: American
- Diet: Low Fat
Ingredients
- 1.5 lbs ground beef (80/20 recommended)
- 1 cup breadcrumbs (Panko or regular)
- 1/2 cup milk
- 1 large egg
- 1/4 cup finely chopped onion
- 1 teaspoon salt
- 1/2 teaspoon black pepper
- 1/4 cup ketchup (for the mix)
- 1/4 cup packed brown sugar (for the glaze)
- 2 tablespoons apple cider vinegar
- 2 tablespoons ketchup (for the glaze)
Instructions
- Preheat your oven to 400 degrees Fahrenheit. Lightly grease a standard 12-cup muffin tin.
- In a large bowl, combine the ground beef, breadcrumbs, milk, egg, chopped onion, salt, pepper, and 1/4 cup of ketchup. Mix gently with your hands until just combined. Do not overmix.
- Divide the meat mixture evenly among the 12 muffin cups. Gently press the mixture down to form compact mini meatloaves.
- In a small bowl, whisk together the brown sugar, apple cider vinegar, and 2 tablespoons of ketchup to create the glaze.
- Spoon about 1 teaspoon of the glaze over the top of each mini meatloaf.
- Bake for 20 to 25 minutes, or until the internal temperature reaches 160 degrees Fahrenheit and the glaze is set.
- Let the mini meatloaf cups cool in the pan for 5 minutes before carefully removing them. Serve immediately for a quick dinner idea.
Notes
- For freezer friendly dinners, cool the baked mini meatloaves completely, then place them in a freezer-safe bag or container. They reheat well in the microwave or oven.
- If you prefer a different flavor, swap the glaze for a maple-mustard mixture.
- This recipe makes individual meatloaf servings perfect for portion controlled meals.
Nutrition
- Serving Size: 1 meatloaf cup
- Calories: 240
- Sugar: 8
- Sodium: 350
- Fat: 13
- Saturated Fat: 5
- Unsaturated Fat: 8
- Trans Fat: 0.5
- Carbohydrates: 12
- Fiber: 1
- Protein: 19
- Cholesterol: 65