
If you’ve ever looked at a head of broccoli and thought, “Yeah, that’s going to taste like steamed disappointment,” I totally get it. I used to be there! Replacing takeout with real, vibrant home cooking was my whole mission when I started Kitchenican, and honestly, vegetables were my biggest hurdle. But I cracked the code.
This recipe for roasted broccoli is the game-changer. We aren’t aiming for mushy greens here; we are aiming for those perfect, slightly charred, crispy edges you see in restaurants, while keeping the center wonderfully tender. I figured all this out through sheer repetition back when I was trying to prove that simple techniques, not chef diplomas, are what make great food. Trust me, once you master this method, you’ll never look back. This is going to be the staple side dish you turn to for easy weeknight dinners!
- Why This Is the Best Roasted Broccoli Recipe (Tender Inside Crispy Outside Broccoli)
- Ingredients for Garlic Parmesan Roasted Broccoli
- How To Roast Broccoli Perfectly: Step-by-Step Instructions
- Ingredient Notes and Substitutions for Your Roasted Broccoli
- Tips for Success When Making Roasted Broccoli
- Flavor Variations: Beyond Garlic Parmesan Broccoli
- Serving Suggestions for Your Roasted Broccoli
- Storage and Reheating Instructions for Roasted Broccoli
- Frequently Asked Questions About Roasted Broccoli
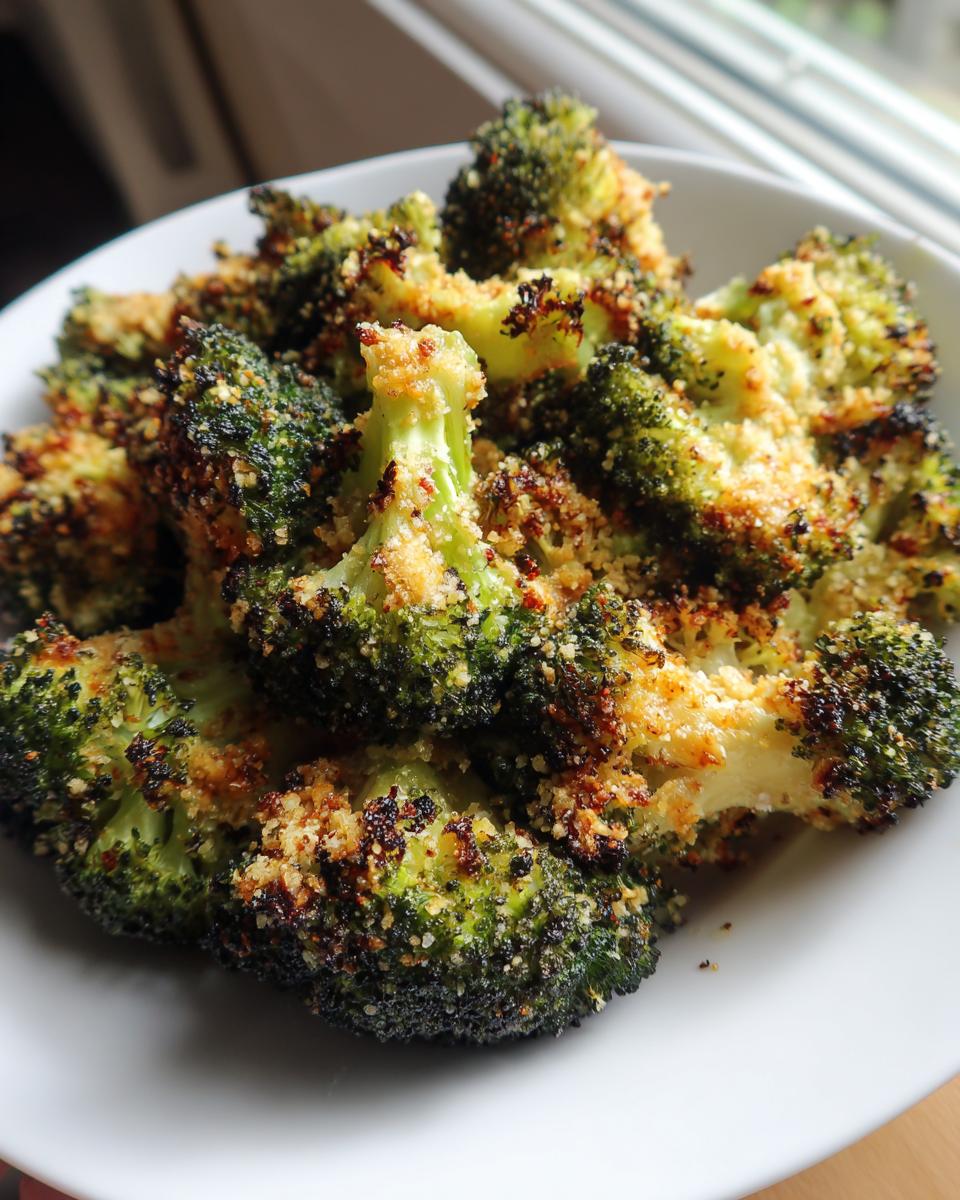
Why This Is the Best Roasted Broccoli Recipe (Tender Inside Crispy Outside Broccoli)
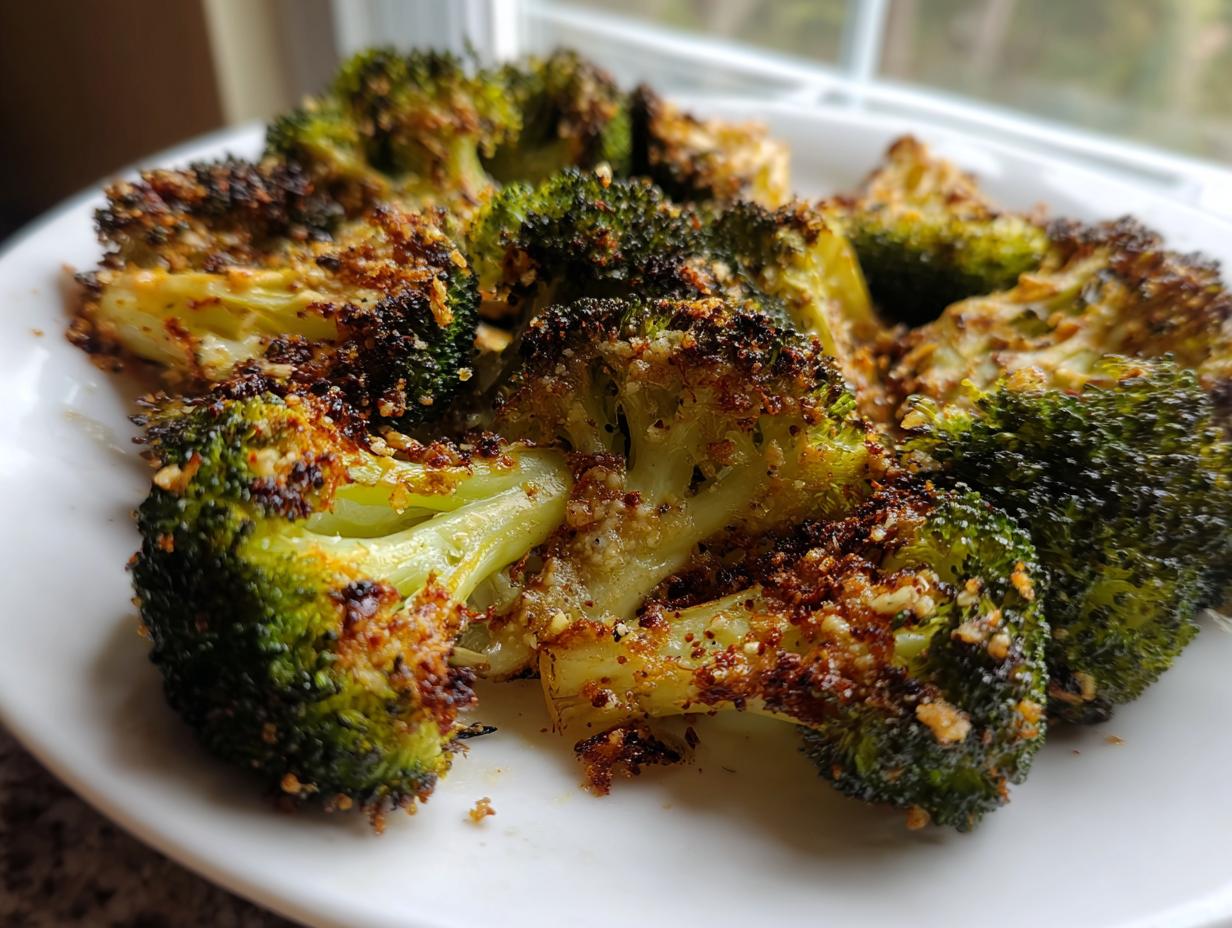
Honestly, the difference between sad, soggy broccoli and this version is all about technique, not fancy ingredients. This isn’t just another side dish; this is the Best Roasted Broccoli Recipe because we nail the texture: that sought-after Tender Inside Crispy Outside Broccoli blend. I remember the first time I pulled a tray out and saw those little charred tips—it was magic! I thought I’d ruined the broccoli, but when I bit into it, the outside snapped and the middle was just perfect and yielding.
The secret? High heat and not crowding the pan. We use enough good olive oil to help conduct that heat, which is key for proper crisping. Forget those recipes where you boil it first; that’s a total no-go. This batch of roasted broccoli relies on the oven’s dry, roaring heat to caramelize those edges beautifully. If you follow these heating and spacing rules, I promise you’ll have a side dish that even the pickiest eaters will ask seconds of. You can find more of my methods for nailing vegetable roasting over at my favorite oven roasting techniques.
Ingredients for Garlic Parmesan Roasted Broccoli
See? Simplicity wins every time. We don’t need a whole pantry raid for this. These ingredients are standard, accessible, and work together to create that knockout flavor profile we’re aiming for. Having the Parmesan ready to go is key because we add it late in the game!
- 2 large heads broccoli, cut into uniform florets
- 3 tablespoons olive oil
- 1 teaspoon kosher salt
- 1/2 teaspoon black pepper
- 1 teaspoon garlic powder
- 1/2 cup grated Parmesan cheese
- 1 tablespoon fresh lemon juice
When you’re cutting your broccoli, try to keep those florets about the same size. That’s super important for even roasting. If you have some big chunks and some tiny ones, the little pieces burn while the big ones are still a bit shy of tender. Big or small, make them friends with one another in size!
How To Roast Broccoli Perfectly: Step-by-Step Instructions
This is where the magic really happens! If you’re wondering How To Roast Broccoli Perfectly, it comes down to setting up your environment correctly before the food even hits the pan. Don’t rush the preheat; that oven needs to be screaming hot when that green goodness goes in. Keep your eye on the timer, because getting that balance right between tender and crisp is the whole game when making this Crispy Roasted Broccoli. Following these steps means you get a healthier side dish ready almost as fast as picking up takeout. It’s perfect for those nights when you need fast, amazing weeknight meals.
Preheating and Preparation for Optimal Roasted Broccoli
First things first: get that oven cranking to 400 degrees Fahrenheit. Seriously, let it preheat completely. A lukewarm oven causes steam, and steam is the enemy of crispiness! I highly recommend pulling out your largest baking sheet and lining it with parchment paper. I used to just oil the pan, but parchment paper is my non-negotiable cleanup miracle now, especially with sticky cheese involved later. Remember how I mentioned cutting the florets uniformly? This is where that effort pays off. Even pieces mean even cooking time, so you don’t end up with some black bits and some raw bits.
Seasoning and Initial Roast for Crispy Roasted Broccoli
Now, grab a big bowl—the bigger the better so you can toss everything vigorously without it spilling all over the counter! Drizzle in that olive oil, then hit it with the salt, pepper, and garlic powder. You have to really toss this until every single floret looks slick and evenly coated. I mean it—no dry patches allowed! Next, you carefully lay out your seasoned broccoli onto that prepared baking sheet. This next part is critical if you want successful roasted broccoli: spread it out! It must be in a single layer, with space between the pieces. If they are overlapping or touching too much, they will steam instead of roast, and we spent all that time getting the oven hot for nothing. Into the oven it goes for 15 minutes. Don’t peek too early!
Adding Parmesan and Final Roasting for Flavorful Roasted Broccoli
After those 15 minutes, gently pull the tray out. You should already see a little bit of color starting to develop on the edges. Now it’s time for the payoff! Sprinkle that grated Parmesan cheese evenly all over the top. Don’t stir it in yet! Shove the tray back in for another 5 to 10 minutes. You’re looking for those gorgeous, golden-brown, even slightly crispy edges on the broccoli, and the cheese should be melted and maybe starting to brown a bit. Once it looks perfect, pull it out immediately. That final drizzle of fresh lemon juice right before serving just wakes up all those savory, roasted flavors. The result is incredible roasted broccoli!
Ingredient Notes and Substitutions for Your Roasted Broccoli
You know, I always get questions about ingredients, and honestly, that’s great! It shows you’re thinking about how to make the recipe your own, and that’s exactly what building cooking confidence is all about. Since this recipe is streamlined, using garlic powder keeps things fast, but I totally want you to use what you have on hand. If you have fresh garlic—like two cloves—just mince them up small and toss them in with the olive oil during that first seasoning stage. Fresh garlic browns up wonderfully, but watch it closely because it can burn faster than the powder.
Also, if you’re watching your carb intake, I have good news! This dish is inherently fantastic for lower-carb eating plans. You can confidently call this a Keto Roasted Broccoli Side. We keep things clean—it’s just a wonderful vegetable, healthy fat, cheese, and seasoning. It fits right in with my other favorite low-carb recipes, like my fluffy coconut flour pancakes, proving that satisfying food doesn’t need a ton of sugar or starch.
The Parmesan quality really matters here, by the way. If you can grate your own from a block, please do! Pre-grated stuff sometimes has anti-caking agents that stop it from melting down into that gorgeous, slightly crispy blanket we love. It makes all the difference when you’re making truly great roasted broccoli!
Tips for Success When Making Roasted Broccoli
Okay, you know the basics, but I want to send you into the kitchen feeling like a total pro. Mastering the crisp factor is all about catching little details that seem minor but have huge pay-offs in the flavor department. Get ready to turn this **Easy Roasted Vegetable Side Dish** into a total showstopper. These quick tips are what I learned through trial and—let’s be honest—a few slightly scorched attempts!
For instance, here are my absolute must-dos for incredible **roasted broccoli**:
- Make Sure It’s Bone Dry: After you wash your florets, you absolutely must pat them completely dry with paper towels or a clean kitchen towel. Water on the surface turns to steam in the oven, and steam equals soggy. A dry floret absorbs oil beautifully and browns faster. I literally shake mine around in a salad spinner first, then pat them down!
- Don’t Be Shy with the Oil (But Not Too Shy!): You need enough oil to coat every nook and cranny so the heat transfers properly, but you don’t want oil pooling at the bottom of your bowl or baking sheet. Use just enough that the broccoli looks shiny all over. Less oil means less conduction, so don’t try to cut back here unless you want steamed greens.
- Use Your Largest Pan Available: I mentioned this before, but it bears repeating because it’s the biggest mistake people make. If you have two baking sheets, use two! Overcrowding the pan is the recipe’s single fastest path to failure. Those florets need space to breathe and caramelize. If they are touching too much, they’ll steam each other, and you won’t get that wonderful crispy edge.
When you bring these little tweaks into your routine, you’re not just making a side dish; you’re making an event! I use these same rules when planning my other quick, healthy dinner recipes, and the results are always stunning.
Flavor Variations: Beyond Garlic Parmesan Broccoli
While I absolutely stand by the Garlic Parmesan version—it’s popular for a reason, just look at how many people love that easy weeknight dinner flavor profile!
—sometimes you just need to shake things up a little, right? It keeps cooking interesting! I love that this base recipe for roasted broccoli is so adaptable. It’s like a blank canvas waiting for your next flavor adventure. You don’t need a whole new recipe; you just need a quick swap or addition.
Let’s talk about ramping up the flavor intensity. Since we are already using lemon juice as a final brightener in the main recipe, leaning into that is super easy. If you want a straightforward, zesty hit, try making a dedicated Lemon Roasted Broccoli. When you toss the raw florets with the oil, add about a teaspoon of lemon zest right in with the garlic powder and salt. Zest has all the bright citrus flavor without adding extra liquid, which helps keep those edges crisp! Then, just drizzle with fresh lemon juice when it comes out of the oven.
Looking for a kick? Oh, I love a little heat! For a spicy batch of roasted broccoli, add about 1/4 to 1/2 teaspoon of red pepper flakes right in with your initial seasonings. A pinch of cayenne works if you’re feeling bold! I find that the heat really complements the sweetness that develops when the broccoli caramelizes. It turns a simple side dish into something that really pops on your plate.
Another simple trick is focusing purely on herbs. Try swapping out the garlic powder for dried herbs like Italian seasoning or a touch of dried thyme before roasting. It changes the whole vibe of the dish immediately! These small tweaks prove that having one fantastic, dependable base recipe for roasted broccoli in your back pocket is all you need to keep things exciting all week long.
Serving Suggestions for Your Roasted Broccoli
I always get asked what I serve this incredible side dish with, and honestly, it’s one of the best things about making a fantastic vegetable—it goes with everything! It elevates a standard weeknight meal instantly, which is why I classify it as one of my go-to quick weeknight vegetables that feels fancy. You don’t need a ton of extra effort to turn a plain dinner into a **Family Favorite Vegetable Side**.
If I’m having a night where I just need something fast and comforting, I throw a couple of chicken breasts into the oven alongside the broccoli sheet pan. Seriously, just season your chicken simply, pop it in at 400°F, and you have a complete meal ready at the same time. The juices drip down, but the dry heat of the oven still manages to keep the broccoli crisp—it’s heavenly!
Another favorite, especially when I want to keep things meatless or change gears completely, is serving it over a light pasta dish. Think about tossing the hot, crispy broccoli right into a bowl of angel hair tossed simply with good quality olive oil, toasted breadcrumbs, and maybe a little extra Parmesan (because why wouldn’t you?). It brings a wonderful texture contrast to the soft noodles. It’s also fantastic served right alongside my easy mini meatloaf if you want that classic comfort meal structure.
Truly, though, the beauty of this crispy side is its versatility. It handles steak, fish, or even just a baked sweet potato incredibly well. If you’ve got your vegetable sorted out and tasting this good, the rest of the meal planning becomes so much less stressful!
Storage and Reheating Instructions for Roasted Broccoli
Even though this **roasted broccoli** is so good you’ll probably eat it all right off the tray (I know I usually do!), sometimes life happens, and you end up with leftovers. And that’s okay! The good news is that this side dish holds up pretty well, but we have to be careful when reheating it. Microwaving broccoli is a one-way ticket to Mushville, and we absolutely cannot let that happen after we worked so hard to get those crispy edges!
When you’re storing the leftovers, make sure you let them cool down completely on the counter first. Once they are room temperature, tuck them into an airtight container. This prevents excess condensation inside the container, which is another moisture risk. You can keep them happily chilling in the fridge for about three to four days. If you want to reheat them, skip the microwave entirely—unless you truly don’t care about texture, of course!
My favorite way to bring these back to life, making them taste almost freshly roasted, is using the oven or, even better, an air fryer. If you use the oven, spread the broccoli out on a baking sheet (don’t crowd it!) and bake it at a slightly lower temperature, maybe 350°F, for about 8 to 10 minutes. This gentle heat encourages the drying process again, bringing back some of that structural integrity. If you use an air fryer (which is my current obsession for reheating!), 350°F for about 4 minutes usually does the trick brilliantly.
This ensures that even on a busy Tuesday night when you pull out Friday’s leftovers, you still get a fantastic side dish. If you’re ever looking for something else to whip up while you have the oven hot after a reheat, check out my super simple blender hollandaise sauce—it makes leftover roasted veggies taste like brunch fare!
Frequently Asked Questions About Roasted Broccoli
Whenever I post my **roasted broccoli** recipe—and trust me, I post it a lot because it’s that good—I always get a flood of questions from people who are just starting out. That’s fantastic! It means you want to get this right, and I want to help you conquer any doubt you might have about turning vegetables into something awesome. This section is for all those little technical things that can make the difference between a good side dish and the *best* side dish.
Can I make this a truly crispy roasted broccoli without parchment paper?
You absolutely can! Don’t worry if you ran out of parchment paper or just prefer not to use it. The key to getting crispy roasted broccoli isn’t the paper itself; it’s the intense, dry heat of the oven and making sure the pan isn’t overcrowded. If you skip the parchment, just make sure your heavy-duty baking sheet is lightly oiled—a little extra brushing won’t hurt. The oil acts as a barrier and helps transfer the heat directly to the floret for browning. Just be prepared to scrub a little bit more afterward! The cheese does tend to stick, so soap and water will be your friend, but the crispiness will still be there!
Is this a quick weeknight vegetables recipe?
Oh, 100% yes! I built this recipe specifically for the busy home cook, which is me, too! If you look at the details, the total time is only about 35 minutes, including prep. And here’s the best part for a busy night: only about 10 minutes of that is active prep work—chopping, oiling, and tossing. The remaining 25 minutes is hands-off oven time where you can focus on getting your main course ready or just enjoying a minute of peace before dinner service starts. It’s genuinely one of the fastest, most impressive **quick weeknight vegetables** you can make.
For those of you wondering why your previous attempts at veggie roasting failed, often the issue is moisture or oven temperature. This method is foolproof once you commit to that high heat and single-layer arrangement. If you ever have general questions about setting up your kitchen routine, please don’t hesitate to reach out via my contact page. I love hearing from you!
PrintCrispy Garlic Parmesan Roasted Broccoli: The Best Side Dish You Will Make

You can create truly delicious roasted broccoli with crispy edges and tender insides using this simple method. This recipe transforms simple florets into a flavorful side dish perfect for weeknight dinners or family meals.
- Prep Time: 10 min
- Cook Time: 25 min
- Total Time: 35 min
- Yield: 4 servings 1x
- Category: Side Dish
- Method: Oven Roasting
- Cuisine: American
- Diet: Low Fat
Ingredients
- 2 large heads broccoli, cut into uniform florets
- 3 tablespoons olive oil
- 1 teaspoon kosher salt
- 1/2 teaspoon black pepper
- 1 teaspoon garlic powder
- 1/2 cup grated Parmesan cheese
- 1 tablespoon fresh lemon juice
Instructions
- Preheat your oven to 400 degrees Fahrenheit (200 degrees Celsius). Line a large baking sheet with parchment paper for easier cleanup.
- Place the broccoli florets in a large bowl. Drizzle with olive oil and toss to coat evenly.
- Add the salt, pepper, and garlic powder to the bowl. Toss again until the seasonings stick to the broccoli.
- Spread the seasoned broccoli in a single layer on the prepared baking sheet. Do not overcrowd the pan; use two sheets if necessary to promote crisping.
- Roast for 15 minutes.
- Remove the pan from the oven. Sprinkle the grated Parmesan cheese evenly over the broccoli.
- Return the pan to the oven and roast for another 5 to 10 minutes, or until the edges are browned and crispy and the broccoli is tender when pierced with a fork.
- Remove from the oven. Immediately drizzle with fresh lemon juice before serving hot.
Notes
- For the crispiest results, ensure your oven is fully preheated and do not skip the single-layer arrangement on the baking sheet.
- If you prefer a stronger garlic flavor, substitute the garlic powder with 2 cloves of minced fresh garlic tossed with the oil before roasting.
- This recipe is naturally Keto Roasted Broccoli Side friendly.
Nutrition
- Serving Size: 1 serving
- Calories: 120
- Sugar: 2
- Sodium: 350
- Fat: 8
- Saturated Fat: 3
- Unsaturated Fat: 5
- Trans Fat: 0
- Carbohydrates: 9
- Fiber: 4
- Protein: 6
- Cholesterol: 8