
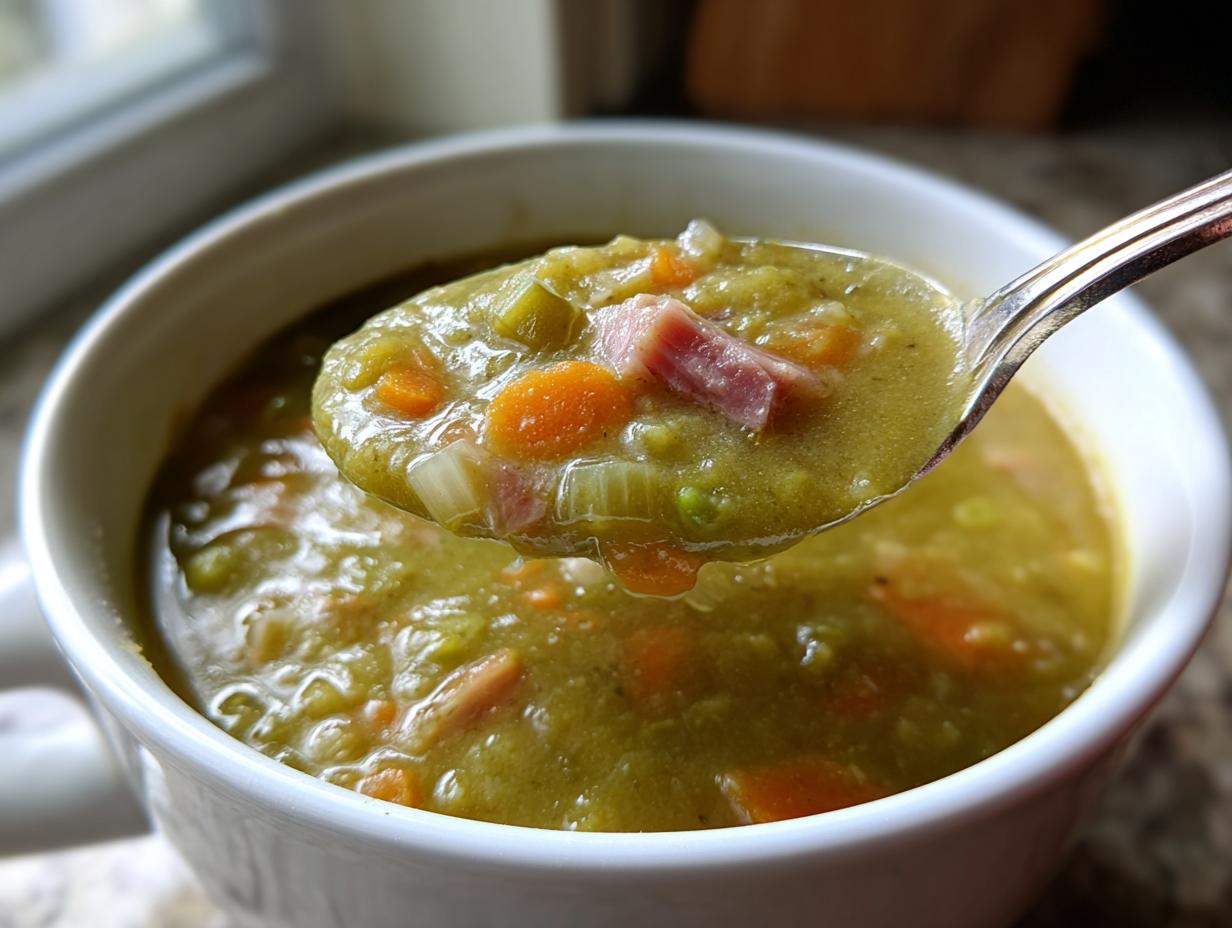
When the cold weather shows up—and I mean really shows up—there’s only one thing that feels like a genuine hug in a bowl, and that’s soup. Not watery soup, but thick, substantial, stick-to-your-ribs comfort food. If you’ve ever felt intimidated by making soup from scratch, especially a classic pea soup that’s supposed to taste like it simmered all day, I totally get it. I started my kitchen journey feeling the exact same way until I made this Classic Split Pea Soup with Ham Bone and realized how simple real flavor can be. When I—Ava Sinclair—was finally mastering my own kitchen, recipes like this one proved that you don’t need a fancy culinary degree to create truly satisfying meals.
This recipe uses dried split peas, which break down beautifully to create that incredible, rich texture. It’s hearty, it’s deeply savory, and it requires very little intervention once it gets going. You can serve this perfectly cozy soup alongside amazing homemade soft bread bowls. Trust me, this is the ultimate cozy food.
- Why This Classic Split Pea Soup Recipe Works (Comfort Food Soup)
- Ingredients for Your Hearty Split Pea Soup Recipe
- How to Prepare Classic Split Pea Soup with Ham Bone
- Tips for Success Making Easy Split Pea Soup
- Variations: From Ham and Split Pea Soup to Vegetarian Split Pea Soup
- Serving Suggestions for This Cozy Dinner Recipes
- Storage and Reheating Instructions for Homemade Pea Soup
- Frequently Asked Questions About Split Pea Soup Recipe
- Nutritional Estimates for This Hearty Pea Soup
- Share Your Kitchenican Pea Soup Success
Why This Classic Split Pea Soup Recipe Works (Comfort Food Soup)
This isn’t just any soup; this is the kind of Hearty Soup Recipes that warms you from the inside out. Why does this particular pea soup stand out as the Best Split Pea Soup? It boils down to respecting the process and the quality of the ingredients. It’s that slow-simmered magic that turns humble dried peas into incredible Comfort Food Soup. When I first started cooking, I used broth cubes, and honestly? It tasted two-dimensional. This method is how you build real, lasting flavor confidence in the kitchen.
Flavor Foundation: The Ham Bone Secret
Forget those packets of flavor dust; the ham bone is non-negotiable here! That bone, often leftover from a holiday dinner, releases deep, salty, smoky richness into the liquid as it cooks. Broth alone just can’t mimic that slow-extracted, savory depth. It’s pure flavor, no extra effort required!
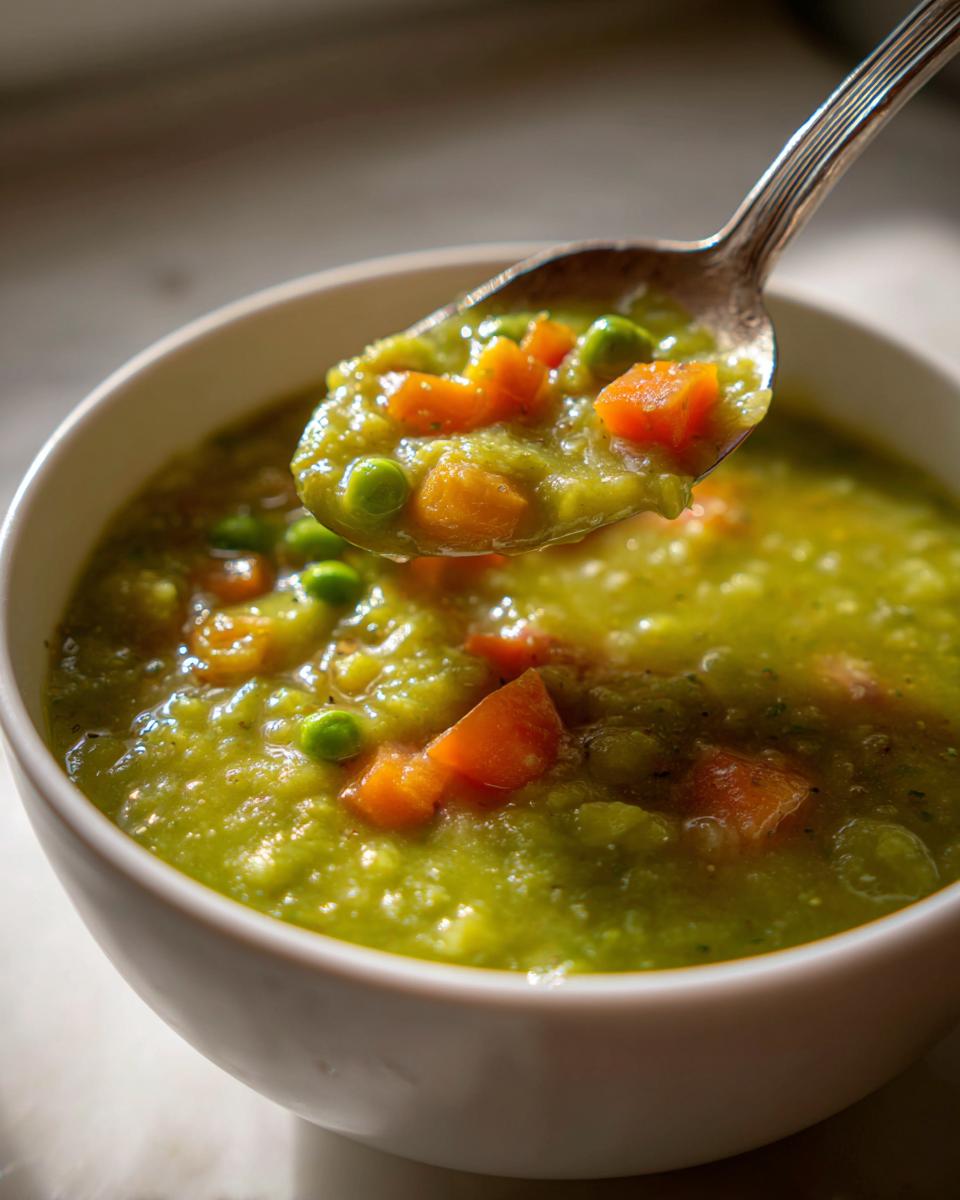
Achieving That Thick and Creamy Soup Texture
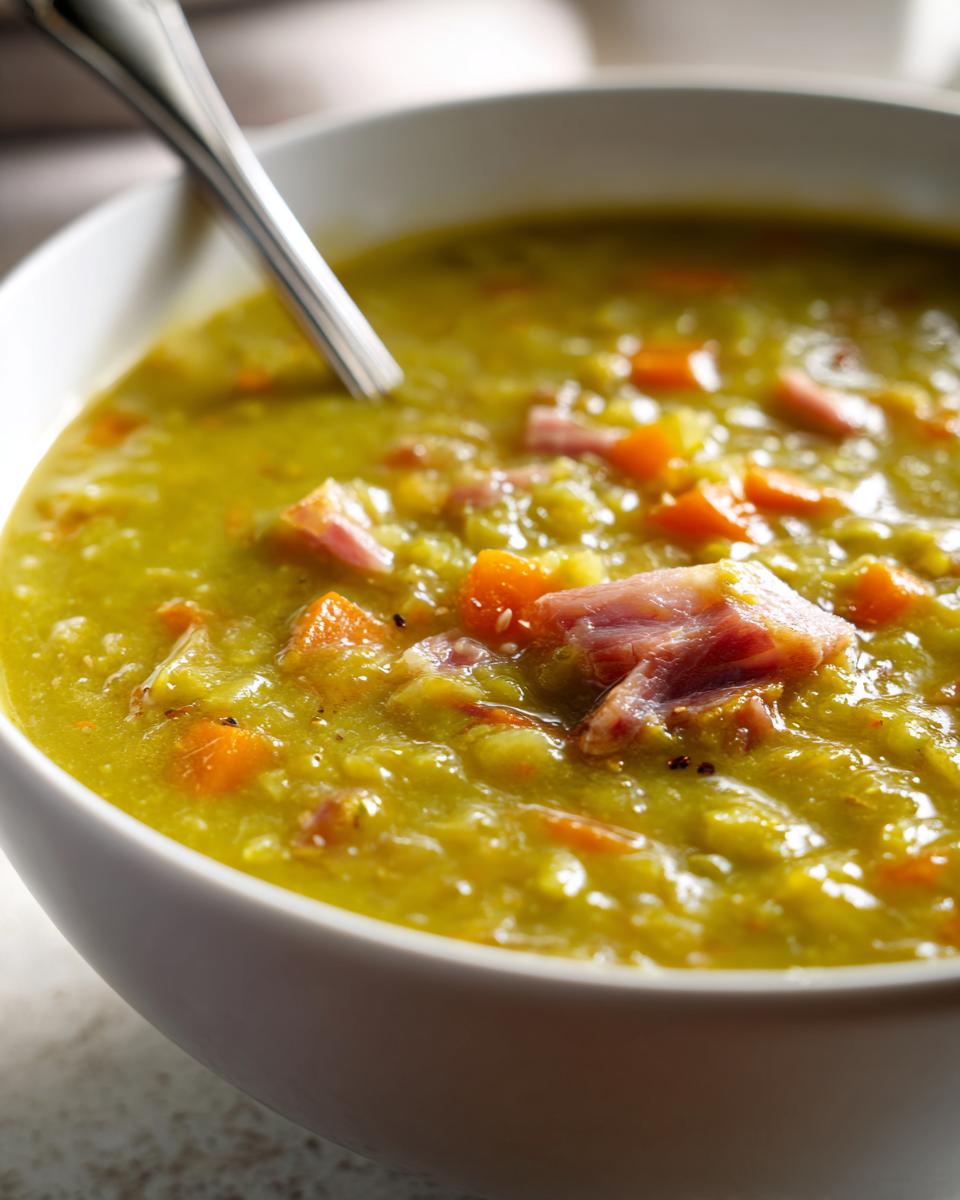
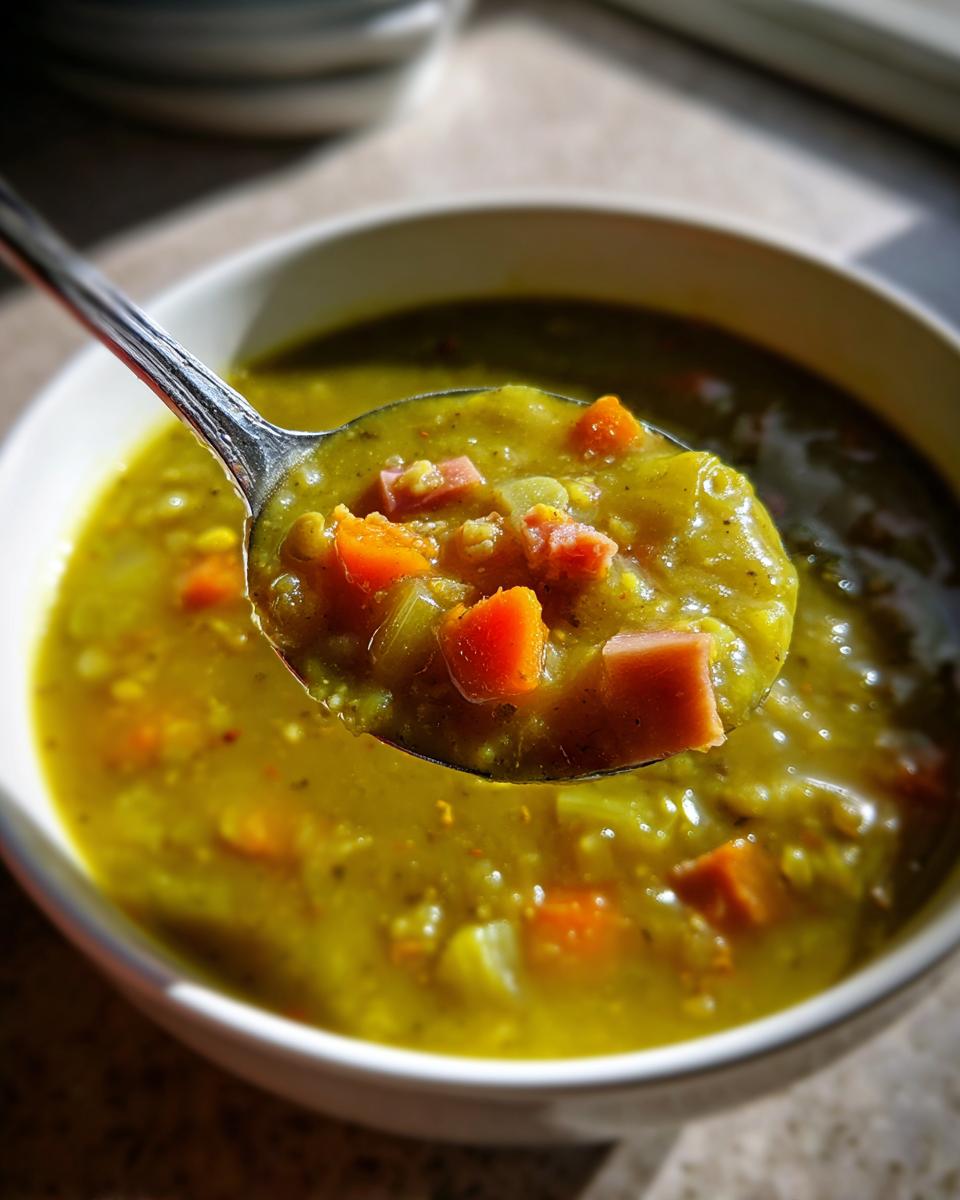
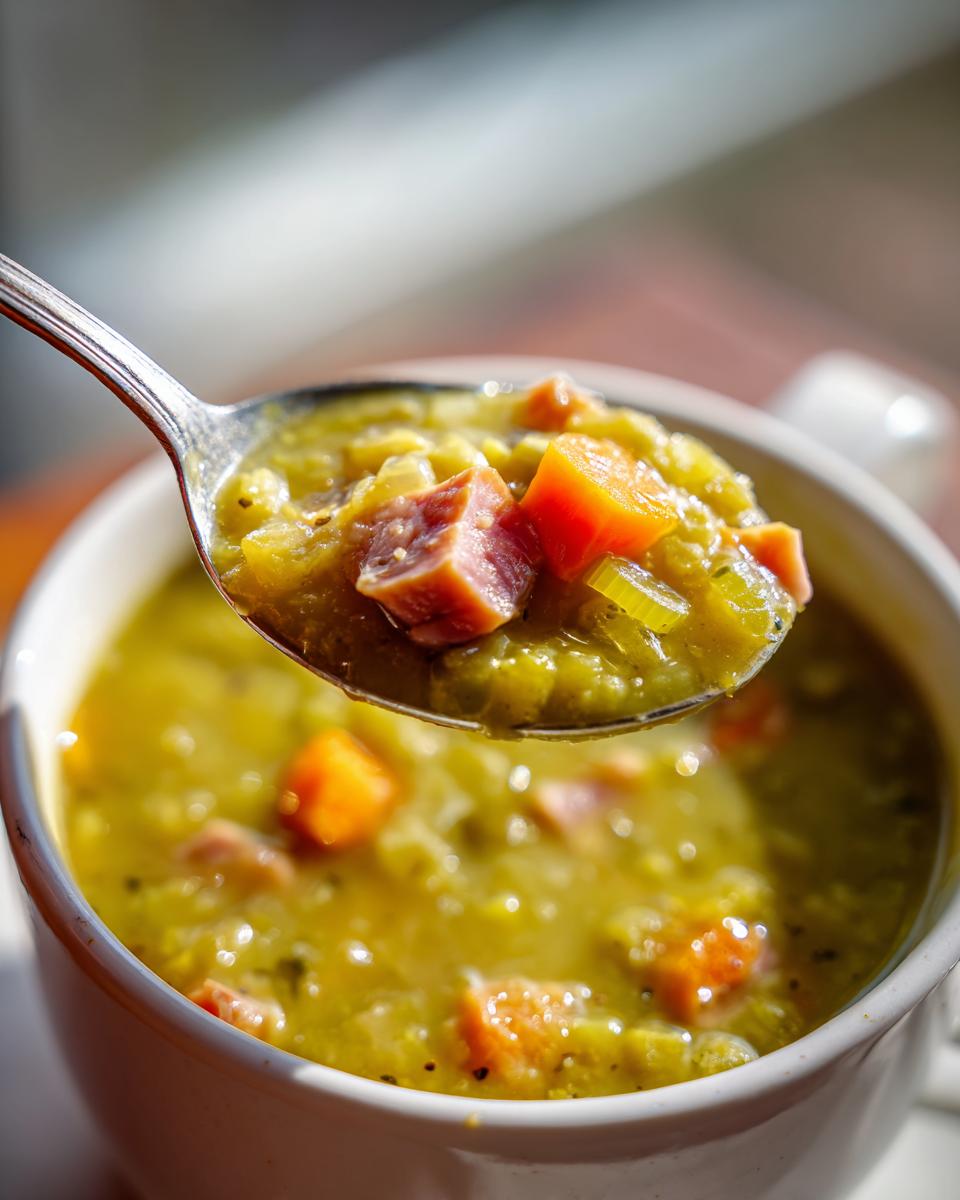
Dried split peas are amazing because they don’t need cream or flour to thicken up. As they simmer for hours, they naturally collapse and dissolve right into the broth. This gives you that signature, velvety, Thick and Creamy Soup look and mouthfeel. That’s the hallmark of a truly satisfying homemade pea soup, and it happens all on its own!
If you end up with extra soup, you absolutely have to try making some homemade garlic butter to go alongside it for dipping. It’s seriously addictive!
Ingredients for Your Hearty Split Pea Soup Recipe
Getting this pea soup right starts with having everything measured out before that ham bone goes into the pot. When you lay everything out, it’s like setting the stage for a perfect culinary performance—no frantic searching mid-simmer! I’ve learned that precise prep makes way less mess and gives you way better results. You’ll need about 8 cups of liquid, either water or good quality, low-sodium chicken broth. If you’re using store-bought broth, check the salt content because the ham bone adds a lot later on! If you happen to be making this soup often, you should whip up a batch of homemade garlic butter to serve on the side, trust me on this one.
Here’s the shortlist of what you need for this Hearty Soup Recipe:
- 1 large ham bone, making sure the meat is still attached
- 1 pound of dried split green peas (remember to rinse these well!)
- 1 large onion, ready to be chopped
- 2 cups of carrots, chopped up
- 2 cups of celery, chopped just right
- 8 cups of water or broth
- 2 bay leaves
- 1 teaspoon of dried thyme
- 1/2 teaspoon of black pepper
- Salt—but only at the very end!
Vegetable Prep for the Best Pea Soup
Okay, let’s talk about chopping for a minute because it matters. We aren’t aiming for perfect uniformity here, but we want consistency so everything cooks down around the same time. For your onion, carrot, and celery—the backbone of flavor, really—aim for a medium dice. You want the pieces small enough to blend into the texture of the soup later, but not so tiny that they dissolve instantly. I usually chop my carrots a little smaller than the celery, just because they take a touch longer to soften up nicely in the simmer.
How to Prepare Classic Split Pea Soup with Ham Bone
This is where the magic really happens, and trust me, it’s easier than you think! We are moving from prep to potential here. While this recipe takes time to simmer, the active work is super minimal—perfect for those days you want something comforting but don’t want to stand over the stove constantly. Once everything goes into the pot, you can step away and let this pea soup develop its deep, smoky flavor. This stovetop process allows the peas to fully break down into that luxurious texture we want.
Step 1: Preparing the Dried Pea Soup Base
Before anything hits the heat, you have to deal with the peas. Grab those dried split peas and toss them into a colander. Rinse them well under cold running water until the water coming off looks clear. I always dig around a bit while rinsing, just in case there’s a tiny, hard stone hiding in there—we definitely don’t want to crack a tooth trying to enjoy this amazing Dried Pea Soup! Just a quick rinse is all they need; soaking isn’t necessary unless the recipe specifically calls for it, which this classic one doesn’t.
Simmering and Thickening Your Ham and Split Pea Soup
Now, toss the rinsed peas, that gorgeous ham bone, all your chopped veggies, bay leaves, thyme, pepper, and water/broth into your largest Dutch oven or pot. Bring it to a rolling boil, then immediately drop that heat way down low—we are looking for a gentle, lazy simmer here. Cover it just partially so some steam can escape. You’ll need to let this cook for about 1.5 to 2 hours. Set a timer, but make sure you give it a stir every 20 minutes or so. If you ignore it, those peas will definitely glue themselves to the bottom of the pot. That stirring is vital for that easy weeknight dinner process!
Finishing Touches: Meat Removal and Seasoning
Once those peas are tender and mushy—you’ll just know when they’ve broken down—it’s time for the clean-up! Carefully lift out that big ham bone. Toss the bay leaves, too. Next, use a fork to scrape off any tasty meat clinging to the bone and shred it up, then stir that savory meat right back into your soup pot. The last, most important step for any Ham and Split Pea Soup? Taste it *before* you add salt. That ham bone releases salt as it cooks, so you might not need any at all. Season sparingly at the end!
Tips for Success Making Easy Split Pea Soup
Even though this is an Easy Split Pea Soup recipe, every great cook learns that sometimes things don’t go exactly according to plan, especially with slow-simmered dishes. Don’t panic if your soup seems a little off halfway through! Building confidence in the kitchen means knowing how to troubleshoot on the fly, and that’s what your Kitchenican guide is all about. These little fixes are what separate a standard soup from a satisfying, restaurant-quality bowl.
I used to worry endlessly about the texture, but honestly, you have all the control once you know the tricks. Mastering the consistency is key to serving up the best version of this pea soup possible. Don’t forget, if you want to boost your veggie game alongside your soup, you should check out my technique for perfect roasted vegetables—they hold their shape much better when roasted than when boiled!
Adjusting Consistency of Your Pea Soup
So, you’ve simmered for two hours, and now you’re staring at your pot. What do you do? It usually falls into one of two categories: too thin, or way too thick. If your soup is too thin—meaning the peas haven’t quite broken down enough, or you added too much liquid—don’t worry, we can fix that! Just keep it uncovered over low heat and let it simmer for another 15 to 30 minutes, stirring occasionally. That extra time will let the moisture evaporate and the peas will finally disintegrate, thickening it up the natural way.
Now, if you pulled the lid off and it looks like actual green cement? That happens sometimes, especially if you cook it down too long! The solution here is adding back liquid. Grab some hot water or extra low-sodium broth and stir it in, half a cup at a time, until you reach that lovely, slightly pourable consistency. If you want it ultra-creamy but you didn’t quite get enough breakdown, take about two cups of the soup out into a separate bowl. Use an immersion blender (or carefully transfer it to a regular blender) and blend it until it’s completely smooth, then stir that velvety portion back into the main pot. Instant richness!
Variations: From Ham and Split Pea Soup to Vegetarian Split Pea Soup
This recipe is such a fantastic foundation, and once you nail the timing for this classic pea soup, you can start experimenting! The best cooking happens when you feel you have the freedom to change things up without worrying about total failure. While the ham bone provides that incredible smoky depth for our Ham and Split Pea Soup, I completely understand that sometimes you need a meatless bowl, or maybe you just didn’t plan ahead enough to save that bone.
Don’t stress! This recipe adapts beautifully into a hearty Vegetarian Split Pea Soup. If you skip the ham, you need to build back that savory foundation. My favorite trick when leaving out the meat is to double up on the aromatic veggies—throw in an extra carrot or half a parsnip, and seriously boost your herbs. A dash of smoked paprika in place of the smokiness from the ham works wonders, too. It keeps the spirit of the hearty meal intact, just minus the meat!
Making a Quick Instant Pot Split Pea Soup
If you’re reading this recipe and thinking, “Wow, two hours simmering? I need this for dinner tonight,” I’ve got you covered with the electric pressure cooker version. Turning this into an Instant Pot Split Pea Soup slashes your active time dramatically, which is perfect for those busy weeknights where comfort food is still a must-have.
The process is almost identical: Sauté your veggies quickly in the pot if you want that extra layer of flavor first. Then, add everything else—peas, seasonings, broth—but skip the bay leaves for now to keep clean-up easy. Seal it up, set it to High Pressure, and cook for exactly 20 minutes. Now, this is important: don’t quick release immediately! Let it do a Natural Pressure Release (NPR) for 15 minutes before carefully venting the rest. This allows the peas to finish cooking gently without blowing foam everywhere. In less than an hour total, you’ll have a fantastic, thick pea soup ready to go. If you’re looking for other meatless ideas to go along with it, you might enjoy my veggie lentil salad recipe, which is great for balancing out a heavy soup night!
Serving Suggestions for This Cozy Dinner Recipes
When you’ve put in the effort to create such a deeply flavorful and hearty pea soup, you want the rest of the meal to match that cozy mood! This soup is substantial all on its own, but presentation and perfect pairings make it feel like a complete event rather than just a weeknight filler. When I think about what truly elevates this dish from simple dinner to perfect Cozy Dinner Recipes, it always comes down to what you serve on the side.
Because this split pea soup is so creamy and rich, I highly recommend contrasting that texture with something fresh or something sturdy for dipping. Let’s face it, you need something to sop up every last bit of that thick goodness left at the bottom of your bowl. If you are feeling ambitious, you absolutely must try making easy homemade soft bread bowls. Nothing feels more comforting than cracking into a crusty bread bowl filled with steaming soup!
If dipping bread seems like too much work after making the soup, don’t fret! A simple, bright salad can cut through the richness beautifully. Think about something crisp, maybe with a light vinaigrette—something with some crunchy cucumber or sharp red onion. It offers a needed counterpoint to the savory ham and the earthy peas. Even just serving this with a sprinkle of fresh parsley or chives right before you carry it to the table adds a pop of fresh color and flavor that makes the whole experience feel more special. It’s those little finishing touches that really boost your cooking confidence, I promise!
Storage and Reheating Instructions for Homemade Pea Soup
The best part about making a huge pot of pea soup like this? You get leftovers! Seriously, one of my favorite things about Homemade Pea Soup is that it actually tastes even better the next day after the flavors have had time to really marry together in the fridge. But storage is key, especially since this soup develops that super thick texture. You can’t just reheat it like you would a broth-based soup; you need a little technique.
For refrigeration, just let the finished soup cool down completely on the counter for about an hour—don’t put a steaming pot directly into the fridge, as that messes with the temperature balance in there. Then, transfer it to airtight containers. It keeps beautifully in the refrigerator for about 4 to 5 days. Just remember that when it chills, it solidifies quite a bit! If you try to scoop it out on Day Two, you might need a sturdy spoon.
Now, when it comes to reheating, always add a splash of liquid back in before you even turn on the heat. I usually use hot water or broth—hot liquid helps it come up to temperature faster without burning the bottom. Stir frequently as it heats up on the stovetop over medium-low heat. If you use the microwave, heat it in short 60-second bursts, stirring well between each one until it’s perfectly warmed through and creamy again.
If you are freezing this, which I highly recommend when you make a batch this big, leave about an inch of headspace in your freezer-safe container because liquids expand! It freezes perfectly well for up to three months. When you’re ready to eat it later, just thaw it in the fridge overnight and then use the reheating steps above. It’s the ultimate make-ahead meal!
And speaking of making things ahead for cozy meals, if you ever make too much soup and need a quick side, my recipe for easy homemade applesauce is a surprisingly bright counterpoint to the savoriness of this split pea dish!
Frequently Asked Questions About Split Pea Soup Recipe
It’s funny, even when I think I’ve explained every tiny detail for making this comforting pea soup, I still get questions! That’s totally fine, though; that’s how we build confidence together in the kitchen. It means you’re thinking critically about the process, and that’s the sign of a great cook in the making. I’ve gathered the most common questions I hear about this Split Pea Soup Recipe right here so you feel fully prepared before you even turn on the stove.
Do I need to soak dried peas before making pea soup?
This is probably the number one question I get about using dried peas! Honestly, for modern dried split peas, the answer is a firm no, you usually don’t need to soak them overnight. Those old family recipes often called for it, but today’s drying processes are much more efficient. However, you absolutely MUST rinse them! I mentioned this in the steps, but it bears repeating: give those peas a good, thorough rinse in a colander until the water runs clear. You’re washing off excess starch and, more importantly, looking for any tiny grit or debris that might have snuck in during packaging. A quick rinse is mandatory maintenance for a perfect batch of homemade pea soup.
What is the best way to add flavor if I skip the ham bone?
If you’re leaving out the ham bone for a Vegetarian Split Pea Soup, you’re losing that gorgeous, salty, smoky foundation the meat provides. You need to manually replace that depth! My favorite method for building flavor in a Dried Pea Soup without meat is actually threefold. First, use a high-quality vegetable broth instead of water. Second—and this is key—add about one teaspoon of smoked paprika right along with your other spices. That paprika mimics that smoky flavor perfectly. Third, don’t skimp on the aromatics! Double the amount of onion, carrots, and celery, and maybe add in half a cup of finely diced mushrooms when you sauté them. These changes help create a really robust flavor profile that makes you forget all about that missing ham bone. You could even bake some savory buttermilk pie to serve for dessert later to keep that cozy dinner theme going!
When you successfully use substitution tricks like these, you feel like a real kitchen wizard, don’t you? That confidence boost is what Kitchenican is all about!
Nutritional Estimates for This Hearty Pea Soup
Now, let’s talk numbers for a second. I always feel a little better about tucking into a second bowl of soup when I have a general idea of what’s in it. When I first started cooking, I never paid attention to nutrition labels, but having this information ready helps me balance my weekly meals. Remember, because this amazing, deep flavor comes from a real ham bone, the sodium content can vary wildly depending on how salty that bone was!
These figures are just estimates based on the recipe components, so treat them as a helpful guide rather than gospel. If you’re making a vegetarian version, for example, the sodium will likely drop significantly, and the fat content will change, too! This is just another piece of the puzzle in building your confidence so you can adjust recipes safely. If you’re looking for more ways to balance your menu, check out my comprehensive guide to healthy dinner recipes.
For one serving (which we estimate around 1.5 cups of this thick, rich soup), here is what you can generally expect:
- Calories: 350
- Protein: 28 grams (That’s fantastic! A great source of plant-based protein from the peas.)
- Fat: 8 grams
- Saturated Fat: 3 grams
- Carbohydrates: 45 grams
- Fiber: 15 grams (Holy smokes! The fiber content here is incredible.)
- Sugar: 6 grams
- Sodium: 650 mg (Again, this jumps up or down based entirely on your ham bone!)
See? That’s some serious staying power packed into one bowl. It’s satisfying, it’s filling, and it’s hearty enough that you probably won’t need a giant side dish to feel full. That’s the power of a well-made, traditional soup working for you!
Share Your Kitchenican Pea Soup Success
You see? Making something as deeply satisfying and classic as this pea soup isn’t about some secret, exclusive technique. It’s about taking the time, trusting the process, and knowing that you—yes, you—can create something that tastes like it simmered on a farmhouse stove for hours. I hope that seeing how simple the actual steps are has boosted your confidence to jump into your own kitchen and try this recipe out!
When you do make this Classic Split Pea Soup with Ham Bone, I truly want to hear about it! Did the ham bone give you that perfect savory kick? Did you manage to get that wonderfully thick and creamy texture without adding any flour? Please, take a moment to leave a rating right here on the recipe card. Those stars and comments genuinely help other cooks who might be standing where I once stood—feeling that little voice of doubt creep in before they start cooking.
Sharing your success helps build the Kitchenican community, proving to everyone else that they absolutely *can* cook delicious meals. If you loved the deep comfort of this soup, don’t stop here! Head over to my About Page to read more about my own journey from beginner to confident home cook, and then jump into another recipe. Keep creating, keep tasting, and keep building that wonderful kitchen confidence, one hearty bowl at a time!
PrintClassic Split Pea Soup with Ham Bone

Make this hearty, thick, and creamy split pea soup using a ham bone for deep, savory flavor. This recipe is simple to follow and creates comforting food perfect for cozy dinners.
- Prep Time: 15 min
- Cook Time: 2 hours
- Total Time: 2 hours 15 min
- Yield: 6 servings 1x
- Category: Dinner
- Method: Stovetop Simmering
- Cuisine: American
- Diet: Low Fat
Ingredients
- 1 large ham bone with meat attached
- 1 pound dried split green peas, rinsed
- 1 large onion, chopped
- 2 cups chopped carrots
- 2 cups chopped celery
- 8 cups water or low-sodium chicken broth
- 2 bay leaves
- 1 teaspoon dried thyme
- 1/2 teaspoon black pepper
- Salt to taste
Instructions
- Rinse the dried split peas under cold water in a colander until the water runs clear. Discard any small stones or debris.
- Place the rinsed peas, ham bone, onion, carrots, celery, water or broth, bay leaves, thyme, and pepper into a large pot or Dutch oven.
- Bring the mixture to a boil over high heat.
- Once boiling, reduce the heat to low, cover the pot partially, and let it simmer for 1.5 to 2 hours, or until the peas are completely tender and have broken down, thickening the soup. Stir occasionally to prevent sticking.
- Remove the ham bone and bay leaves. Shred any usable meat from the bone and return the meat to the pot. Discard the bone.
- Taste the soup and add salt as needed. Remember that ham bones add saltiness, so season carefully at the end.
- Serve hot. This soup thickens considerably as it cools.
Notes
- For a quicker cooking time, you can use an Instant Pot. Cook on high pressure for 20 minutes, followed by a natural pressure release for 15 minutes.
- If you do not have a ham bone, substitute with 1 cup of diced smoked ham and 8 cups of vegetable broth. Add the diced ham during the last 30 minutes of cooking.
- If you prefer a smoother texture, use an immersion blender to partially blend a portion of the soup before serving.
Nutrition
- Serving Size: 1.5 cups
- Calories: 350
- Sugar: 6
- Sodium: 650
- Fat: 8
- Saturated Fat: 3
- Unsaturated Fat: 5
- Trans Fat: 0
- Carbohydrates: 45
- Fiber: 15
- Protein: 28
- Cholesterol: 35