
If the question of what’s for dinner sends a wave of panic through your evening routine, I get it. I used to think a truly satisfying, flavorful meal meant pulling out every spice jar and spending an hour prepping. That belief kept me ordering takeout far too often! But I’m here to tell you that the best cooking is all about smart simplicity. This ultimate juicy 5-ingredient baked ranch chicken recipe is the proof. Seriously, this dish takes minutes to assemble, and it delivers bold, comforting flavor that tastes like you put in way more effort than you actually did. Forget the intimidation; we’re building confidence together right here. You can learn more about our mission to empower home cooks just like us over at our homepage.
- Why This Easy Baked Ranch Chicken Is Your New Weeknight Staple
- Gathering Ingredients for Your Simple Ranch Chicken
- Step-by-Step Instructions for Ranch Chicken Oven Bake
- Tips for Success with Your Flavorful Baked Chicken
- Making Variations of Baked Ranch Chicken
- Serving Suggestions for Your Quick Chicken Dinner Ideas
- Storage and Reheating Instructions for Leftover Baked Ranch Chicken
- Frequently Asked Questions About Baked Ranch Chicken
- Share Your Kitchenican Baked Ranch Chicken Success
Why This Easy Baked Ranch Chicken Is Your New Weeknight Staple
If you’re anything like me, you need dinner on the table fast, but you don’t want it to taste like it was rushed. This recipe is my cheat code for those crazy evenings! This easy baked ranch chicken is proof that you don’t need complexity for comfort. We’re focusing on delivering tender, flavorful results when you need quick chicken dinner ideas the most. See the list below—this is why it works for real life:
- It’s faster than a slow cooker and requires almost zero fuss.
- The prep time is about ten minutes, which is less time than it takes to decide what to watch on TV.
- It uses humble ingredients that bring huge flavor
I have all my favorite time-saving recipes collected, you can check them out when you have a moment here.
Minimal Ingredient Chicken for Maximum Flavor
We are aiming for minimal ingredient chicken perfection here! With just five main components—chicken, ranch mix, mayo, oil, and Parmesan—you can’t mess this up. There are barely any bowls to wash afterward, which is honestly half the battle won on a Tuesday night. It’s just mix, top, and bake. That’s it!
Achieving Juicy Baked Chicken Recipe Results
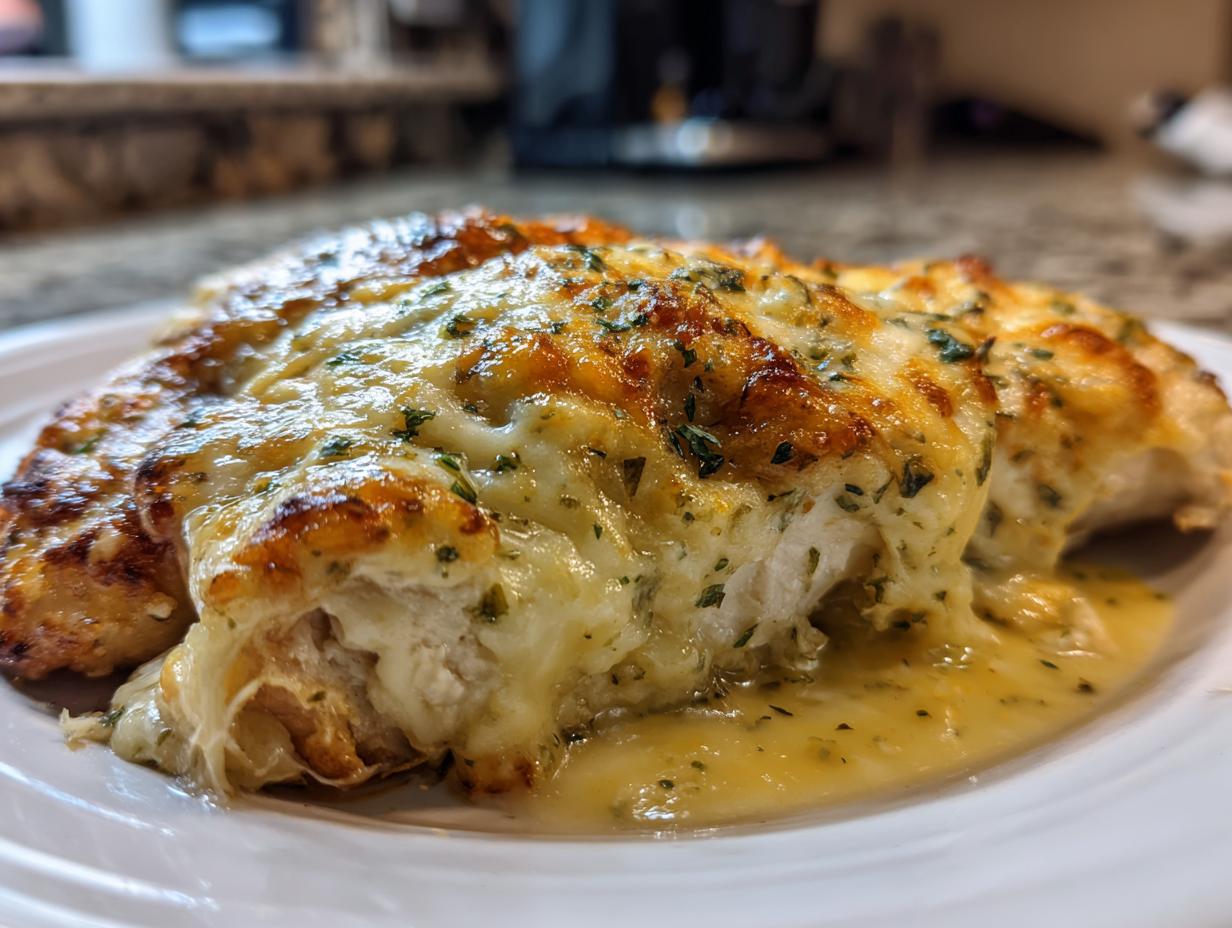
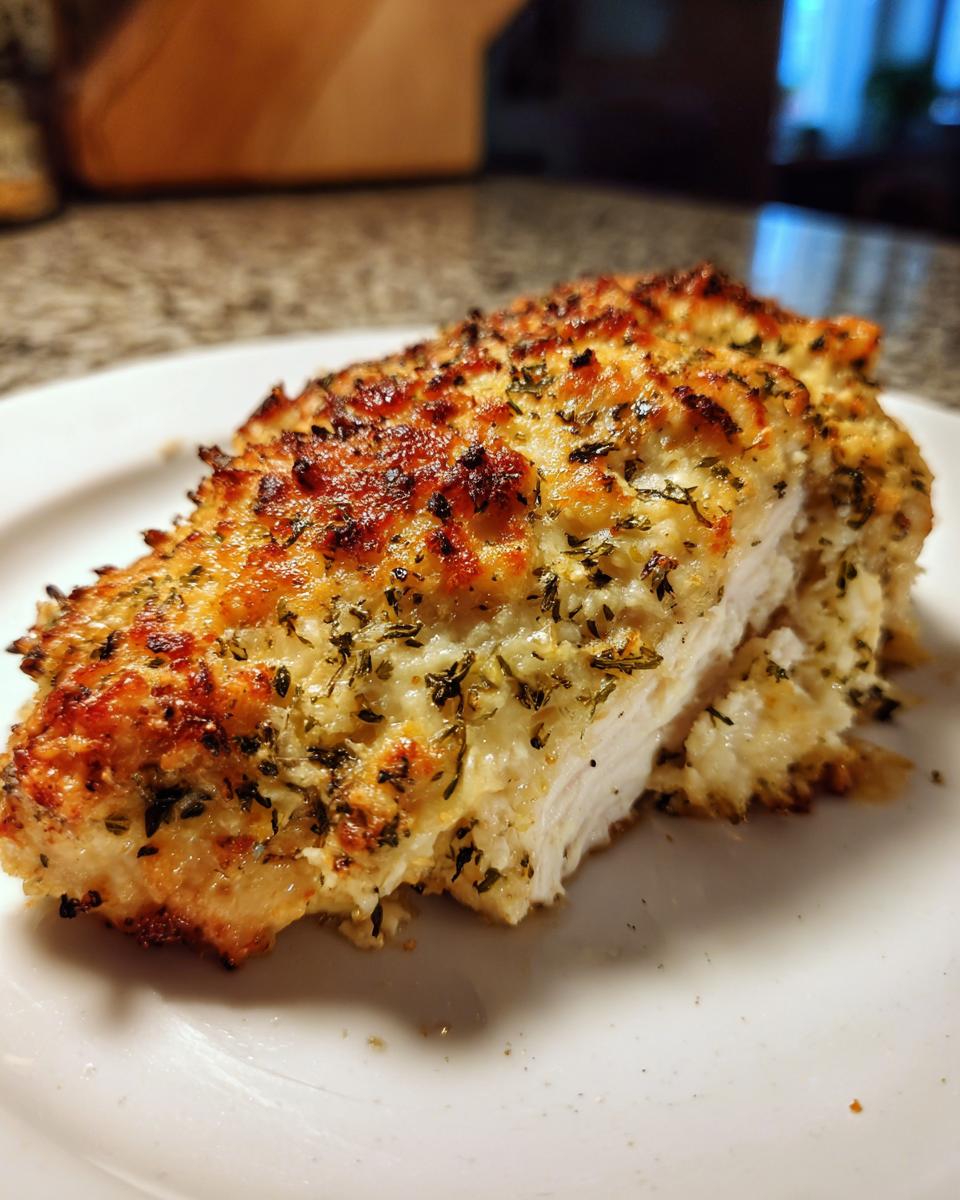
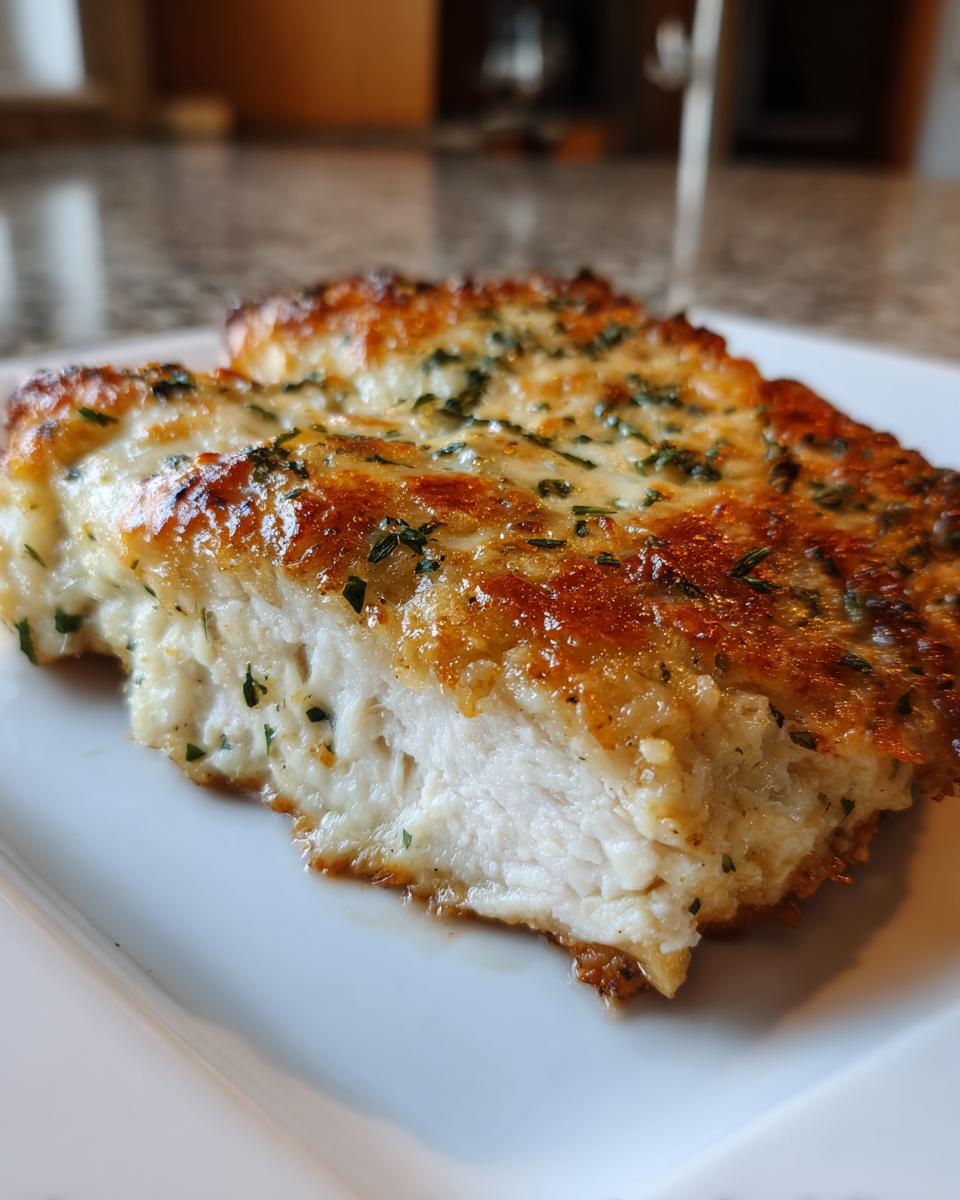
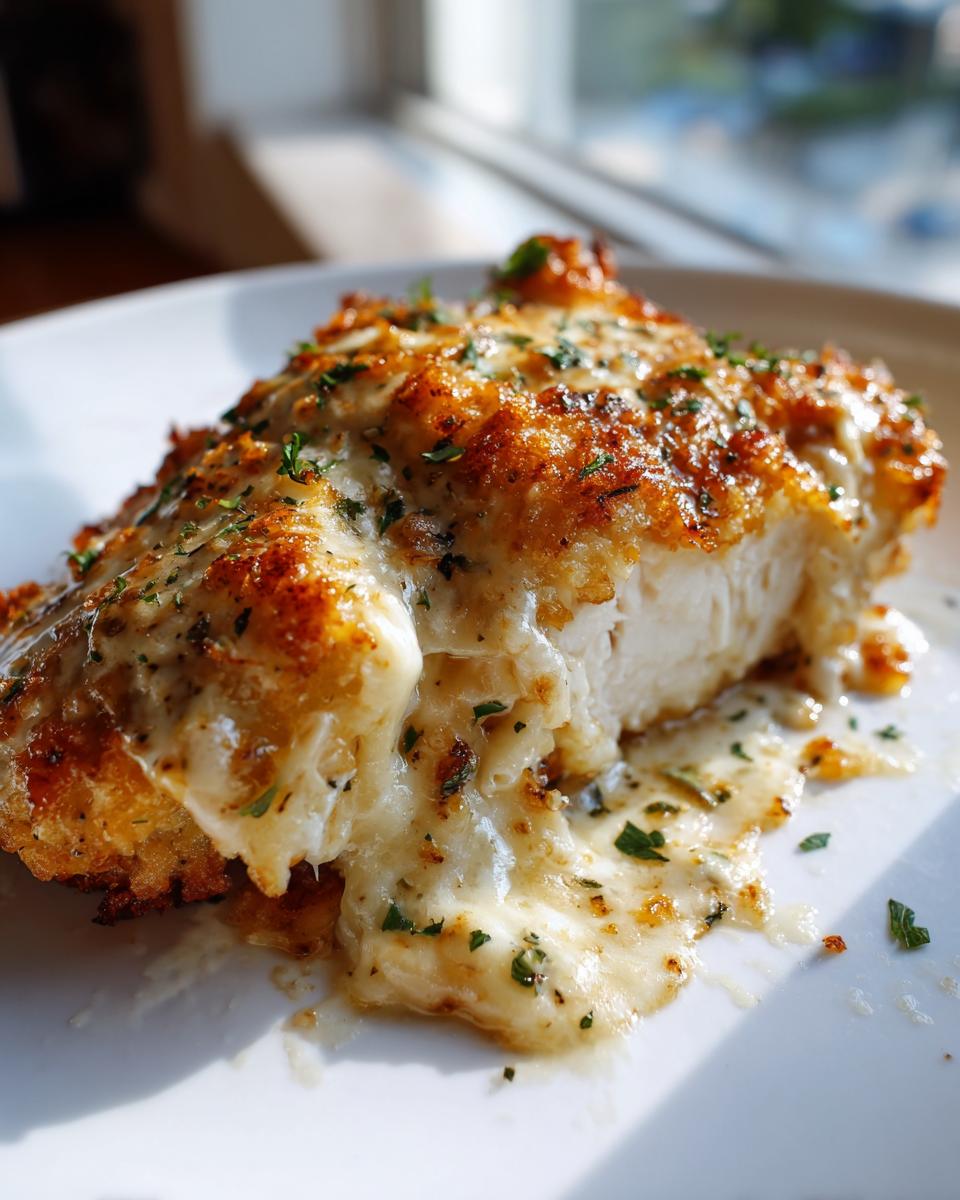
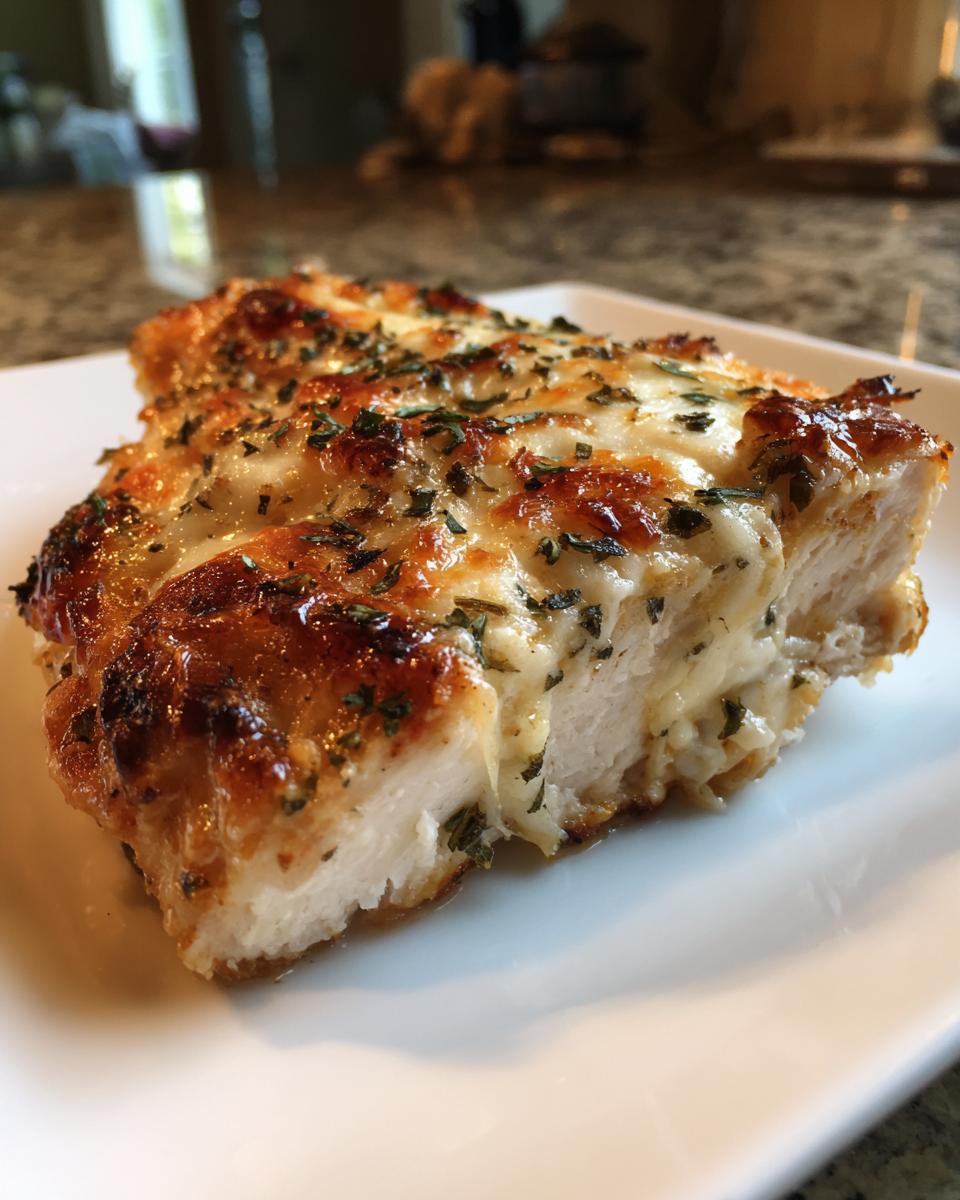
The number one fear with chicken breasts? Drying them out! But don’t worry about that mushy, cardboard texture here. The combination of mayonnaise and Parmesan creates this incredible barrier. It acts like a little raincoat for your chicken, locking all the juices right inside while it bakes. It’s the secret weapon for the most reliable juicy baked chicken recipe you’ll ever try.
Gathering Ingredients for Your Simple Ranch Chicken
Okay, let’s look at what you need! Since this is a simple ranch chicken recipe, the quality of these few things really shines through. We aren’t hiding anything here; we just need the basics to be good. I always try to keep these ingredients stocked because they pull together dinner in a flash.
You’ll need four chicken breasts, the ranch seasoning packet (make sure it’s the dry mix!), mayo, Parmesan cheese, and a touch of olive oil. That’s the core of our ranch chicken oven bake!
Ingredient Notes and Substitutions for Baked Ranch Chicken
A quick tip from my kitchen: If you can grate your own Parmesan fresh instead of using the stuff in the green shaker can, please do. It melts so much better and gives you that truly beautiful golden top!
If you are using chicken thighs instead of breasts for your baked ranch chicken, just remember they need a little longer in the oven, maybe an extra 5 or 10 minutes. And listen, if you want to skip the mayo, you absolutely can use plain Greek yogurt instead. It keeps it tangy and adds a slightly healthier touch while still giving you that creamy coating we aim for in this baked chicken thighs recipe variant.
Step-by-Step Instructions for Ranch Chicken Oven Bake
Now we get to the fun part—putting it all together! This is where the magic happens for our baked ranch chicken. Remember, we’re keeping it super straightforward, but a little organization upfront means a perfectly cooked dinner later. Make sure your oven is cranked up to 400°F (200°C). I always line my dish with parchment paper—it’s like signing a contract for easy cleanup. You can always find my go-to guide for making sure chicken breasts come out perfectly cooked when you need it right here.
Preparing the Flavorful Baked Chicken Coating
Grab a small bowl! This is where we build that amazing layer of flavor. We just need to mix the mayo, the dry ranch packet, and that grated Parmesan cheese. Mix it really well until it looks like a thick, slightly stiff paste. You want it uniform—no pockets of plain mayo floating around! When it’s ready, take your patted-dry chicken, brush it with just a tiny bit of olive oil first (that helps the coating stick!), and then spread this mixture generously over the top of each piece. Make sure it’s a nice, thick layer, pressing it down so it stays put!
Baking Time and Temperature for Perfect Baked Ranch Chicken
Place your coated beauties into that prepared dish and slide them into the hot oven. You are looking at about 20 to 25 minutes. I cannot stress this enough: check that internal temperature! Food safety first, always. We want to pull them out when they hit 165°F (74°C) right in the thickest part. If you want that slightly crustier, almost crispy baked ranch chicken look, switch the oven to broil for just a minute or two right at the end. Watch it like a hawk during broiling, though, because it goes from golden to burnt surprisingly fast!
Tips for Success with Your Flavorful Baked Chicken
Even though this is a ridiculously easy recipe, I have a couple of non-negotiable tips that ensure you get that restaurant-quality texture every single time. This is all about respect for the process, even when the process is short!
First up, you absolutely must pat your chicken dry. I mean really dry! Use paper towels and blot away every bit of surface moisture. If the chicken is wet, the creamy ranch topping—which is what adds all the flavor to this simple ranch chicken—will just slide right off in the oven. That’s a tragedy we want to avoid!
My final, most important piece of advice: Let it rest! Once you pull that beautiful flavorful baked chicken out of the oven, let it sit on the cutting board or a clean plate for about five minutes before slicing into it. If you cut it immediately, all those gorgeous juices we worked so hard to keep locked in will run right out onto the plate. Resting lets those juices redistribute throughout the meat. Trust me on this one; it’s the difference between good chicken and *great* chicken.
Making Variations of Baked Ranch Chicken
Now that you’ve mastered the basic baked ranch chicken, which, let’s be honest, is flavor perfection on its own, you might be wondering how to shake things up. It’s so easy to riff on this base recipe without losing that amazing speed we love. We can tweak the coating to make it even richer or lighter, depending on what you’re craving that night.
If you want to lean into the creamy side—maybe you want a deeply savory, comforting experience that feels a bit decadent—you can certainly amp up the richness. After the chicken comes out of the oven, while it’s resting, you can sprinkle on slices of mozzarella or cheddar cheese right on top of that ranch crust. Pop it back under the broiler for just 30 seconds until it’s melted and bubbly. It turns this into an unofficial, super-simple cheesy chicken bake!
Remember how I mentioned Greek yogurt as a swap for mayonnaise? That’s your route to a slightly lighter, tangier dish. If you use yogurt, you might find you need an extra tiny bit of binder, or perhaps an extra half-teaspoon of Parmesan, just to make sure that coating stays put on your baked chicken thighs recipe variation. But honestly, the core ranch flavor stays intense no matter what you do!
For those looking for that true crunch factor, instead of just relying on the Parmesan, you can mix 1/4 cup of Panko breadcrumbs into your coating mixture before spreading it on. This guarantees a texture closer to a crispy baked ranch chicken finish. It’s such a small addition that dramatically changes the mouthfeel. If you love that crispy exterior with a juicy middle, you should check out my guide to making perfectly crispy toppings; the principles are very similar!
Serving Suggestions for Your Quick Chicken Dinner Ideas
The beauty of this baked ranch chicken is how perfectly it tastes with almost anything, making it a true cornerstone for any quick chicken dinner ideas rotation you have. Because the chicken itself is already so rich and savory from the ranch mixture, you don’t need side dishes that require a ton of fussy preparation. We want to keep the speed going!
When I make this for a standard weeknight chicken dinner, I usually go two simple paths: something green or something starchy. For greens, you can’t beat roasted broccoli. It gets a little charred and sweet, which works amazingly against the creamy ranch flavor. I have a great little recipe for garlic Parmesan roasted broccoli that takes about the same time as the chicken does in the oven. Seriously, toss the broccoli with oil, salt, and pepper, and when the chicken is halfway done, toss the broccoli into an adjacent pan!
If you need something a bit heartier, mashed potatoes are an absolute classic pairing. A simple batch of instant mashed potatoes, or even just some microwaved sweet potatoes, will soak up any little bits of flavorful moisture left in the bottom of your baking dish. You want that amazing pan sauce!
And here’s a little thought for leftovers—if you happen to have any, which is rare with this recipe! Use leftover flavorful baked chicken sliced up and tucked into soft flour tortillas with some crisp lettuce. It makes an incredible, fast lunch the next day. See? Flavorful, fast, and versatile. That’s what home cooking is all about!
Storage and Reheating Instructions for Leftover Baked Ranch Chicken
Don’t you just love it when a quick chicken dinner idea turns into a second, easy meal? Leftovers from this baked ranch chicken are fantastic, but we have to treat them right to keep that juice locked in. If you’re anything like me, you probably don’t make enough to last long, but if you do score some extras, here’s how to keep them happy in the fridge.
Once the chicken is completely cooled down—and I mean totally cooled—pop it into an airtight container. You can stack it, but try not to squash the topping too much. It’ll keep just fine in the refrigerator for about three to four days. It’s so flavorful that it tastes just as good cold in a salad the next day!
When it comes to reheating, our goal is gentle warmth so we don’t dry out the meat. Skip the microwave if you can, as that tends to turn chicken tough fast. The best way to revive this ranch chicken oven bake is in the oven. Set your oven to a low temperature, maybe 300°F (150°C). Pop your piece of chicken (maybe put a drop of water in the bottom of the dish to create a steamy environment) and let it warm up for about 10 to 15 minutes. Pull it out when it’s warmed through, and the topping should still be mostly intact!
If you are absolutely in a rush and have to use the microwave, use short bursts! Heat it for about 45 seconds, check it, flip it, and heat another 30 seconds. It won’t have that perfect crust anymore, but it will still be tender enough, which is the most important part for any weeknight chicken dinner success.
Frequently Asked Questions About Baked Ranch Chicken
It’s totally normal to have questions simmering when trying a new recipe, especially when you’re looking for that perfect, reliable outcome! I’ve gathered the questions I get asked most often about our go-to baked ranch chicken below. We want you to feel totally equipped to tackle this!
Can I use frozen chicken breasts for this baked ranch chicken recipe?
Oh, I strongly advise against it, hon. If you try to put that frosty block of chicken straight into the coating and the oven, it’s just going to be a mess. The coating won’t adhere properly because the ice crystals melt immediately, and you’ll end up with a watery situation.
For this recipe, especially since we are relying on that delicious mayo/Parmesan crust to seal in the moisture, you must thaw the chicken first. I usually plan ahead and move it to the fridge the night before. If you’re in a real pinch, you can use the cold water thawing method, but please make sure those breasts are fully thawed and patted completely dry before they even look at the ranch mix!
How do I make this a healthier ranch chicken recipe?
That’s a wonderful question! People often ask about achieving a healthy ranch chicken without sacrificing flavor, and we can totally adjust this. The biggest, easiest swap we discussed is replacing the mayonnaise with plain Greek yogurt. It keeps that creamy texture you need for the coating to stick, but it cuts down on fat significantly while adding a lovely little tang.
Beyond the main ingredients, think about your plate! Instead of serving this with something heavy, pair your flavorful baked chicken with lots of fresh, roasted vegetables. A huge green salad or some nicely charred asparagus makes this whole meal feel lighter and fresher, keeping it firmly in the healthy category without changing the core recipe itself.
What is the best internal temperature for baked chicken breast?
This is the most important question for trust and safety in the kitchen! Whether you are making this as a standard chicken breast bake or a variation, the USDA is very clear here: the safe internal temperature for doneness is 165°F (74°C). This is non-negotiable for poultry.
I always tell folks to use a meat thermometer—it’s the only way to be sure! Insert it into the thickest part of the breast, avoiding the bone if you happen to use thighs. Pull the chicken out of the oven right when it hits that mark. Remember, it will carry over cook for a few minutes while it rests, which is why that resting step is so vital for that perfect, tender texture we all love in a juicy baked chicken recipe.
If you keep running into trouble with your cooking, remember you can always reach out to me directly through the contact page. We’re here to help you succeed!
Share Your Kitchenican Baked Ranch Chicken Success
Well, you made it! You’ve walked through the process of creating what I truly believe is the most effortless, flavorful baked ranch chicken out there. Now, it’s your turn to shine in your own kitchen. I want to hear everything!
Did you try adding a sprinkle of extra garlic powder? Did you swap the mayo out for yogurt? Or maybe you just stuck to the original plan, and it was a total hit for your family. Don’t keep those small victories to yourself!
Please hop down to the comments below and let me know what you thought. Give the recipe a star rating—that’s how other home cooks, maybe those just starting their journey, know they can trust this recipe too. We are building this community together, one delicious, minimal-fuss meal at a time. Knowing that this recipe is making your weeknights easier is honestly the best payoff for me. Feel free to share pictures using the tag #KitchenicanCooks, if you’re on social media! (And while you’re looking around, you can always read up on our privacy policy if you’re curious about how we handle things around here.)
PrintThe Ultimate Juicy 5-Ingredient Baked Ranch Chicken (Perfect for Weeknights)

You can make incredibly flavorful and juicy baked ranch chicken using just five simple ingredients. This oven bake recipe is ideal for busy weeknights when you need an effortless, family-friendly dinner that requires minimal cleanup.
- Prep Time: 10 min
- Cook Time: 25 min
- Total Time: 35 min
- Yield: 4 servings 1x
- Category: Dinner
- Method: Baking
- Cuisine: American
- Diet: Low Fat
Ingredients
- 4 large boneless, skinless chicken breasts
- 1 packet (1 oz) dry ranch seasoning mix
- 1/2 cup mayonnaise
- 1/4 cup grated Parmesan cheese
- 1 tablespoon olive oil
Instructions
- Preheat your oven to 400°F (200°C). Lightly grease a 9×13 inch baking dish or line it with parchment paper for easier cleanup.
- In a small bowl, combine the mayonnaise, dry ranch seasoning mix, and grated Parmesan cheese. Mix until the ingredients are fully incorporated into a thick coating.
- Pat the chicken breasts dry using paper towels. Rub the olive oil lightly over all sides of the chicken.
- Spread the ranch mixture evenly over the top of each chicken breast, pressing gently so the coating adheres well.
- Place the coated chicken breasts in the prepared baking dish.
- Bake for 20 to 25 minutes, or until the internal temperature of the chicken reaches 165°F (74°C) and the topping is lightly golden brown. For extra crispiness, you can briefly place it under the broiler for the last 1-2 minutes, watching closely to prevent burning.
- Remove from the oven and let the baked ranch chicken rest for 5 minutes before serving.
Notes
- For a variation using chicken thighs, increase the baking time by 5 to 10 minutes, as thighs are thicker and benefit from longer cooking.
- If you prefer a less creamy texture, substitute the mayonnaise with 1/2 cup of plain Greek yogurt for a healthier, tangier coating.
- Serve this flavorful baked chicken with roasted potatoes or a simple green salad for a complete weeknight meal.
Nutrition
- Serving Size: 1 breast
- Calories: 410
- Sugar: 2
- Sodium: 680
- Fat: 28
- Saturated Fat: 6
- Unsaturated Fat: 22
- Trans Fat: 0
- Carbohydrates: 3
- Fiber: 0
- Protein: 35
- Cholesterol: 115