
Hosting a party can sometimes feel like you need a culinary degree just to get appetizers on the table without panicking. I get it! We often believe that impressive finger food has to be complicated, involving multiple steps and fancy equipment. That’s simply not true, and honestly, I want to take all the stress out of your next big cookout or holiday gathering. Trust me when I say I’ve spent years figuring out the recipes that deliver maximum impact with minimal fuss. That’s why I’m so excited to share what I genuinely believe is The Best Easy Classic Cheese Ball Recipe with Bacon and Pecans. It proves that your confidence—not complexity—is the secret ingredient that makes everything delicious. This savory spread is ready in minutes and is guaranteed to disappear first! For other low-stress dips, you should check out my recipe for easy whipped ricotta dip.
- Why This Easy Cheese Ball Recipe Works for Every Gathering
- Gathering Ingredients for Your Classic Cheese Ball Recipe
- Step-by-Step Instructions for the Best Easy Cheese Ball Recipe
- Tips for Success with Your Must Try Cheese Ball
- Serving Suggestions for Your Cheesy Ball
- Storage and Reheating Instructions
- Frequently Asked Questions About This Savory Cheese Spread
- Estimated Nutritional Data
- Share Your Kitchen Confidence
Why This Easy Cheese Ball Recipe Works for Every Gathering
When you’re assembling a spread for a big event—whether it’s the Super Bowl or Christmas Eve—you need reliable hitters. This particular classic cheese ball recipe takes the familiar, beloved base and adds smoky bacon and crunchy pecans. It’s an inspired little upgrade that makes it incredibly memorable. Trust me, once you try this version, you’ll find yourself leaning on it again and again for hosting duties. It’s the definition of a simple snack recipe that punches way above its weight class. For related dips that hold up well at parties, be sure to look at my easy chili cheese dip recipe.
The Ultimate Party Appetizer Recipes
This cheesy ball is designed for success! It’s what I call one of those legendary crowd pleasing appetizers. It’s fantastic for casual game day snacks where everyone is grabbing quickly, but it looks totally gorgeous sitting out at a holiday potluck, too. It simply doesn’t clash with any theme, and everyone loves that creamy, savory combination.
Make Ahead Appetizers for Stress-Free Entertaining
This is where we really beat the stress monster! This recipe needs time in the fridge to let the flavors integrate and help the whole thing firm up so you can shape it perfectly. That means you can whip this entire thing up a day or two before your event. It’s one of the best make ahead appetizers you can keep tucked away, letting you focus on everything else the day of the party. That chilling time is crucial!
Gathering Ingredients for Your Classic Cheese Ball Recipe
The beauty of a great classic cheese ball recipe is that it doesn’t require hunting down specialty items. We are sticking to tried-and-true ingredients you can grab at any standard grocery store. That’s the Kitchenican way—great results using accessible stuff! Having these components ready is half the battle won. If you need another simple recipe to round out your appetizer spread, go check out my easy creamy fruit dip recipe!
Ingredient Clarity for a Perfect Homemade Cheese Ball
Getting the prep right here sets you up for success the second you start mixing. Remember, the cream cheese needs to be soft—I mean really soft, almost spreadable—so you don’t end up fighting your mixer. These measurements create the absolute best homemade cheese ball:
- 8 ounces cream cheese, softened (this is critical!)
- 8 ounces sharp cheddar cheese, shredded (don’t use pre-shredded if you can help it; it mixes better when you shred it yourself!)
- 1/2 cup cooked bacon, crumbled
- 1/4 cup chopped pecans, plus 1/2 cup for coating
- 1 teaspoon Worcestershire sauce
- 1/2 teaspoon garlic powder
- 1/4 teaspoon onion powder
- 1/4 teaspoon salt
- 1/4 teaspoon black pepper
- Optional: 2 tablespoons chopped fresh chives or green onion tops
Step-by-Step Instructions for the Best Easy Cheese Ball Recipe
Okay, the ingredients are assembled, and you’re ready to create magic! I love how fast this all comes together—it really is the definition of an easy cheese ball recipe. Remember, the goal here is smooth, uniform flavor distribution. Don’t rush the mixing process! If you’re struggling to find time to cook in general, these steps should fit right into those easy weeknight dinners you’re trying to master. Follow these steps exactly for the perfect outcome!
Mixing the Cream Cheese Appetizer Base
First things first: grab your softened cream cheese and the shredded sharp cheddar. You need to beat these two together until they are completely smooth. I prefer using a hand mixer for this part because it saves your arm, but a really sturdy wooden spoon works just fine if you get some good elbow grease into it! Once that base is silky (no lumps!), you fold in the flavor boosters: the bacon, the first measure of pecans, the Worcestershire sauce, and all those lovely seasonings. Mix it just until everything looks evenly speckled. Don’t overmix past the point of combining, or the texture gets weird.
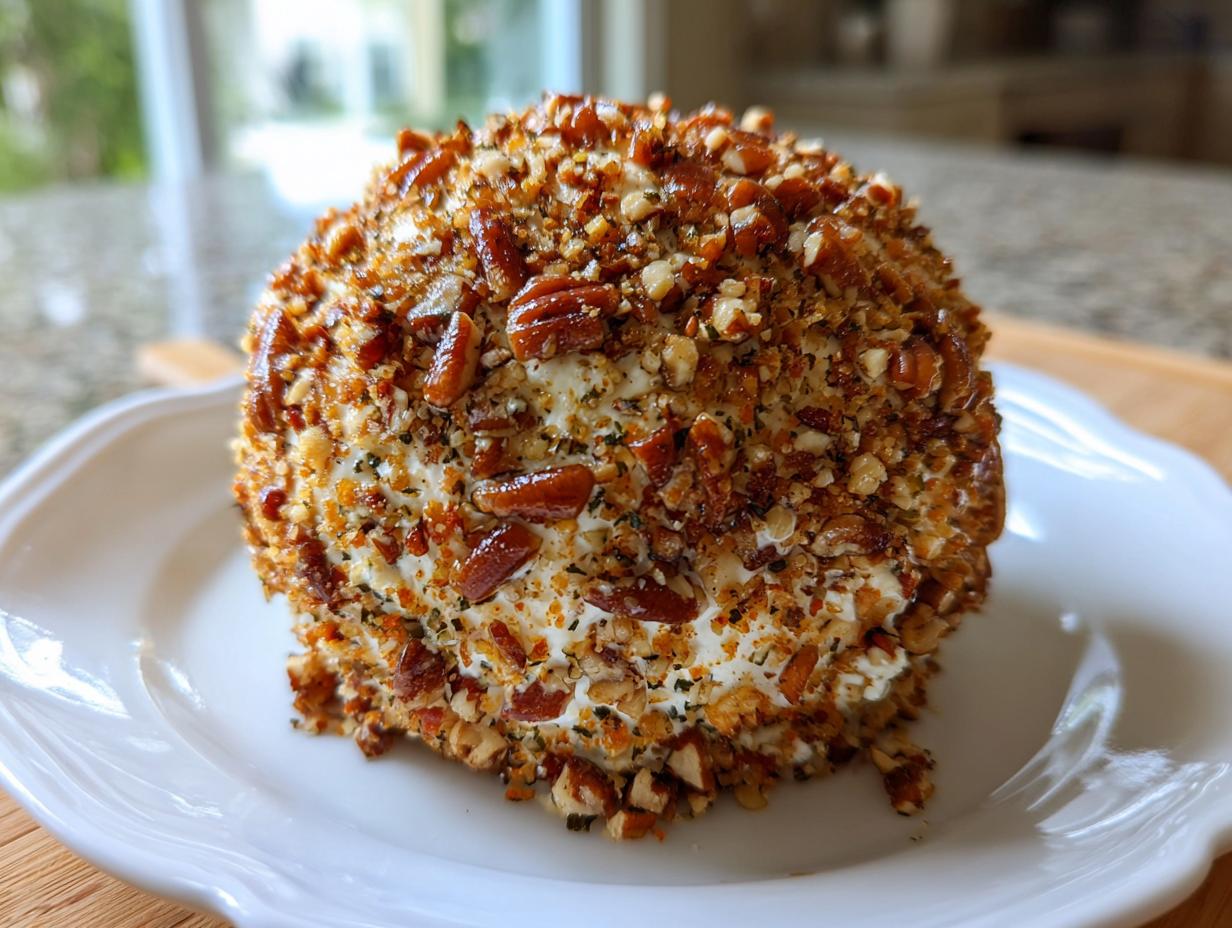
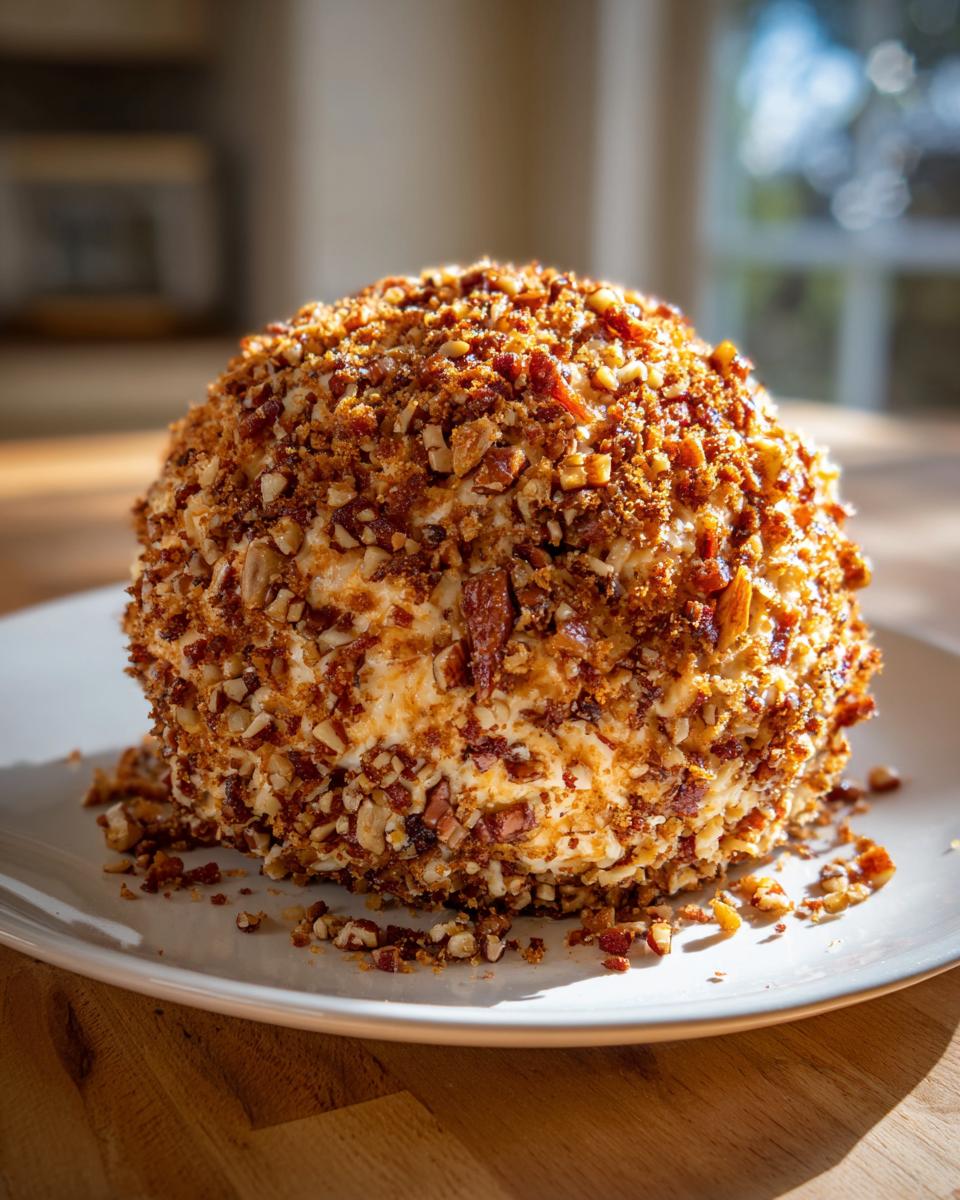
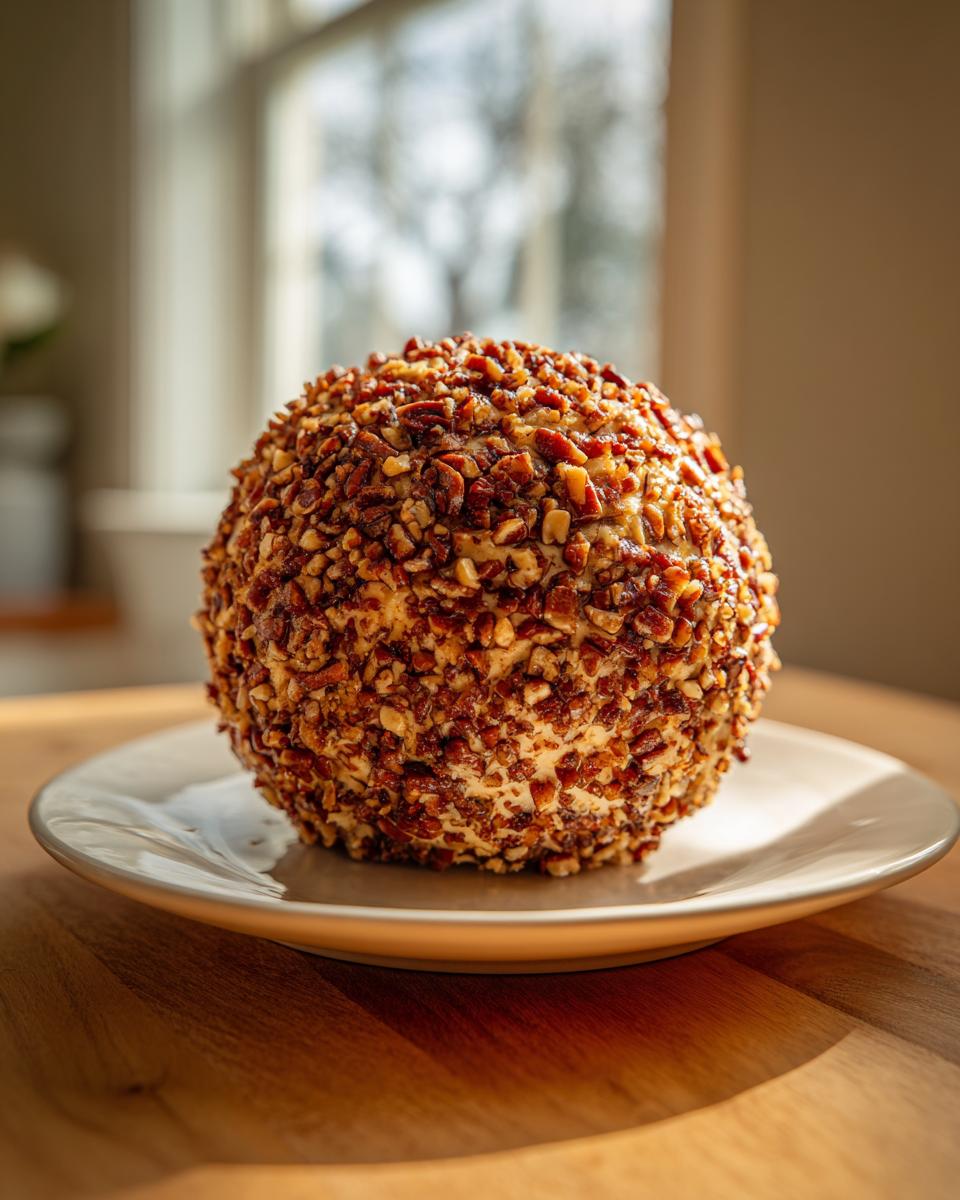
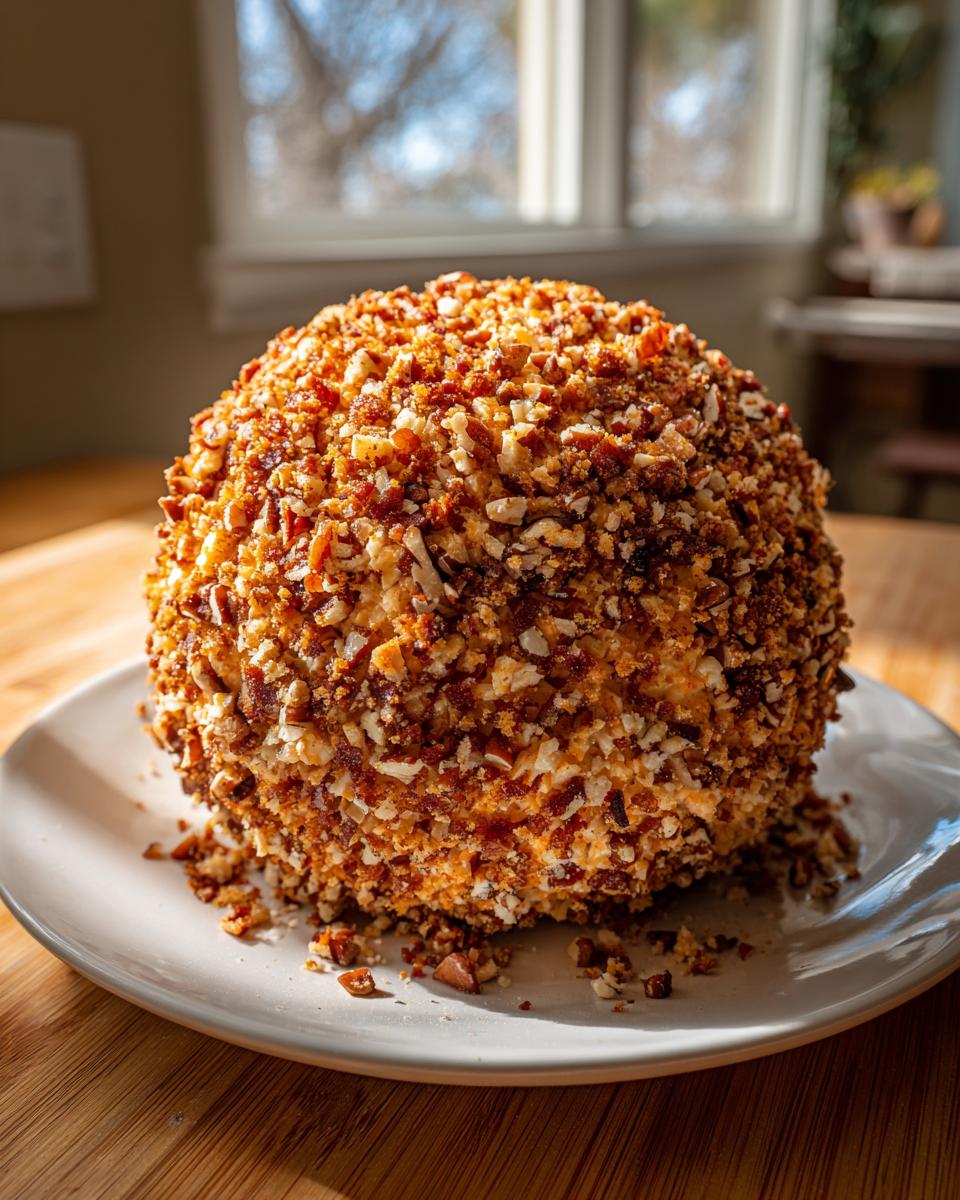
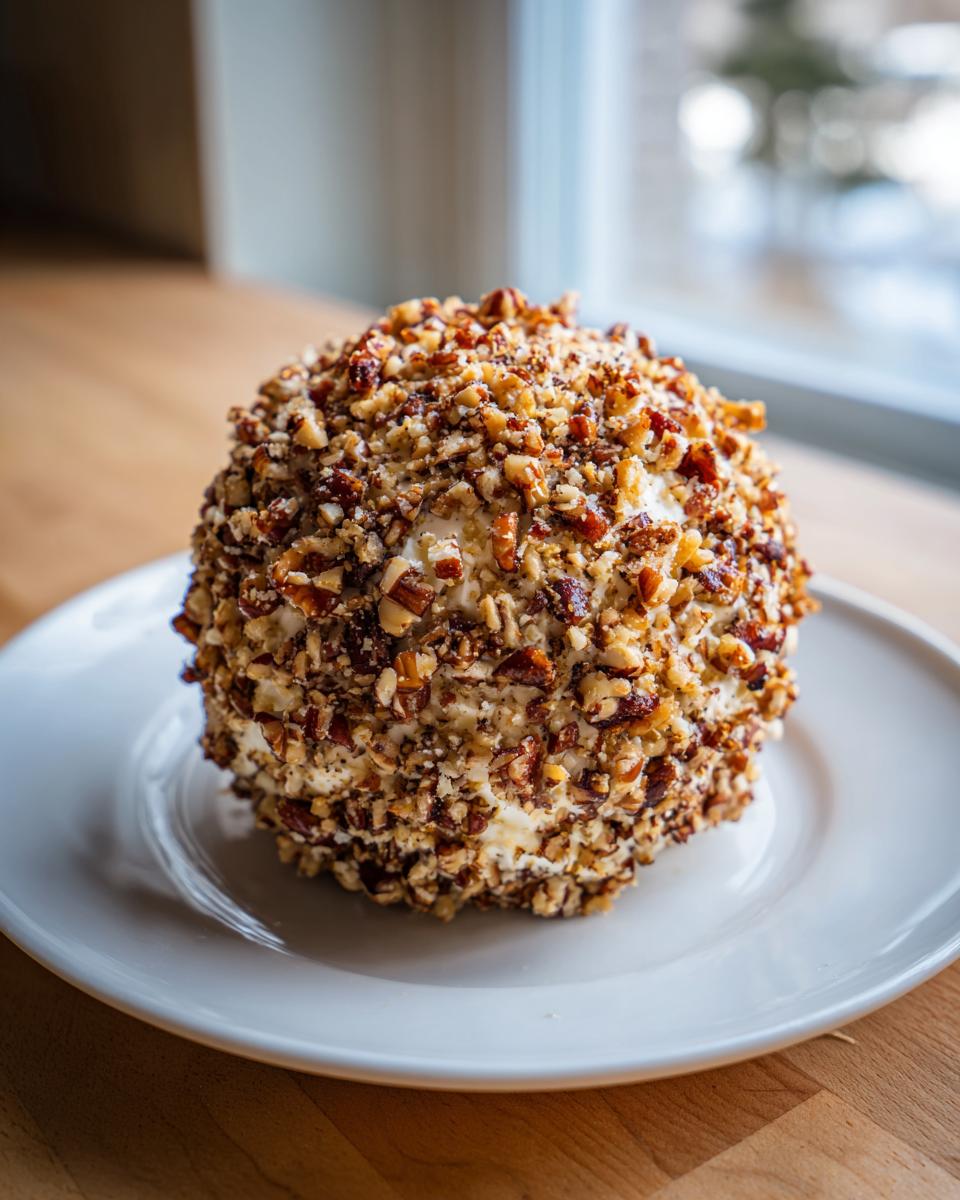
Shaping and Applying the Pecan Coated Cheese Ball Finish
Now for the shaping! Scoop that cheesy mixture onto a large piece of plastic wrap. Use the wrap to gently guide the mixture into a nice, tight ball shape. Don’t handle it too much with your bare hands; the warmth melts the cheese, and then it gets sticky fast! Once you have your beautiful sphere, spread the remaining 1/2 cup of pecans out on a shallow plate. Roll that cheese ball right over the nuts until it’s coated completely on all sides. This crunch is what makes our cheese ball recipe so addictive! Pop it onto a plate, wrap it tight in that plastic wrap, and get it into the fridge for at least two hours. That chilling time is non-negotiable—it marries all those savory flavors together.
Tips for Success with Your Must Try Cheese Ball
You’ve mastered the mixing, but I want to give you a few extra nuggets of wisdom so this must try cheese ball turns out perfectly every single time you make it. Remember, cooking is about learning the ‘why’ behind the steps, and that’s what builds real kitchen confidence, right? We want this appetizer to shine, whether it’s sitting next to your desserts or as the star of the show. If you’re looking for some incredibly decadent dessert inspiration, check out my brown butter sugar cookies!
Ingredient Notes and Substitutions
Let’s talk cheese first. Using sharp cheddar—and I mean *sharp*—is a huge deal here. Mild cheddar just gets lost in the cream cheese, and we want that zesty bite! If you don’t have pecans on hand, don’t stress; chopped walnuts are a fantastic substitute, offering similar crunch. If you want to avoid nuts entirely, try crushing up some plain, salty pretzels until they are the same size as the nuts. You could even use a mix of dried herbs like dried dill and parsley for a totally different, but equally delicious, coating!
Serving Suggestions for Your Cheesy Ball
So, you’ve got this stunning, perfectly chilled cheese ball recipe ready to go! Now comes the fun part: what are you going to serve it with? A great appetizer isn’t just about the dip; it’s about the vehicle that gets that delicious, savory spread from the plate to your mouth. You want things that are sturdy enough to handle this rich mixture. If you want another amazing finger food idea that’s a little more substantial, you absolutely have to try my recipe for steak crostini! This cheese ball pairs beautifully with all sorts of crunch.
Pairing with Finger Food for Parties
Since this is a thicker, denser spread—not a thin dip—you need things that won’t snap off halfway to your mouth. Avoid those super thin, delicate crisps! I always lean towards sturdy water crackers or even those sturdy rye crisps; they have the best structural integrity. Pretzels are a must, especially those thicker pretzel rods or hard pretzel chips—they contrast perfectly with the creamy interior.
Don’t forget the veggies! For anyone looking for something lighter or gluten-free, fresh vegetables are a game-changer. You want crisp things here. Think about thick slices of cucumber, celery sticks (they hold up forever!), or maybe some crisp bell pepper strips. Honestly, slicing up some carrots and radishes gives a nice earthy balance to all that cheese and bacon goodness. Presentation is everything, so arrange your crackers and veggies artfully around the ball—it makes the whole display look bigger and more abundant!
Storage and Reheating Instructions
One of the major reasons I love this appetizer so much is that it plays well with your schedule! You absolutely shouldn’t rush this recipe, and thankfully, you don’t have to. Since this is a fantastic make-ahead appetizer, you can get it completely ready to go before the big day even arrives. Planning ahead is how we build confidence in the kitchen, I always say!
Once you’ve rolled your cheese ball in the pecans and wrapped it tightly in plastic wrap, it needs to chill to firm up and let the flavors settle in. I usually aim for at least two hours, but honestly, if you wrap it up tight and put it in the fridge, it’s perfect for up to three full days. The flavor actually gets richer the longer it sits in there—it’s like aging cheese, but faster!
Now, here is the essential step that everyone forgets, and it ruins the texture for everyone: serving temperature! When you pull that beautiful, firm ball out of the fridge, do not serve it immediately. If you cut into it cold, it will be hard, clumpy, and you won’t get that gorgeous, spreadable texture we worked so hard for. You need to let it sit on the counter, still wrapped loosely, for about 15 to 20 minutes before you unwrap it and set it out. This little bit of time at room temperature softens the cream cheese just enough so it spreads beautifully onto crackers. It’s a small tweak that makes a huge difference in presentation and taste!
Frequently Asked Questions About This Savory Cheese Spread
I know that when we approach a beloved recipe like this savory cheese spread, questions always pop up about substitutions or timing. That’s totally normal! Building that confidence means knowing you can adapt things to fit your pantry or your party schedule. We’ve covered the basics, including how to make this an amazing game day snack, but let’s tackle some specific things people often ask about this easy cheese ball recipe.
Can I make this without bacon for a vegetarian option?
Absolutely! If you need to skip the bacon—no problem at all. You can make this recipe vegetarian very easily. Think about what the bacon adds: salt, depth, and a little bit of chew. To replace that complexity, try adding about two tablespoons of finely minced sun-dried tomatoes. They bring a concentrated, savory burst that’s delicious! Or, if you really want those herbs to shine, toss in a teaspoon of your favorite dried Italian herbs for a different kind of punch.
How long does the cheese ball need to chill?
If you are in a massive hurry, the absolute minimum chilling time for this cheesy ball to get firm enough to handle is two hours. Seriously, don’t skip that! If you try to roll it or shape it right after mixing, you’ll end up with a sticky mess all over your hands, and no one wants that mid-party cleanup. However, for the best flavor? I always push for longer. Chilling it overnight, up to three days, lets that Worcestershire sauce and the spices really sink into the cheese. It just tastes deeper and better the longer it sets.
What if I don’t have pecans? What are good alternatives for coating?
Pecans are amazing, but substitution is the spice of life, right? If you don’t have pecans, chopped walnuts are my number one go-to swap—they taste almost identically wonderful when toasted lightly beforehand, though you can use them raw here too. If you need to avoid tree nuts, try crushing up some plain, thin pretzels until they are roughly the same size as the chopped nuts. The pretzels add salt and crunch! Personally, I also love using dried herbs mixed with a tiny bit of paprika for a green or red coating if I want something completely different instead of nuts. If you’re looking for other speedy options for your week, check out my ideas for quick, healthy breakfasts!
Estimated Nutritional Data
Okay, so we’ve established that this is the easiest, most delicious party food on the planet, but sometimes people ask me about the specifics. Look, I’m not a nutritionist—I’m just Ava, a home cook who loves good food—but I want to be transparent about what’s in our wonderful cheese ball recipe! The nutritional data below is just an estimate based on the ingredients we used, divided into 12 equal servings, as listed in the recipe card. Take this as a rough guide for what you’re enjoying!
For reference, I’m basing these numbers on the standard recipe, including the bacon and pecans. If you decide to switch out the nuts, or maybe skip the bacon to make it vegetarian, those numbers will change slightly. You can read more about our data handling over on the privacy policy page, but here’s the snapshot:
- Serving Size: 1/12 of recipe
- Estimated Calories: 160
- Estimated Total Fat: 15g (This is where the cheese and bacon hang out!)
- Estimated Saturated Fat: 8g
- Estimated Protein: 7g
- Estimated Carbohydrates: 2g
- Estimated Sugar: 1g
See? It’s rich, full of that satisfying fat and protein that makes appetizers feel hearty, but it’s still relatively low in sugar. It’s a perfect balance for a celebratory spread. Just remember, anything this good is best enjoyed responsibly!
Share Your Kitchen Confidence
Wow, we made it! You’ve got the **cheese ball recipe** that’s going to be the star of your next party, potluck, or quiet night on the couch. I sincerely hope this recipe boosted your confidence in the kitchen. That’s what Kitchenican is all about—taking those simple ingredients and turning them into something impressive without breaking a sweat.
Now that you’ve tried making this **simple snack recipe**, I truly want to hear about it! Did the bacon and pecan combination sing? Did your guests ask for the recipe immediately? Don’t keep the magic to yourself! Please take a moment to leave a star rating right down below—it helps other cooks know this recipe is worth their time. And if you snapped a picture of your beautiful presentation next to those crackers and veggies, tag me! Seeing your success is the greatest joy for me.
Also, if you found yourself loving how easy this was and want to jump right back into planning your next low-stress entertaining moment, maybe you should check out some other ideas I’ve collected. I found this great roundup of other amazing recipes over at 15 Best Cheese Ball Recipes that you might want to bookmark for next time!
If you ever have a question while cooking—maybe you’re wondering about the best way to soften cream cheese or need hosting advice—you know where to find me. Head over to the contact page, and let’s keep this conversation going. Keep cooking simply, keep eating well, and keep believing in what you can make!
PrintThe Best Easy Classic Cheese Ball Recipe with Bacon and Pecans

Make this classic cheese ball for your next party or holiday gathering. It uses simple ingredients, comes together fast, and is a guaranteed crowd-pleaser. You can prepare this appetizer ahead of time for stress-free entertaining.
- Prep Time: 15 min
- Cook Time: 0 min
- Total Time: 2 hr 15 min
- Yield: 12 servings 1x
- Category: Appetizer
- Method: Mixing and Chilling
- Cuisine: American
- Diet: Vegetarian
Ingredients
- 8 ounces cream cheese, softened
- 8 ounces sharp cheddar cheese, shredded
- 1/2 cup cooked bacon, crumbled
- 1/4 cup chopped pecans, plus 1/2 cup for coating
- 1 teaspoon Worcestershire sauce
- 1/2 teaspoon garlic powder
- 1/4 teaspoon onion powder
- 1/4 teaspoon salt
- 1/4 teaspoon black pepper
- Optional: 2 tablespoons chopped fresh chives or green onion tops
Instructions
- In a medium bowl, combine the softened cream cheese and shredded cheddar cheese. Beat them together with a hand mixer or a sturdy spoon until the mixture is smooth and fully combined.
- Add the crumbled bacon, 1/4 cup of chopped pecans, Worcestershire sauce, garlic powder, onion powder, salt, and pepper to the cheese mixture. Mix well until all ingredients are evenly distributed. If using, stir in the chives or green onion tops now.
- Place the cheese mixture onto a piece of plastic wrap. Shape the mixture into a ball.
- In a small, shallow dish, spread out the remaining 1/2 cup of chopped pecans.
- Roll the cheese ball in the pecans until the entire surface is evenly coated.
- Wrap the cheese ball tightly in plastic wrap. Chill in the refrigerator for at least 2 hours, or up to 3 days, to allow the flavors to meld and the ball to firm up.
- Before serving, let the cheese ball sit at room temperature for about 15 minutes to soften slightly. Serve with crackers, pretzels, or fresh vegetables.
Notes
- You can substitute the pecans with chopped walnuts or a mix of dried herbs for a different coating flavor.
- This is an excellent make-ahead appetizer; it tastes even better the next day.
- For game day snacks, serve alongside sturdy pretzel chips or celery sticks.
Nutrition
- Serving Size: 1/12 of recipe
- Calories: 160
- Sugar: 1
- Sodium: 210
- Fat: 15
- Saturated Fat: 8
- Unsaturated Fat: 7
- Trans Fat: 0
- Carbohydrates: 2
- Fiber: 0
- Protein: 7
- Cholesterol: 40