
I swear, if I see one more stunning, perfectly crafted dessert trend on social media, I’m going to throw my apron in the air and order takeout. Viral desserts just look so impossibly fancy, right? It makes you think you need a pastry degree just to try them. But that’s where we step in, because that myth ends right here, right now. I’m Ava Sinclair, and if I learned anything starting out in my cramped little kitchen, it’s that you don’t need complex techniques to achieve absolute luxury!
Today, we’re conquering those breathtaking dubai chocolate balls. They seem like something that takes days, but trust me, these are decadent, rich, and completely achievable—and better yet, they are deliciously no-bake. We’re stripping away all the intimidation. If you’ve ever doubted your ability to make something that looks this gourmet, keep reading. We’re going to prove that the most important ingredient you need is just the confidence to start. You can absolutely make these amazing treats today.
If you’re looking for more simple sweets to build that confidence, check out my collection of delicious dessert recipes!
- Why You Will Love Making These Dubai Chocolate Balls
- Essential Ingredients for Gourmet Dubai Chocolate Balls
- Step-by-Step Guide to Perfect Dubai Chocolate Balls
- Tips for Success When Making Homemade Luxury Chocolate Bites
- Variations on Classic Dubai Chocolate Balls
- Storage and Reheating Instructions for Decadent Chocolate Truffles
- Frequently Asked Questions About Dubai Chocolate Balls
- Nutritional Estimates for This Rich Cocoa Dessert
- Share Your Experience Making Dubai Chocolate Balls
Why You Will Love Making These Dubai Chocolate Balls
I’m telling you right now, once you see how simple these turn out, you’ll be making them every weekend. Seriously, these aren’t just good; they hit that sweet spot of looking incredibly high-end without any real fuss. They are pure, unadulterated indulgence, and they require zero oven time!
- They are the ultimate No Bake Chocolate Balls Recipe. You just mix, chill, and dip. It’s that straightforward, which is perfect for busy weeknights or last-minute party planning!
- They deliver that “wow factor.” These look like they came from a fancy pastry shop, making them perfect for gifting or impressing guests. Welcome to the world of Homemade Luxury Chocolate Bites!
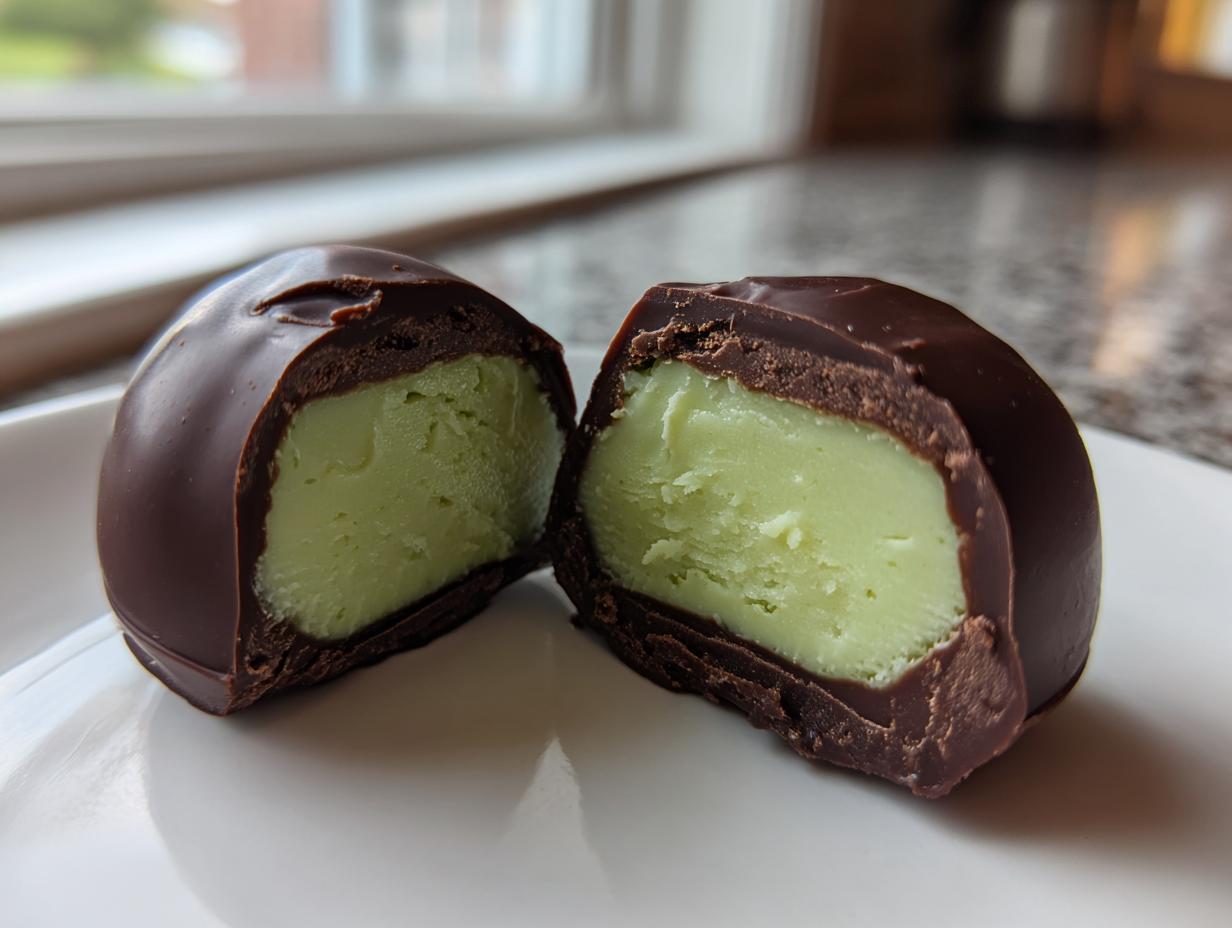
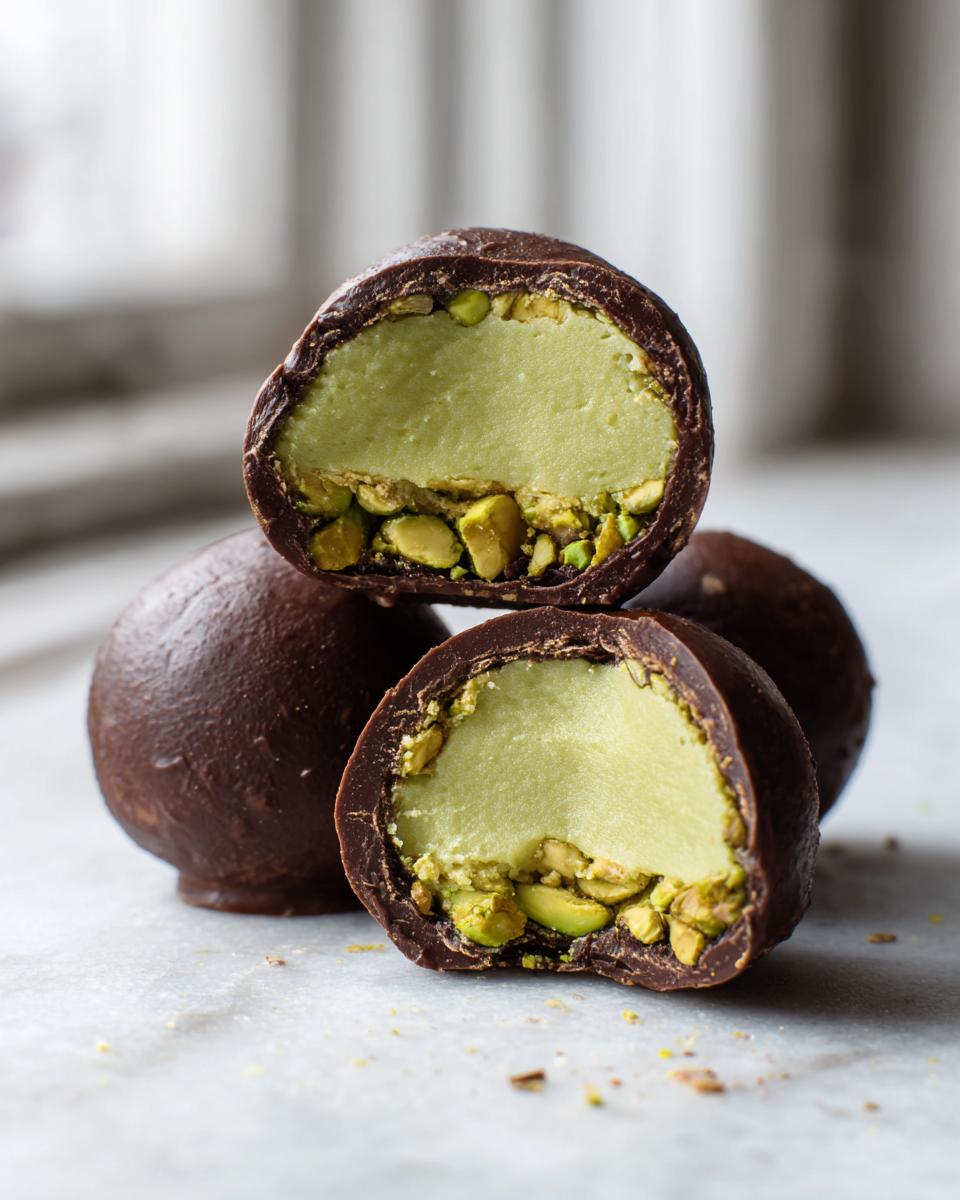
- The texture combination is unbelievable. You get the smooth, rich chocolate shell, a soft, fudgy middle layer, and that satisfying, unexpected crunch inside. It’s a textural masterpiece!

- This recipe is lightning fast for what you get out of it. While the chilling time is mandatory, your actual hands-on time is minimal, making these some of the best Easy Chocolate Truffles you’ll ever mix up.
- The pistachio filling adds that perfect hint of exotic flavor that sets these Dubai Chocolate Balls apart from any plain old truffle. It tastes complex, but it’s so easy to whip up.
Essential Ingredients for Gourmet Dubai Chocolate Balls
Okay, I know I keep saying these are simple, but when you’re aiming for that truly decadent, luxurious experience, the quality of your ingredients absolutely matters here. We aren’t obscuring anything with tons of sugar or baking tricks, so every component needs to shine. Don’t panic, though! You don’t need a specialty store—I sourced everything needed for this recipe locally. We’re building this masterpiece in three layers: the creamy, fudgy base, the vibrant pistachio center, and the beautiful chocolate cloak on the outside. Focus on getting good cocoa and quality chocolate; that’s half the battle won for these Decadent Chocolate Truffles.
Here is what you’ll need to gather before we start mixing:
- 1 cup fine digestive biscuits or graham crackers, crushed (make sure they are very fine!)
- 1/2 cup unsalted butter, melted
- 1/4 cup cocoa powder, unsweetened (use the best one you have!)
- 1/4 cup powdered sugar
- 1 tablespoon milk (or heavy cream for an even richer texture)
- 1 teaspoon vanilla extract
-
For the Creamy Pistachio Filling Recipe:
- 1/2 cup shelled pistachios, finely ground (get them almost to a flour consistency)
- 1/4 cup cream cheese, softened (this is important for smoothness!)
- 2 tablespoons powdered sugar (for filling)
- 1/4 teaspoon cardamom powder (optional, but oh my goodness, it transports you!)
-
For the Coating:
- 10 ounces high-quality dark or milk chocolate, chopped (I prefer bittersweet for contrast)
- 1/4 cup Kataifi pastry threads, lightly toasted (If you can find these, they provide that incredible Middle Eastern crunch!)
Step-by-Step Guide to Perfect Dubai Chocolate Balls
We are diving into the assembly now! Because this is a No Bake Chocolate Balls Recipe, time management is all about organized chilling rather than oven time. Follow these steps closely, especially the chilling, and you’ll have flawless Dubai Chocolate Balls ready to impress in under two hours!
Creating the Rich Chocolate Base for Your Dubai Chocolate Balls
This base is what gives us that fudgy, dense layer that holds everything together. Start by getting your crushed biscuits—and I mean really fine crumbs, almost like flour—mixed up in a bowl with the melted butter. You need that butter to coat every little crumb.
Next, toss in the cocoa powder and the first measure of powdered sugar. Mix it well. My expert tip here: since we aren’t using any liquid binders like syrup, the quality of your cocoa matters hugely for the flavor foundation. Use an unsweetened one that smells rich and dark.
Once that’s combined, we add just enough milk and vanilla to bring it together into a workable dough. You’re looking for a consistency that feels like firm, damp playdough—what I call ‘wet sand.’ If it’s crumbly, add milk half a teaspoon at a time. Wrap this ball of dough snugly and let it rest in the fridge for 30 minutes so it firms up. This chill makes shaping so much easier.
Preparing the Creamy Pistachio Filling Recipe
While the base chills, let’s make the star inside! This step is what elevates this from a simple truffle to a featured Pistachio Dessert Recipe. We need this filling to be smooth, not grainy.
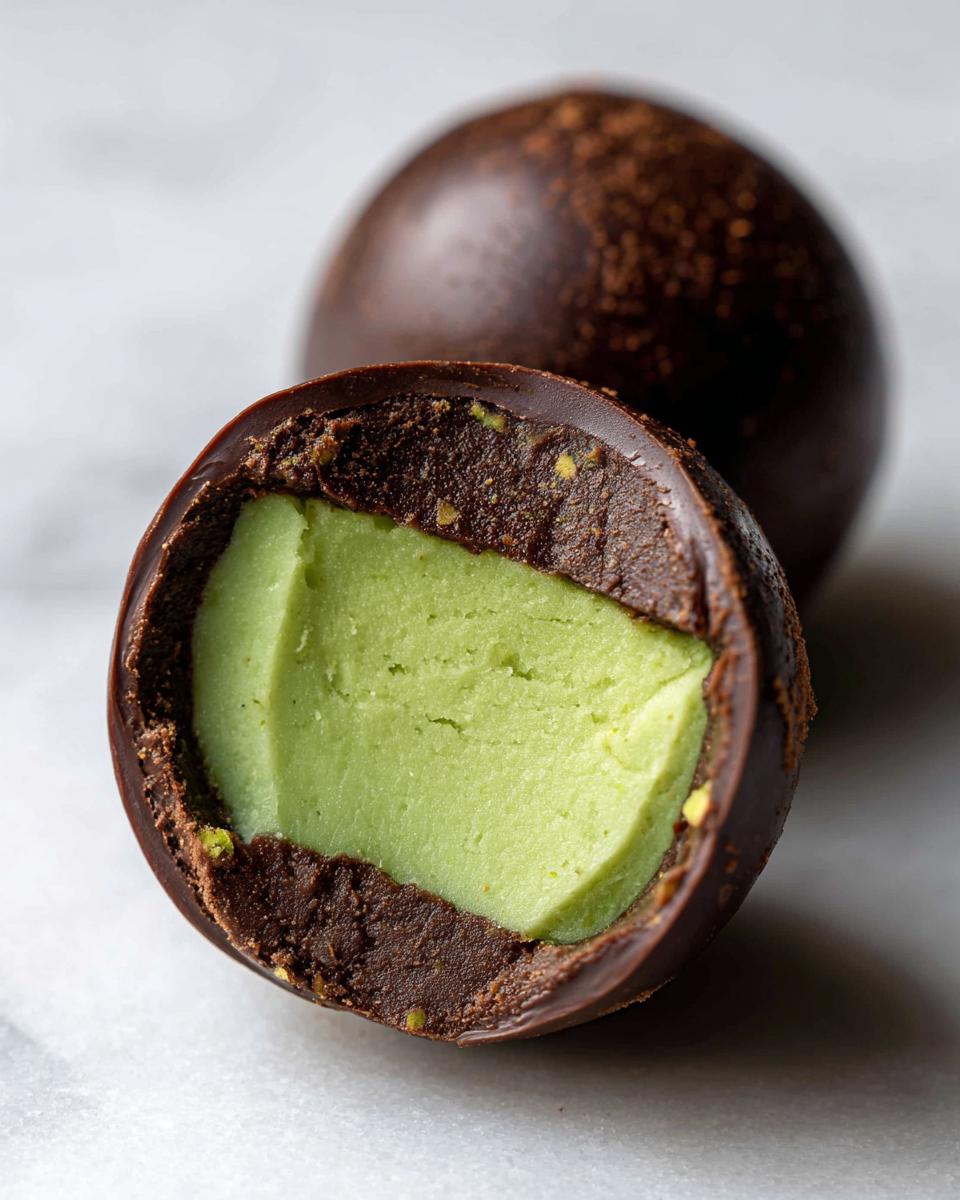
In a small bowl, combine your finely ground pistachios, the softened cream cheese, the filling powdered sugar, and that optional hint of cardamom. You need to beat this until it’s completely smooth. If your cream cheese is stiff, the filling will be lumpy, so make sure it’s truly soft! You want a beautiful, bright green, creamy dollop that tastes nutty and almost sweet-tart.

Assembling and Chilling the Dubai Chocolate Balls
This is where we bring the two components together. Take your chilled chocolate base dough out. I like to use a small cookie scoop—about one tablespoon—to keep them uniform. Flatten that scoop into a small disc in the palm of your hand.
Place a small amount of your pistachio filling, maybe half a teaspoon, right in the center of the disc. This is delicate work! Gently fold the edges of the chocolate dough up and over the filling, sealing it completely. You need to roll that sealed ball between your palms just enough to smooth out the creases and get a nice sphere shape. Don’t overwork it, or the heat from your hands will melt the base.
Crucially, place these assembled balls on a parchment-lined tray and pop them back in the fridge for at least one hour. This super-chill is the secret! If they aren’t rock solid, the melted chocolate coating will just slide right off, and we absolutely cannot have that!
Mastering the Chocolate Coating Techniques for Dubai Chocolate Balls
Now for the final, shiny bow on top! We need that beautiful chocolate shell, and that means treating the chocolate right. Melt your chopped chocolate gently, either over a double boiler or in the microwave using very short 15-second bursts, stirring aggressively between each burst to keep it from getting too hot and seizing up. Smooth, glossy chocolate is the goal!
Once your balls are frozen solid from that long chill, grab your fork or dipping tool. Dip one perfectly chilled ball completely into the melted chocolate. Lift it out and gently tap the fork against the side of the bowl to let the extra chocolate drip back in. This is key to good Chocolate Coating Techniques.
If you’re adding that gorgeous crunch—and you should—you need to work fast! While the chocolate coating is still totally wet, roll the dipped ball lightly in those toasted Kataifi threads. Place it back on the parchment paper immediately to set. If you wait even a minute, the chocolate hardens, and the crunch won’t stick. If you skip the Kataifi, just let them sit until the coating sets up in the fridge for about 15 minutes. Done! You’ve just made gourmet Dubai Chocolate Balls.
For more insights on making perfect coatings, you might enjoy my guide on making homemade chocolate syrup—it helps with understanding chocolate consistency!
Tips for Success When Making Homemade Luxury Chocolate Bites
I want every single one of you to succeed, and that means talking about the tiny little details that separate a good chocolate ball from a truly show-stopping batch of Homemade Luxury Chocolate Bites. Honestly, the difference is usually down to temperature.
First off, let’s talk about the chocolate coating again. If your chocolate seizes up and looks thick, grainy, or suddenly solidifies right after melting, you used slightly wet equipment or microwaved it too long. Always use scrupulously dry bowls and utensils when working with melted chocolate. If you’re worried about high heat, stick to the double boiler method—slow and steady wins this race.
Temperature control is your best friend during assembly. That super-chilled ball? It’s crucial. If the interior is even slightly soft when it hits the warm melted chocolate, the heat transfers too fast, the filling might leak out, or the coating will bubble up instead of setting smooth. So, if your fridge is packed, consider using a small ice pack tray lined with parchment specifically for that crucial final chill before dipping!
When you’re rolling them in the Kataifi or chopped pistachios, think light pressure. You aren’t trying to squish the coating on; you’re just gently encouraging it to adhere to the wet chocolate shell. Too much pressure, and you’ll dent your perfect sphere shape.
If you want that incredible, professional-looking sheen on the chocolate shell, adding a teaspoon of coconut oil or cocoa butter to your melted chocolate mixture before dipping works wonders. It helps the chocolate flow better and creates a smoother, shinier finish once it sets. It’s a tiny trick that makes a huge visual impact!
If these little beauties survive long enough to need storing, make sure they are kept cold. Since we used cream cheese in that incredible pistachio layer, keeping them chilled prevents them from getting too soft. For more tips on achieving perfect finishes on baked—or unbaked—goods, take a look at my guide for getting that shiny crust on brownies; the principles for chocolate are surprisingly similar!
Variations on Classic Dubai Chocolate Balls
While the pistachio filling is truly spectacular in these Dubai Chocolate Balls, I love that this recipe format—a fudgy interior encased in chocolate—is so versatile! Part of the joy of making your own treats is making them exactly how *you* like them. If you’re looking to mix things up or if you’re missing an ingredient, fear not! We can totally adapt this to create some seriously fun Gourmet Chocolate Balls Ideas.
Let’s talk swaps, because sometimes you just need to use what you have on hand or explore new flavor profiles. Think of this recipe as your blank, delicious canvas!
Swapping Out the Biscuit Base
The base we used is rich, slightly chocolatey, and sturdy thanks to the digestive biscuits. But you can totally experiment here! Don’t have biscuits? Try these accessible swaps for a different texture:
- Vanilla Wafer Base: Use fine vanilla wafers instead of digestive biscuits. This makes the base sweeter and eliminates the slight cocoa undertone, letting the pistachio or outer chocolate shine more.
- Oatmeal Crunch: Substitute half the crushed biscuits with finely ground rolled oats. This gives the base a slightly chewier texture, almost like a denser energy bite. Ensure you grind the oats very finely so they don’t feel too chunky when you roll the balls.
- Nut Butter Base: For an even richer, simpler base, you can omit the biscuits entirely (though you’ll need less milk). Mix melted butter with cocoa, powdered sugar, and substitute the biscuit volume with a good quality smooth peanut butter or almond butter. Be careful, this makes the mixture very soft, so you’ll need extra chilling time!
Exploring New Filling Flavors
The creamy pistachio filling is heavenly, but if you’re trying to avoid nuts or just want something different, this is the area for real creativity. Remember, the filling needs to be stiff enough to hold its shape after chilling—no runny jams!
- Date Caramel Filling: This leans right into those amazing Middle Eastern sweets flavors! Blend real Medjool dates (pitted, maybe softened in hot water for a minute) with a tiny splash of your preferred milk until it forms a thick, sticky paste. It provides a deep, almost molasses-like sweetness that pairs beautifully with dark chocolate coating.
- White Chocolate Ganache Center: Melt down a few ounces of high-quality white chocolate and mix it with just enough heavy cream to create a thick, almost pipeable ganache. Chill this until firm before using it as the center. It makes for a beautiful presentation when you bite into a white center surrounded by dark chocolate.
- Spiced Coconut Dream: For a textural contrast, mix softened cream cheese with toasted desiccated coconut and a pinch of cinnamon and nutmeg. It offers a totally different flavor layer that’s familiar but tastes elevated when paired with the chocolate shell.
See? It’s all about having fun with what you love. These little tweaks turn one great recipe into a whole repertoire of delicious, easy, no-bake treats!
Storage and Reheating Instructions for Decadent Chocolate Truffles
Now, I know what you’re thinking: when you make something this good, how do you possibly make them last until tomorrow? That’s a valid concern, especially since these Decadent Chocolate Truffles pack so much flavor. The good news is that because we used a biscuit base instead of a purely ganache-based truffle, these Dubai Chocolate Balls are actually quite sturdy, but we do need to respect the cream cheese.
Since that gorgeous, creamy pistachio filling uses softened cream cheese, these treats absolutely must be stored in the refrigerator. They are not shelf-stable like a pure fudge might be. The good news is that keeping them chilled keeps that outer chocolate coating nice and snappy, and it prevents the centers from getting too soft, which helps maintain their perfect spherical shape.
Seal them airtight! I use an airtight container or a zip-top bag, making sure to press out most of the air before sealing it. If I’m stacking them, I always put a small piece of parchment paper between layers, just in case the chocolate coating sticks together when cold. They will keep beautifully in the fridge for up to ten days. Seriously, if they last that long, you deserve a medal!
Now, about “reheating”—we actually don’t reheat these at all. If you pull them straight from the fridge, they will be very firm because the base and the coating will be hard. If you want them to taste perfectly fresh and decadent right when you eat them, just pull them out of the refrigerator about 15 to 20 minutes before serving. This slight warming allows the chocolate coating to soften just slightly, and the inner filling becomes creamy again, giving you that perfect melt-in-your-mouth experience without becoming messy.
Frequently Asked Questions About Dubai Chocolate Balls
I always get so many questions when I share these—which I love! It means you’re ready to get into the kitchen and try them. Usually, the questions revolve around the texture (since they look so rich!) and how much oven time is involved. Let’s clear up these last little hurdles so you can get right to making these stunning Dubai Chocolate Balls.
Are these Dubai Chocolate Balls truly no-bake?
Yes, absolutely! I wouldn’t have it any other way for such a quick and impressive treat. This is truly a fantastic No Bake Chocolate Balls Recipe. We swap out the oven entirely by relying on chilling time to solidify everything. The cold temperature is doing the work of setting the base dough and firming up the filling so that they are sturdy enough for dipping into the melted chocolate. Think of your refrigerator as your helpful, non-heat-producing oven for this dessert!
Can I substitute the Kataifi crunch?
Oh, I totally get it! Sometimes finding Kataifi dough feels like an archaeological dig! If you can’t find it, don’t stress for a second. Remember, the point of that final coating is to give you a textural *snap* against the smooth filling. You have great options for Quick Homemade Candy substitutes:
- Finely Chopped, Toasted Pistachios: This is the easiest swap, maintaining that gorgeous nutty flavor profile of the filling. Toast them in a dry pan until fragrant, let them cool, and roll the wet chocolate balls through them.
- Crispy Rice Cereal (like Rice Krispies): They give a lighter, airier crunch that’s fun and familiar. Just make sure the chocolate coating is set just enough so they adhere, but not so hard that they fall off.
- Crushed Waffle Cookies: If you have any plain waffle cookies or even shortbread cookies lying around, crushing them up into small, irregular pieces gives a great buttery crunch that melts nicely in your mouth.
What is the best chocolate to use for the outer coating?
This is where you can really treat yourself! Because the coating is the first thing you see and bite into, using a high-quality chocolate makes a huge difference in both the flavor payoff and the final appearance. For the best visual appeal and that satisfying *snap*, I highly recommend using real chopped chocolate bars rather than standard chocolate chips.
Chips often contain stabilizers that help them hold their shape, which means they don’t melt as smoothly or set as finely as a pure bar. If you can find couverture chocolate, that’s the gold standard—it melts like silk. If you’re using bittersweet or dark chocolate, look for one with around 60% to 70% cacao content. That slight bitterness provides the best balance against the sweetness of the biscuit base and the pistachio filling. Remember what I said about keeping everything dry? Dry bowls equal glossy chocolate!
If you want to dive deeper into making your own small-batch sweets that impress, take a look at my tips on quick homemade candy making!
Nutritional Estimates for This Rich Cocoa Dessert
Now, I know what some of you are thinking: these Dubai Chocolate Balls are incredibly indulgent, so what exactly are we putting into our bodies? I always want to be upfront about what’s in the food we make here at Kitchenican. Since we are combining rich cocoa, butter, and a sweet filling, these are definitely treats to be savored!
Please remember that these figures are just estimates, calculated based on standard ingredient quality and usage as laid out in the recipe. If you use a different brand of chocolate or substitute honey for sugar, your totals will shift a little. But this gives you a great baseline for enjoying these Rich Cocoa Dessert bites responsibly!
- Serving Size: 1 ball
- Calories: 210
- Sugar: 18g
- Sodium: 35mg
- Fat: 14g
- Saturated Fat: 7g
- Unsaturated Fat: 7g
- Trans Fat: 0g
- Carbohydrates: 20g
- Fiber: 2g
- Protein: 3g
- Cholesterol: 25mg
See? While they are definitely a satisfying treat, they clock in at just over 200 calories per ball, which is pretty decent for something this luxurious and decadent! Enjoy them guilt-free—you earned this moment of indulgence!
Share Your Experience Making Dubai Chocolate Balls
And just like that, we did it! You’ve moved right past the doubt and created something truly extraordinary. I am so unbelievably proud of you for tackling these beautiful, luxurious Dubai Chocolate Balls. I told you an expert touch wasn’t required—it just takes a little patience and a willingness to try something new.
Now, here’s the final, vital step in our Kitchenican journey—sharing that success! Don’t let these beauties just sit silently in a container. I genuinely want to know how your pistachio filling turned out and if you tried one of the fun variations we talked about. Did you go for the date caramel, or did you stick purely to the classic pistachio?
Head down to the comments section below! Tell me how it went. Did you find it easier than you expected? Drop a rating so other home cooks know just how achievable this recipe is. Building confidence in the kitchen happens when we cheer each other on, so please share your triumphs!
If you managed to snap a photo of your perfectly coated, decadent chocolate spheres—and I bet you did!—please tag me on social media! Seeing your creations is the absolute highlight of my week. If you need to reach out directly with a question about technique or timing, you can always connect with me via my contact page. Happy baking—or rather, happy chilling!
PrintDecadent Dubai Chocolate Balls with Creamy Pistachio Filling
You can create these luxurious, no-bake Dubai Chocolate Balls at home. This recipe delivers a rich, indulgent bite combining smooth chocolate with a creamy pistachio center and a satisfying crunch, perfect for impressing guests or satisfying your sweet cravings.
- Prep Time: 40 min
- Cook Time: 5 min
- Total Time: 1 hour 45 min
- Yield: 18 servings 1x
- Category: Dessert
- Method: No Bake
- Cuisine: Middle Eastern Inspired
- Diet: Vegetarian
Ingredients
- 1 cup fine digestive biscuits or graham crackers, crushed
- 1/2 cup unsalted butter, melted
- 1/4 cup cocoa powder, unsweetened
- 1/4 cup powdered sugar
- 1 tablespoon milk (or heavy cream for richer texture)
- 1 teaspoon vanilla extract
- 1/2 cup shelled pistachios, finely ground
- 1/4 cup cream cheese, softened
- 2 tablespoons powdered sugar (for filling)
- 1/4 teaspoon cardamom powder (optional)
- 10 ounces high-quality dark or milk chocolate, chopped (for coating)
- 1/4 cup Kataifi pastry threads, lightly toasted (optional, for crunch coating)
Instructions
- Prepare the base: In a medium bowl, combine the crushed biscuits, melted butter, cocoa powder, and 1/4 cup powdered sugar. Mix until the mixture resembles wet sand.
- Add moisture: Mix in the milk and vanilla extract until a firm dough forms. If the mixture is too dry, add milk half a teaspoon at a time.
- Chill the base: Wrap the dough in plastic wrap and chill in the refrigerator for 30 minutes to firm up.
- Make the pistachio filling: While the base chills, beat the ground pistachios, softened cream cheese, 2 tablespoons of powdered sugar, and cardamom (if using) until smooth and creamy. This is your creamy pistachio filling.
- Form the balls: Remove the chocolate base dough from the refrigerator. Scoop about 1 tablespoon of the base mixture and flatten it into a small disc in your palm.
- Fill the centers: Place a small dollop (about 1/2 teaspoon) of the pistachio filling in the center of the disc. Gently fold the chocolate base around the filling, rolling it carefully between your palms to form a smooth, uniform ball.
- Chill again: Place the formed balls on a parchment-lined baking sheet and chill for at least 1 hour, or until very firm. This step is crucial for easy dipping.
- Melt the coating chocolate: Temper or gently melt the chopped chocolate using a double boiler or in short bursts in the microwave, stirring until completely smooth.
- Coat the balls: Dip each chilled ball into the melted chocolate, ensuring it is fully coated. Use a fork to lift the ball out, tapping off excess chocolate.
- Add crunch (optional): Immediately roll the wet chocolate ball in the lightly toasted Kataifi threads, or place it back on the parchment paper to set.
- Set the coating: Allow the chocolate coating to set completely at room temperature or in the refrigerator for 15 minutes.
Notes
- For a truly gourmet chocolate coating, use high-quality couverture chocolate.
- If you skip the Kataifi, you can roll the finished balls in extra ground pistachios for texture.
- These are no-bake chocolate truffles, so chilling time is essential for structure.
Nutrition
- Serving Size: 1 ball
- Calories: 210
- Sugar: 18
- Sodium: 35
- Fat: 14
- Saturated Fat: 7
- Unsaturated Fat: 7
- Trans Fat: 0
- Carbohydrates: 20
- Fiber: 2
- Protein: 3
- Cholesterol: 25