
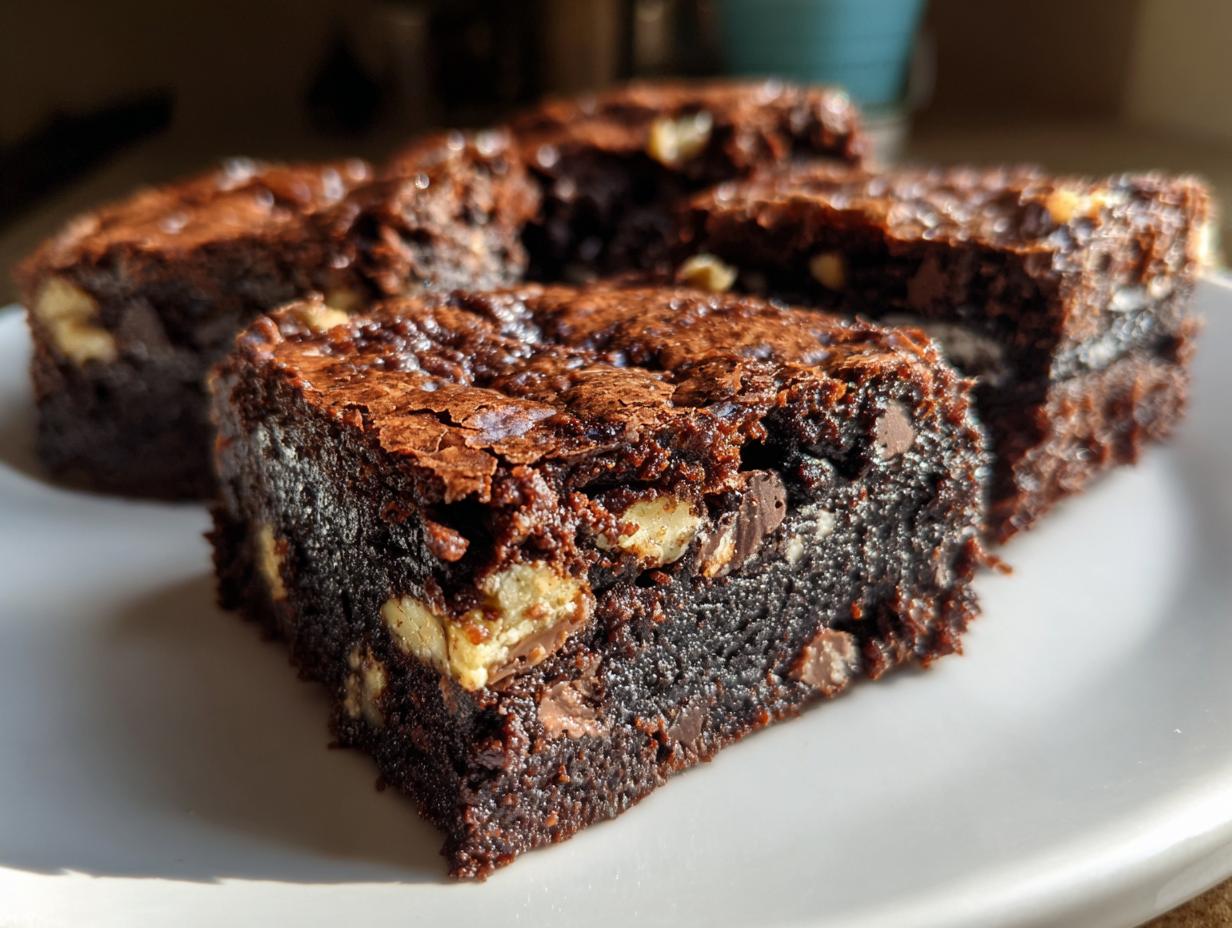
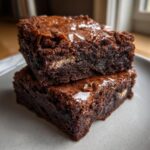
If you’re facing a deep, undeniable chocolate craving, throw out the box mixes you have gathering dust. Seriously! For years, I thought achieving that perfect, dense, almost unbelievable fudgy chocolate square was reserved for professional bakers. I used to stare at recipes wondering if I had the expertise. But then I cracked the code for these Ultimate Fudgy Homemade Oreo Brownies with a Shiny Crust. Trust me, when these come out of the oven, that crinkly, glossy top just screams decadence. I promise you, making amazing Oreo brownies from scratch is easier than you think, and you deserve this level of deeply satisfying, chewy chocolate goodness today.
I even included a link to some of my other favorite delicious dessert recipes if you want more inspiration once you’ve mastered these bars!
- Why These Oreo Brownies Are Your New Favorite Decadent Chocolate Dessert
- Essential Ingredients for Perfect Homemade Oreo Brownies
- The Simple Steps to Making Fudgy Oreo Brownies From Scratch
- Tips for Achieving Bakery Style Oreo Brownies Every Time
- Storage and Reheating Instructions for Your Cookies and Cream Brownies
- Serving Suggestions for These Decadent Chocolate Dessert Bars
- Frequently Asked Questions About Making Oreo Brownies
- Nutritional Estimates for Homemade Oreo Brownies
- Share Your Ultimate Fudgy Oreo Brownies Creation
Why These Oreo Brownies Are Your New Favorite Decadent Chocolate Dessert
It’s easy to see why people call these the best Oreo brownie recipe out there. When I set out to make these, I wasn’t satisfied with just ‘good’ brownies. I wanted the deep chocolate flavor you find at a specialty bakery, but achievable in my own kitchen with minimal fuss. These deliver everything you want in a chewy chocolate dessert.
- Incredibly Fudgy Texture: These are dense, rich, and just melt in your mouth—not cakey at all!
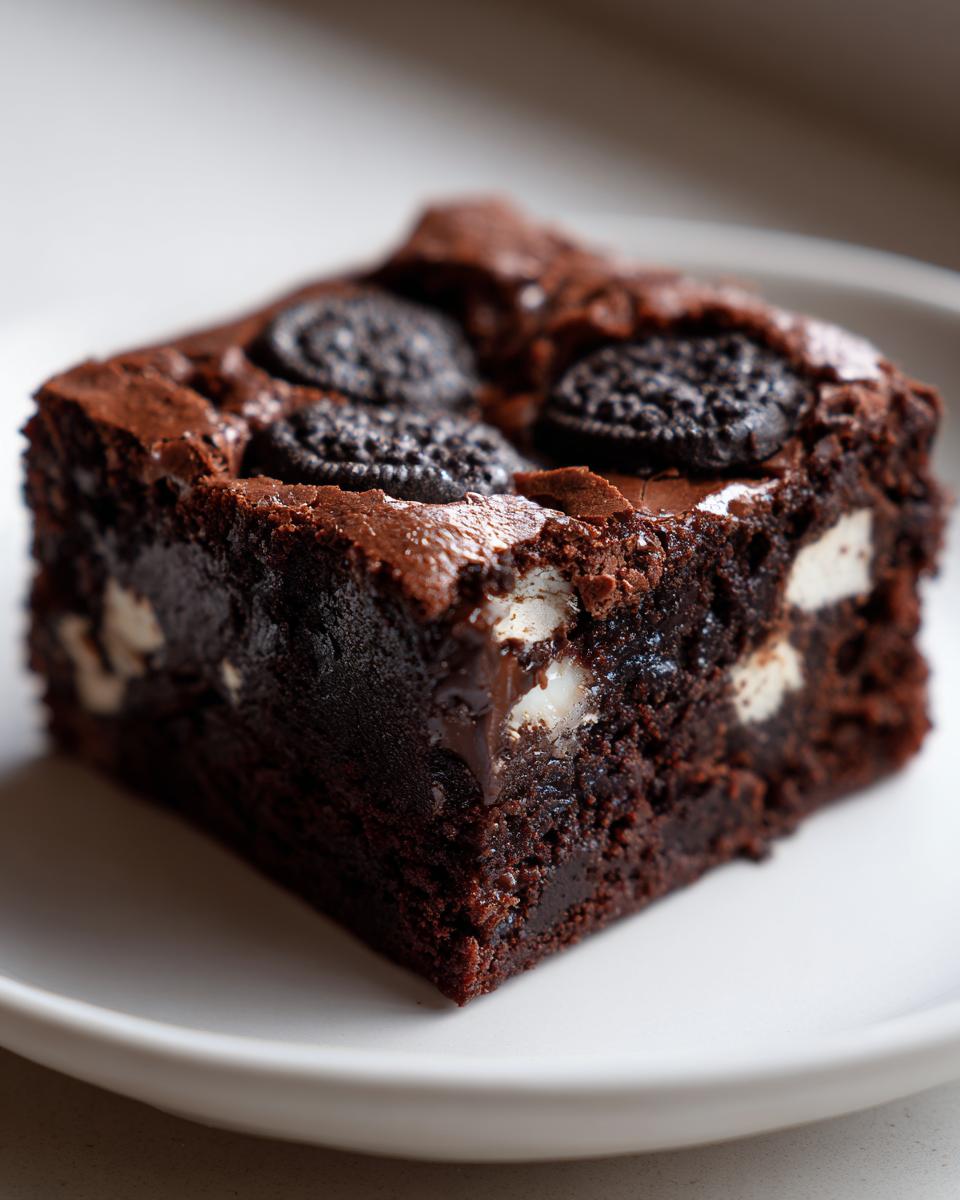
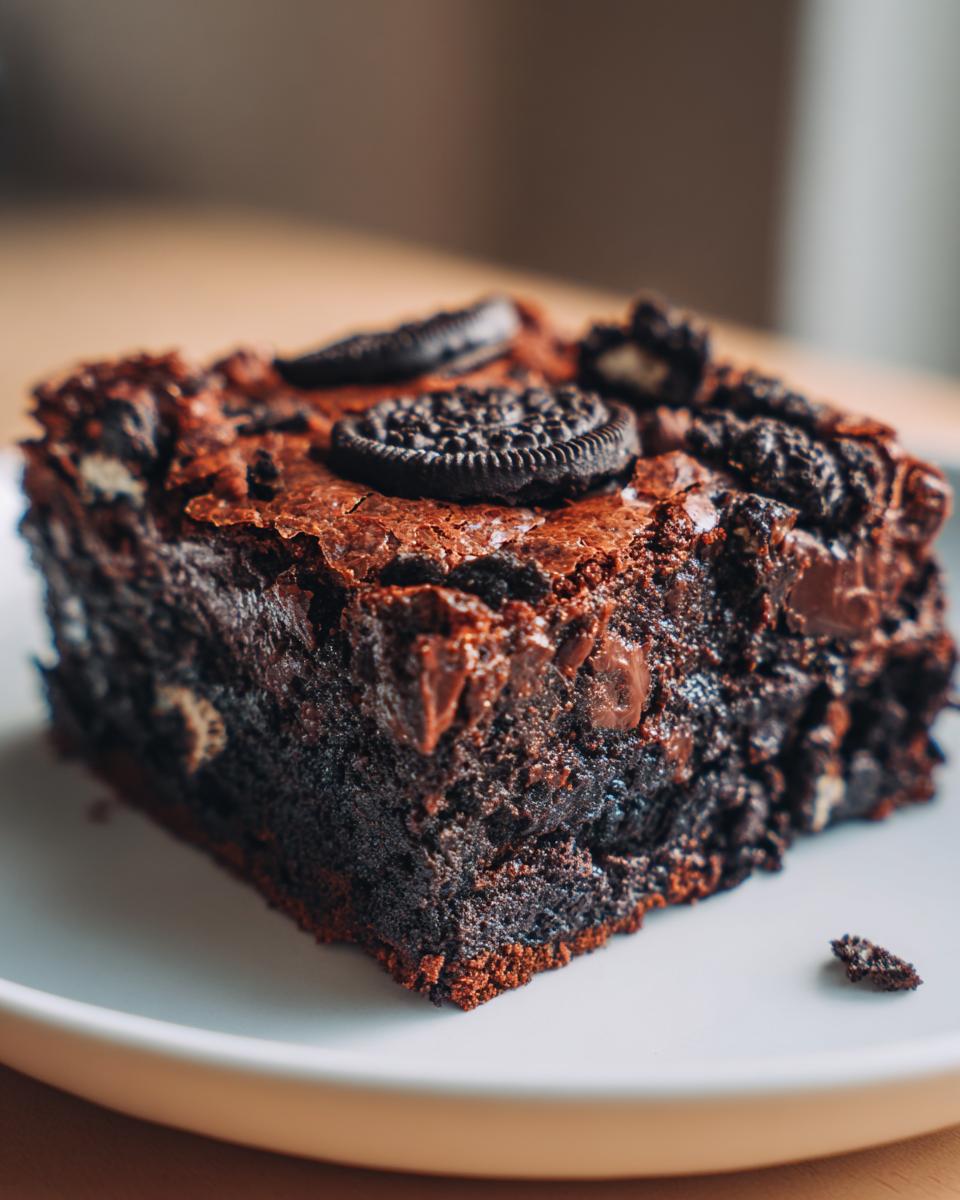
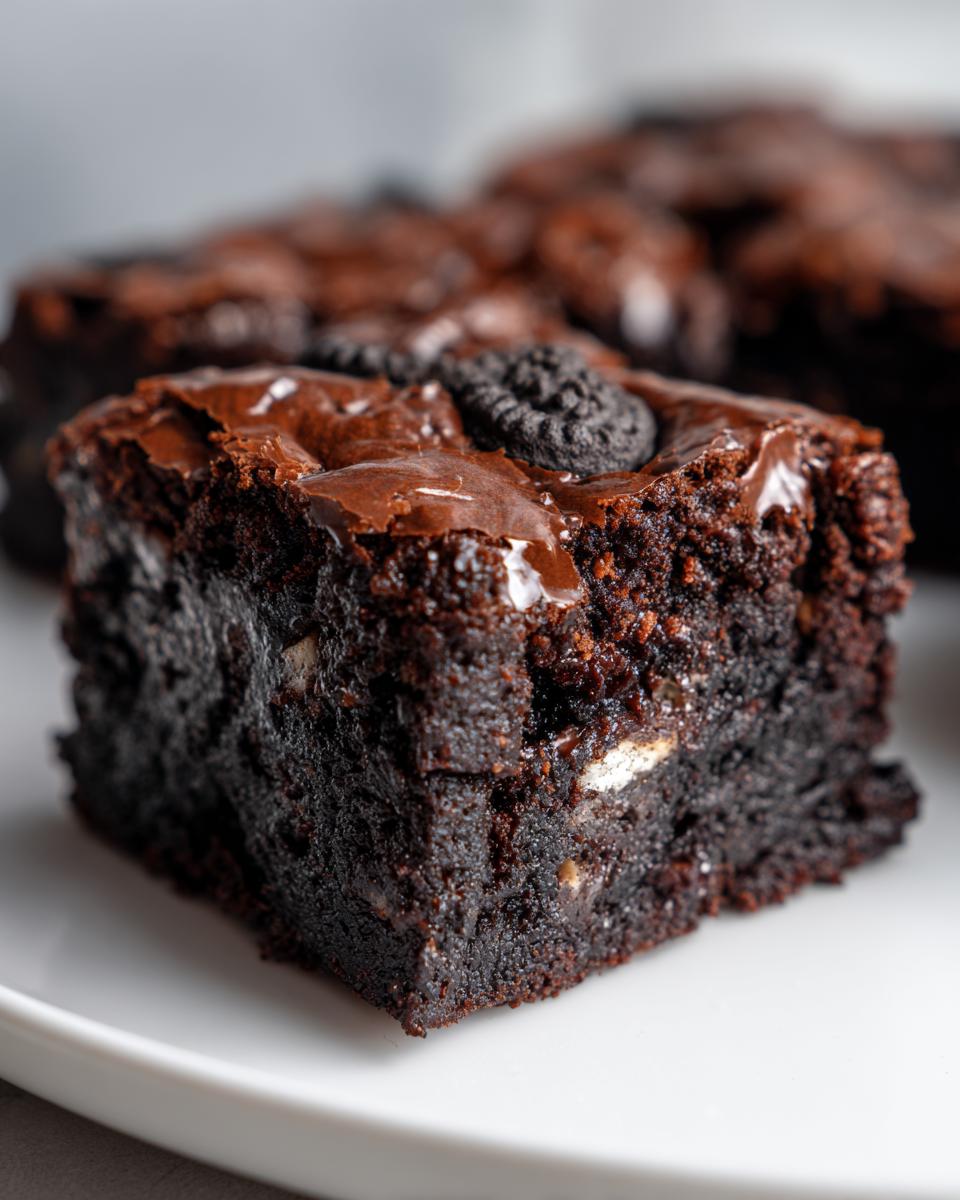
- The Perfect Cookie Crunch: We use both crushed Oreos *in* the batter and whole cookies layered on top.
- Baked-In Beauty: That beautiful, paper-thin, crackly top happens naturally when you follow my simple mixing rules.
- From Scratch Goodness: You skip the box mix entirely, and it only takes about 15 minutes of active prep time.
Honestly, if you love cookies and cream desserts, you have to try these homemade Oreo brownies. They are seriously addictive!
If you’re ready for more sweet inspiration after you conquer these, check out my favorite delicious dessert recipes collection.
Essential Ingredients for Perfect Homemade Oreo Brownies
When you’re making something as decadent as these Oreo brownies, you have to respect the ingredients! This isn’t the time to cheat on your cocoa powder or try to sneak in oil instead of butter. I learned this the hard way when my first attempts were just… meh. The key to that deep, dark, fudgy base that holds up against all those cookies comes down to using good quality fat and rich cocoa. Because we aren’t using any fancy stabilizers here, the quality of the butter and cocoa powder really steps up to the plate to deliver that bakery-style result.
Trust me on this: the difference between a good chewy chocolate dessert and an absolutely amazing one is in the details of what goes into the bowl. I want you to have the amazing results I finally achieved, so let’s look at exactly what you need. (And if you’re looking for other simple ingredient deep dives, I wrote a big one about using real butter in my easy homemade garlic butter recipe—it’s the same principle on ingredient quality!)
Ingredient Clarity and Preparation Details
Getting the exact measurements for this recipe is huge, especially when aiming for that signature shiny top. When I finally figured out the glossy crust, it was because I paid attention to the state of my ingredients, not just the amount!
- 1 cup (2 sticks) unsalted butter: This needs to be completely melted down first—no solid chunks allowed, we are whisking the sugar into warm liquid fat.
- 1 1/4 cups granulated sugar: Make sure this is leveled in the cup.
- 1 cup packed light brown sugar: Yes, packed! This molasses content is vital for chewiness and color.
- 4 large eggs: Using large eggs ensures the right structure when we whisk them in vigorously.
- 1 tablespoon vanilla extract: Use the pure stuff, it helps layer the flavor profile!
- 3/4 cup unsweetened cocoa powder: Use a good quality, dark cocoa if you can find it for the deepest chocolate taste.
- 1 teaspoon salt
- 1/2 teaspoon baking powder
- 3/4 cup all-purpose flour
- 1 cup crushed Oreo cookies: Crushed roughly—we want bits, not fine dust!
- 1 cup whole Oreo cookies: Decide now if you want to keep them whole or break them slightly in half; just don’t crush them all!
The Simple Steps to Making Fudgy Oreo Brownies From Scratch
Okay, let’s get down to the fun part! This is where we take those beautiful ingredients we just talked about and turn them into pure magic. The entire active preparation time is only about 15 minutes, which is fantastic for such a decadent treat. But to get that glossy, shiny top that makes everyone think you bought these from a fancy bakery, technique matters more than speed once the dry ingredients hit the bowl.
I’ll tell you, my first batch of Oreo brownies came out looking matte, and I was so bummed! I realized I was rushing the sugar dissolving part. You have to treat the wet ingredients like they are the foundation for that shiny crust. If you want to see how I apply these time-saving but flavor-focused techniques to weeknights, check out my tips on easy weeknight dinners—it’s all about smart prep!
Prepping the Pan and Oven for Optimal Oreo Brownies
First things first: get that oven warming up to 350°F (175°C). While it heats, grab your 9×13 inch pan. I’m a huge advocate for lining it completely with parchment paper—and I mean leaving an overhang on the sides! This little skirt of paper is your foolproof handle later on so you can lift these beauties out in one glorious slab. Give the paper a light grease, just in case, then we move onto the mixing.
Mixing Wet Ingredients for a Shiny Top on Your Oreo Brownies
This is the critical moment for that crackle top everyone wants. Melt your butter completely in a saucepan on low heat, then take it off the burner. Immediately whisk in both your granulated and packed brown sugars. Keep whisking until it looks smooth and glossy. Then, you have to add the eggs one at a time. Don’t throw them all in! Whisk really well after each egg; this is what dissolves the sugar crystals, which is essential for that shiny finish during the 35 minutes of baking time.
Folding in Dry Ingredients and Cookies: The Key to Chewy Chocolate Desserts
Once the wet mixture is smooth and gorgeous, grab your whisked dry ingredients (cocoa, flour, etc.). Add them gradually, and here is the absolute rule: mix until *just* combined. I mean it! As soon as you don’t see huge streaks of white flour, stop mixing. Overmixing develops gluten and makes your rich dessert bars turn cakey—we want chewy, fudgy goodness!
Finally, gently fold in your cup of crushed Oreos for texture first. Then, delicately fold in the whole cookies on top. You just want them nestled in before pouring the whole glorious mess into that prepared pan. Then, it’s off to the oven!
Tips for Achieving Bakery Style Oreo Brownies Every Time
Now that you’ve nailed the mixing, let’s talk about what to do if your results aren’t exactly what you pictured. Getting these Oreo brownies to that perfect bakery-style consistency takes listening to the batter. It’s worth noting that if your final product is strangely cakey, you probably overworked the flour! Remember, we stop mixing as soon as that flour disappears. That gentle touch is what keeps the texture dense and chewy.
Also, don’t underestimate the cooling time! If you try to cut these warm, they will absolutely fall apart. They need to cool completely in the pan before you try lifting them by the parchment sling. If you’re looking for more ways to master chocolate baking without getting stressed, my guide on an easy chocolate frosting recipe has some similar gentle folding secrets!
Troubleshooting Common Issues with Fudgy Oreo Brownies
Did your top turn out dull instead of gorgeous and shiny? Don’t sweat it! Usually, that means two things: either you didn’t whisk the eggs and sugar long enough while they were warm, or you overbaked them by a couple of extra minutes. The sugar crystals need that warmth to dissolve fully so they can form that delicate shell on top during baking. If your toothpick comes out completely clean, you’ve gone too far—we want those moist crumbs clinging on for dear life!

For the thickest, fudgiest texture, remember the recipe notes suggest using an 8×8 inch pan instead of the 9×13. It adds 10 to 15 minutes to that baking time, but the reward is a truly dense bar. That extra time in the oven lets that fudginess lock in!
Storage and Reheating Instructions for Your Cookies and Cream Brownies
Look, these cookies and cream brownies are so good, you might accidentally eat them all in one day. But if you’re lucky enough to have leftovers, storage is easy! Keep them in a tightly sealed, airtight container right on the counter. They stay wonderfully fudgy at room temperature for about three days. Seriously, don’t worry about the fridge unless your kitchen is super hot!
If you need to refresh them later, just pop a square in the microwave for about 10 seconds. That gentle heat wakes up the chocolate flavor and makes them gooey all over again. It’s the best way to enjoy them the next day!
Serving Suggestions for These Decadent Chocolate Dessert Bars
These decadent chocolate dessert bars are amazing on their own, freshly cut once they’ve totally cooled down. They are perfectly rich just standing alone! But if you want to elevate them for a party or just because it’s a Saturday, I have a couple of simple suggestions that never fail.
They are absolutely fantastic served slightly warm with a scoop of good quality vanilla bean ice cream melting over the top—that hot/cold contrast is heavenly. And since they cut so cleanly when cool, they make the dreamiest party dessert bars. Just stack them up on a platter! We all need more delicious dessert recipes on hand for last-minute gatherings, and these always win!
Frequently Asked Questions About Making Oreo Brownies
I get so many questions about adjusting recipes, and that’s fair because we all bake differently depending on what we have on hand! These Oreo brownies are so versatile, but a few tweaks can change that perfect soft, fudgy texture we worked so hard for. I generally like sticking to the recipe exactly when aiming for that shiny top, but here are a few common things people ask about when they are whipping up an Easy Oreo Brownie Recipe.
Can I substitute the butter in this Easy Oreo Brownie Recipe?
This is a tough one for fudgy brownies! Because we are melting the butter and whisking the sugar right into it, the fat needs to be pure butter to properly dissolve those sugar crystals for the shiny top. If you substitute with something like coconut oil or applesauce, you risk losing that crucial structural element for the fudgy texture. I highly recommend sticking to the full cup of butter for the absolute best brownie flavors.
What if I want extra thick brownies?
If you want super thick, almost fudge-like layers—more like a decadent chocolate dessert bar than a standard slice—simply cut the pan size! The recipe is written for a 9×13, which yields thinner bars. Switch to an 8×8 inch pan, and you’ll need to add another 10 to 15 minutes onto that baking time. Just check them carefully near the end!
Can I make these ahead of time, or freeze leftover brownies?
Absolutely! These are amazing for planning ahead. Once they are completely cooled, you can store them in an airtight container for up to three days. If you need to stash them longer, they freeze beautifully! Wrap individual squares tightly in plastic wrap, then toss them into a freezer bag. They will stay perfect for up to two months. Thaw them on the counter and they’ll taste fresh-baked. It’s one of my favorite easy weeknight dinners quick fixes, honestly!
Do I have to use both crushed and whole Oreos?
You don’t *have* to, but I strongly encourage it! The crushed Oreos melt slightly into the batter which intensifies that cookies and cream element throughout the brownie. The whole ones give you those fantastic, recognizable chunks when you bite in. If you only have one package, crush them all, and you’ll still get fantastic results!
Nutritional Estimates for Homemade Oreo Brownies
Okay, let’s be real for a second. When you are diving face-first into a batch of homemade, fudgy Oreo brownies that taste this rich, you probably aren’t reaching for the nutrition facts panel first. Believe me, I get it! Sometimes, an incredible, decadent chocolate dessert is just what the doctor ordered.
However, because I believe in being totally transparent about what we are putting into our bodies—even when it involves a little bit of indulgence—I ran these through a calculator for you. Remember that these figures are just estimates based on the ingredients listed and our yield of 16 generous servings. Think of this as background info, not a reason to skip making them!
Here is a rough look at what one serving provides. Enjoy it guilt-free!
- Serving Size: 1 square
- Calories: 320
- Fat: 18g
- Carbohydrates: 38g
- Protein: 4g
If you decide to cut them into smaller squares or use an 8×8 inch pan, these numbers will definitely change, so just keep that in mind!
Share Your Ultimate Fudgy Oreo Brownies Creation
Now that you have everything you need to bake the best Homemade Oreo Brownies of your life, I truly hope you give them a try! When you pull out that pan and see that beautiful shiny crust, I want you to feel that surge of confidence that comes from mastering a truly decadent dessert.
Once you’ve let them cool (the hardest part, I know!) and cut them into squares, please come back here and let me know how they turned out. Did you go for the 8×8 inch pan for extra thickness? Did that shiny top come out perfectly for you? Drop a comment below and tell me all about your results. Leaving a star rating really helps other bakers who are standing where I once stood—doubting if they could make something this rich and fudgy from scratch.
If you run into any snags or have lingering questions about achieving the perfect chew, don’t hesitate to reach out! You can always get in touch with me directly via my Contact page. I love seeing what you create in your kitchen!
PrintUltimate Fudgy Homemade Oreo Brownies with a Shiny Crust
Make these decadent, fudgy Oreo brownies from scratch. They are chewy, packed with whole and crushed Oreos, and develop a beautiful, shiny top crust. This easy recipe proves you can create bakery-style results without complex techniques.
- Prep Time: 15 min
- Cook Time: 35 min
- Total Time: 50 min
- Yield: 16 servings 1x
- Category: Dessert
- Method: Baking
- Cuisine: American
- Diet: Vegetarian
Ingredients
- 1 cup (2 sticks) unsalted butter
- 1 1/4 cups granulated sugar
- 1 cup packed light brown sugar
- 4 large eggs
- 1 tablespoon vanilla extract
- 3/4 cup unsweetened cocoa powder
- 1 teaspoon salt
- 1/2 teaspoon baking powder
- 3/4 cup all-purpose flour
- 1 cup crushed Oreo cookies
- 1 cup whole Oreo cookies
Instructions
- Preheat your oven to 350°F (175°C). Line a 9×13 inch baking pan with parchment paper, leaving an overhang on the sides for easy removal. Lightly grease the paper.
- In a medium saucepan, melt the butter over low heat. Remove from heat.
- Whisk the granulated sugar and brown sugar into the melted butter until combined.
- Whisk in the eggs one at a time, mixing well after each addition. Stir in the vanilla extract.
- In a separate bowl, whisk together the cocoa powder, salt, and baking powder.
- Gradually add the dry ingredients to the wet ingredients, mixing until just combined. Do not overmix.
- Gently fold in the crushed Oreo cookies.
- Pour half of the batter into the prepared pan and spread evenly. Arrange the whole Oreo cookies on top of the batter. Pour the remaining batter over the whole cookies and spread gently to cover.
- Bake for 30 to 35 minutes. A toothpick inserted near the edge should come out with moist crumbs attached, but not wet batter. This helps achieve a fudgy texture.
- Let the brownies cool completely in the pan on a wire rack before lifting out using the parchment overhang. Cut into squares.
Notes
- For the best shiny, crackly top, do not overmix the batter once the flour is added. The sugar needs to dissolve properly into the warm butter and eggs.
- If you prefer a thicker, denser brownie, use an 8×8 inch pan instead, and increase the baking time by 10 to 15 minutes.
- You can substitute Double Stuf Oreos for extra cookie flavor in the batter.
Nutrition
- Serving Size: 1 square
- Calories: 320
- Sugar: 35
- Sodium: 210
- Fat: 18
- Saturated Fat: 10
- Unsaturated Fat: 8
- Trans Fat: 0
- Carbohydrates: 38
- Fiber: 2
- Protein: 4
- Cholesterol: 75