
There is seriously nothing that compares to the aroma of freshly baked bread filling your entire kitchen, right? For years, I chased that warm, comforting smell, thinking I needed fancy equipment or a culinary degree to nail that perfect bakery-style crusty Italian bread. Trust me, I’ve been where you are—staring at flat, floppy loaves and wondering what I did wrong! But here at Kitchenican, we prove that belief wrong every day. My journey from being someone who was frankly terrified of yeast to confidently pulling gorgeous, golden loaves out of the oven taught me that simple steps lead to mastery. This specific Italian bread recipe is the one that finally clicked for me, giving me that amazing texture without any fuss.
- Why This Homemade Italian Bread Recipe Builds Confidence
- Gathering Ingredients for Your Italian Bread
- Step-by-Step Instructions for Bakery Style Italian Loaf
- Pro Tips for Perfecting Your Crusty Italian Bread
- Serving Suggestions for Your Fresh Baked Bread Aromas
- Storage and Reheating Instructions for Italian Bread
- Frequently Asked Questions About Making Italian Bread
- Nutritional Estimate for This Classic Loaf
- Share Your Kitchenican Success
Why This Homemade Italian Bread Recipe Builds Confidence
I know what you’re thinking: bread is hard. But this recipe flips that script! This is the ultimate test for anyone looking to get into Easy Crusty Bread Baking without getting overwhelmed. We focus on building a structure that naturally gives you that coveted bakery look and feel.
- It delivers that perfect contrast: a Soft Inside Crusty Outside Bread every single time.
- The steps are straightforward—we don’t ask you to wait two days for a slow fermentation.
- You get massive payoff with minimal risk!
Achieving That Golden Brown Crust Bread Texture
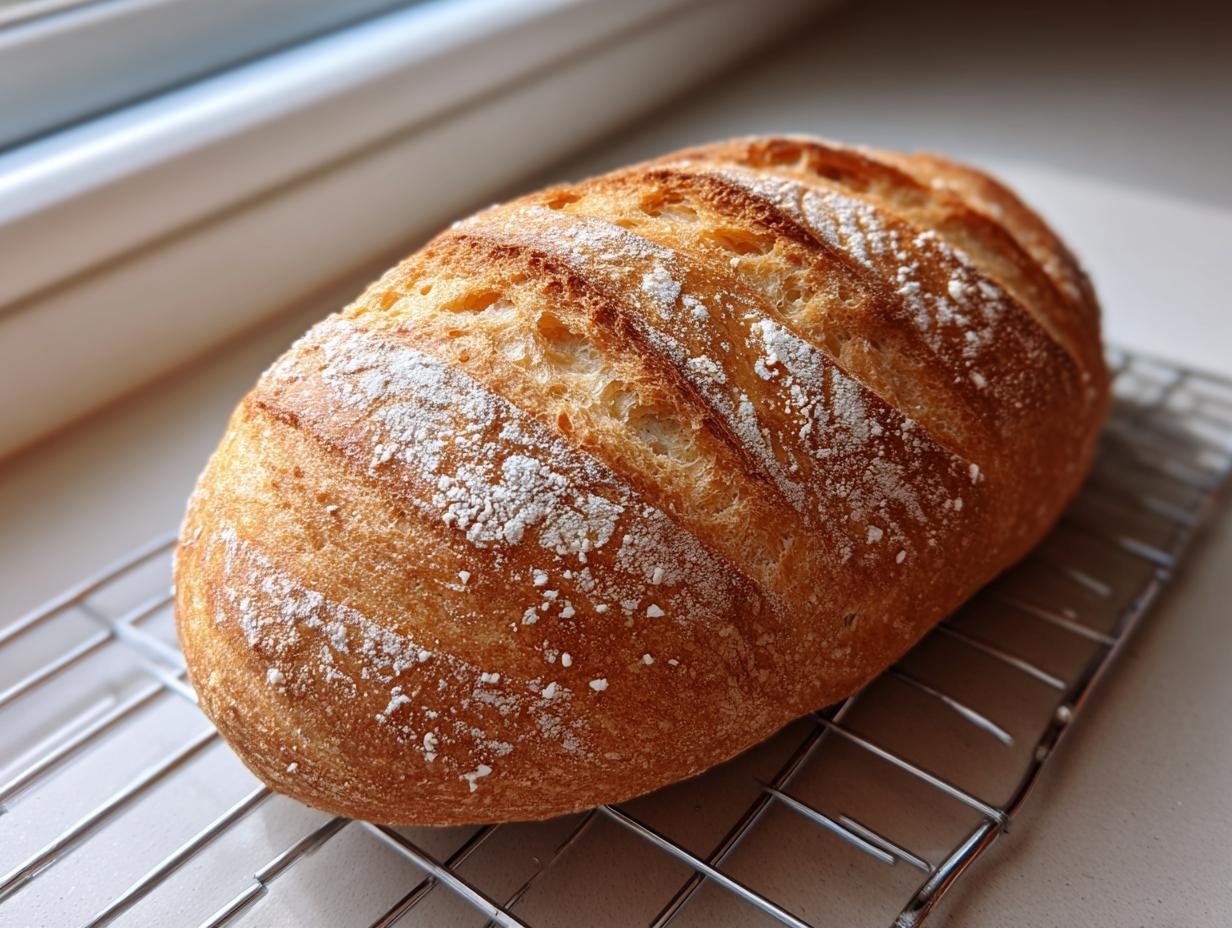
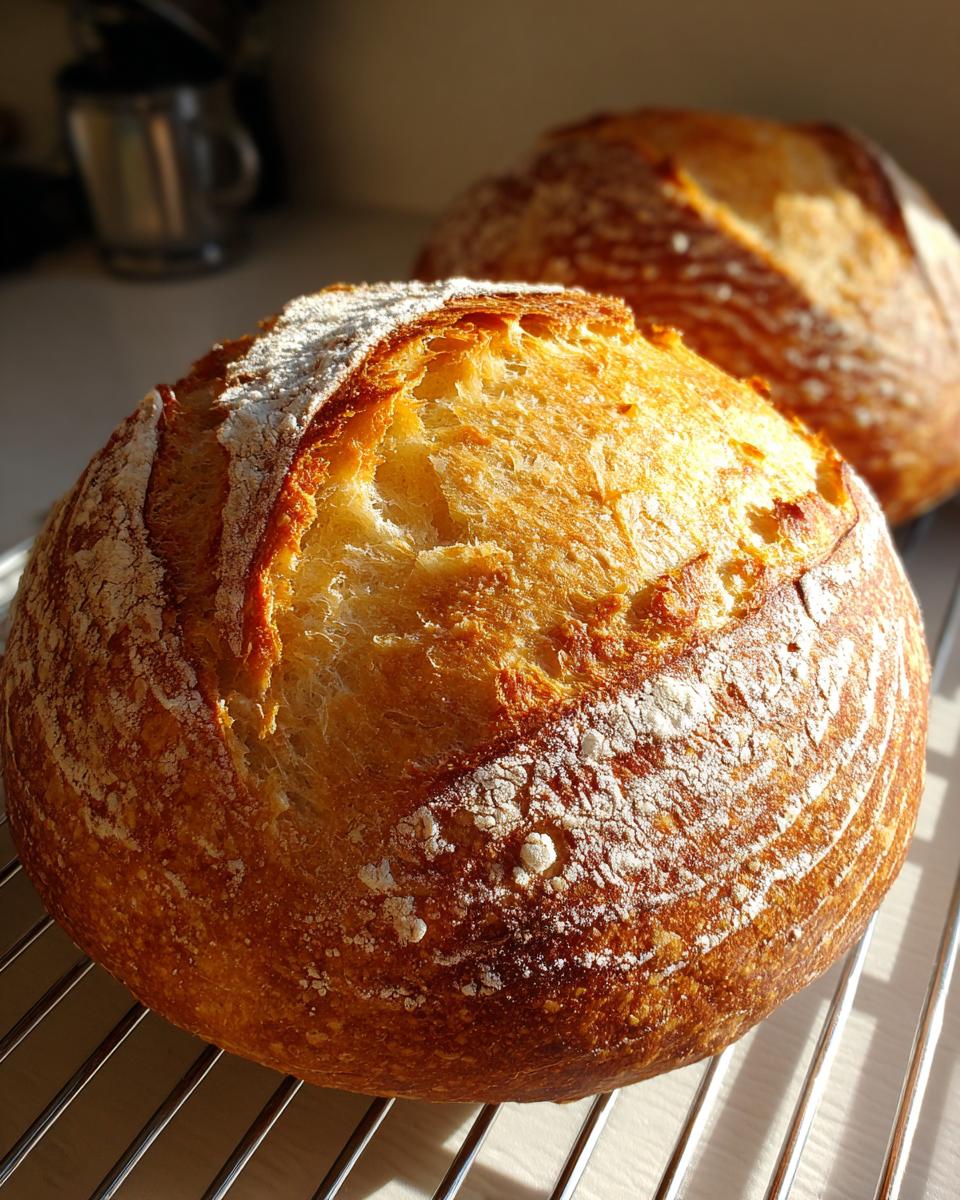
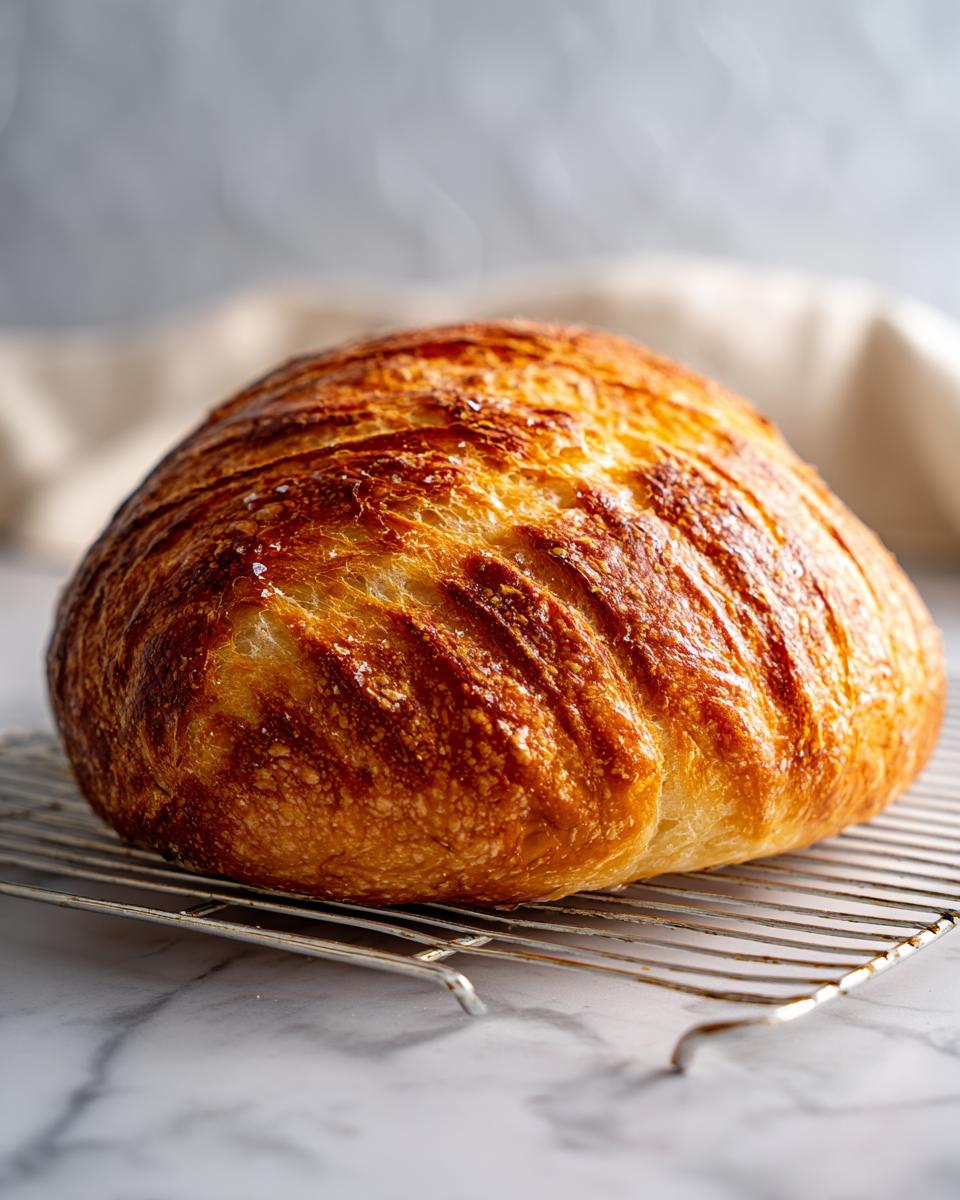
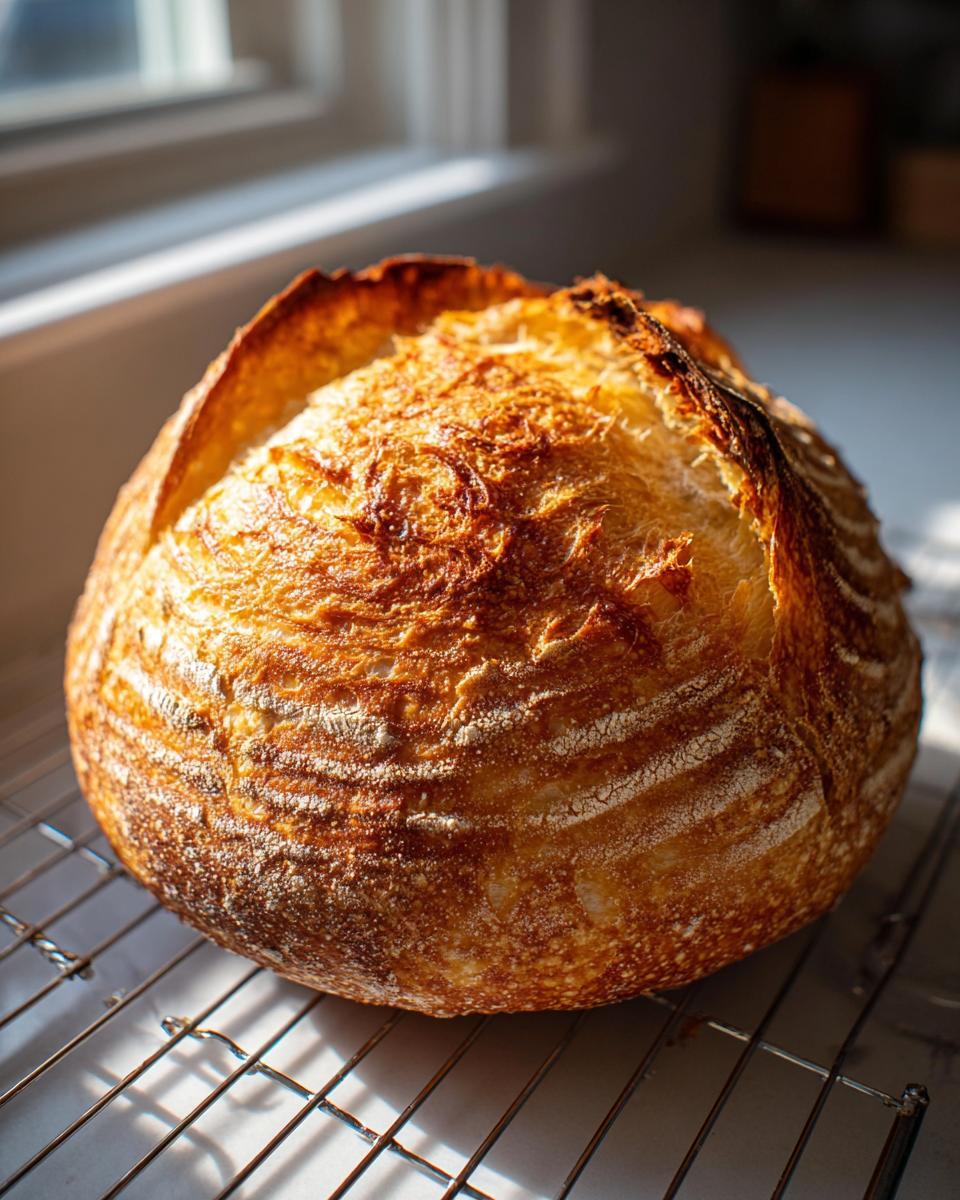
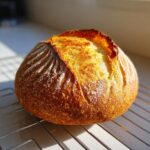
That gorgeous, crackly finish you see in bakeries? It’s mostly steam! Remember that little step where we put a hot pan in the oven? Pouring water in there creates that blast of steam right at the beginning. That steam keeps the outside of your dough soft just long enough to expand fully, setting that final bake into a deep, satisfying Golden Brown Crust Bread texture. It sounds fancy, but it’s so easy!
Simple Ingredients for Classic Italian Baking
Part of my whole Kitchenican philosophy is using what you have! You will not need exotic flours or specialty items here for this Classic Italian Baking. It’s flour, yeast, salt, sugar, and oil. That’s it! When you realize the amazing flavor of authentic Italian bread comes from watching simple pantry items transform, your confidence just soars.
Gathering Ingredients for Your Italian Bread
Okay, let’s get our mise en place ready! This is where the magic starts, and honestly, it only requires basic pantry staples. Don’t stress about finding specialty products here; we are keeping this super accessible. If you happen to grab a good quality all-purpose flour—one that feels slightly heavier—it can help build a little more structure, which we love for that chewy center!
Here is the simple list you need for one beautiful loaf of homemade Italian bread:
- 3 1/2 cups all-purpose flour
- 1 1/2 teaspoons salt
- 1 teaspoon granulated sugar
- 2 1/4 teaspoons active dry yeast (that’s usually one standard packet, not instant!)
- 1 1/2 cups warm water (aim for that magic temperature range of 105–115°F, just warm like a baby’s bath).
- 2 tablespoons olive oil, plus whatever you need to grease the bowl.
Step-by-Step Instructions for Bakery Style Italian Loaf
Now for the fun part where simple ingredients turn into glorious bread! Don’t worry about rushing the process; good bread always rewards patience. We are going to build a structure that ensures you get that light, airy interior while keeping the exterior beautifully crisp. This is your roadmap to making the best Italian bread without needing to visit a professional bakery first.
Activating Yeast and Mixing the Italian Bread Dough
First things first, we wake up the yeast! Take your warm water—if it’s too hot, you’ll kill the yeast, so remember that bathtub temperature idea—and sprinkle in the sugar and the yeast. You absolutely must let this sit for about 5 to 10 minutes. If you don’t see foam, your yeast is sleeping, and you need to start over! Once it’s bubbly, that means “Go time!” Add the flour, salt, and the olive oil right into that foamy mixture. Mix everything until it just barely comes together into what we call a “shaggy dough.” Don’t try to make it perfect yet; we’re just combining things.
Kneading Technique for a Chewy Italian Loaf Interior
Time to get your hands involved! Turn that shaggy dough out onto a lightly floured surface. Now, knead it firmly for a solid 5 to 7 minutes. You aren’t looking for the dough to stop sticking entirely, but you are looking for a real transformation. It should stop clinging aggressively to your hands and start feeling smooth and bouncy under your palms. When you press it gently, it should spring back slowly. This kneading builds the invisible framework that traps the air, giving you that coveted, Chewy Italian Loaf texture later on.
Managing the First and Second Rises
Tuck that smooth dough into a bowl lightly coated with olive oil—this stops it from drying out underneath the towel. Pop a cover on it and put it somewhere comfortably warm. Let it go for about 1 to 1.5 hours until it’s clearly doubled in size. Don’t just trust the clock; watch the actual dough! After that, gently deflate it—just punch it down softly to release that built-up gas. Shape it into a tight loaf (or two small ones), place it on your pan, cover it again, and let it relax for another 30 to 45 minutes. This second rise makes sure the final bake is light, not dense.
Pro Tips for Perfecting Your Crusty Italian Bread
Even though this is an easy recipe, those little extra steps can take your loaf from “good” to “I bought this from an artisan bakery.” Since we are laser-focused on that incredible crust, I want to walk you through the details I learned through trial and error when trying to make the best Crusty Italian Bread.
The Secret to Steam: Creating the Ultimate Crust
You know how sometimes the crust sets too fast in the oven, leaving you with a pale, thick shell? That’s crust setting too early! The trick, as mentioned in the instructions, is steam. When you pop that loaf in at 400°F, you quickly pour about half a cup of hot water into that shallow pan you preheated on the bottom rack. That instant burst of hot water vapor envelops the bread. Why does this matter? Steam keeps the surface of your dough hydrated and flexible longer, letting that interior expand as much as possible before the crust finally sets hard and crackly. It’s total game-changer for that bakery texture!
Scoring and Washing the Loaf Before Baking
I know scoring bread sounds intimidating, but trust me, it’s just slashing the top! You only need a very sharp knife or a razor blade, and you make a quick, shallow cut—maybe half an inch deep—right down the middle or on a pretty diagonal. The dough expands so much in the heat (that oven spring!) that if you don’t give it a specific place to burst open, it will crack randomly. Scoring gives you control over where that burst happens, resulting in a more attractive, rustic look. Also, I usually brush the top with a little water right before it goes in; it promotes that deep golden color we are aiming for.

Serving Suggestions for Your Fresh Baked Bread Aromas
That wonderful smell that drifts through your house means one thing: it’s time to eat! Honestly, the best part of pulling a perfect loaf of this crusty Italian bread out of the oven is figuring out how to destroy it immediately. Since this loaf has such a fantastic, crispy exterior and a soft, airy interior, it really shines when paired simply.
If you are looking for classic Dipping Bread Recipes, you truly can’t beat high-quality extra virgin olive oil mixed with a pinch of flaky sea salt and maybe a drizzle of balsamic vinegar. Tear off a warm piece and soak it up—it is heaven!
For weeknight meals, this is the ultimate accompaniment. It’s the star of any Dinner Side Bread Recipes lineup. Keep a loaf handy to sop up every last bit of marinara sauce from your spaghetti or to just serve alongside a big salad. It makes even the simplest meal feel special, like a little cafe visit!
And for sandwiches? Because we worked so hard to get that sturdy but chewy crumb, this loaf holds up beautifully. It’s perfect for hearty Italian cold cuts, freshly sliced mozzarella, or even just butter and thick slices of tomato. Don’t let this amazing bread just sit there; you have to use it!
Storage and Reheating Instructions for Italian Bread
We put all that effort into getting the perfect crust, so we have to treat it right when we store it! Don’t put your fresh loaf right into a plastic bag; that traps moisture and that gorgeous crust will go soft immediately. Keep it in a paper bag or loosely wrapped in a clean kitchen towel on the counter for up to two days. If it softens up overnight—and let’s be honest, Italian bread is often gone in a day—don’t despair! Just give that loaf a 5-minute blast in a 350°F oven. It wakes up the exterior and makes it nearly as crisp as when it first came out.
Frequently Asked Questions About Making Italian Bread
I totally get it—when you’re tackling bread for the first time, you’ve got a million little questions swirling around. That’s perfectly normal! Making great Homemade Italian Bread Recipe doesn’t mean you can skip the learning curve, but we can certainly make the curve shallower. Here are some things I hear a lot while folks are baking.
Can I use bread flour instead of all-purpose flour in this Italian bread recipe?
You absolutely can! Bread flour has a slightly higher protein content than all-purpose flour. If you swap it one-for-one, the main difference you’ll notice is that the final result will lean toward an even chewier texture. Since we already built structure in the kneading step, using bread flour just amps that up a notch, which is fantastic for a really sturdy Italian bread perfect for sandwiches!
How long does it take to make this bread if I skip the second rise?
Oh, don’t do it! I know the total time adds up, but skipping that second rise is like trying to bake a cake without letting your oven get hot. The second rise—that 30 to 45 minutes after shaping—is crucial because it lets the dough relax and gently fill with air again after you punched it down. If you skip it, you are going to end up with a very dense, heavy, almost hockey-puck-like loaf instead of that light, airy, Soft Inside Crusty Outside Bread we worked so hard to achieve. Stick with both rises, promise!
Nutritional Estimate for This Classic Loaf
Now, look, I’m not a nutritionist, and I’m certainly not counting every single calorie when I’m busy enjoying my fresh-from-the-oven bread! But because we believe in giving you all the information you need to feel confident, I ran these basic ingredients through a standard calculator. These numbers are just estimates based on the ingredients listed and how much that single loaf yields. Don’t treat these as gospel, but they give you a good general idea of what you’re enjoying!
Here is the breakdown for one slice (based on a 12-slice yield):
- Serving Size: 1 slice
- Calories: 150
- Fat: 2g
- Saturated Fat: 0.3g
- Carbohydrates: 30g
- Protein: 5g
- Sugar: 1g
See? Simple ingredients for a simple, delicious slice! If you use a little extra olive oil when serving for dipping, just factor that in. The beauty of baking at home is that you control what goes in, and you know exactly what you’re eating, which is always better than worrying over processed store-bought loaves!
Share Your Kitchenican Success
I mean it when I say this recipe is built on confidence, and the best way to build yours is to see success! Once you pull that first loaf of truly crusty homemade Italian bread out of the oven, I need you to brag about it. Seriously!
If you made this, please take a moment to click the star rating system right below this—let me know how you did! Five stars means I nailed the easy crusty bread baking instructions, and I’d love to see that reflected!
Sharing your wins helps inspire the next person who thinks they “can’t bake.” Snap a photo of your gorgeous, golden loaf and tag us on social media. Seeing your results—maybe you used it for those amazing Dipping Bread Recipes we talked about, or maybe you made the ultimate sandwich—is the highlight of my week.
Don’t just leave the success in your kitchen! Jump into the comments below and tell me about your experience. Did the steam trick work magic? Did the dough feel right during kneading? Your feedback is how we keep this community growing and encouraging!
PrintEasy Homemade Crusty Italian Bread Recipe
You can create bakery-style Italian bread at home with this simple recipe. This loaf features a golden, crunchy exterior and a soft, chewy interior, perfect for dipping or sandwiches.
- Prep Time: 20 min
- Cook Time: 35 min
- Total Time: 2 hours 45 min
- Yield: 1 large loaf 1x
- Category: Baking
- Method: Baking
- Cuisine: Italian
- Diet: Vegetarian
Ingredients
- 3 1/2 cups all-purpose flour
- 1 1/2 teaspoons salt
- 1 teaspoon granulated sugar
- 2 1/4 teaspoons active dry yeast (1 packet)
- 1 1/2 cups warm water (about 105-115°F)
- 2 tablespoons olive oil, plus more for the bowl
Instructions
- In a large bowl, mix the warm water, sugar, and yeast. Let this stand for 5 to 10 minutes until it becomes foamy. This shows the yeast is active.
- Add the flour, salt, and 2 tablespoons of olive oil to the yeast mixture. Mix with a wooden spoon until a shaggy dough forms.
- Turn the dough out onto a lightly floured surface. Knead the dough for 5 to 7 minutes until it becomes smooth and elastic. You are building the structure for a chewy interior.
- Lightly oil a large bowl with olive oil. Place the dough in the bowl and turn it over to coat the top with oil. Cover the bowl with plastic wrap or a clean kitchen towel.
- Let the dough rise in a warm place for 1 to 1.5 hours, or until it has doubled in size. This is your first rise.
- Gently punch down the dough to release the air. Shape the dough into a tight loaf or two smaller loaves.
- Place the shaped loaf(ves) on a baking sheet lined with parchment paper or in a prepared loaf pan. Cover loosely and let it rise again for 30 to 45 minutes, or until puffy. This is your second rise.
- Preheat your oven to 400°F (200°C). If you want a very crusty exterior, place a shallow pan on the bottom rack while preheating to create steam later.
- Before baking, lightly brush the top of the loaf with water or an egg wash for color. You can score the top with a sharp knife if desired.
- Bake for 30 to 35 minutes, or until the crust is deep golden brown and the internal temperature reaches 200°F (93°C). For extra crust, pour 1/2 cup of hot water into the preheated shallow pan on the bottom rack immediately after placing the bread in the oven, then quickly close the door.
- Remove the bread from the oven and transfer it to a wire rack to cool completely before slicing. Enjoy your homemade Italian bread.
Notes
- For a crispier crust, place a baking stone in the oven while preheating.
- If your kitchen is cold, place the dough in the oven while it is turned off, with the light on, to create a warm rising environment.
- This bread is excellent served warm with olive oil for dipping.
Nutrition
- Serving Size: 1 slice
- Calories: 150
- Sugar: 1
- Sodium: 250
- Fat: 2
- Saturated Fat: 0.3
- Unsaturated Fat: 1.7
- Trans Fat: 0
- Carbohydrates: 30
- Fiber: 1
- Protein: 5
- Cholesterol: 0