
You know those moments, right? You’re kicking back on game day or watching a movie, and suddenly, you just need that tangy, salty, crunchy hit you usually only get from your favorite pub. I’m talking about Fried Pickles!
For so long, I thought making restaurant-quality appetizers at home was too messy, too complicated, or just destined to be soggy. I really struggled with deep frying—it felt like an expert-only zone. But what if I told you that the crunchy perfection you crave is totally achievable in your own kitchen? I promise you, we can make Fried Pickles that rival the best spots out there.
That’s the Kitchenican philosophy in a nutshell: building confidence by stripping away the intimidation. If you want to know more about where this belief comes from, you can read about my journey right here. This guide is going to show you exactly how to get that amazing crust, whether you use a pot of oil for that classic, rich texture or pop them into the air fryer for a quicker, Healthy Fried Pickles alternative. Seriously, you’ve got this. Let’s ditch the takeout menu and conquer the crunch together!
- Why You Will Love This Homemade Fried Pickles Recipe
- Gathering Ingredients for the Best Fried Pickles Appetizer
- How to Make Fried Pickles Crispy: Step-by-Step Instructions
- Cooking Methods for Your Fried Pickles
- The Essential Fried Pickle Dipping Sauce
- Tips for Success with Your Easy Fried Pickle Recipe
- Storage and Reheating Instructions for Leftover Fried Pickles
- Frequently Asked Questions About Fried Pickles
- Share Your Kitchenican Accomplishment
Why You Will Love This Homemade Fried Pickles Recipe
When you make these at home, something magical happens. You realize you don’t need to order them out! This recipe is built on that Kitchenican core belief: you absolutely can create amazing, restaurant-worthy appetizers yourself. Here’s what makes this our go-to snack:
- They deliver that signature tangy snap you crave.
- The breading is unbelievably secure—no flakes falling off in the oil!
- It’s fast enough for last-minute cravings.
Achieving Truly Crispy Fried Pickles Every Time
Soggy breading is the enemy, plain and simple. We beat that enemy! The secret to truly Crispy Fried Pickles isn’t luck; it’s making sure those pickles are bone dry before they even touch our seasoned flour. Then, we use panko breadcrumbs—they create an unbeatable, jagged crunch that holds on tight.
Quick Snack Recipes for Game Day Fried Pickles
I know your schedule is busy, and that’s why this recipe fits right into real life. From grabbing the jar to pulling them golden brown from the fryer or air fryer, you’re looking at about 25 minutes total. Talk about an easy win for your Game Day Fried Pickles spread!
Gathering Ingredients for the Best Fried Pickles Appetizer
Okay, now for the fun part—getting our supplies ready! Remember, the Kitchenican way means using ingredients you can find easily at your regular grocery store. There are no rare spices needed here, just simple things that pack a huge flavor punch. We’re aiming for that perfect balance of salt, tang, and seasoning in our crunchy coating.
You need three main groups of items: the star of the show (our pickles!), the dredging setup, and the crispy coating. Because we are making this recipe from scratch, the quality of that dill pickle really shines through, so grab a jar you enjoy eating straight out of the brine!
Ingredient Notes and Substitutions for Fried Pickles
When it comes to the pickles, I stick with dill chips for ease as they cook faster, but spears work great too if you like something heartier. Just make sure you drain them really well before you start seasoning. For the coating, that secret weapon for restaurant texture is definitely the panko breadcrumbs—don’t sub regular breadcrumbs if you can help it; the crisp just won’t be the same.
If you’re aiming for that specific fan-favorite flavor, here’s a little secret: adding just a pinch of onion powder to the flour mix gives you that perfect Texas Roadhouse Fried Pickles Copycat profile. It’s an easy flavor upgrade!
How to Make Fried Pickles Crispy: Step-by-Step Instructions
This is where we conquer sogginess, folks! Making these perfect, Homemade Fried Pickles Recipe takes just a few quick steps, and I promise, paying attention to the dredge is what separates the ‘okay’ appetizer from the one everyone fights over. We are going for maximum crunch and zero fallout in the oil!
It all starts with preparation. Think of this as setting up a little assembly line right on your counter. Once you have your three stations ready, the coating process flies by. Remember, we aren’t professional chefs; we are just home cooks empowering ourselves in the kitchen, and following a simple technique makes all the difference. If you’re trying to nail that specific zesty flavor profile, I pulled some inspiration from folks who do that classic recipe well, which you can peek at here: Texas Roadhouse Copycat Fried Pickles.
The Critical Step: Drying Your Pickles for Crunchy Pickle Chips
Seriously, stop! Before you do anything else, you must blot those pickles almost violently dry. I mean it. Lay them out on paper towels, cover them with more towels, and press down firmly. Moisture is gluten’s best friend, and we want to keep the breading away from that moisture so it sticks tight. This tiny bit of prep work is the foundation for How to Make Fried Pickles Crispy!
Dredging Technique for Perfect Fried Pickles
We need three shallow dishes. First, the seasoned flour mixture—this sticks to the pickle. Second, the egg wash (just eggs and milk whisked up). Finally, the key to our texture—the Panko breadcrumbs. Coat the pickles first in flour, then let the excess drip off, dip them in the egg, and then—this is key—press them firmly, really patting that Panko on. This firm press ensures you get those thick, beautiful ridges that turn into dazzling Golden Fried Pickles.
Cooking Methods for Your Fried Pickles
Now that everything is breaded and ready to shine, we have two paths to glorious, crunchy snack perfection! This is where you get to choose your adventure: go full-throttle classic for that ultimate pub experience, or pivot to a lighter, faster method using your air fryer. Both ways deliver fantastic results, but they feel a little different, which is great because it means we have options for every mood!
Achieving Pub Style Fried Pickles with Deep Frying
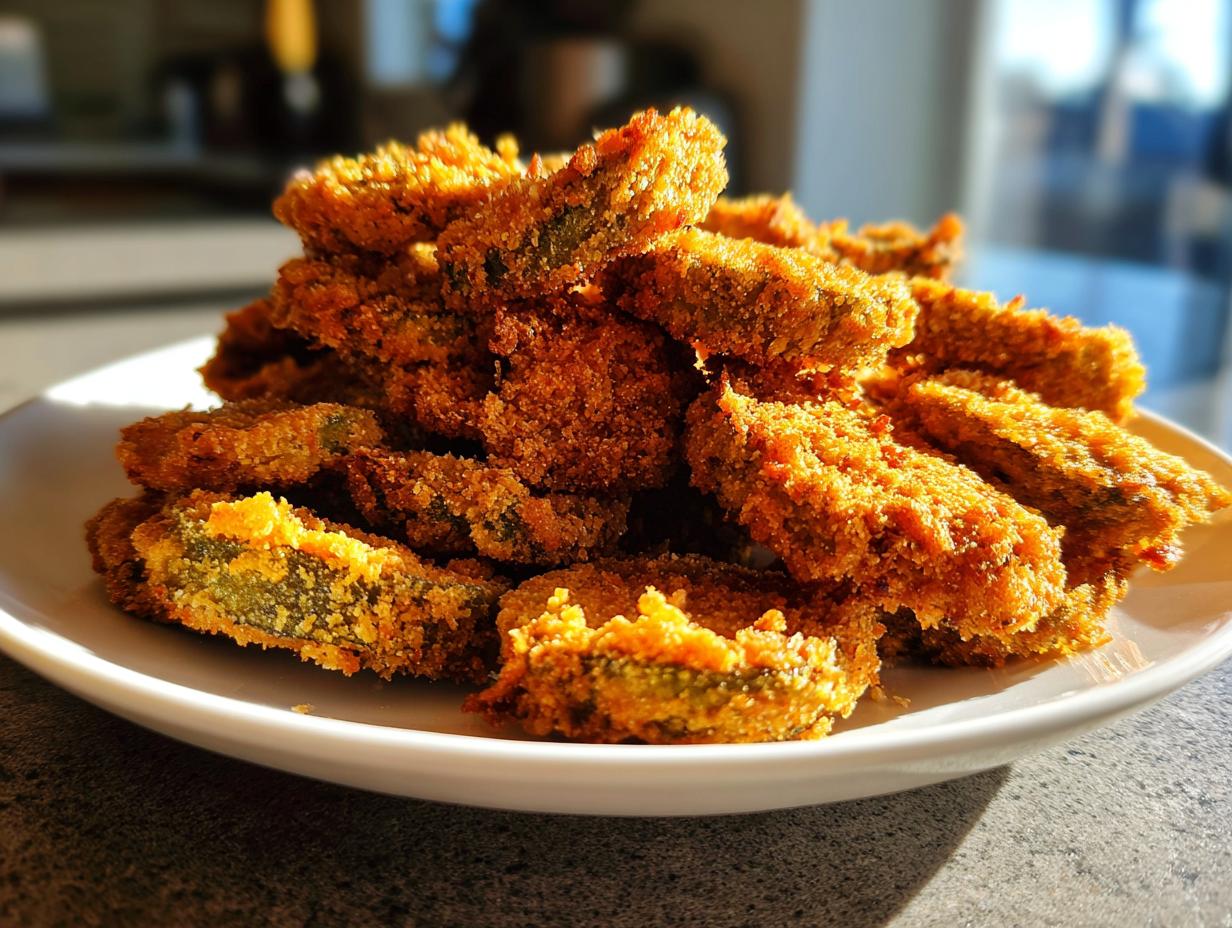
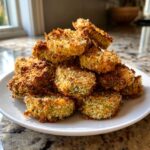
If you want that authentic, diner-level crunch, you need some good hot oil. Get your vegetable oil heated up to about 375°F (190°C). You need that heat to be spot-on! Carefully drop your breaded dills in, making sure not to crowd your pot—that drops the temperature too fast. Fry them for just 1 to 2 minutes per side until they hit that perfect golden hue. When they come out, use a slotted spoon and drain them on a wire rack. Trust me, putting them on a rack instead of stacked paper towels keeps the bottoms from steaming and getting soft!
Making Healthy Fried Pickles Using an Air Fryer
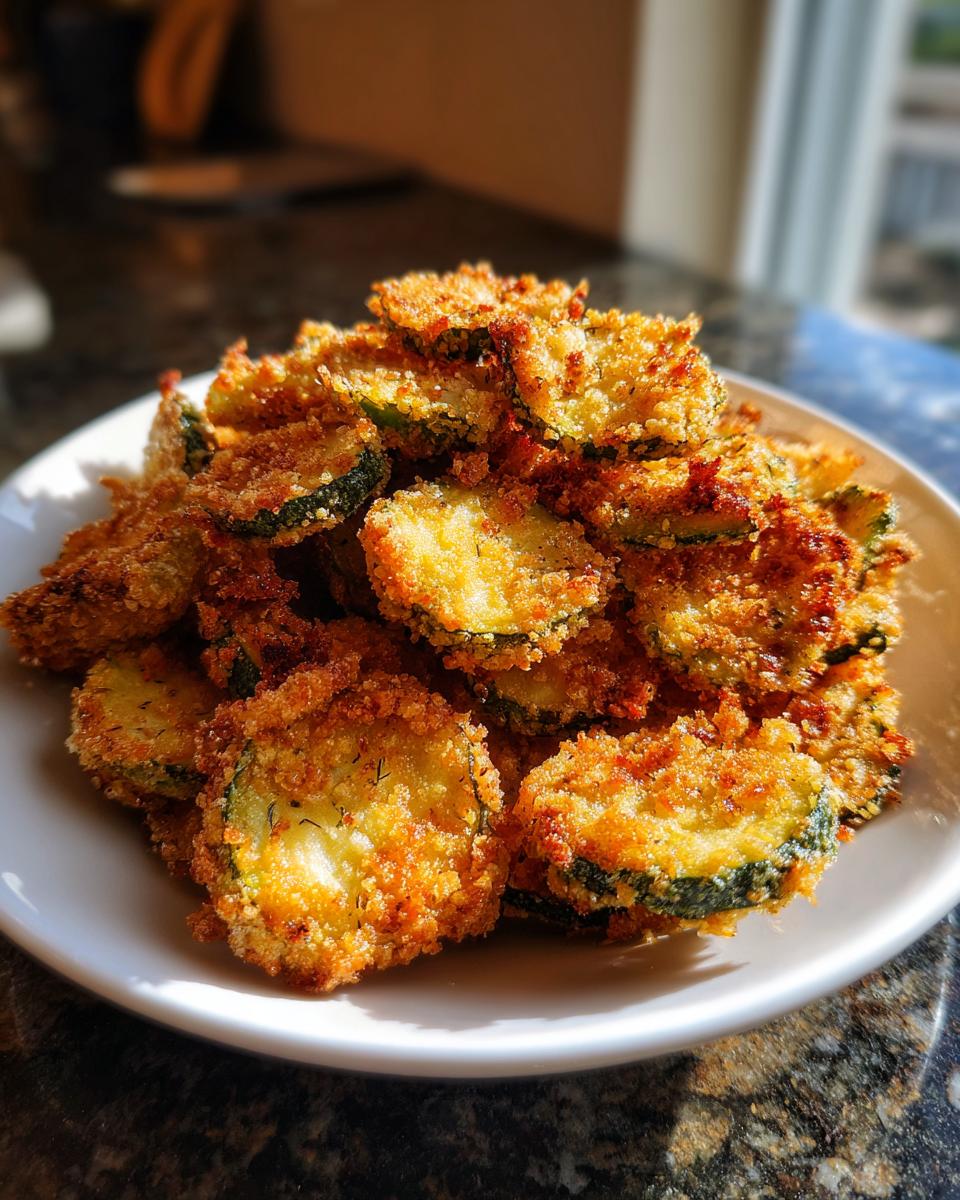
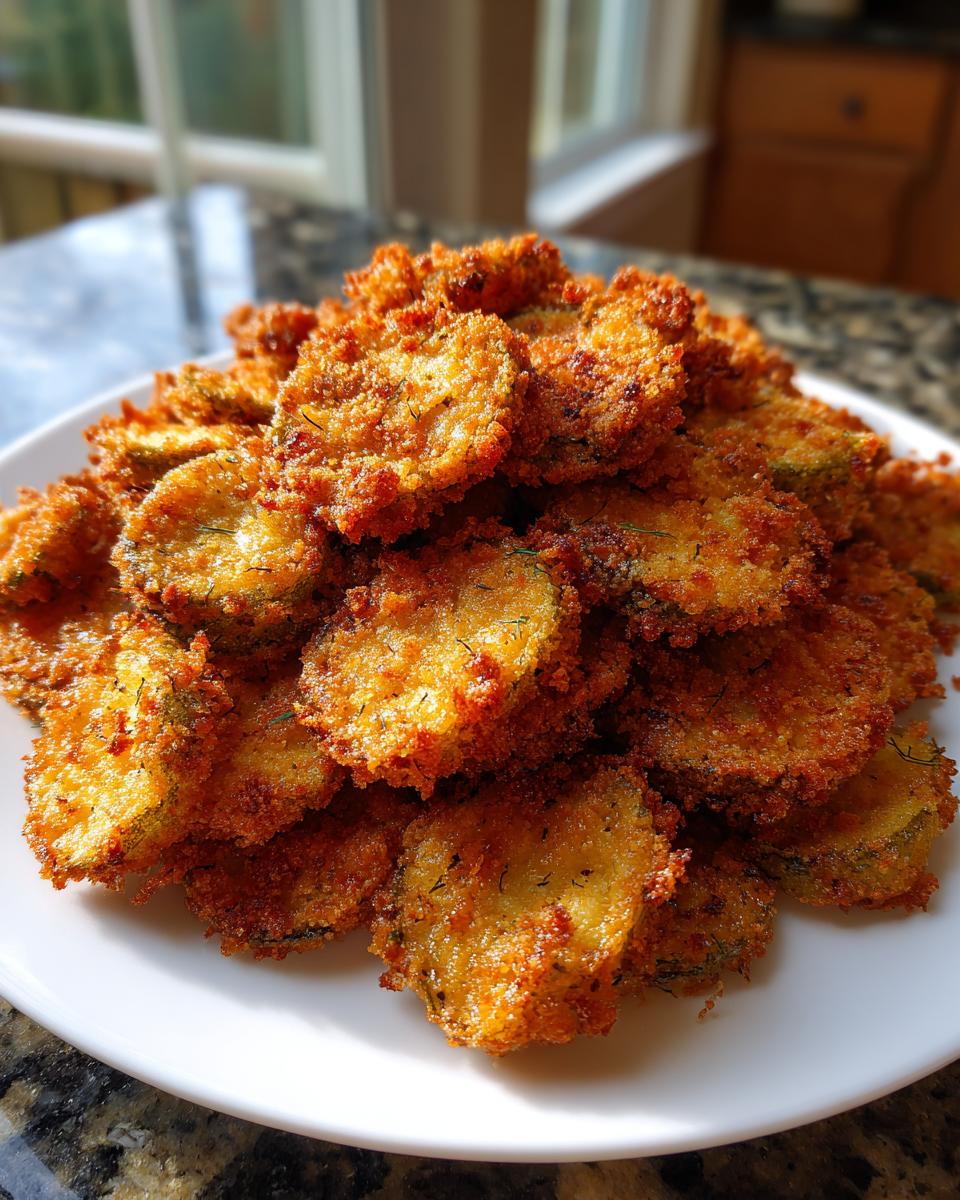
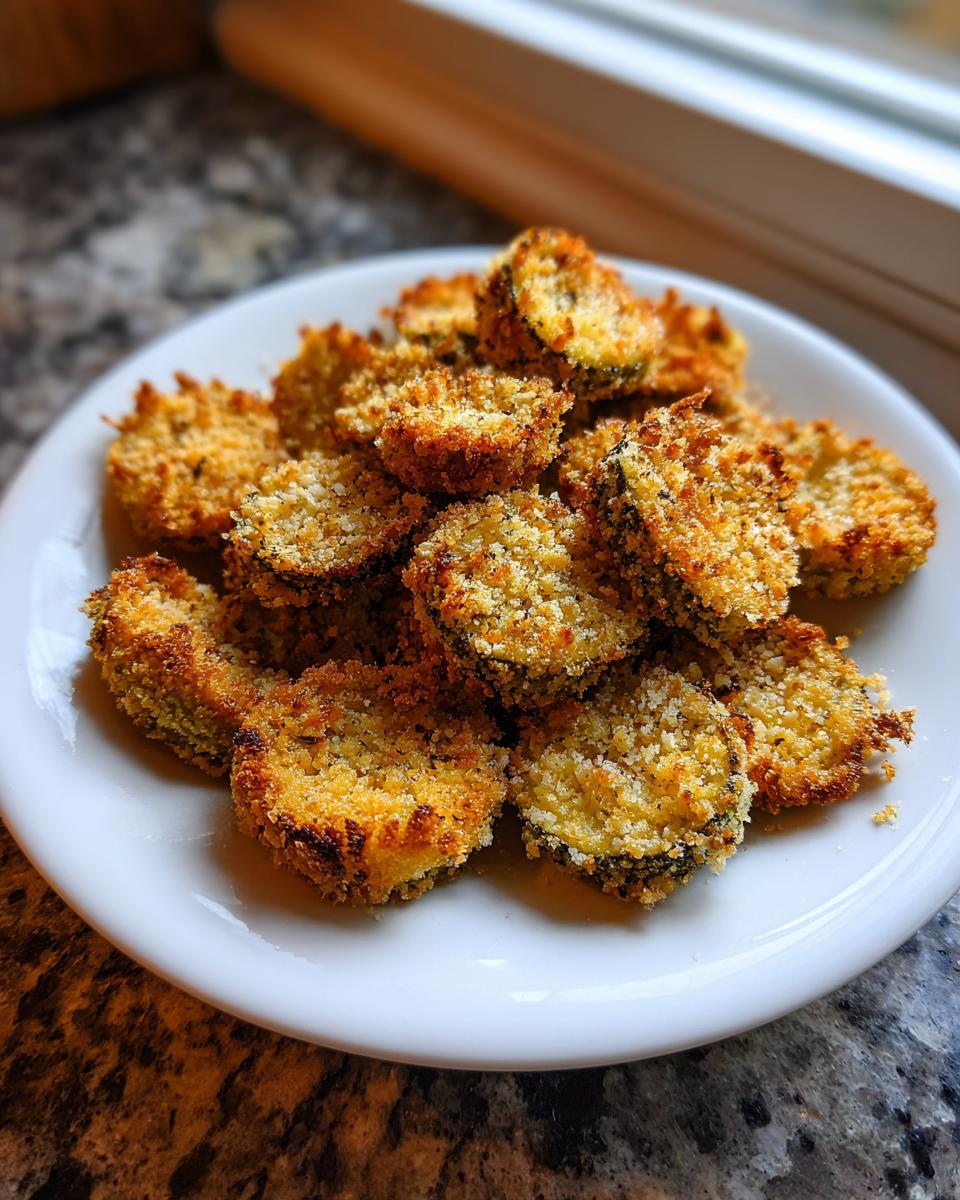
For those days when maybe you feel like you’ve already reached your deep-fry quota, the air fryer is your best friend, giving us wonderful Healthy Fried Pickles. Set your air fryer to 400°F (200°C). You absolutely must arrange the pickles in a single layer—overlap equals steaming, and we’ve already done the hard work to avoid that! A light spritz of cooking spray on top helps them brown beautifully. Cook them for about 8 to 10 minutes total, flipping them halfway through so both sides get that lovely crunch. You can check out some great tips for getting this method dialed in over here!
The Essential Fried Pickle Dipping Sauce
Okay, let’s be real—no basket of crunchy, salted goodness is complete without the perfect partner for dipping. This is where we elevate our Tangy Pickle Snacks from ‘great’ to ‘the reason we came here.’ You need something cool, zesty, and creamy to cut through that warm, tangy pickle crunch.
You don’t need a whole separate recipe to make this happen! My go-to is always a simple, spiced ranch dressing. You just grab your favorite ranch, and then stir in a little extra hit of cayenne for warmth, a squeeze of fresh lemon juice for brightness, and maybe a dash of smoked paprika to really make that flavor pop. If you want something sharper, whisking mayonnaise with a little pickle juice and garlic powder makes an incredible zesty aioli that gives you that perfect Fried Pickle Dipping Sauce experience. Dips make everything better, trust me!
Tips for Success with Your Easy Fried Pickle Recipe
Learning to cook something new always involves a few bumps, but I want to make sure your experience making these Fried Pickles is smooth sailing! Think of these pointers as the little secrets I figured out after wasting too many batches of salty pickles. The number one thing I want you to remember is that this process is all about building confidence, one crunchy bite at a time.
If you are deep frying, temperature stability is your best friend. If your oil isn’t hot enough, the breading sucks up grease instantly and you get sadness instead of crunch. If you see the oil smoking, it’s way too hot—back off the burner instantly! Pay close attention during the dredging phase, too. That firm press into the panko? That’s critical for How to Make Fried Pickles Crispy because it locks the coating down. If the coating starts peeling off when they hit the heat, it means your pickles weren’t dry enough from Step One!
Storage and Reheating Instructions for Leftover Fried Pickles
Okay, let’s talk real life for a second. These crispy delights are absolutely, one hundred percent best enjoyed the minute they come out of the oil or the air fryer basket. That fresh, hot crunch is unbeatable! However, if you somehow managed to have any leftovers—which, honestly, takes discipline—we can try to bring them back to life.
Throwing them in the microwave is an absolute no-go. It’s going to steam the breading and turn your lovely Fried Pickles into sad, chewy little snacks. Instead, if you have an oven or an air fryer still handy, pop them back in! Preheat the oven to about 375°F or the air fryer to 380°F. Five to eight minutes should do the trick, just long enough to heat them through and crisp up that coating again. It might not be *exactly* the same as fresh, but it’s a thousand times better than soggy leftovers!

Frequently Asked Questions About Fried Pickles
I get so many questions every time I post a picture of these golden bites! It’s wonderful how many people want to tackle making a super satisfying snack like Fried Pickles at home. Don’t stress about the little things; most issues are easy fixes once you know the trick. Here are a few things folks ask me all the time!
Can I use pickle spears instead of chips for my Fried Pickles?
Absolutely! Spears work great, especially if you love having something heftier to grab—they make for a really satisfying, meaty bite! Since spears are thicker, they hold moisture longer, so you need to be extra diligent in that first drying step. Make sure you pat them down really well. You might also find you need to let them fry for just 30 seconds longer than the chips to make sure the center is heated through, but don’t let the coating burn!
What makes these Dill Pickle Appetizer bites so tangy?
That signature, mouth-watering zing comes almost entirely from the pickle itself! We’re using good, solid dill pickles here, right? The key is that salty, vinegary brine they sit in. Seasoning the flour helps, of course, but the real star of this Dill Pickle Appetizer show is the pickle juice lingering on the surface. If you want them extra tangy, sometimes I’ll even give the breaded pickles a very quick, light spritz with pickle juice right before they go into the hot oil—just watch for that sizzle!
Can I make these ahead of time?
If you mean fully breading them hours outside of cooking? I really advise against it, sweet friend. Breading loves moisture, and that moisture is currently residing in your pickles. If you coat them too early, the flour mixture will start drawing water out, and when that breading hits the heat, it just turns into a mushy mess. For the best, crunchiest result, make these during your prep time and get them frying or air frying immediately. That’s the best way to guarantee you get amazing Tangy Pickle Snacks!
Share Your Kitchenican Accomplishment
And that’s it! You have officially conquered the world of crunchy, zesty, at-home Fried Pickles. Whether you went full deep-fry or kept it light with the air fryer, I want to hear about it! Don’t keep that amazing kitchen confidence to yourself. Go ahead, leave a rating, and share a picture of your crispy success on social media.
If you ran into any questions along the way or just want to tell me how much better these were than takeout, please reach out to me on the contact page here. I can’t wait to cheer you on!
PrintThe Ultimate Crispy Fried Pickles Recipe (Restaurant-Style & Air Fryer Options)
You can make incredibly crispy, restaurant-style fried pickles at home. This recipe shows you how to achieve that perfect golden crunch, whether you deep fry or use your air fryer for a lighter snack.
- Prep Time: 15 min
- Cook Time: 10 min
- Total Time: 25 min
- Yield: 4 servings 1x
- Category: Appetizer
- Method: Deep Frying or Air Frying
- Cuisine: American
- Diet: Vegetarian
Ingredients
- 1 jar (16 ounces) dill pickle chips or spears, drained well
- 1 cup all-purpose flour
- 1 teaspoon salt
- 1 teaspoon black pepper
- 1 teaspoon garlic powder
- 1 teaspoon paprika
- 1/2 teaspoon cayenne pepper (optional, for heat)
- 2 large eggs
- 1/2 cup milk
- 1 cup panko breadcrumbs (for extra crispiness)
- Vegetable oil, for deep frying (or cooking spray for air fryer)
Instructions
- Prepare the pickles: Lay the drained pickle chips or spears on several layers of paper towels. Place more paper towels on top and press firmly to remove as much moisture as possible. Excess moisture prevents crispiness.
- Set up the dredging stations: In one shallow dish, combine the flour, salt, pepper, garlic powder, paprika, and cayenne pepper. Mix well. In a second shallow dish, whisk together the eggs and milk. In a third shallow dish, place the panko breadcrumbs.
- Dredge the pickles: Working in small batches, coat the pickles thoroughly in the flour mixture, shaking off any excess. Dip the floured pickles into the egg mixture, allowing excess to drip off. Finally, press the pickles firmly into the panko breadcrumbs until fully coated. Place the coated pickles on a clean, dry baking sheet.
- For Deep Frying (Restaurant Style): Pour 2 inches of vegetable oil into a heavy-bottomed pot or Dutch oven. Heat the oil to 375°F (190°C). Carefully drop the breaded pickles into the hot oil in a single layer, being careful not to overcrowd the pot. Fry for 1 to 2 minutes per side, until golden brown and crispy. Remove with a slotted spoon and place on a wire rack lined with paper towels to drain excess oil.
- For Air Frying (Healthy Fried Pickles): Preheat your air fryer to 400°F (200°C). Lightly spray the air fryer basket with cooking spray. Arrange the breaded pickles in a single layer in the basket (work in batches). Lightly spray the tops of the pickles with cooking spray. Air fry for 8 to 10 minutes, flipping halfway through, until golden and crunchy.
- Serve immediately with your favorite dipping sauce, such as a spiced ranch or zesty aioli.
Notes
- Drying the pickles completely is the secret to achieving that restaurant-style crunch. Do not skip this step.
- If you want a Texas Roadhouse Copycat flavor, add a pinch of onion powder to the flour mixture.
- For the best results in the air fryer, do not overlap the pickles in the basket.
Nutrition
- Serving Size: 1/4 of recipe (approx. 10 chips)
- Calories: 280
- Sugar: 2
- Sodium: 750
- Fat: 18
- Saturated Fat: 3
- Unsaturated Fat: 15
- Trans Fat: 0
- Carbohydrates: 24
- Fiber: 1
- Protein: 6
- Cholesterol: 65