
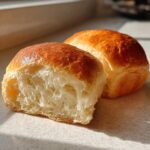
I used to think that cloud-like, incredibly soft bread was something reserved only for professional Japanese bakeries. You know the kind—it stretches forever, feels like it weighs nothing, and tastes like pure comfort. Well, I’m here to tell you that’s absolutely not true! I spent years trying to crack the code, moving past burnt crusts and dense centers, until I finally mastered the secret to incredible Japanese milk bread. This masterpiece of fluffiness relies entirely on the Tangzhong method. It’s the technique that traps the moisture, giving you that signature pillowy texture and ensuring your loaf stays fresh for days. Believe me, I’ve been where you are, feeling intimidated, but I promise that once you conquer this one step, you’ll gain the confidence to tackle any dough. You can absolutely achieve this bakery-style bread in your own kitchen. If you want to see the full journey and how I got here, check out the story on baking soft bread bowls!
- Why This Japanese Milk Bread Recipe Delivers Bakery Style Bread
- Ingredients for Your Japanese Milk Bread Recipe
- How to Make Shokupan: Step-by-Step Instructions
- Tips for Success When Making Japanese Milk Bread
- Storage and How to Keep Your Bread Stays Fresh
- Serving Suggestions for Your Soft Homemade Bread
- Frequently Asked Questions About Japanese Milk Bread
- Estimated Nutritional Data for Japanese Milk Bread
- Share Your Japanese Milk Bread Creations
Why This Japanese Milk Bread Recipe Delivers Bakery Style Bread
When you’re striving for that melt-in-your-mouth, almost cloud-like interior, you can’t cut corners. This isn’t just a regular loaf; it’s magic held together with yeast and dairy! What makes this Japanese milk bread different is that we are treating part of the flour differently before we even start mixing the main dough. It’s all about maximizing moisture retention so that your final product doesn’t dry out by the next afternoon. If you’ve struggled to keep your homemade loaves soft, this technique is going to change everything for you. You can compare the texture difference to the satisfying chewiness you get when you make our fluffy sourdough sandwich bread.
The Tangzhong Secret for a Pillowy Loaf
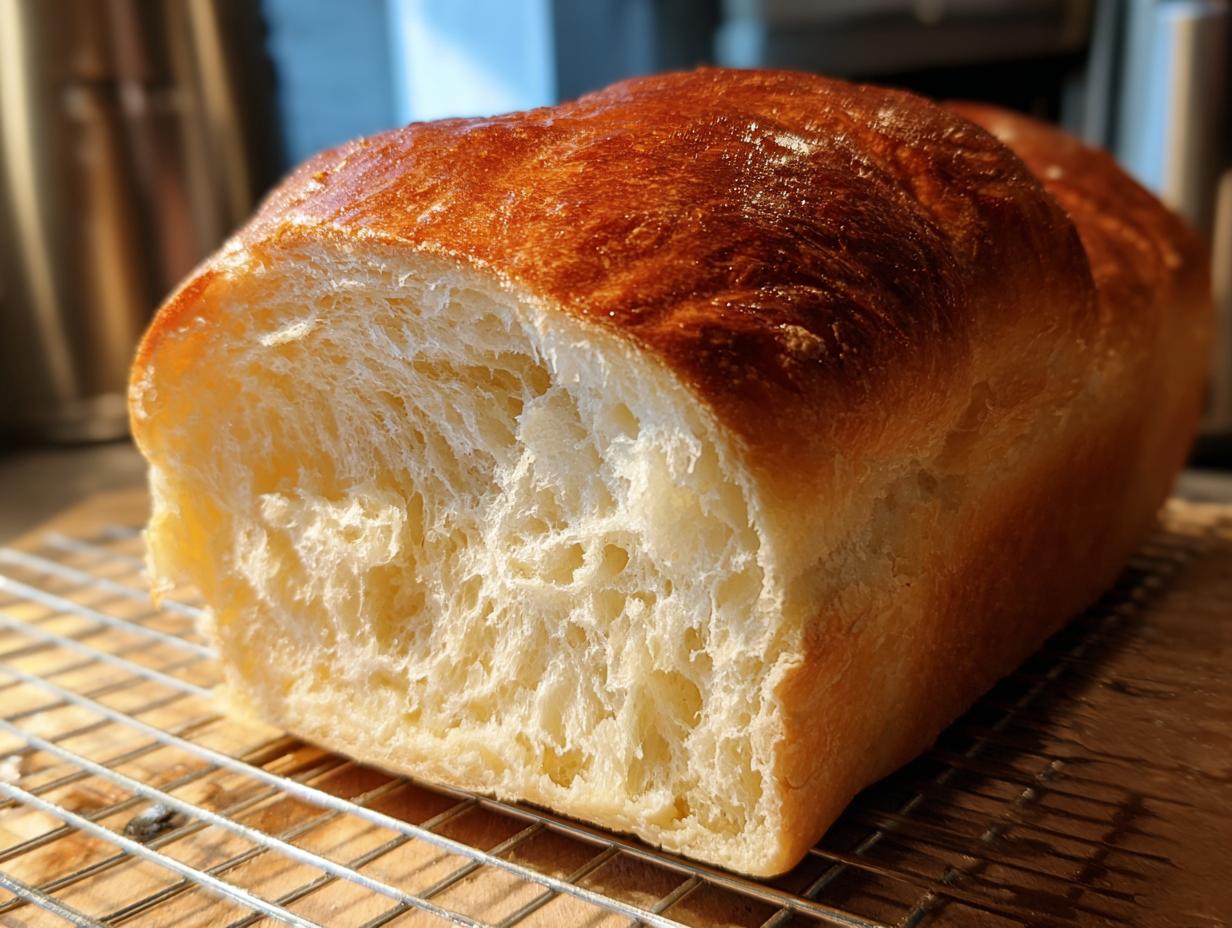
Okay, let’s talk Tangzhong. It sounds fancy, but it’s just a simple cooked flour paste we make with flour and water first. We cook it gently until it turns into this thick, almost pudding-like slurry. When you add that cooked paste into your main dough, it acts like a sponge, holding onto water molecules that would otherwise evaporate during baking. This is the literal secret weapon for giving your Japanese milk bread that incredible, slightly bouncy, almost mochi texture that stays pillowy for days. No dryness allowed!
Achieving That Fluffy Bread Crumb
Once the Tangzhong is in there, we move on to building a sturdy yet tender structure. This dough is what we call ‘enriched’ because we load it up with decadent stuff like milk, butter, and egg. These fats are what give the bread its richness and softness. But don’t rush the kneading! You absolutely need to develop that gluten structure properly, usually until you can achieve the windowpane test. That means you can stretch a piece of dough thin enough to see light through it without tearing. That beautiful stretch means maximum fluffiness!
Ingredients for Your Japanese Milk Bread Recipe
Gathering ingredients when baking something truly special like this Japanese milk bread can feel a little fussy, but stick with me—every item here plays a role in achieving that famous cloud-like softness! Because we are using the Tangzhong method, we need two separate little ingredient lists. Don’t worry if you don’t have a kitchen scale; these standard measurements work perfectly for this loaf. I actually made a batch last week where I forgot the salt, and wow, it tasted totally different! So make sure you account for everything here before you start mixing. If you’re looking for ideas for what to put *on* this incredible bread after it bakes, you have to try my garlic butter.
For the Tangzhong Paste
This is the magic starter! You only need two things for this base, but mixing them completely smooth before heating is key. If you skip that initial whisking, you’ll end up with lumps, and nobody wants lumpy pudding in their bread!
- 1/4 cup Bread Flour
- 3/4 cup Water
For the Enriched Dough
This is where the richness comes in. Make sure your butter is actually cubed and cold-ish when you add it to the dough—it incorporates better that way later on. Also, really pay attention to using bread flour here; it has the higher protein content we need to hold all the moisture we’re adding!
- 1 cup Milk
- 1/4 cup Granulated Sugar
- 1/2 teaspoon Salt
- 1/4 cup Unsalted Butter, cubed
- 1 large Egg
- 2 1/2 cups Bread Flour (plus more for dusting)
- 2 teaspoons Instant Yeast
- 1/4 cup Heavy Cream (this is for brushing the top right before baking!)
How to Make Shokupan: Step-by-Step Instructions
Alright, this is where the magic happens! Making this Japanese milk bread requires patience, especially with the Tangzhong, but trust me, the payoff is worth every whisk and knead. This process is designed to give you that ultimate bakery-style loaf that screams softness before you even slice it. Are you ready to get your hands doughy?
Prepare the Tangzhong and Combine Dough Ingredients
First things first: we cook that little flour-and-water paste we talked about. Whisk your 1/4 cup of flour and 3/4 cup of water together in a small saucepan until it’s totally smooth—no lumps! Then, put it on low heat and stir constantly. You need to cook it until it thickens up like thick gravy and hits about 140°F (60°C). Once it looks like paste, pull it off the heat and let it cool down completely before moving on. Seriously, cool it down! In your stand mixer bowl, just toss in your yeast and the 2 1/2 cups of bread flour. Then add the cooled Tangzhong, milk, sugar, salt, and egg. Mix on low speed until it just comes together into a messy ball.
Kneading the Japanese Milk Bread Dough
Now for the workout! Start kneading on medium-low speed for about five minutes. This builds the initial structure. Next, we introduce the butter—this is a key moment! Add your cubed butter one cube at a time, waiting until the previous bit is completely mixed in before dropping the next one. Once all the butter is absorbed, keep kneading for another 10 to 15 minutes. You are looking for a dough that is smooth, elastic, and passes that windowpane test. If you don’t have a mixer, this is where you grab a sturdy elbow and knead by hand for a solid 20 minutes after the butter is incorporated. It takes effort, but this enriched dough needs it! If you’re struggling with texture, this recipe is another great resource.
Proofing and Shaping the Pillowy Loaf
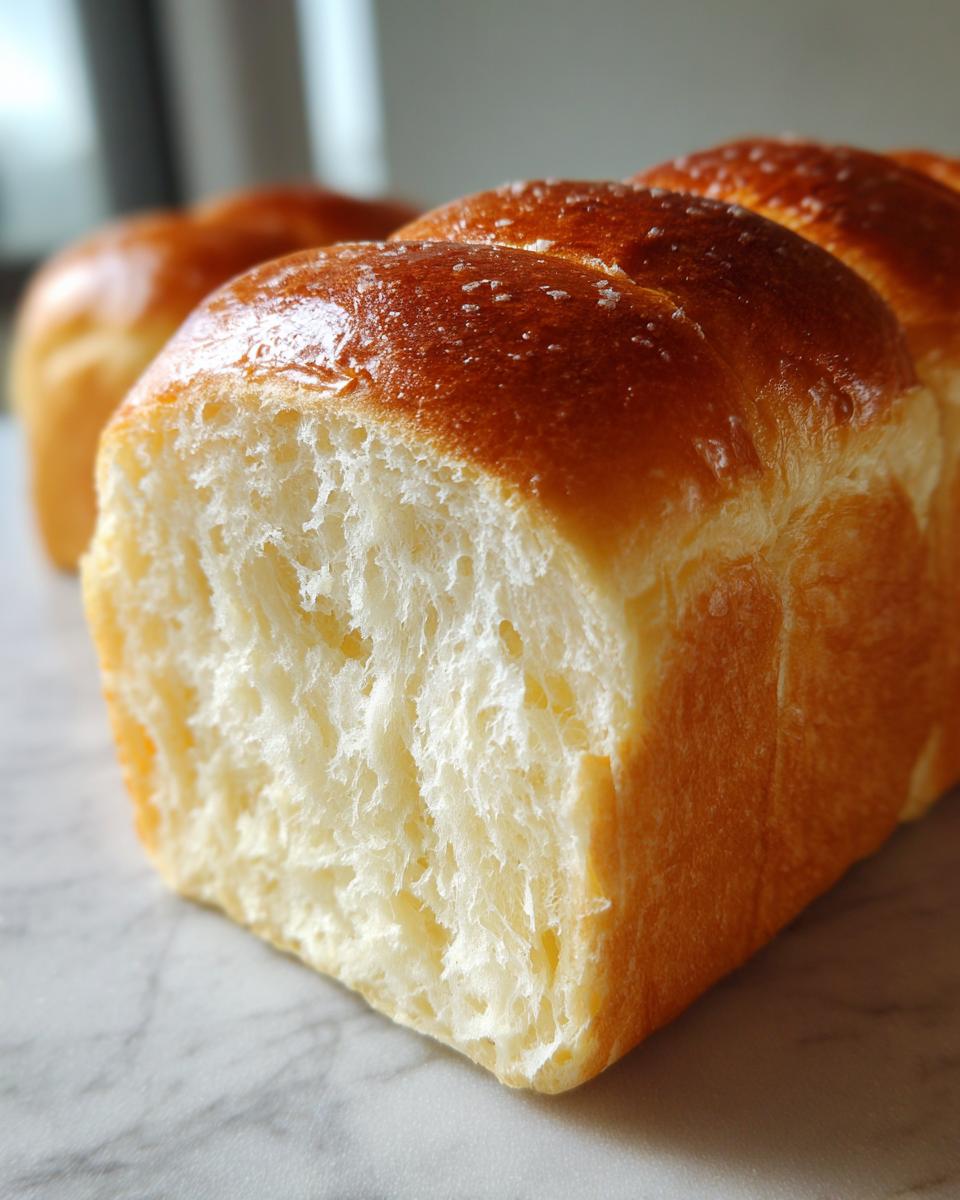
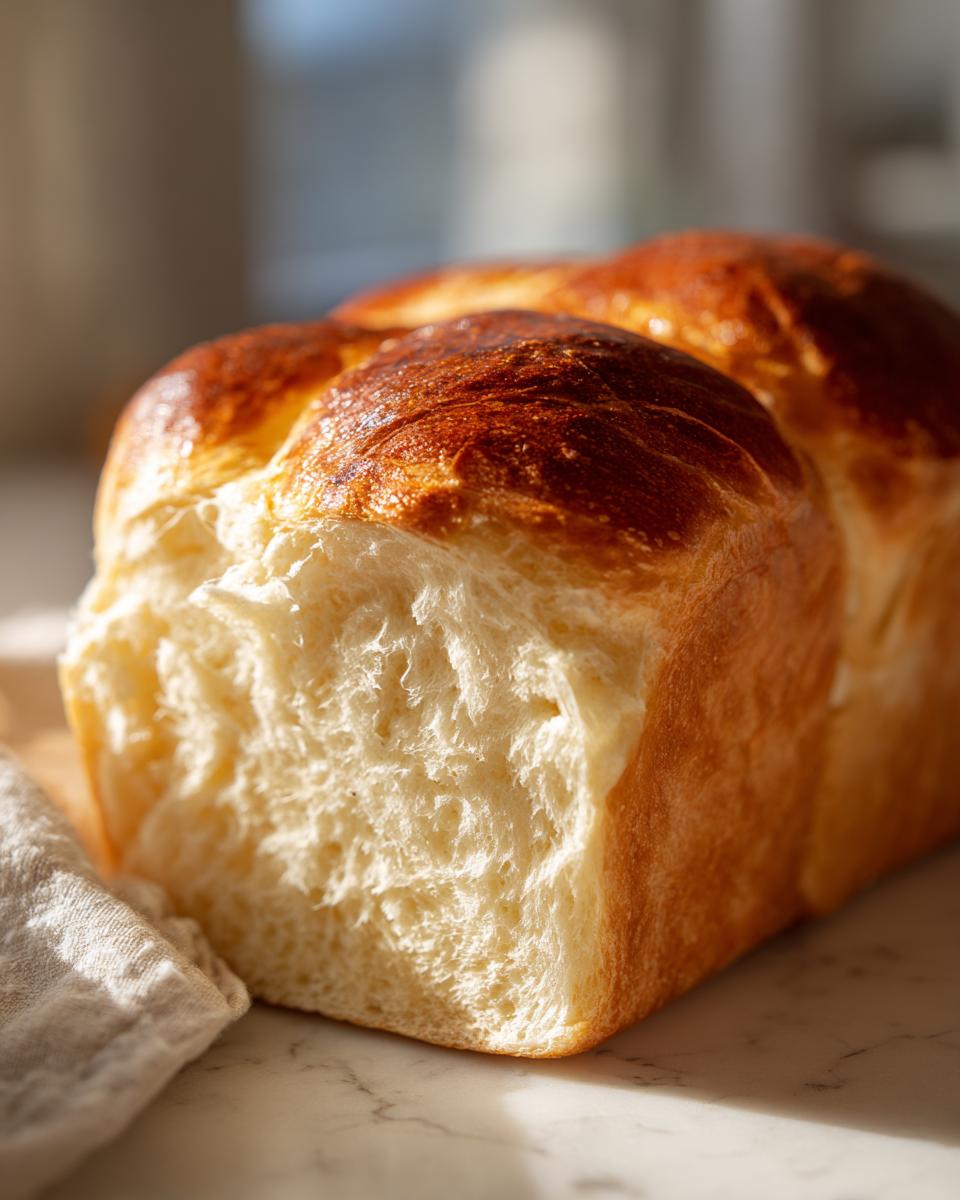
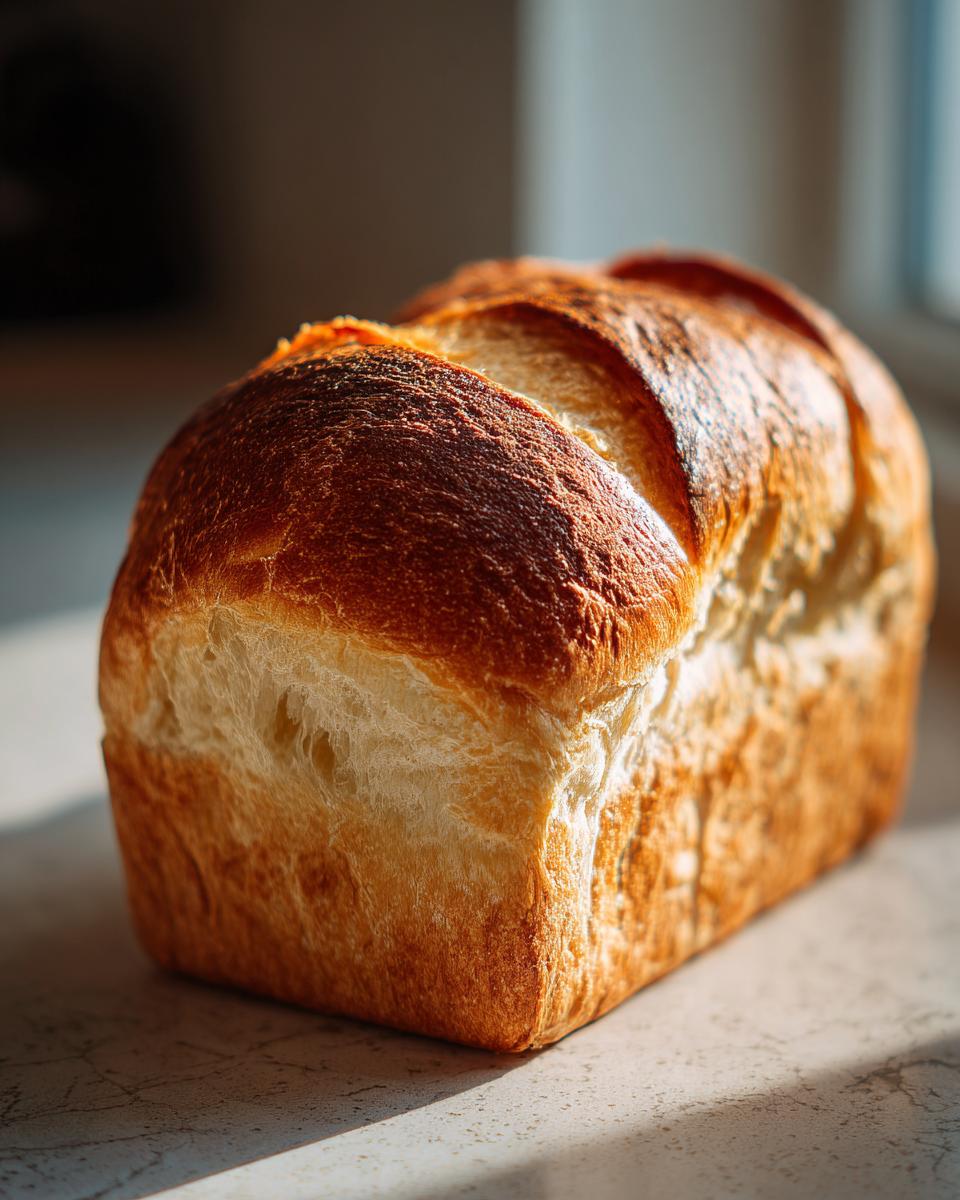
Pop that beautiful dough into an oiled bowl, cover it up, and let it rest somewhere warm until it doubles—usually about an hour to an hour and a half. Gentle handling is appreciated! Once puffed up, punch the air out softly. Now, we divide that dough into three equal pieces. Roll each piece into a tight little ball, let them snooze for ten minutes (they earn it!), and then roll each ball out into a flat rectangle. You have to roll these rectangles up tightly, like a jelly roll, to create those beautiful soft layers inside. Place the three logs side-by-side in your greased loaf pan. Cover it again lightly and let it have its second rest, watching it grow until it crowns about an inch over the edge of the pan. Don’t let it proof too long, or it might collapse when it bakes!
Baking and Cooling for the Best Texture
Get your oven preheated to 350°F (175°C). Before it goes in, brush the top really carefully with heavy cream—that’s what gives us that gorgeous golden top. Bake for about 30 to 35 minutes. You’ll know it’s ready when the top is deeply golden and the internal temperature hits 200°F (93°C). But hey, here’s a tip I learned the hard way: the cooling matters just as much as the baking! As soon as it comes out of the oven, you must immediately take it out of the hot pan and let it cool completely on a wire rack. Slicing it while it’s hot traps steam, and we need that steam to set the amazing texture we worked so hard to create. If you want some great ideas for quick meals while you wait for your bread to cool, check out these easy weeknight dinners!
Tips for Success When Making Japanese Milk Bread
Baking this Japanese milk bread is a bit of a balancing act, but once you nail these few details, you’ll feel like a true baking pro! Don’t get discouraged if your first attempt isn’t absolutely perfect; even I had a few loaves that were just… okay. It’s all about paying attention to the small things, like what temperature your ingredients are when they go into the mixer. I’ve learned that consistency is everything when you’re aiming for that incredible soft, pillowy crumb. If you are already feeling great about your baking skills and want to try something savory next, maybe check out my recipe for pizza pasta bake!
Ingredient Temperature and Flour Choice
Here’s a big one that trips people up: temperature control. Your milk and egg? They better be at room temperature, or at least close to it. Cold liquids drastically slow down yeast activity, and we want that rise to be consistent. If your dough is sluggish, the gluten structure won’t develop properly, and you end up with density instead of fluff. Also, please, please stick to bread flour for this recipe. All-purpose flour just doesn’t have enough protein, and we absolutely need that extra protein to handle all the liquid we’re adding. That high protein content is what builds the strong framework necessary for the perfect inner structure.
Mastering the Second Proof for Height
The first rise is easy—just wait until it doubles. The second proofing, after you shape the logs into the pan, is where you need to watch closely. This is called the ‘final proof,’ and it determines how high and airy your final loaf gets. You’re aiming for the dough to have almost doubled again and to have risen about one inch over the top edge of your loaf pan. If you poke it gently, the indentation should spring back *slowly*, like a little slow-motion recovery. If it springs back instantly, it needs more time. But here is the danger zone: if you push it too far, the dough structure collapses under its own weight in the oven, and you get that sad, dense center. It’s all about catching that sweet spot right before it’s over-proofed. For an awesome guide on nailing that texture, check out the great tips you can find about the Tangzhong method!
Storage and How to Keep Your Bread Stays Fresh
This is where the power of the Tangzhong really shines! I know you’re worried about that beautiful Japanese milk bread going stale by Tuesday, but that cooked paste we made acts like its own little built-in preservative system. Seriously, if you follow the steps correctly, this bread will stay softer than most loaves you buy from the grocery store, even three or four days later. It’s amazing how a little bit of flour and water can do so much!
The absolute number one rule for storage is this: don’t slice it until it’s completely cool. We already talked about how essential cooling on the rack is, but once it’s fully cooled, you need to wrap it up like a precious gift. I use plastic wrap, wrapping the loaf as tightly as possible, and then I usually slip that whole wrapped package into a large Ziploc bag to really seal out any dry air.
Keep it stored right there on the counter at room temperature. Please don’t stick it in the fridge! The cold actually speeds up the staling process for breads like this, taking away all that gorgeous softness we worked so hard to create. If you’re planning on keeping your loaf for more than three days, you can slice what you need and freeze the rest right in the plastic wrap for up to a month. When you’re ready for some fresh-tasting bread, just pop a slice or two directly into the toaster or microwave for about 10 seconds. It revives that incredible fluff instantly!
When you have a slice that’s a day or two old, it’s still fantastic for dipping into soups or slathering with homemade garlic butter—you have to try my creamy garlic aioli recipe, it’s heavenly with this bread! And if you want another angle on how this powerful method works in other recipes, check out The Bakeanista on Tangzhong; they cover some great angles on texture retention too.
Serving Suggestions for Your Soft Homemade Bread
This bread is so unbelievably soft and tender that honestly, sometimes I just stand there with the loaf wrapper off, taking big, silent bites right over the sink. I know, I know, I’m sure you will too! But seriously, this bread is versatile enough for almost anything you can dream up. It’s sturdy enough for hearty fillings but light enough that it doesn’t weigh down your lunch. It elevates simple, everyday meals into something truly special, which is exactly what home baking should be about.
For me, the absolute best way to enjoy the initial bake is simple toast. Seriously. Just slice it thick, put it in the toaster until it’s warm through but not hardened, and slather it with whatever jam I grabbed that morning. The slight sweetness from the milk and sugar in the dough just pops when it’s toasted. It’s basically a hug in bread form.

But we can’t just eat it plain forever, right? Because this is such a perfect sandwich bread recipe, you should definitely try it for your lunchtime creations. I’m partial to using slices of this for a really upgraded chicken or egg salad sandwich. You won’t believe the texture difference when you swap out standard sandwich bread for this fluffy loaf. You can find my favorite recipe for that creamy filling over here if you need inspiration: classic creamy egg salad.
And oh my goodness, have you ever thought about using this for French toast? Since the crumb is already so rich and slightly dense thanks to the Tangzhong, it soaks up the custard mixture without dissolving into a mushy mess. It caramelizes beautifully on the griddle. If you want to try turning your breakfast up a notch, follow my recipe for easy homemade French toast. It’s transformative!
It’s also wonderful just sliced thick and served alongside dinner. It’s perfect for mopping up sauces or dips. Honestly, don’t overthink it; this fluffy bread is ready to be enjoyed however you see fit!
Frequently Asked Questions About Japanese Milk Bread
I get so many questions about this recipe, which is fantastic because it means you’re excited to bake! Dealing with an enriched dough like this can sometimes bring up little uncertainties, but trust me, we can troubleshoot anything together. We want your Shokupan Recipe attempt to be a huge success!
Can I use the Yudane Method instead of Tangzhong for this Shokupan Recipe?
Oh, that’s a great question! Both Tangzhong and Yudane are fantastic pre-cooking methods designed to give you that super soft, almost mochi texture. Tangzhong is the method we used here, where we cook a flour-and-water paste. The Yudane Method, on the other hand, uses hot water (not cooked on the stove) poured over the flour to gelatinize the starches. Both will absolutely give you wonderfully soft homemade bread that stays fresh! Think of them as two equally wonderful siblings in the world of fluffy Asian baking. If you end up trying the Yudane version sometime, I’d love to hear how it compares!
Is this Japanese Milk Bread Recipe suitable for beginners?
I built this recipe around the idea that *everyone* should be able to achieve bakery-quality results, even if you’ve only baked cookies before. Yes, making the Tangzhong adds an extra step, and kneading that butter in takes patience, but the instructions are laid out clearly so you never feel lost. It takes time, but it’s not technically difficult—it’s mostly about following the process! If you can follow directions, you can definitely conquer this easy milk bread recipe. We break down the tricky parts so you gain confidence with every knead. If you’re interested in other beginner-friendly recipes, be sure to check out my guide on easy cool whip candy!
What is the best flour to use for Mochi Texture Bread?
I have to stress this again because it’s so important for that perfect, springy crumble: use bread flour! This is not the place for all-purpose flour, even though it might seem close enough. Bread flour has a significantly higher protein content—we’re talking 12% or higher usually. That extra protein is what forms those long, strong gluten strands we need to trap the moisture added by the Tangzhong. If you use AP flour, the structure can’t hold up, and you’ll end up with a denser loaf instead of that signature pillowy loaf. For the very best Japanese baking results, always opt for the high-protein flour here.
If you want to see how others have gotten results with this recipe, check out the amazing success stories over at Recipes You Crave!
Estimated Nutritional Data for Japanese Milk Bread
Now, I know that when we’re baking something this rich and delicious, we aren’t exactly worried about counting every single calorie, right? We are aiming for joy and comfort here! But since this is such a bakery-style bread, it’s helpful to have a general idea of what’s in that beautiful loaf before you start slicing it thick for toast.
I’ve pulled together the estimated nutritional breakdown based on the ingredients used in this recipe. Remember, this is just a baseline estimate for one slice, and since we are making everything from scratch, your specific numbers might shift a little based on the exact brands of butter or milk you use. Think of this as a bonus detail, not a strict dietary requirement, especially when the goal is nailing that incredible soft homemade bread texture!
- Serving Size: 1 slice
- Calories: 180
- Sugar: 8g
- Sodium: 150mg
- Fat: 5g
- Saturated Fat: 3g
- Unsaturated Fat: 2g
- Trans Fat: 0g
- Carbohydrates: 28g
- Fiber: 1g
- Protein: 5g
- Cholesterol: 30mg
If you want to explore ways to make your everyday meals a little lighter while still bringing that satisfying, homemade feel, I share a few easy swaps over in my guide on quick and healthy breakfasts. Enjoy your bread—you earned that soft, fluffy slice!
Share Your Japanese Milk Bread Creations
I’ve shared every secret I have, from making the Tangzhong paste to kneading in that final cube of butter, and now, the best part is seeing what you create! Honestly, when you achieve that first perfect, cloud-like slice of Japanese milk bread, I want to know all about it. That moment you slice into the loaf and see those beautiful, airy layers? That’s pure satisfaction.
Did you find the kneading process easier than expected? Did you try brushing yours with an egg wash instead of cream for a different sheen? I want to read all your triumphs, your little tweaks, and anything you might have learned along the way. Leave a comment right here on the site! Rating the recipe is super helpful for other home cooks who might be standing where I once stood—hesitant to start.
And please, if you snap a picture of your finished Shokupan resting on the cooling rack or looking fantastic sliced thick for toast, tag me on social media! It genuinely makes my day to see your kitchen filled with the warm scent of success. You can always reach out through the contact page if you have follow-up questions—I love connecting with fellow bakers!
For another beautiful take on this style of soft bread, especially if you want to see results using the Yudane method, check out the amazing work over at Chopstick Chronicles. Happy baking, and enjoy that incredible, fluffy bread!
PrintBakery-Style Japanese Milk Bread (Shokupan) Using the Tangzhong Method
This recipe shows you how to make incredibly soft, fluffy, and pillowy Japanese Milk Bread, or Shokupan, using the Tangzhong method. This technique locks in moisture, ensuring your homemade loaf stays fresh for days, perfect for sandwiches or toast.
- Prep Time: 45 min
- Cook Time: 35 min
- Total Time: 3 hours 20 min
- Yield: 1 loaf (about 12 slices) 1x
- Category: Baking
- Method: Baking
- Cuisine: Japanese
- Diet: Vegetarian
Ingredients
- 1 cup Milk
- 1/4 cup Granulated Sugar
- 1/2 teaspoon Salt
- 1/4 cup Unsalted Butter, cubed
- 1 large Egg
- 2 1/2 cups Bread Flour (plus more for dusting)
- 2 teaspoons Instant Yeast
- 1/4 cup Heavy Cream (for brushing)
- For the Tangzhong: 1/4 cup Bread Flour
- For the Tangzhong: 3/4 cup Water
Instructions
- Make the Tangzhong: Whisk together the 1/4 cup bread flour and 3/4 cup water in a small saucepan until smooth. Cook over medium-low heat, stirring constantly, until the mixture thickens into a paste, reaching about 140°F (60°C). Remove from heat and let it cool completely.
- Combine Dry Ingredients: In the bowl of a stand mixer fitted with a dough hook, whisk together the 2 1/2 cups bread flour and instant yeast.
- Mix Wet Ingredients: Add the cooled Tangzhong paste, milk, sugar, salt, and egg to the dry ingredients. Mix on low speed until a shaggy dough forms.
- Knead the Dough: Increase the speed to medium-low and knead for 5 minutes. Add the cubed butter, one piece at a time, waiting until each piece is incorporated before adding the next. Continue kneading for another 10 to 15 minutes until the dough is smooth, elastic, and passes the windowpane test.
- First Proof: Place the dough in a lightly oiled bowl, turning to coat. Cover the bowl and let it rise in a warm place until doubled in size, about 1 to 1.5 hours.
- Shape the Loaf: Gently punch down the dough. Divide it into three equal pieces. Shape each piece into a tight ball. Let the balls rest for 10 minutes. Roll each ball into a rectangle, then roll each rectangle tightly into a log. Place the three logs side-by-side into a greased 9×5 inch loaf pan.
- Second Proof: Cover the loaf pan loosely and let it rise again in a warm place until the dough has nearly doubled and crowns about 1 inch above the rim of the pan, about 45 to 60 minutes.
- Bake: Preheat your oven to 350°F (175°C). Brush the top of the dough lightly with heavy cream. Bake for 30 to 35 minutes, or until the top is golden brown and the internal temperature reaches 200°F (93°C).
- Cool: Immediately remove the bread from the pan and cool completely on a wire rack before slicing. This step is crucial for achieving the best texture.
Notes
- For the softest texture, use the Tangzhong method as described; this is the secret to achieving that bakery-style, pillowy crumb.
- If you do not have a stand mixer, you can knead this enriched dough by hand for about 20 minutes after the butter is incorporated.
- This bread stays moist for several days when stored tightly wrapped at room temperature.
Nutrition
- Serving Size: 1 slice
- Calories: 180
- Sugar: 8
- Sodium: 150
- Fat: 5
- Saturated Fat: 3
- Unsaturated Fat: 2
- Trans Fat: 0
- Carbohydrates: 28
- Fiber: 1
- Protein: 5
- Cholesterol: 30