
Oh, the disappointment of sad, watery gravy! We’ve all been there, right? You’ve made beautiful mashed potatoes or a perfect roast, and you pour on that pale, flavorless sauce, and suddenly the whole meal feels a little… flat. I used to think that truly rich, comforting gravy was reserved only for when you had a giant roasting pan dripping with beef juices. That’s just not true anymore, trust me.
That’s why I want to share what I call the ultimate **homemade brown gravy** recipe. This is truly perfection from scratch, designed specifically for the busy home cook like myself. The best part? You don’t need any pan drippings whatsoever! We’re building deep, savory flavor right on the stovetop, proving that a deeply satisfying **comfort food sauce** is totally within your reach. If you want to learn more about my philosophy of making cooking accessible, check out my story over at Kitchenican. Building confidence in the kitchen starts with mastering simple things like this, and you are absolutely capable of making this amazing stuff!
- Why This Is Your Best Homemade Brown Gravy Recipe (No Drippings Needed!)
- Gathering Ingredients for Rich Savory Gravy
- How To Make Brown Gravy: The Simple Stovetop Method
- Tips for Success with Your Homemade Gravy Recipe
- Serving Suggestions: The Perfect Mashed Potato Topping and More
- Storage and Reheating Instructions for Easy Brown Gravy
- Frequently Asked Questions About Brown Gravy From Scratch
- Nutritional Estimates for This Homemade Gravy Recipe
- Share Your Success with This Rich Savory Gravy
Why This Is Your Best Homemade Brown Gravy Recipe (No Drippings Needed!)
I know you’re skeptical. How can you get that deep flavor without the treasured drippings? That’s the secret sauce here! This recipe focuses on technique, meaning you get incredible results fast. It’s honestly the recipe I turn to when I need a fantastic **Mashed Potato Topping** on a crazy Tuesday night.
- It’s genuinely fast—we’re talking 15 minutes start to finish. It works perfectly as a **Quick Dinner Gravy**.
- The flavor is robust and rich, not weak or tinny like the packets.
- It uses simple pantry staples you likely already have on hand!
Quick Dinner Gravy Ready in Minutes
Seriously, set a timer. From the moment the butter hits the pan to the moment you’re tasting it for salt, you are looking at about 15 minutes total. That’s faster than running to grab a packet at the store, and way better tasting! This makes it perfect for weeknight comfort food when everyone is starving.
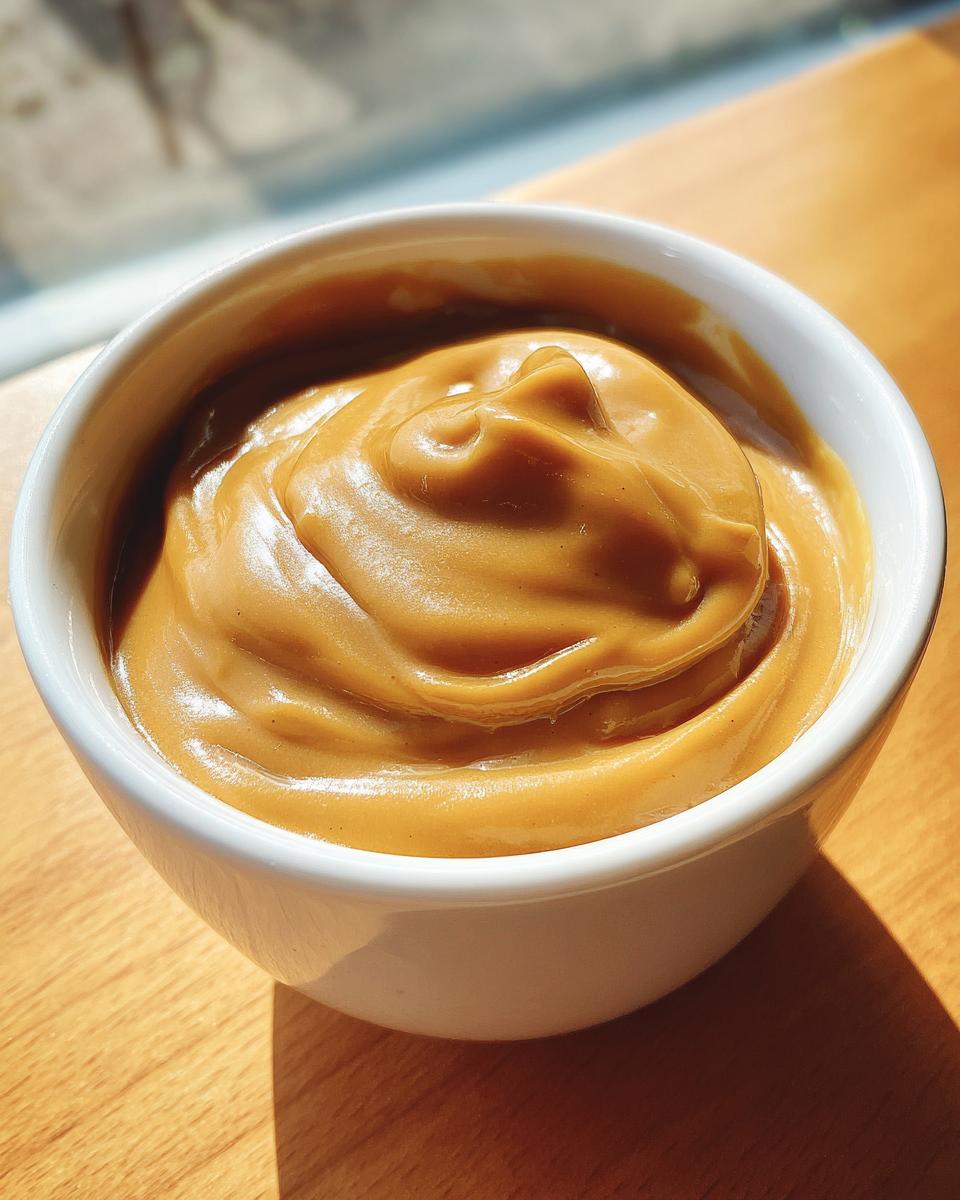
Achieving Rich Savory Gravy Without Drippings
The flavor magic here lies entirely in Step 1: creating that beautiful, deep brown roux. When you cook the flour and butter together long enough so it smells slightly nutty, you’re essentially pre-toasting the flavor into the base. That beautiful color we aim for is what gives you a genuinely **Rich Savory Gravy** even when we skip the meat juices. It’s all about transforming humble flour.
Gathering Ingredients for Rich Savory Gravy
Because we aren’t relying on drippings, every single ingredient here has to pull its weight. This means using good quality components, especially your broth. For this **homemade brown gravy**, I insist on using low-sodium beef broth. Why low-sodium? Because we are adding salt and Worcestershire later, and we want complete control over how salty our final sauce ends up. You only need a few basic things to master this!
Here is what you need:
- 4 tablespoons unsalted butter
- 4 tablespoons all-purpose flour
- 2 cups high-quality beef broth (low sodium preferred)
- 1 teaspoon Worcestershire sauce
- 1/2 teaspoon onion powder
- 1/2 teaspoon garlic powder
- 1/4 teaspoon black pepper
- 1/2 teaspoon salt (adjust to taste)
- 1/4 teaspoon dried thyme (optional, for depth)
Ingredient Notes and Substitutions for Gravy Without Drippings
If you’re making this for a holiday meal and have run out of beef broth, please don’t stress! You can absolutely substitute it with a really rich vegetable broth, or even chicken broth, though the color will be a little lighter. If you want that deep mahogany color back without drippings, a tiny dash of dark soy sauce or a little commercial browning sauce mixed in at the end works wonders for depth. These little tricks are how we build big flavor, even when we’re missing the typical base.
How To Make Brown Gravy: The Simple Stovetop Method
Alright, here is where we put that culinary confidence to work and learn exactly **How To Make Brown Gravy** that rivals anything you’ve ever had. Forget the lumps! We’re keeping this smooth and rich, and it all happens in one simple saucepan on the stovetop. This is the foundation for everything good in comfort food sauces.
Step 1: Building the Flavor Base with a Roux Based Gravy
First things first: the roux. Set your saucepan over medium heat and let that butter melt completely—don’t rush it! Once it’s liquid, whisk in your flour. Now, this is my big tip: you must keep whisking constantly and let that mixture cook down. I mean it! You want it to turn a deep, nutty brown color, almost like peanut butter, which takes a good 2 to 3 minutes. If you stop stirring, it burns, but when you get it right, you’ve created that amazing foundation for a proper **Roux Based Gravy**.
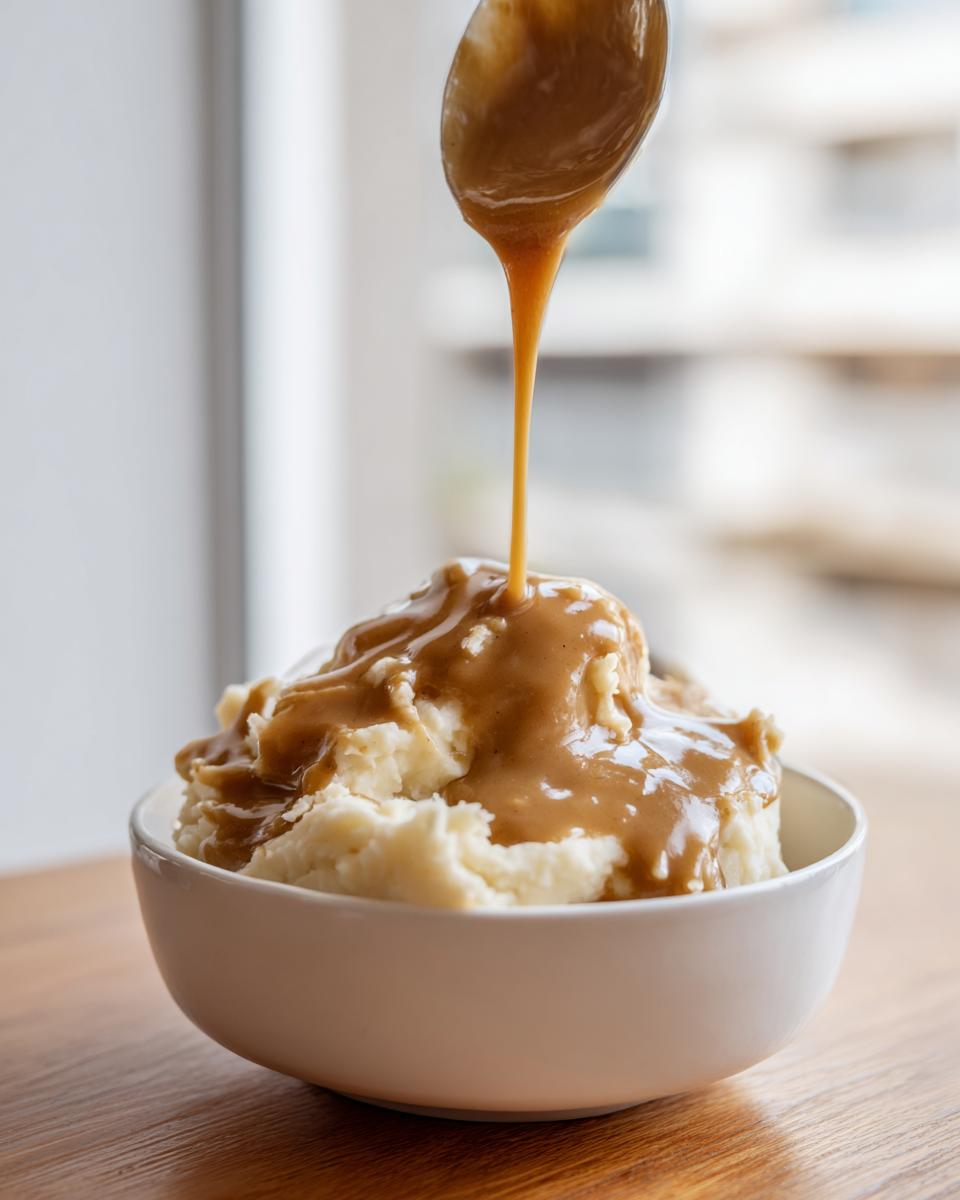
Step 2: Achieving a Velvety Brown Gravy Texture
Once your roux is perfectly browned, take your beef broth and start pouring it in very slowly, whisking like crazy! I mean *non-stop* whisking until every speck of flour is incorporated and the mixture looks smooth. Don’t worry if it seems thin at first. Bring it up to a gentle simmer—don’t let it boil hard—and let it bubble quietly for about 5 to 8 minutes, stirring frequently. You’ll watch it transform right before your eyes into the thick, **Velvety Brown Gravy** you’ve been dreaming about. If you need ideas for the drippings-free inspiration for this, check out how quickly you can whip up something similar over at Drive Me Hungry.
Tips for Success with Your Homemade Gravy Recipe
Now you have a fantastic skillet of gravy, but sometimes things need a little nudge to reach peak deliciousness. Don’t worry if it came out slightly too thin or if you need to boost that savory punch. This is where we personalize the batch to make it the absolute **Best Homemade Gravy** for your meal tonight! Getting the seasoning balance just right is key to achieving that deep flavor profile.
Troubleshooting Common Issues with Homemade Brown Gravy
If your gravy has cooled off slightly and seems too thick—which happens if you let it sit for just a minute too long—just whisk in a tablespoon or two of warm beef broth or even warm water until it loosens up back to being pourable. If, heaven forbid, it’s too thin after simmering, you just need a quick fix: whisk up a tiny slurry using a teaspoon of flour mixed with a teaspoon of cold water, then whisk that into the simmering gravy. For seasoning, remember: taste, taste, taste! If it needs depth, that’s when you add that little dash of soy sauce for color and umami, just like you see suggested over at Little Bit Recipes. Always season at the very end!
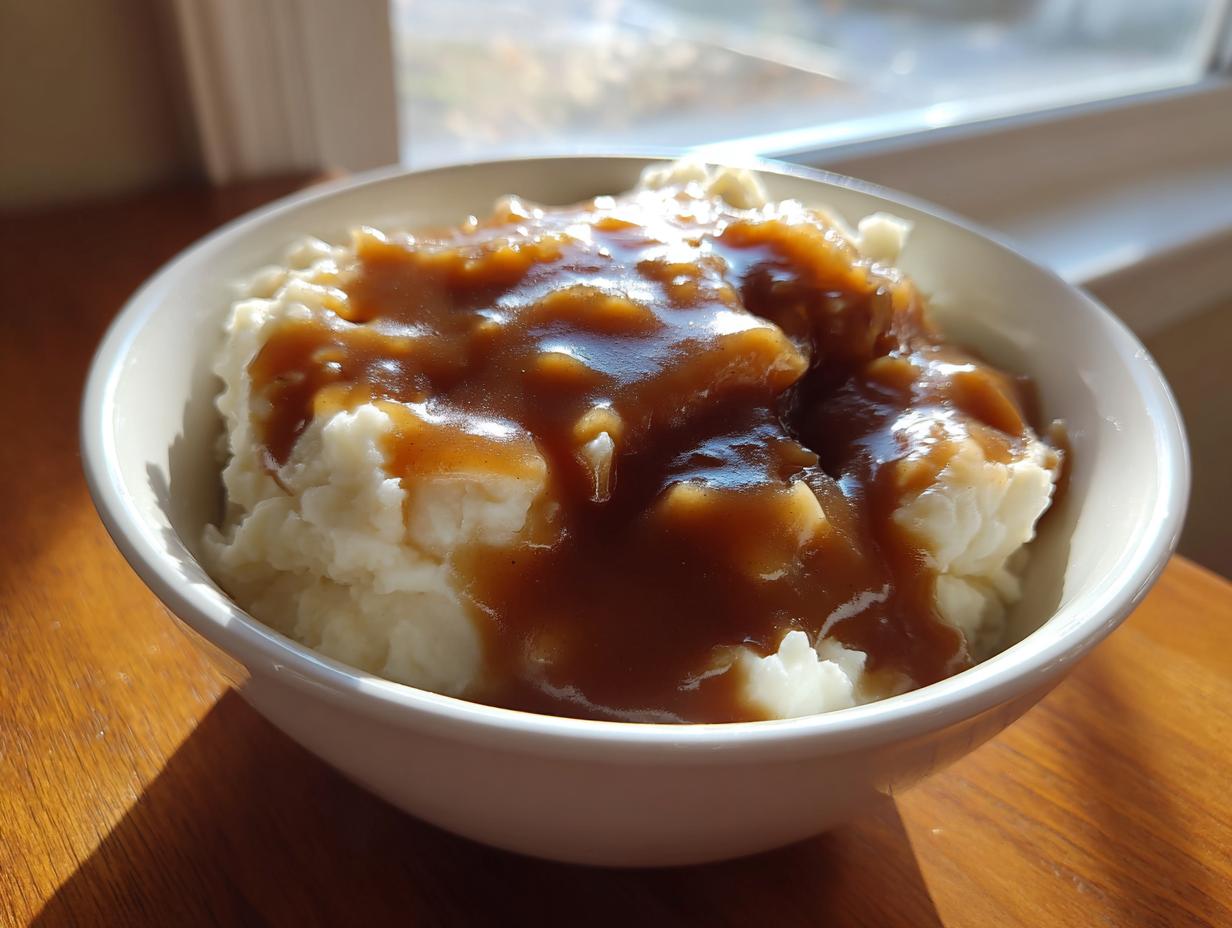
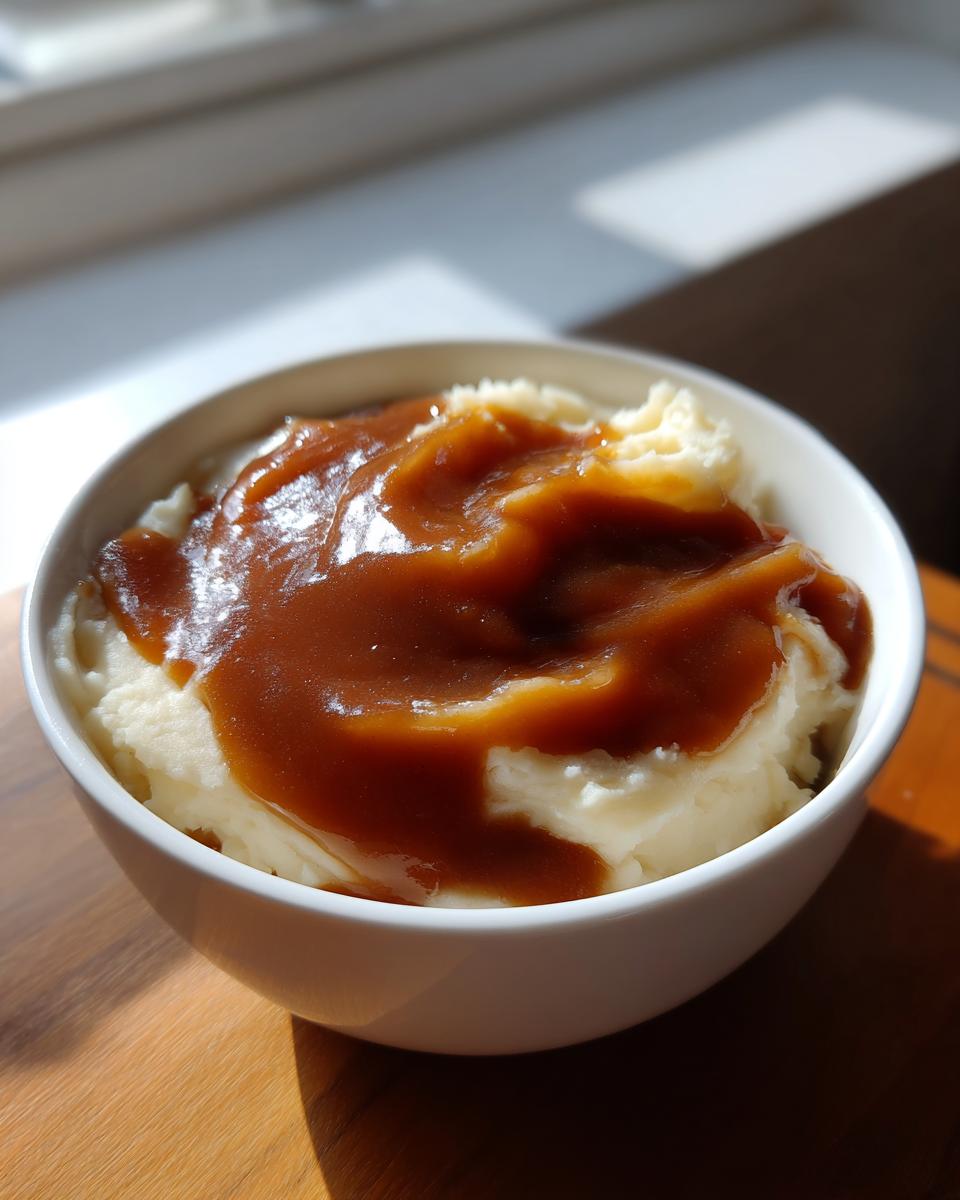
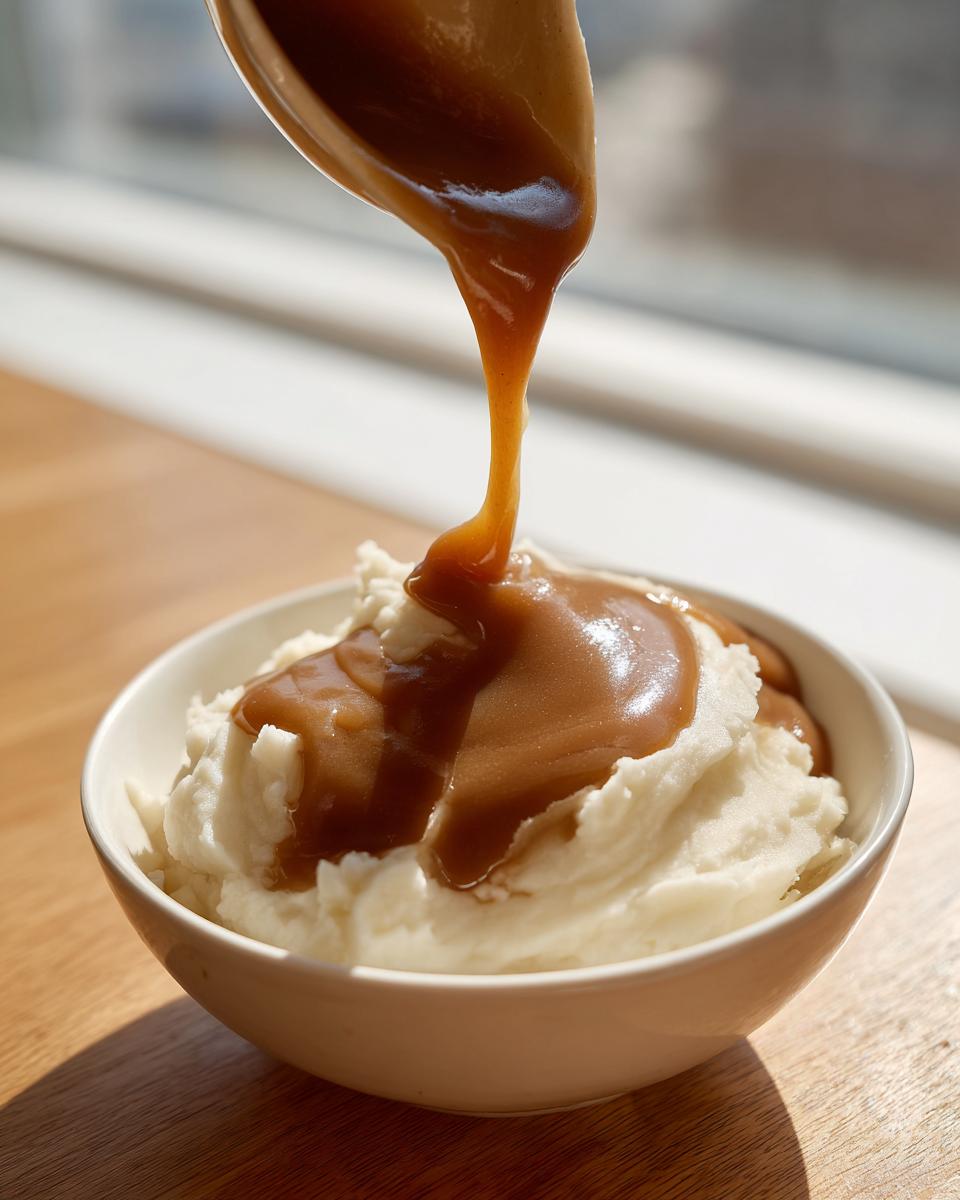
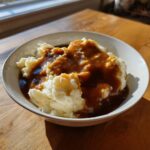
Serving Suggestions: The Perfect Mashed Potato Topping and More
Now that you have this absolutely incredible, rich, savory gravy made entirely from scratch, the possibilities are endless! Honestly, I’ve been known to just eat this with a spoon while I’m cleaning up the kitchen—it’s that good. But we should probably put it on something, right?
Because this **homemade brown gravy** has such a deep, satisfying flavor profile, it elevates even the simplest meals into something spectacular. Forget those bland alternatives; this is the real deal for maximizing comfort food flavor.
Here are my favorite ways to use this **Mashed Potato Topping** and soak up every last drop:
- Mashed Potatoes: Obviously! This gravy clings perfectly to fluffy, buttery potatoes. It’s non-negotiable for our Sunday dinners.
- Meatloaf: Drizzle it generously right over the top before serving. It keeps the meatloaf moist and adds that classic savory crust.
- Roasted Meats: Whether you roast chicken, pot roast, or a holiday turkey, this gravy acts as the perfect stand-in when you don’t have enough pan drippings.
- Biscuits and Gravy: While traditionally sausage gravy is used, a spoonful of this rich brown gravy on a warm biscuit is just divine for a quick lunch.
- Over Stuffing: Trust me on this one, especially around Thanksgiving, a dollop of this on a pile of homemade stuffing makes everything better. You can find more great holiday ideas like this over at The Cozy Cook.
Storage and Reheating Instructions for Easy Brown Gravy
One of the best things about mastering a great recipe like this **homemade brown gravy** is that you can make a batch ahead of time! This stuff is heaven leftover, but you have to treat it right so it doesn’t separate or seize up when you reheat it. Since we are using butter and flour for our roux, we want to make sure we don’t shock the texture when warming it up again for your next meal.
Here’s the breakdown for keeping your **Easy Brown Gravy** perfect:
For storage, let the gravy cool down to room temperature first. Don’t seal it hot because condensation builds up. Once cooled, scoop it into an airtight container. It will keep beautifully in the refrigerator for about three to four days. It will get quite thick when cold—almost like a solid paste—which is totally normal. Don’t worry, it always comes back to life!
When it comes to reheating, the stovetop is your absolute best friend. Please, try to avoid the microwave if you can. Microwaves tend to reheat unevenly and can make the gravy grainy because of how it heats the fats and starches. Instead, pop the cooled gravy into a small saucepan over low to medium-low heat. You must whisk it constantly, or it will stick to the bottom and scorch.
As it warms up, it will start to loosen. If it’s still too stiff, just add a splash of warm liquid—either warm beef broth or just some warm water works—a tablespoon at a time, whisking until you reach that perfect, velvety consistency we love. It should only take about 5 to 7 minutes on the stove to reach serving temperature! This is what I do when I’m making roast leftovers on Monday night; it tastes homemade all over again!
Frequently Asked Questions About Brown Gravy From Scratch
I totally get it—planning around a recipe can bring up a few last-minute questions, especially when you’re trying to nail that perfect texture! These are the questions I get asked most often about switching to making **brown gravy from scratch**. Don’t worry, we can troubleshoot anything!
Can I make this homemade brown gravy recipe vegan?
Yes, absolutely! Since this recipe already focuses on avoiding meat drippings, making it vegan is just a couple of easy swaps. You can replace the unsalted butter with an equal amount of good quality vegan butter substitute or even just use a neutral, high-heat oil like canola oil. For the broth, you’ll want to use a rich, deeply flavored vegetable broth instead of beef broth. If you use vegetable broth, you might need an extra pinch of salt or maybe even a little bit of that soy sauce trick I mentioned earlier to help deepen the color and savory flavor so it still tastes incredible!
How do I make my gravy thicker without using cornstarch?
This is one of my favorite things to talk about because I built this entire **homemade brown gravy** recipe around the perfect roux! If your gravy isn’t thick enough by the time the 8 minutes of simmering are up, the best technique is to just let it cook longer. Keep it at a low simmer and keep whisking—it’s essentially just cooking out more liquid, which concentrates the starches present from the flour. If you really need it thicker fast, you can make a ‘flour slurry,’ which is just a spoonful of flour mixed with a spoonful of *cold* water until smooth. Whisk that into your simmering gravy right away and let it cook for another minute. That will give you a fantastic **Thick Gravy Sauce** without resorting to cornstarch!
Is this an acceptable Beef Gravy Recipe if I don’t have drippings?
One hundred percent yes! This recipe was specifically designed for those times you want a rich **Beef Gravy Recipe** but maybe you’re only roasting chicken, or perhaps you’re just whipping this up for mashed potatoes on a totally random Tuesday when no meat has been cooked nearby! The key to making this a successful **gravy without drippings** is ensuring your broth is high quality—look for low-sodium beef broth—and that you cook your roux until it is deeply brown. That brown roux replaces the browned bits stuck in your pan, giving you that essential flavor foundation.
How long does this gravy last in the fridge?
Since this is a real, simple sauce made from scratch, it lasts quite well. Stored in an airtight container after cooling, it should be good for about 4 to 5 days in the refrigerator. Remember what I said about reheating? Always revive it gently on the stovetop with a little warm liquid to keep that smooth texture. If you have any questions about storage or want to let me know how your batch turned out, feel free to reach out on my contact page!
Nutritional Estimates for This Homemade Gravy Recipe
When creating something this delicious and comforting from scratch, I know a lot of you wonder about the nutrition breakdown, especially when it comes to building that rich flavor base. Because we’re using real butter and flour for our roux here in this **homemade brown gravy**, it definitely packs more flavor—and maybe a little more fat—than those watery, preservative-filled packets. But honestly, that’s half the joy of making it yourself!
I always like to give you a general idea of what you’re looking at, but please treat these numbers as a starting point. Since ingredient brands, broth types (low sodium versus regular), and even butter content can vary wildly, these are just estimates based on the standard recipe above. This info is helpful if you are tracking, but remember, the most important thing is the satisfaction of making something wonderful!
Here are the estimates for a standard 1/4 cup serving:
- Serving Size: 1/4 cup
- Calories: 85
- Fat: 6g
- Saturated Fat: 3.5g
- Carbohydrates: 6g
- Protein: 2g
- Sodium: 350mg (This is why I stressed using low-sodium broth!)
- Sugar: 0.5g
- Cholesterol: 15mg
See? It really isn’t bad at all, especially considering how little you use per serving because this is such a deeply flavorful **Rich Savory Gravy**! A little goes a long way when you build flavor properly through the roux, which is why this recipe works so perfectly as a **Thick Gravy Sauce**.
Share Your Success with This Rich Savory Gravy
Now that you’ve mastered making **homemade brown gravy** right on your stovetop—no drippings required!—I really, really want to hear about it. There is nothing that makes my day more than knowing you’ve taken a step forward in your kitchen confidence and created something truly delicious.
Did this recipe deliver the **Rich Savory Gravy** you were hoping for? Did it cling perfectly to your mashed potatoes? Please drop a comment below with your rating and any tweaks you loved! Knowing that you successfully made this without stress is what Kitchenican is all about—empowering you to create amazing meals.
If you snap a picture of your creation—maybe your beautiful Thanksgiving spread or that perfect weeknight meatloaf smothered in gravy—tag me on social media! It’s so fun to see your kitchen creations come to life. We all learn from each other’s successes, so don’t be shy about sharing your beautiful brown sauce!
If you want to learn more about how we handle your amazing feedback and data on the site, you can always check out our Privacy Policy. And hey, if you’re looking for even more inspiration for next-level comfort food, check out the incredible ideas shared by others over at The Chunky Chef!
PrintThe Ultimate Homemade Brown Gravy (No Drippings Needed!) – Rich & Savory Perfection
You can create a rich, savory, and velvety brown gravy from scratch without needing any meat pan drippings. This easy stovetop recipe uses a simple roux and quality broth to deliver deep flavor perfect for mashed potatoes or holiday meals.
- Prep Time: 5 min
- Cook Time: 10 min
- Total Time: 15 min
- Yield: About 2 cups 1x
- Category: Sauce
- Method: Stovetop
- Cuisine: American
- Diet: Vegetarian
Ingredients
- 4 tablespoons unsalted butter
- 4 tablespoons all-purpose flour
- 2 cups high-quality beef broth (low sodium preferred)
- 1 teaspoon Worcestershire sauce
- 1/2 teaspoon onion powder
- 1/2 teaspoon garlic powder
- 1/4 teaspoon black pepper
- 1/2 teaspoon salt (adjust to taste)
- 1/4 teaspoon dried thyme (optional, for depth)
Instructions
- Make the Roux: In a medium saucepan over medium heat, melt the butter completely. Once melted, whisk in the flour. Continue whisking constantly for 2 to 3 minutes until the mixture turns a deep, nutty brown color. This step builds the rich flavor base.
- Whisk in Liquid: Slowly pour in the beef broth while whisking continuously to prevent lumps from forming. Keep whisking until the mixture is smooth.
- Simmer and Thicken: Bring the mixture to a gentle simmer, stirring often. Reduce the heat to low and let it cook for 5 to 8 minutes, or until the gravy thickens enough to coat the back of a spoon.
- Season: Remove the pan from the heat. Stir in the Worcestershire sauce, onion powder, garlic powder, black pepper, salt, and dried thyme, if using. Taste the gravy and adjust salt and pepper as needed for your desired flavor.
- Serve: Pour your velvety brown gravy immediately over mashed potatoes, meatloaf, or roasted meats.
Notes
- For an even deeper color and flavor without drippings, add 1/2 teaspoon of dark soy sauce or a small dash of browning sauce during the seasoning step.
- If your gravy becomes too thick after sitting, whisk in a tablespoon of warm beef broth or water until you reach your preferred consistency.
- If you prefer a lighter gravy, substitute half of the beef broth with chicken broth or vegetable broth.
Nutrition
- Serving Size: 1/4 cup
- Calories: 85
- Sugar: 0.5
- Sodium: 350
- Fat: 6
- Saturated Fat: 3.5
- Unsaturated Fat: 2.5
- Trans Fat: 0
- Carbohydrates: 6
- Fiber: 0.2
- Protein: 2
- Cholesterol: 15