

There’s just something about setting a steaming bowl of soup down on the table, and it’s not the soup itself that makes it magical—it’s the vessel it sits in. For years, I thought those perfect, bakery-style edible soup bowls were totally out of reach for a busy home cook like me. I thought they required some secret sourdough starter or an entire afternoon of complicated folding. Well, I was wrong! I finally cracked the code for making the absolute best easy homemade soft bread bowls for soup that are still sturdy enough to handle even the thickest chili without weeping or collapsing. This recipe strips away the intimidation and proves that you absolutely can achieve that bakery-quality, crusty exterior with a tender, perfect interior right in your own kitchen. Trust me, once you smell this dough rising, you’ll never look at store-bought bread the same way again!
- Why This is the Best Bread Bowls Recipe for Home Cooks
- Ingredients for Easy Homemade Soft Bread Bowls from Scratch
- How to Bake Bakery Style Bread Bowls at Home
- Hollowing Out Your Sturdy Bread Bowls for Soup
- Tips for Achieving Perfect Bread Bowls Every Time
- Creative Bread Bowl Stuffing Ideas Beyond Basic Soup
- Storage and Reheating Instructions for Homemade Bread Bowls
- Frequently Asked Questions About Making Bread Bowls
- Share Your Homemade Bread Bowls Creations
Why This is the Best Bread Bowls Recipe for Home Cooks
I designed this recipe specifically because I know what it’s like to stare at a recipe thinking, “I just don’t have time for that!” This isn’t some artisan, overnight process. This is the reliable way to get those delicious bread bowls everyone loves without a huge fuss. We use basic pantry staples, so you don’t have to hunt down specialty flours or weird ingredients.
It hits that sweet spot every single time. Here’s why I keep coming back to this formula:
- Soft Interior: The secret is in the initial quick kneading and allowing for a proper rise—it keeps the inside fluffy and chewy, perfect for soaking up soup.
- Sturdy Crust: We use a specific egg wash and bake them hot enough to create structure, so your bowl won’t fail you when filled with a heavy **broccoli cheddar soup bread bowl** filling.
- Simple Ingredients: Every item listed is something you likely already have. No complex starters needed here!
If you love the idea of making your own bread dough but get intimidated easily, this easy homemade bread bowl recipe is your new best friend. If you’re looking for another simple bread to master, you should check out my ideas for crusty Italian loaf!
Ingredients for Easy Homemade Soft Bread Bowls from Scratch
When gathering your items for these bread bowls, remember that clarity is key. We’re keeping the ingredient list short and sweet so you can focus on the mixing, not hunting for obscure items. You’ll note we need warm water specifically—not just warm, but right around 105°F to 115°F. That temperature is crucial for waking up the yeast and ensuring a great rise!
- 1 packet active dry yeast (about 2 1/4 teaspoons)
- 1 teaspoon granulated sugar
- 1 cup warm water (105°F to 115°F)
- 3 cups all-purpose flour, plus more for dusting
- 1 1/2 teaspoons salt
- 2 tablespoons unsalted butter, melted
- 1 egg white, lightly beaten (for egg wash)
- 1 teaspoon water (mixed with egg white)
That’s it! Simple components coming together to make something amazing. Don’t skip dusting extra flour on your surface later, or things get sticky fast!
How to Bake Bakery Style Bread Bowls at Home
Okay, now that we have our simple ingredients ready, let’s get these amazing bread bowls into the oven! This process is straightforward, but the rising times are where we build that lovely, soft texture inside. Don’t rush the yeast; it’s doing the heavy lifting for us here. We want soft, delicious bread that can handle a hearty scoop of stew, and patience wins that battle every time.
Activating Yeast and Mixing the Dough for Your Bread Bowls
First things first: wake up that yeast! Grab your warm water—and I mean exactly 105°F to 115°F. If it’s too cool, the yeast just sulks. If it’s boiling hot, you’ve killed it! Add in your sugar and yeast, stir it gently, and let it sit until it looks foamy on top. That foam is proof that your yeast is ready to go! Once foamy, mix in your melted butter and salt before adding flour gradually until you have a shaggy mass.
Kneading and Rising Time for Perfect Bread Bowls
Time to develop that good structure! Turn that shaggy dough out onto a lightly floured surface. You need to knead this for about 6 to 8 minutes until it feels smooth—really elastic and bouncy when you poke it. If you’re using a stand mixer, the dough hook is great for this, usually about 5 minutes. After kneading, pop it into an oiled bowl, cover it, and let it relax! I let mine sit in a warm spot for a good 1 to 1.5 hours. That whole time, the yeast is creating those wonderful air bubbles that make great bread bowls.
Shaping and Final Proofing of the Bread Bowls
When that dough has doubled, gently punch it down—that’s the satisfying part! Divide that big beautiful lump into four equal pieces. The trick here, just like when making soft dinner rolls, is making sure each piece is shaped into a really tight, round ball. Tuck those edges under until the surface is taut. Place them on your parchment-lined sheet, cover them loosely, and let them proof for another 30 minutes. They won’t double again, but they should look noticeably puffier.
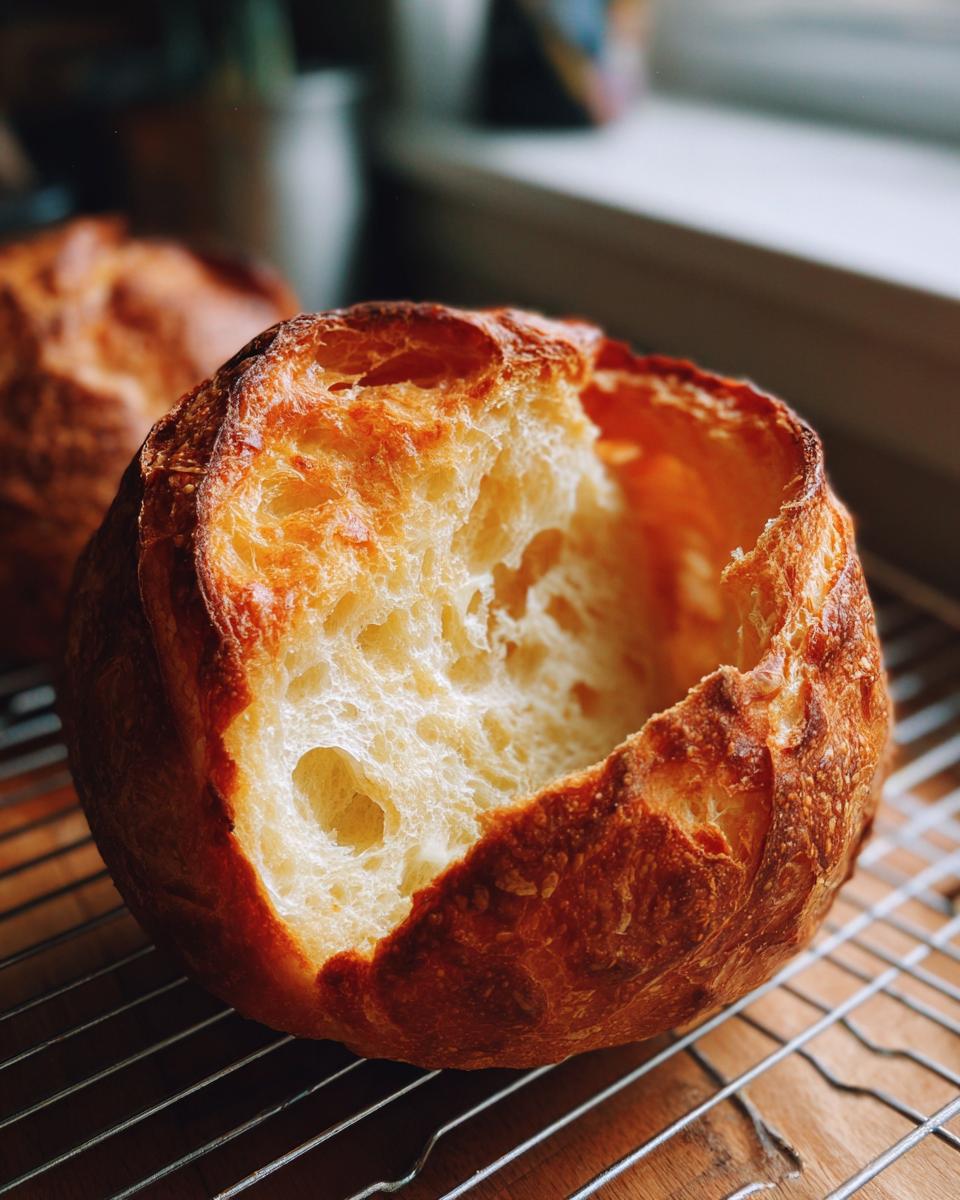
Baking and Creating Crispy Crust Soft Inside Bread Bowls
Preheat that oven to 375°F (190°C) while those loaves are having their final rest. Now, for that gorgeous color and crust: whisk up your egg white with a splash of water for the egg wash. Brush it generously over the tops of your proofed dough. Bake them for 25 to 30 minutes until they are deep golden brown. Pro tip for that extra great crispy crust soft inside bread bowls feel? Spritz the loaves with a little water halfway through the bake!
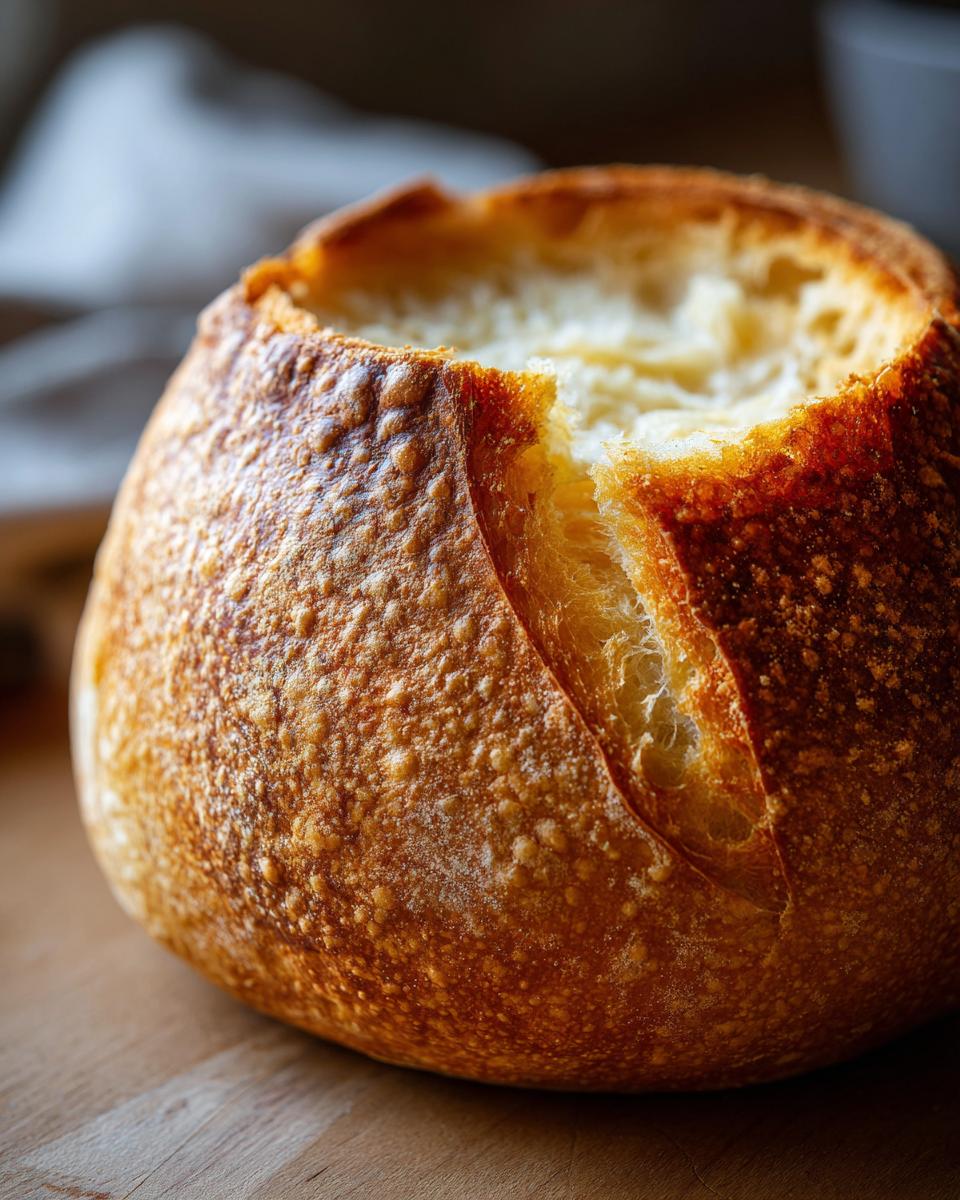
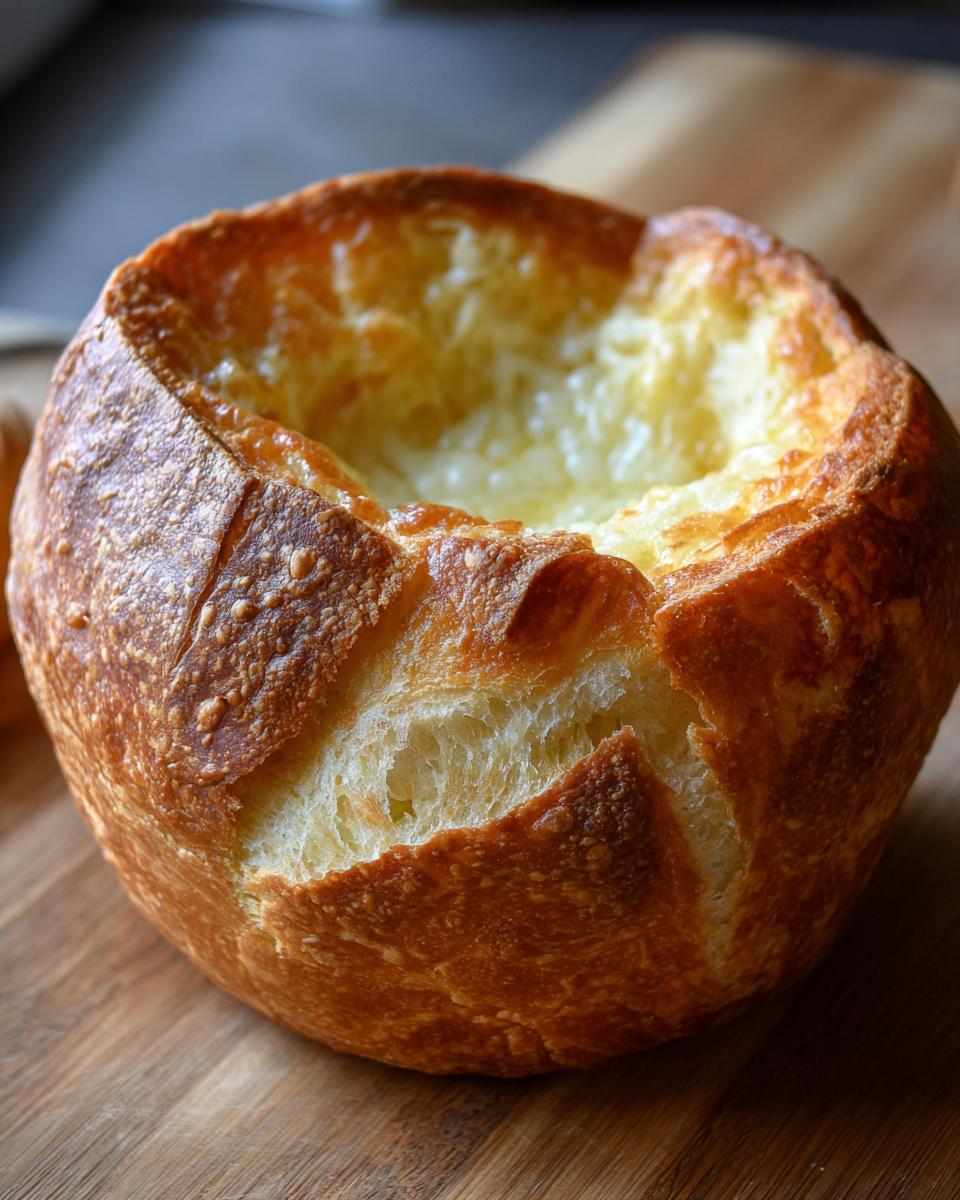
Hollowing Out Your Sturdy Bread Bowls for Soup
This is the moment of truth, isn’t it? You’ve baked this beautiful, golden loaf, and now you have to turn it into a functional eating vessel! Since we are aiming for those signature sturdy bread bowls that can hold liquids without leaking everywhere, structure is super important here. You want to treat this carefully, almost like surgery, to ensure you have enough bread left to support your hefty filling.
Grab your sharpest bread knife—not a dull one that tears the crumb. Here’s my tried-and-true method for gutting these loaves perfectly, based on much trial and error (I’ve definitely had collapses!).
First, let them cool down! I know, I know; everything smells amazing right out of the oven, but if you try to cut these babies when they are still piping hot, the steam will make the internal structure collapse, and you’ll end up with mush. Wait at least 15 minutes until they are just warm to the touch.
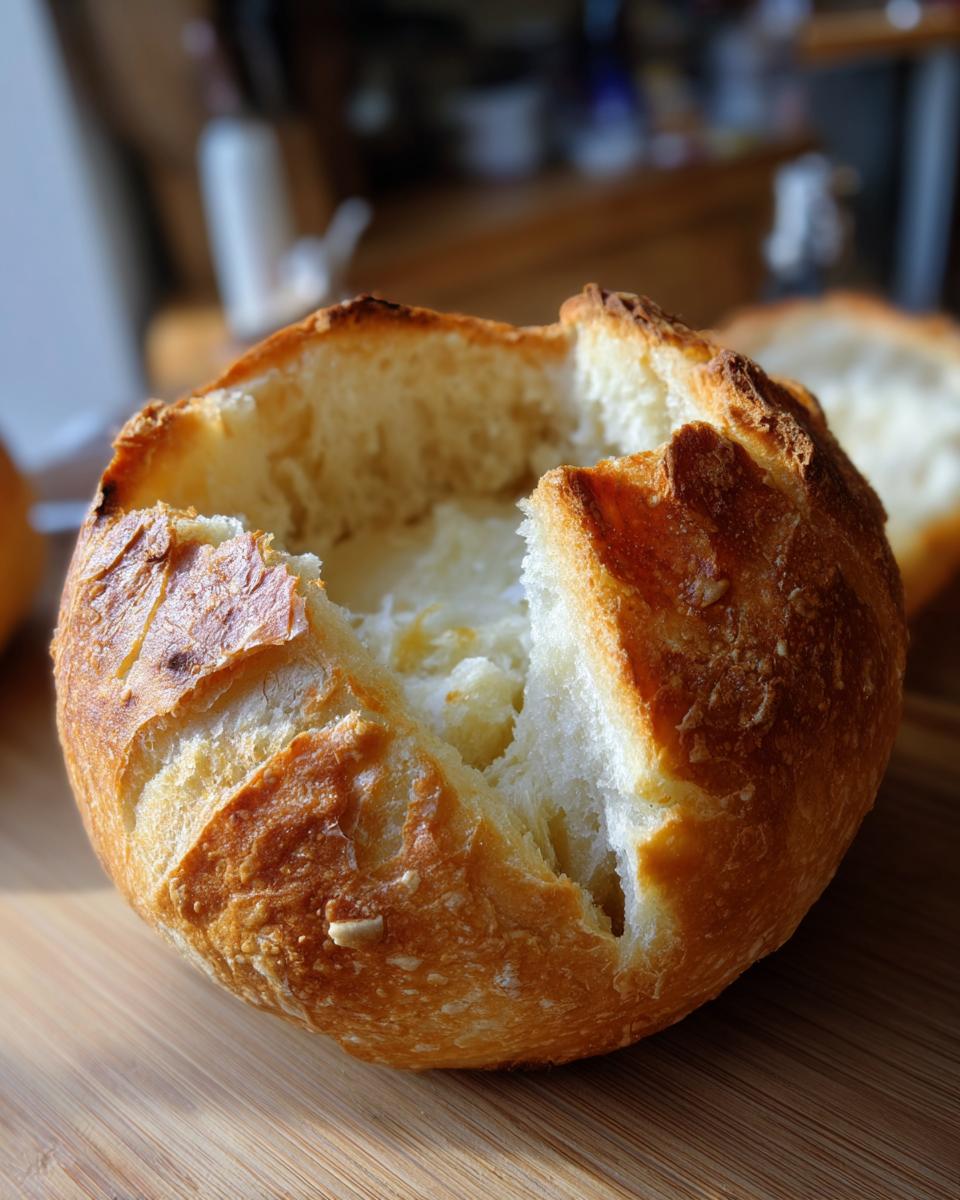
Use your knife to slice a circle around the top of the loaf. This is your ‘lid.’ Make sure you leave a border that is at least an inch thick all the way around. This 1-inch wall is what keeps the structural integrity when you pour in your thick loaded potato soup in bread bowl recipe later! Once you’ve scored that circle, use your fingers or a spoon to gently pull out the soft bread from the center. Be patient and scrape down the sides until you have a nice cavern ready for soup.
And please, please, do not waste that soft bread you scooped out! That perfect, fluffy interior is amazing for dipping right into your soup, or you can toss it with a little garlic powder and bake those chunks into croutons. If you’re feeling ambitious, you can even transform those leftovers into some delicious bread pudding!
Tips for Achieving Perfect Bread Bowls Every Time
Baking home breads can feel temperamental, I know! When I first tried making these sturdy bread bowls, I underestimated how much moisture a really liquid soup—like a creamy clam chowder—could steal from the bread wall overnight. My first attempt resulted in a Soggy Bottom disaster, and frankly, I almost gave up on the whole concept!
But here’s what I learned through trial and, yes, a few delicious failures. Getting that edge firm enough to hold your favorite fillings consistently takes one extra, super simple technique. We aren’t just making bread to eat; we are engineering a vessel!
Preventing the Soggy Bottom: The Extra Bake
This is my biggest piece of advice, especially if you plan to fill these gorgeous creations with something extremely liquid or if you are making them ahead of time. After you hollow out the bread—after you’ve scooped out all that fluffy interior—don’t stop there! If you know you’re using something watery, give the empty shells a little vacation back in the oven.
Put them back into the 375°F oven, empty, for about 5 to 7 extra minutes. This extra blast of dry heat helps toast the inside walls slightly, making them much firmer and less likely to absorb the soup too quickly. This step seriously transformed my results, turning structurally weak loaves into genuine champions ready for even the soupiest meals.
Controlling the Crust Texture
We love that golden brown finish, but sometimes the crust can get a little too hard if you aren’t careful. If you find your crust is setting up too quickly and you want a softer bite, try spritzing the loaves with a little water during the first 15 minutes of baking. Conversely, if you want that slightly artisanal, crackly feel—almost like a bakery style bread bowls at home feel—you can increase the oven temperature by 25 degrees right at the end for the final 5 minutes.
And hey, if you are having trouble getting your bread to rise properly, double-check your yeast activation (we talked about that above!), but also make sure your mixing bowl isn’t sitting near a drafty window! The dough needs to be cozy. For more tips on making great dough work for you, check out my guide on making amazing copycat breadsticks!
Creative Bread Bowl Stuffing Ideas Beyond Basic Soup
Okay, you’ve made the perfect, sturdy home for your meal—now for the fun part! Once you have mastered these bread bowls, you realize they aren’t just for soup anymore. Seriously, you can fill these edible containers with almost anything savory and it feels instantly more comforting and impressive! I love having variety ready for company, so I always have a few filling ideas up my sleeve.
Savory Bread Bowl Recipes: Chili and Creamy Stews
Obviously, our classic recipe is built for heartiness. If you are deep-diving into serious comfort food, a thick chili or a beef stew is where these truly shine. The sturdiness we worked so hard to achieve in the baking process pays off huge here because the bread absorbs all those rich, slow-cooked flavors without dissolving. If you are making my favorite hearty stew, the leftovers are incredible too! Try filling your bowl with a batch of my loaded baked potato soup; it’s thick enough to practically be a casserole!
Appetizer Bread Bowls: Dips and Spreads
Don’t feel like a full meal? Make smaller versions of these same bread bowls and use them as the appetizer centerpiece! They are unbelievable for serving hot, gooey dips. Imagine serving your famous spinach and artichoke dip right out of a warm bread basket—instant party win. For that, I often use slightly smaller dough balls to keep the surface area manageable for dipping. My go-to is to bake a cheesy dip and then place it inside a warm bread bowl, but you can certainly use a recipe like my easy chili cheese dip if you want a spicy kick. If you’re feeling adventurous and want something salty and chewy, you could even try making pretzel bread bowls as appetizers!
And don’t forget, a rich Chicken Alfredo or even baked Spaghetti works beautifully inside one of these edible vessels!
Storage and Reheating Instructions for Homemade Bread Bowls
So, you’ve made a giant batch because, let’s be honest, who stops at just four when the dough is this good? Now you need to know how to keep them fresh! Whether you have leftover whole bread bowls or you’ve got that beautiful hollowed-out shell waiting for tomorrow’s lunch, proper storage is key to keeping that perfect crust and soft middle intact.
If you have any whole, un-hollowed loaves left over (maybe you ended up with five instead of four!), they store just like any other soft bread. Wrap them tightly in plastic wrap, and then slide that whole package into an airtight container or a large zip-top bag. They are best eaten within two days, but they should easily last three at room temperature. Don’t refrigerate homemade bread unless you absolutely have to, because it tends to dry it out faster!
Now, the important part: dealing with those empty soup shells. If you plan on eating them the next day, store the hollowed-out shells wrapped tightly in foil or plastic wrap. They usually still hold up well!
When it’s time to eat, and your bread bowl feels a little stale or limp from the fridge or countertop, we need to revive that golden crust! Don’t try to microwave these; it will just make them tough. Instead, peel back the wrapping and pop the empty shells—or even the leftover pieces of bread—into a moderate oven. I set mine to about 325°F (160°C) for just 5 to 8 minutes. You just want to heat them through and crisp that exterior back up a bit. They’ll come out smelling amazing, ready to hold your leftover chili or stew. It brings back that fresh-from-the-oven texture you worked so hard for!
Frequently Asked Questions About Making Bread Bowls
It’s so common to have questions once you finish the main bake, especially when you’re trying to get that perfect structure for your filling. I’ve answered the top things I always get asked about making these wonderful bread bowls. Don’t sweat the small stuff; home baking is all about learning as you go!
Can I make bread bowls faster than 2 hours?
I totally get the desire for a “one hour bread bowl recipe.” My recipe totals about an hour and 55 minutes, and honestly, that rise time is where all the magic happens! Yeast needs time to work its wonders. While you can rush the first rise or use ‘fast-acting’ yeast instructions, you usually end up with a denser, less flavorful final product. If you need them *fast*, you might need to sacrifice some of that soft, pillowy texture we love. The best, thickest, most reliable edible soup bowls take that hour and a half for the dough to relax and develop.
What is the secret to sturdy bread bowls for chili?
This is the question I wrestled with the most! The secret isn’t just in the shaping, although that helps. The absolute best way to guarantee your bread bowl handles thick fillings like a robust chili or stew is that extra blast in the oven *after* you hollow it out. Remember what I mentioned? If you suspect your filling is extremely watery or you are planning to hold onto those shells overnight, bake them empty for an extra 5 to 7 minutes at 375°F. That little extra dry heat totally sets the inner crust, making them far less likely to get soggy beneath that hearty topping!
Can I use bread flour instead of all-purpose flour for these bread bowls?
You certainly *can* substitute bread flour for the all-purpose flour if that’s what you have on hand! Bread flour is higher in protein (gluten), which means you’ll naturally develop a stronger structure. For these particular homemade bread bowls, which we want to be soft on the inside but sturdy on the outside, all-purpose flour gives us a slightly more tender crumb. If you use bread flour, just be mindful during the kneading stage—it might feel a little tighter, and it might need an extra splash of the warm water to keep it from feeling dry. You can check out how I use it in my sourdough sandwich loaf for comparison!
Share Your Homemade Bread Bowls Creations
Now that you’ve mastered the easiest, sturdiest bread bowls recipe out there, I really, truly want to see what you fill them with! Did you go classic with creamy clam chowder? Did you try filling those little appetizer-sized ones with hot cheese dip? Or maybe you just ate the entire loaf plain because, honestly, who can blame you?
Tell me about your experience below! Take a moment to leave a rating—five stars if you think this recipe is the one you’ll be turning to again and again for comfort food night. Hearing from you really helps me tailor future recipes, and knowing I empowered you to conquer bread-baking doubt is the absolutely best reward. If you snapped a picture of your golden-brown masterpieces filled with your favorite recipe, tag me on social media! I love seeing your results. For more simple, confidence-boosting recipes, you can always check out my personal journey and philosophy over on the About page!
PrintEasy Homemade Soft Bread Bowls: The Perfect Sturdy Edible Bowl

Learn how to make bakery-style bread bowls at home. This recipe delivers soft interiors and a sturdy crust, making them perfect for holding your favorite soups, chili, or dips.
- Prep Time: 20 min
- Cook Time: 30 min
- Total Time: 1 hour 55 min
- Yield: 4 servings 1x
- Category: Baking
- Method: Baking
- Cuisine: American
- Diet: Vegetarian
Ingredients
- 1 packet active dry yeast (about 2 1/4 teaspoons)
- 1 teaspoon granulated sugar
- 1 cup warm water (105°F to 115°F)
- 3 cups all-purpose flour, plus more for dusting
- 1 1/2 teaspoons salt
- 2 tablespoons unsalted butter, melted
- 1 egg white, lightly beaten (for egg wash)
- 1 teaspoon water (mixed with egg white)
Instructions
- Activate the yeast: In a large bowl, combine the warm water, sugar, and yeast. Let it stand for 5 to 10 minutes until foamy. This confirms your yeast is active.
- Mix the dough: Add the melted butter, salt, and 2 cups of the flour to the yeast mixture. Mix until just combined. Gradually add the remaining flour until a shaggy dough forms.
- Knead the dough: Turn the dough out onto a lightly floured surface. Knead for 6 to 8 minutes until the dough is smooth and elastic. You can also use a stand mixer with a dough hook for about 5 minutes.
- First rise: Place the dough in a lightly oiled bowl, turning to coat. Cover the bowl with plastic wrap or a clean kitchen towel. Let the dough rise in a warm place for 1 to 1.5 hours, or until doubled in size.
- Shape the bowls: Gently punch down the risen dough. Divide the dough into 4 equal pieces. Shape each piece into a tight, round ball. Place the balls on a baking sheet lined with parchment paper, leaving space between them.
- Second rise (Proofing): Cover the shaped dough loosely and let them rest for 30 minutes. They should look slightly puffy.
- Preheat and prepare: Preheat your oven to 375°F (190°C). Prepare the egg wash by whisking the egg white and 1 teaspoon of water together.
- Bake: Brush the tops of the dough balls generously with the egg wash. This helps create a golden, slightly crisp crust. Bake for 25 to 30 minutes, or until the bread bowls are deep golden brown and sound hollow when tapped on the bottom.
- Cool and hollow: Let the bread bowls cool on a wire rack for at least 15 minutes before serving. To serve, use a sharp knife to cut a circle around the top of each loaf, leaving about a 1-inch border. Gently pull out the soft interior bread, creating an edible soup bowl. Save the removed bread for dipping.
Notes
- For a crispier crust, lightly spritz the loaves with water halfway through the baking time.
- If you want sturdier bread bowls for very liquid fillings like clam chowder, bake the hollowed-out shells for an extra 5 to 7 minutes after removing the interior bread to dry them out slightly.
- Use the soft bread removed from the center to dip into your soup or make croutons.
Nutrition
- Serving Size: 1 bread bowl (without filling)
- Calories: 280
- Sugar: 2
- Sodium: 350
- Fat: 4
- Saturated Fat: 2
- Unsaturated Fat: 2
- Trans Fat: 0
- Carbohydrates: 53
- Fiber: 2
- Protein: 8
- Cholesterol: 10