
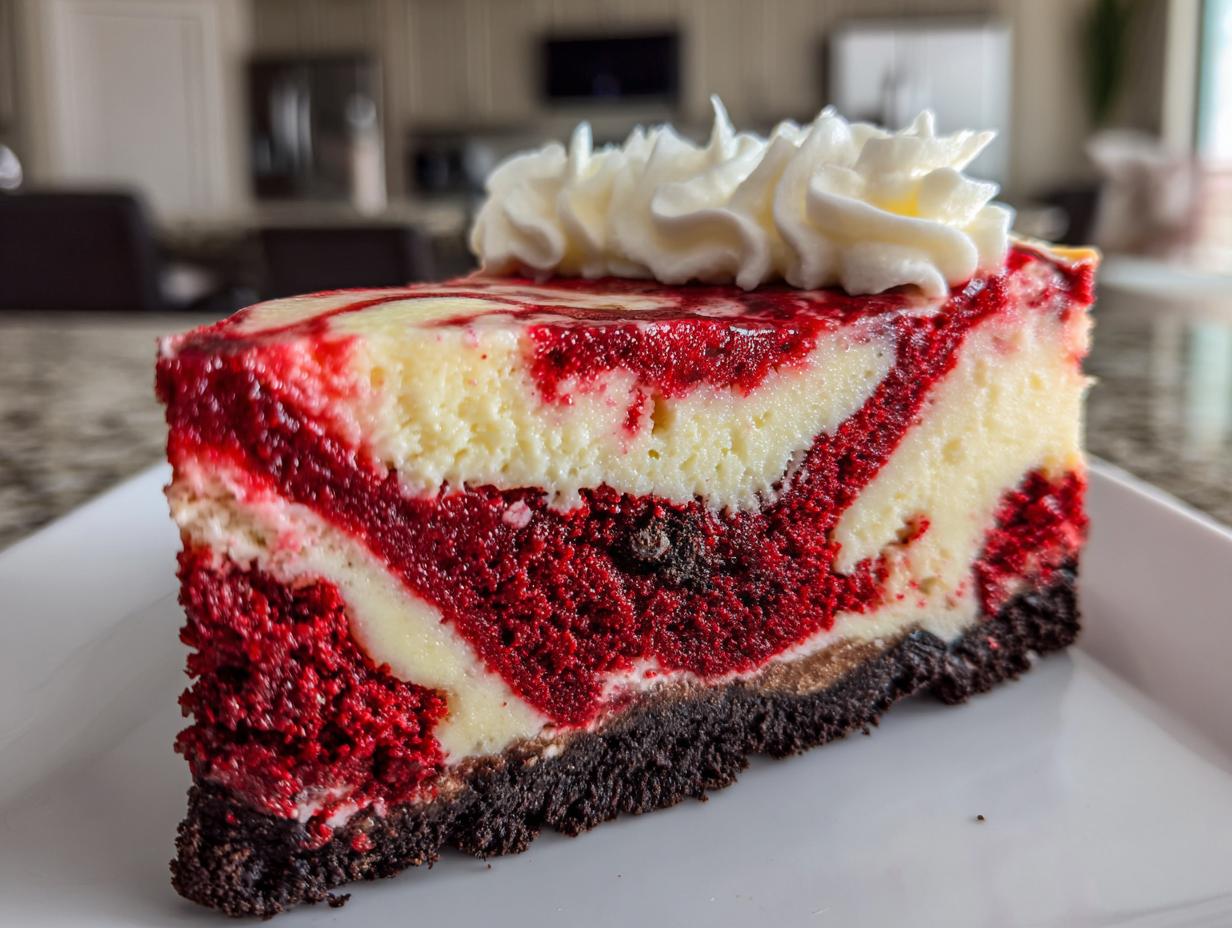
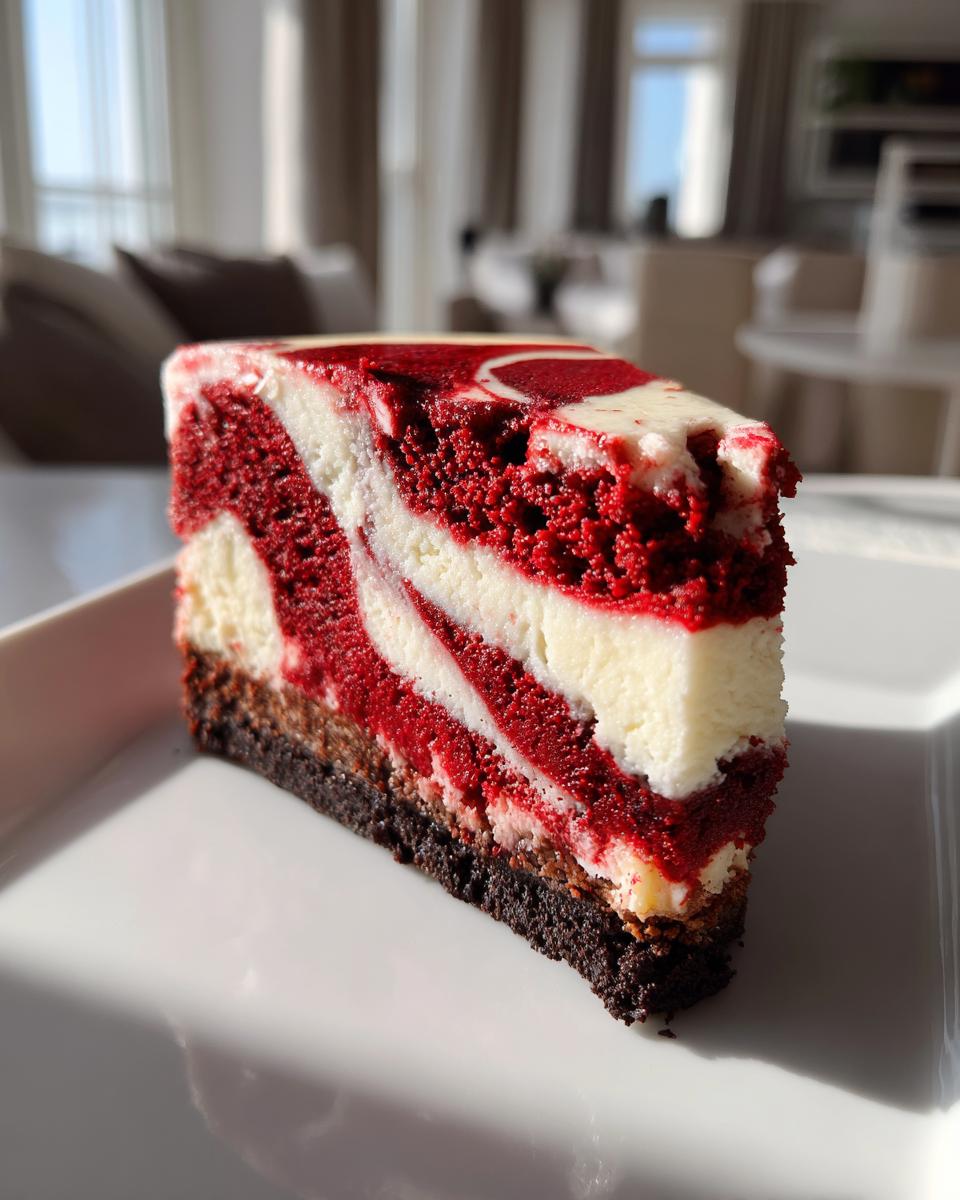
There’s a fine line between wanting a bakery-quality dessert and actually believing you can produce one in your own kitchen. I remember that feeling well—the doubt that creeps in when a recipe looks too beautiful or complicated. But I promise you, conquering the **red velvet cheesecake** is absolutely within your reach! This recipe isn’t just a dessert; it’s the ultimate ‘Showstopper Red Velvet Cheesecake’ because it nails that ultra-creamy texture you crave, paired with stunning visual layers. When I first set out to master this decadent treat, I failed twice, but the third time, things just clicked. Now, it’s my go-to for any celebration. Trust me, we’re trading doubt for deliciousness today!
- Why This red velvet cheesecake Recipe is Your New Showstopper Layered Cheesecake Favorite
- Gathering Your Ingredients for the Ultimate red velvet cheesecake
- The Best red velvet cheesecake Tutorial: Step-by-Step Assembly
- Baking Your Showstopper red velvet cheesecake with a Water Bath
- Tips for Success with Homemade red velvet cheesecake
- Storage and Reheating Instructions for Decadent Red Velvet Dessert
- Serving Suggestions for Your Festive Cheesecake Baking Creation
- Frequently Asked Questions About red velvet cheesecake
- Build Your Confidence in the Kitchen
Why This red velvet cheesecake Recipe is Your New Showstopper Layered Cheesecake Favorite
If you’re searching for that perfect, fail-proof recipe, stop looking! This version delivers on every promise: it’s visually stunning, packed with that signature red velvet flavor, and it achieves a remarkably creamy cheesecake dessert experience. We’ve perfected the swirl so it holds its shape beautifully, making it a true showstopper layered cheesecake. People will ask where you bought this, and you get to say you made it!
- Guaranteed creamy center thanks to the water bath method.
- Natural stability in the swirl—it won’t just sink!
- It’s built to impress guests at any holiday gathering.
If you want to see what others are raving about regarding texture, check out some inspiration here: Ultra Creamy Red Velvet Cheesecake.
Achieving That Velvety Smooth Cheesecake Texture
The secret to avoiding lumps or graininess boils down to two non-negotiable steps. First, make sure your cream cheese and eggs are actually at true room temperature—I mean, soft enough to easily dent. Second, when you mix in those eggs, stop right when they disappear into the batter. Overmixing after adding eggs incorporates air, and air causes cracks. We want dense richness, not fluff!
Gathering Your Ingredients for the Ultimate red velvet cheesecake
Okay, let’s get everything lined up because the success of this decadent red velvet cheesecake totally depends on preparation. You know I am huge on setting up my mise en place—getting everything ready before you even plug in the mixer. This recipe has a few separate components, so laying them out makes assembly totally manageable and keeps things stress-free. Also, quick reminder: for that dreamy texture we are aiming for, make sure your main dairy ingredients are truly at room temperature before you even think about mixing. It makes the biggest difference!
If you’re planning on making a different, but equally delicious, cheesecake sometime, I have a great chocolate chip cheesecake recipe you might want to bookmark for later!
For the Oreo Crust Cheesecake Recipe Base
We start with that crunchy, deep chocolate base. You absolutely must use crushed Oreos—the entire cookie, filling and all! That little bit of sugar in the filling helps bind it together.
- 1 1/2 cups crushed Oreo cookies (you need the whole thing!)
- 6 tablespoons unsalted butter, melted
For the Creamy red velvet cheesecake Batter
This is that gorgeous, tangy cheesecake filling that will take up most of your pan. Don’t skimp on the room temperature rule here; softened cream cheese blends so much smoother! That little bit of vinegar is my secret—it helps boost the tanginess that complements the cocoa perfectly.
- 24 ounces cream cheese, softened until very easy to press
- 1 1/2 cups granulated sugar
- 1 teaspoon vanilla extract
- 1/4 teaspoon salt
- 4 large eggs, brought to room temperature
- 1 cup sour cream, room temperature
- 1 tablespoon white vinegar
- 2 teaspoons red food coloring (gel is your best friend here for popping color!)
- 1 tablespoon unsweetened cocoa powder
- 1 teaspoon baking soda
- 1/2 cup buttermilk
For the Red Velvet Cake Portion
These ingredients are just for that little bit of cake batter we dollop in to create that stunning swirl effect. It’s almost like getting two desserts in one!
- 1/2 cup all-purpose flour
- 1/2 cup granulated sugar (set this aside from the main sugar pile)
- 1/4 cup unsalted butter, softened
- 1 large egg
- 1 teaspoon vanilla extract
The Best red velvet cheesecake Tutorial: Step-by-Step Assembly
Alright, deep breath! This is where we go from ingredients to magic. Remember, for this red velvet cheesecake, time and temperature are your friends. We’re going to build this masterpiece in layers so nothing collapses on us when we serve this impressive holiday bake.
Preparing the Pan and Oreo Crust Cheesecake Recipe Foundation
First things first: Preheat that oven to 350°F (175°C). Because we’re using a water bath—which we’ll talk about later—you need to wrap that 9-inch springform pan *really* well. Use heavy-duty foil and wrap the outside at least twice, going up the sides. This barrier keeps any rogue water out. Next, mix up your crust ingredients and press them firmly into the bottom. Give that Oreo base just 10 minutes in the oven, then pull it out. It needs to cool down completely before we add any creamy layers, so set it aside while we mix the fillings.
Mixing the Velvety Smooth Cheesecake Filling
Now for the main event! In your biggest bowl, start by beating that room-temperature cream cheese with the sugar until it looks completely smooth—no lumps allowed! Add your vanilla and salt. Then, one by one, gently mix in the eggs. I mean it: mix until just combined after each egg. Seriously, if you overdo it here, you’ll invite cracks later. Fold in the sour cream and vinegar. We want this layer super velvety smooth, so keep that mixer speed low!
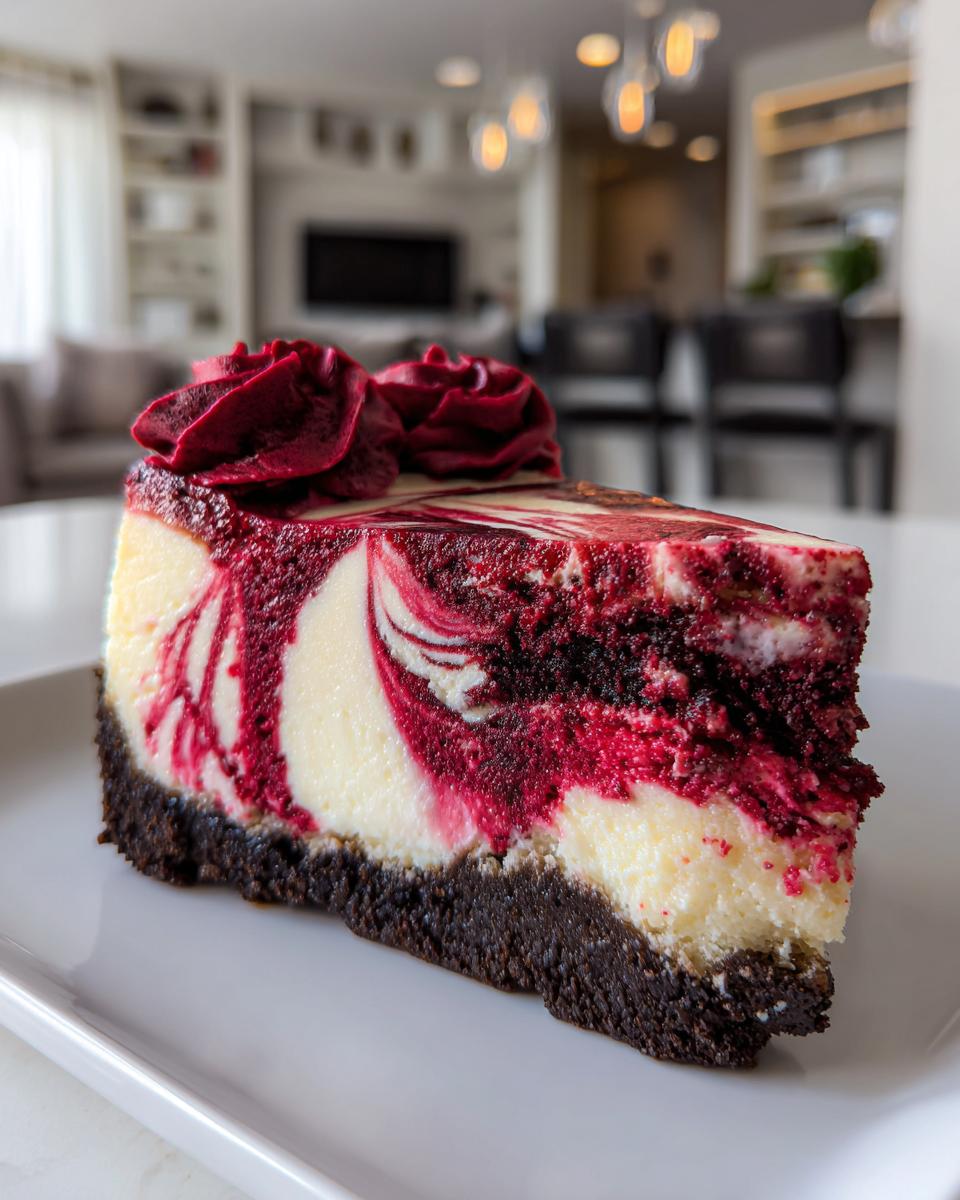
Creating the Red Velvet Swirl and Layering the red velvet cheesecake
Time to introduce the red! Take a small bowl and whisk your cocoa powder and baking soda together. In a separate tiny bowl, mix your buttermilk and all that gorgeous red food coloring until you get that deep, dramatic shade. Gently stir the cocoa mixture into your main cheesecake batter first, then slowly add the red liquid until it’s all one beautiful color. Don’t mix more than you need! Now, assemble: pour half the red cheesecake batter over your cooled crust. Drop spoonfuls of that separate red velvet cake batter mix randomly on top. Pour the rest of the red cheesecake batter over that. Now, grab a knife or a skewer and gently drag it through the layers a few times. That’s how you create that showstopper swirl everyone raves about! If you need a refresher on how to get the best texture results overall, this guide is fantastic: Irresistible Red Velvet Cheesecake. Once this gorgeous dessert is cooled and set, you might want to top it with some homemade frosting—you can check out my easy vanilla buttercream frosting recipe to finish it off!
Baking Your Showstopper red velvet cheesecake with a Water Bath
Okay, this part is where I used to get super nervous, but learning the water bath trick changed everything for me when tackling any big cheesecake, especially this gorgeous **red velvet cheesecake**. Think of the water bath as a cozy spa treatment for your dessert. It creates steam in the oven, which keeps the baking environment super humid.
Why is this necessary? Simple: Steam prevents the top of your cheesecake from drying out and setting too fast, which is the main reason we get those awful cracks. It also ensures that lovely, velvety smooth cheesecake texture we worked so hard to create in the mixing bowl. It keeps the heat gentle and even.
Make sure that foil wrapping you did earlier is tight! Place your foil-wrapped springform pan inside a larger roasting pan—like you’re giving it a little boat ride. Then, carefully pour hot (not boiling, just hot from the tap) water into the roasting pan until it comes about halfway up the side of your cheesecake pan. Don’t splash any water inside the foil, though!
You’ll bake this at 350°F (175°C) for about 60 to 75 minutes. You know it’s done when the edges look set but the very center still has a tiny jiggle when you gently nudge the pan. It shouldn’t look liquidy, but it shouldn’t be totally firm yet.
Here’s the second secret to avoiding cracks: Don’t shock it with cool air! Turn the oven off completely, crack the door open just a tiny bit—maybe prop it with a wooden spoon—and just let the cake hang out in that warm, steamy environment for a full hour as it slowly cools down. This gradual temperature drop is key to keeping that stunning surface intact before you move it to the counter to finish cooling.
Tips for Success with Homemade red velvet cheesecake
You’ve wrapped the pan, you’ve swirled the layers, and now it’s waiting patiently in the oven—but what happens after it comes out? Achieving that perfect, bakery-style result when making a red velvet cheesecake really comes down to patience in the cooling stage and absolute control over your ingredients and mixing.
We’ve all been there: you pull out this gorgeous dessert, let it sit on the counter for five minutes, and BAM! A massive crack appears right in the middle. That’s the excitement talking, not the cake. Cheesecake hates being rushed! If you’re using a water bath, you’re already halfway there, but these extra tips will guarantee that ultra-creamy texture you’re looking for when you slice into this decadent red velvet dessert.
For more inspiration on mastering tricky bakes and getting amazing results, you might enjoy my tips on handling delicate sauces here: Blender Hollandaise Sauce. And if you want to see how others guarantee that incredible texture, check out this recipe reference: Smooth and Creamy Red Velvet Cheesecake.
Ingredient Temperature and Mixing Control for Creamy Cheesecake Dessert
I cannot stress this enough: Room temperature, room temperature, room temperature! If your cream cheese is cold, it will resist blending smoothly with the sugar, leaving you with tiny, hard lumps no matter how long you beat it. You want that beautiful, velvety smooth cheesecake finish, right? That means letting your dairy set out for at least two hours. Don’t even try microwaving it; that just makes the edges melt while the middle stays cold, which is the opposite of what we need.
As for mixing, remember what I said about the eggs? Once you start adding the eggs, you are moving into the delicate phase. You want just enough mixing speed to fully incorporate the yolk and white, and then you stop. Seriously. We are not whipping air into a sponge cake here; we need density! Any excess air trapped inside expands during baking and then contracts too quickly during cooling, leading to that dreaded sunken center or crack. Keep that mixer speed low and lift that batter gently when you fold in the final swirls!
Storage and Reheating Instructions for Decadent Red Velvet Dessert
Now that we’ve conquered the baking and cooling process, the hardest part begins: waiting! This red velvet cheesecake is truly one of those desserts that needs time to fully set and let those rich flavors deepen. Trust me when I say you need patience here, even if it smells incredible right now.
The absolute minimum chilling time is six hours, but if you want that truly perfect, sliceable, decadent red velvet dessert texture, you must let it chill overnight. Seriously, cover that cooled cake loosely with plastic wrap—make sure the wrap doesn’t touch the surface of the cheesecake if you added frosting—and tuck it into the fridge. During this time, the structure firms up beautifully, turning that jiggly center into that dense, creamy texture everyone expects from a bakery-style cheesecake.
Because cheesecakes are so rich, they don’t really reheat well; they are best served chilled or slightly cool. If, for some crazy reason, you have leftovers after a few days and they seem too firm, you can take a slice out about 30 to 45 minutes before you plan to eat it to let it warm up *slightly* on the counter. That little bit of time off the chill lets the flavor bloom without compromising the structure.
Speaking of making things easier for later, if you are making this ahead of time for a holiday party, I have a fun trick for quick holiday treats that don’t require baking you might enjoy: my Easy Cool Whip Candy Recipe. Keep that fridge space reserved for our cheesecake, though!
Serving Suggestions for Your Festive Cheesecake Baking Creation
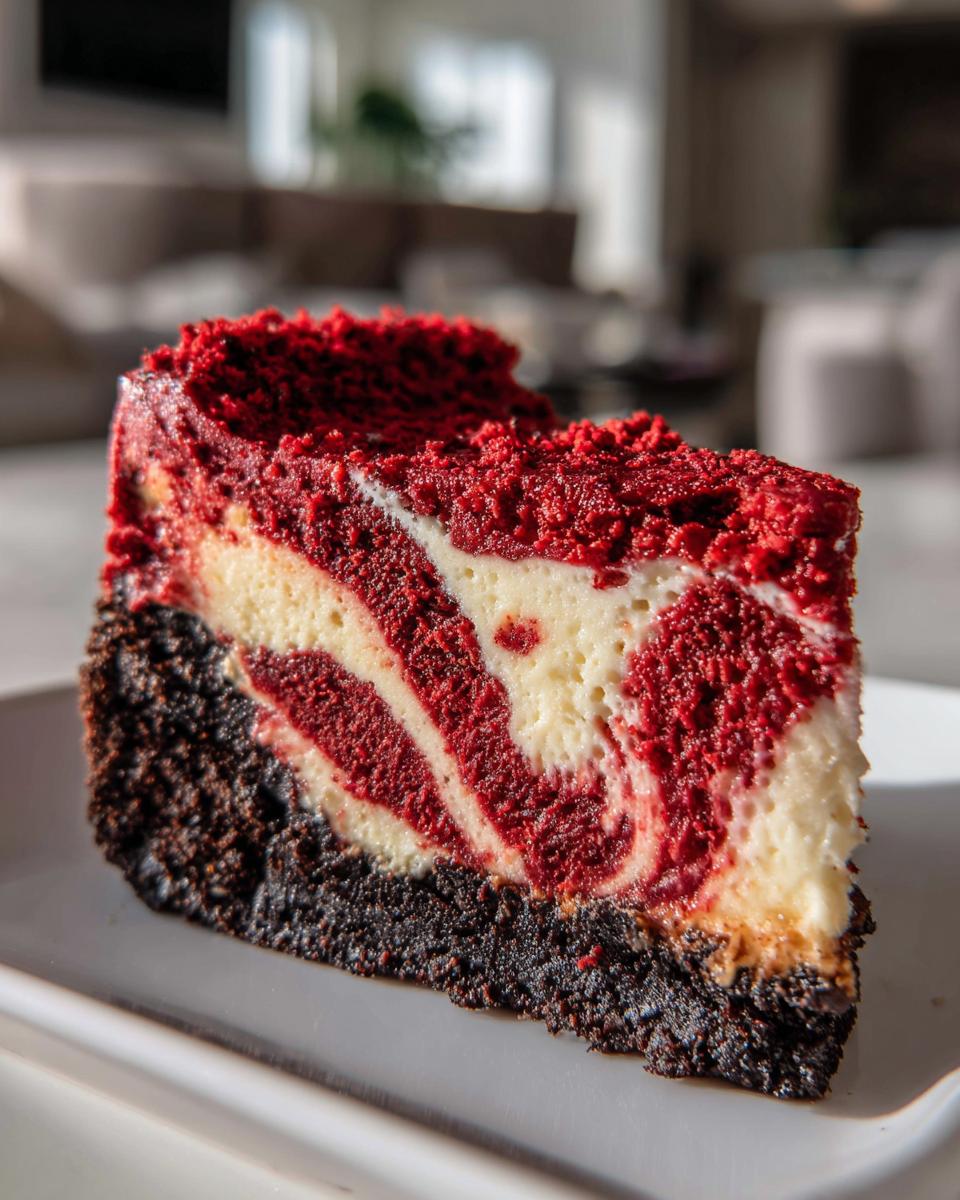
Congratulations! You’ve made it through the water bath, the slow cooling, and the overnight chill. Now comes the fun part: making this masterpiece look as incredible as it tastes! Since this red velvet cheesecake is already a showstopper on its own, you don’t need complicated decorations to create impressive holiday baking ideas. Sometimes, the simplest topping works best to let that deep red color shine through.
When I serve mine, I usually like to keep it relatively straightforward, letting the vibrant color speak for itself. If you want simple elegance, try taking a moment to grab some fresh fruit. Nothing cuts through the richness of the cream cheese quite like tart raspberries or sliced strawberries. They add a pop of color that complements the red velvet base perfectly!
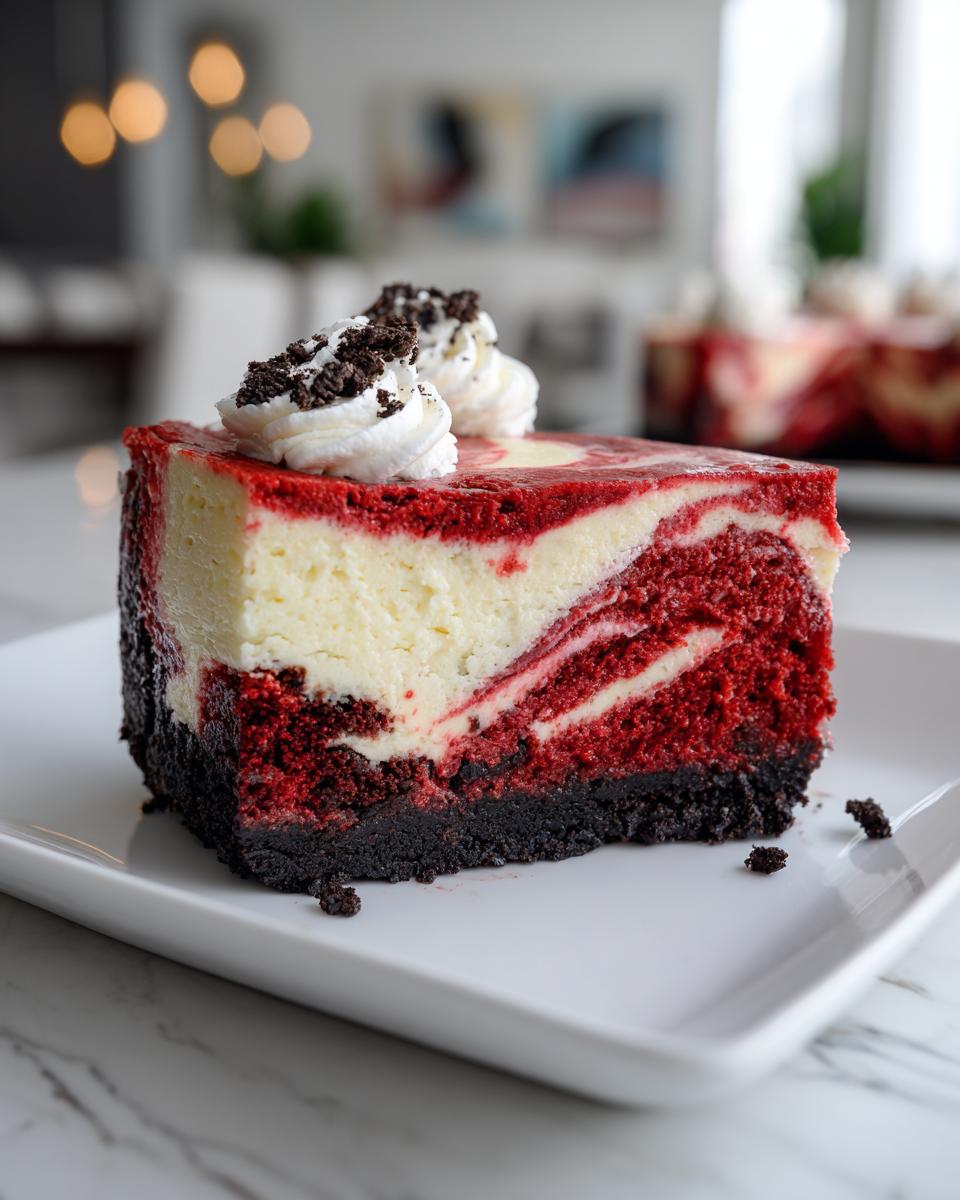
If you need something a bit richer, we can lean into that classic pairing. A thin drizzle of chocolate ganache elevates this instantly. Or, if you want the full flavor bomb, you can top the entire chilled cake with a simple layer of cream cheese frosting. If you need a quick recipe for that, I’ve got you covered with my easy creamy frosting recipe—just omit the chocolate for a classic tangy swirl on top!
For something really festive, especially around Christmas, a light dusting of powdered sugar around the edges makes it look snow-dusted and perfectly polished. You can also use small white chocolate shavings or even some crushed pecans to add textural contrast. Seriously, whatever you choose, this dessert is destined to be the star of the table. For more amazing holiday presentation inspiration, take a peek at how others dress up their festive bakes: Christmas Red Velvet Cheesecake Ideas.
Frequently Asked Questions About red velvet cheesecake
It happens! When you’re tackling something as impressive as a full, layered red velvet cheesecake, you usually end up with a few lingering questions. That’s totally normal! I’ve gathered the ones I hear most often from bakers making this for the first time. Remember, the goal here is to empower you to make this stunning dessert successfully, so don’t feel shy about asking!
If you need quick confidence boosts for other tricky spots in the kitchen, sometimes my advice on making easy creamy garlic aioli can help you feel more decisive about ingredient handling!
Can I make this red velvet cheesecake without the Oreo crust?
Oh, absolutely! The Oreo crust provides that great textural contrast against the creamy cheesecake dessert, but if you don’t have them on hand or just aren’t feeling the chocolate, you have great options. My favorite substitution is a classic graham cracker crust. Just swap out the Oreos for 1 1/2 cups of finely crushed graham crackers and use the same amount of melted butter. Mix it, press it in, and bake it for 10 minutes just like the original. It creates a slightly sweeter, almost buttery base that still pairs wonderfully with the red velvet swirl!
What is the best food coloring for a vibrant red velvet swirl?
This is crucial for getting that truly show-stopping layered cheesecake look! If you use standard liquid food coloring that comes in the little plastic dropper bottles, you end up needing a huge amount to get a deep color, and that extra liquid can throw off the balance of your batter. For the best, most vibrant red without affecting texture, you *have* to use gel food coloring. A little goes a long way, and you’ll get that intense, deep red hue that makes this dessert so iconic without watering down your creamy cheesecake base. Trust me, investing in a small jar of gel color is worth it for this recipe!
Can I skip the water bath?
Look, I know the water bath seems like extra fuss, especially when you just want to get that decadent red velvet dessert in the oven, but please don’t skip it! The water bath is essential for achieving that velvety smooth texture we are aiming for. Without it, the heat around the edges of the pan gets too intense too fast, and you end up with dry, grainy, or cracked edges. If you want true, bakery style cheesecake at home, the steam from the water bath ensures even baking from edge to center. It’s the step that prevents 90% of cheesecake disasters!
How far ahead of time can I make this?
Because this is such an impressive holiday baking ideas contender, planning ahead is smart! You can assemble and bake the cheesecake totally one day before you plan to serve it. It absolutely needs that minimum of 6 hours, but preferably overnight, chilling time in the fridge for the structure to set up properly. If you plan to add your cream cheese frosting on top, wait until the day you serve it to frost it, or at least do it the morning of, just to keep that topping looking its freshest!
Build Your Confidence in the Kitchen
See? You did it! You just tackled a true showstopper, a dessert that people usually buy from a bakery because they think it’s too hard to make at home. But here you are, having mastered that ultra-creamy texture and achieved that incredible swirl. That’s the Kitchenican way, right? It’s taking something that seems intimidating and breaking it down until you realize you already had all the skill you needed—you just needed the confidence to start.
Every time you accomplish something like this **red velvet cheesecake**, you prove that old voice of doubt wrong. Cooking shouldn’t be a source of stress; it should be where you create joy for yourself and the people you love. I hope seeing how achievable this recipe was encourages you to tackle something else you thought was out of your league next!
I’d be absolutely thrilled if you shared a picture of your stunning creation with our community! Your success is exactly what we are here for. If you want to learn more about how we approach cooking with simplicity and empowerment as our core drivers, you can always check out my story over on the About Page. And if you’re already thinking about what impressive dessert to make next, maybe you should check out the inspiration waiting for you in these other gorgeous recipes: More Cheesecake Magic!
PrintShowstopper Red Velvet Cheesecake with Creamy Swirl
You can create this rich, creamy Red Velvet Cheesecake at home. This recipe delivers a velvety smooth texture and deep flavor, making it an impressive dessert for holidays or any special gathering.
- Prep Time: 30 min
- Cook Time: 75 min
- Total Time: 8 hours 45 min
- Yield: 12 servings 1x
- Category: Dessert
- Method: Baking
- Cuisine: American
- Diet: Vegetarian
Ingredients
- 1 1/2 cups crushed Oreo cookies
- 6 tablespoons unsalted butter, melted
- 24 ounces cream cheese, softened
- 1 1/2 cups granulated sugar
- 1 teaspoon vanilla extract
- 1/4 teaspoon salt
- 4 large eggs, room temperature
- 1 cup sour cream, room temperature
- 1 tablespoon white vinegar
- 2 teaspoons red food coloring (gel preferred)
- 1 tablespoon unsweetened cocoa powder
- 1 teaspoon baking soda
- 1/2 cup buttermilk
- 1/2 cup all-purpose flour
- 1/2 cup granulated sugar (for red velvet layer)
- 1/4 cup unsalted butter, softened (for red velvet layer)
- 1 large egg (for red velvet layer)
- 1 teaspoon vanilla extract (for red velvet layer)
Instructions
- Preheat your oven to 350°F (175°C). Wrap the outside of a 9-inch springform pan tightly with heavy-duty aluminum foil.
- Prepare the crust: Mix the crushed Oreos and 6 tablespoons of melted butter. Press the mixture firmly into the bottom of the prepared springform pan. Bake for 10 minutes. Let it cool completely.
- Prepare the cheesecake batter: In a large bowl, beat the softened cream cheese, 1 1/2 cups sugar, vanilla extract, and salt until smooth. Beat in the eggs one at a time, mixing just until combined after each addition. Mix in the sour cream and vinegar.
- In a separate small bowl, whisk together the cocoa powder and baking soda. In another small bowl, mix the buttermilk and red food coloring until you achieve a deep red color.
- Gently mix the cocoa mixture into the cream cheese batter. Then, slowly mix in the red buttermilk mixture until the batter is uniformly colored. Do not overmix.
- Prepare the red velvet cake portion: In a medium bowl, cream together the 1/4 cup softened butter and 1/2 cup sugar until light and fluffy. Beat in the egg and 1 teaspoon vanilla extract. In a separate bowl, whisk the flour and baking soda. Gradually add the dry ingredients to the wet ingredients, mixing until just combined.
- Assemble the cheesecake: Pour half of the red cheesecake batter over the cooled Oreo crust. Dollop spoonfuls of the red velvet cake batter randomly over the cheesecake layer. Pour the remaining red cheesecake batter over the top. Use a knife or skewer to gently swirl the layers together for a showstopper look.
- Bake using a water bath: Place the foil-wrapped springform pan into a larger roasting pan. Carefully pour hot water into the roasting pan until it reaches halfway up the sides of the springform pan.
- Bake for 60 to 75 minutes, or until the edges are set but the center still has a slight jiggle.
- Cool the cheesecake: Turn off the oven, crack the door open slightly, and let the cheesecake cool inside the oven for 1 hour. This prevents cracking.
- Remove the cheesecake from the water bath and foil. Cool completely on a wire rack. Once cool, cover and refrigerate for at least 6 hours, or preferably overnight, before serving.
Notes
- For an ultra-creamy texture, ensure all dairy ingredients, especially the cream cheese and eggs, are at true room temperature before starting.
- If you skip the water bath, you risk the cheesecake cracking or having a grainy texture.
- Top with simple cream cheese frosting or fresh berries for a festive presentation.
Nutrition
- Serving Size: 1 slice
- Calories: 450
- Sugar: 35g
- Sodium: 350mg
- Fat: 30g
- Saturated Fat: 18g
- Unsaturated Fat: 12g
- Trans Fat: 0.5g
- Carbohydrates: 40g
- Fiber: 1g
- Protein: 8g
- Cholesterol: 110mg