
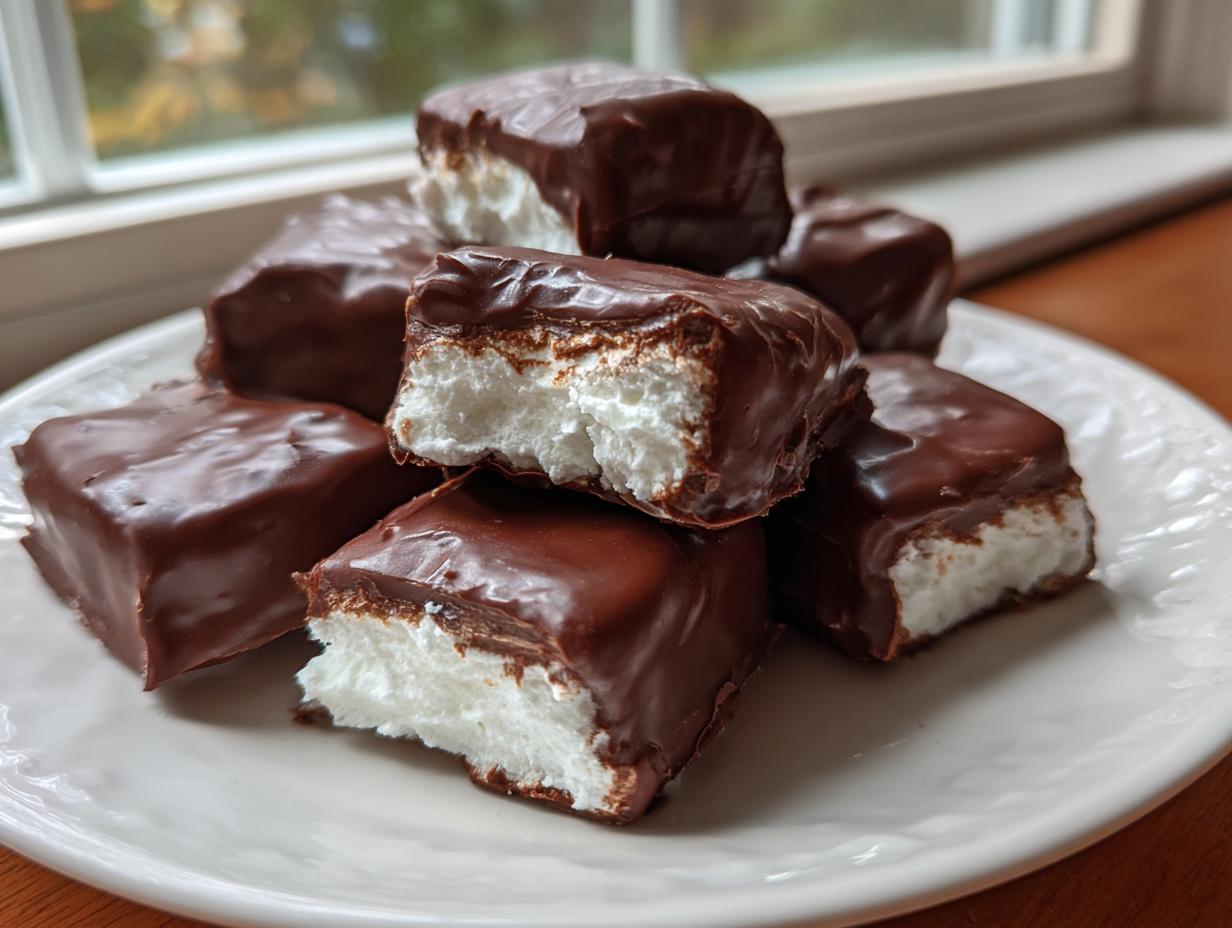
If you’re like me, the holidays loom, and suddenly everyone expects a giant tray of homemade candy! It’s always at that point I realize I haven’t started, and the idea of fiddling with hot sugar makes my palms sweat. But hold on! I’ve found the ultimate shortcut, the simplest treat that tastes unbelievably gourmet: this easy Cool Whip Candy. Seriously, this no-bake magic tastes exactly like a fluffy 3 Musketeers bar, and we only need three ingredients to pull it off. I know you think candy-making is complicated—I definitely did before I discovered recipes as straightforward as buckeye fudge—but trust me, this specific Cool Whip Candy Recipe proves the Kitchenican philosophy true: confidence starts with a simple win. You absolutely can make incredible holiday treats without the fuss!
- Why This Cool Whip Candy Recipe is Your New Go-To Treat
- Gathering Ingredients for Your 3 Ingredient Cool Whip Candy
- How to Prepare Your Easy No Bake Candy Instructions
- Tips for Perfecting Your 3 Musketeers Copycat Candy
- Storage and Reheating Instructions for Cool Whip Candy
- Serving Suggestions for Your Simple Whipped Topping Dessert
- Frequently Asked Questions About Cool Whip Candy
- Estimated Nutritional Data for This Dessert
- Share Your Experience Making This Treat
Why This Cool Whip Candy Recipe is Your New Go-To Treat
Honestly, when holidays roll around, the last thing I want is a complicated recipe that demands all my attention. This is why this particular confection holds a permanent spot on my rotation. It’s budget-friendly, requires next to no actual cooking skill, and it delivers big on flavor. It truly embodies our philosophy: great results don’t need unnecessary steps.
- It fits perfectly into our need for an Easy No Bake Candy solution, freeing up oven space for the real heavy hitters.
- It’s shockingly simplified, earning its reputation as a fantastic 3 Ingredient Dessert.
Quick Holiday Candy Preparation
If you’ve got 15 minutes of prep time and some freezer space, you’ve got time for this! We all know those moments when you realize you promised treats for an event tomorrow. This recipe shines then. Because it’s frozen, you can mix it up late at night, and it’s ready to dip first thing in the morning. It’s the ultimate accessible treat for busy home cooks just trying to get something special on the tray.
Achieving That Fluffy Candy Treats Texture
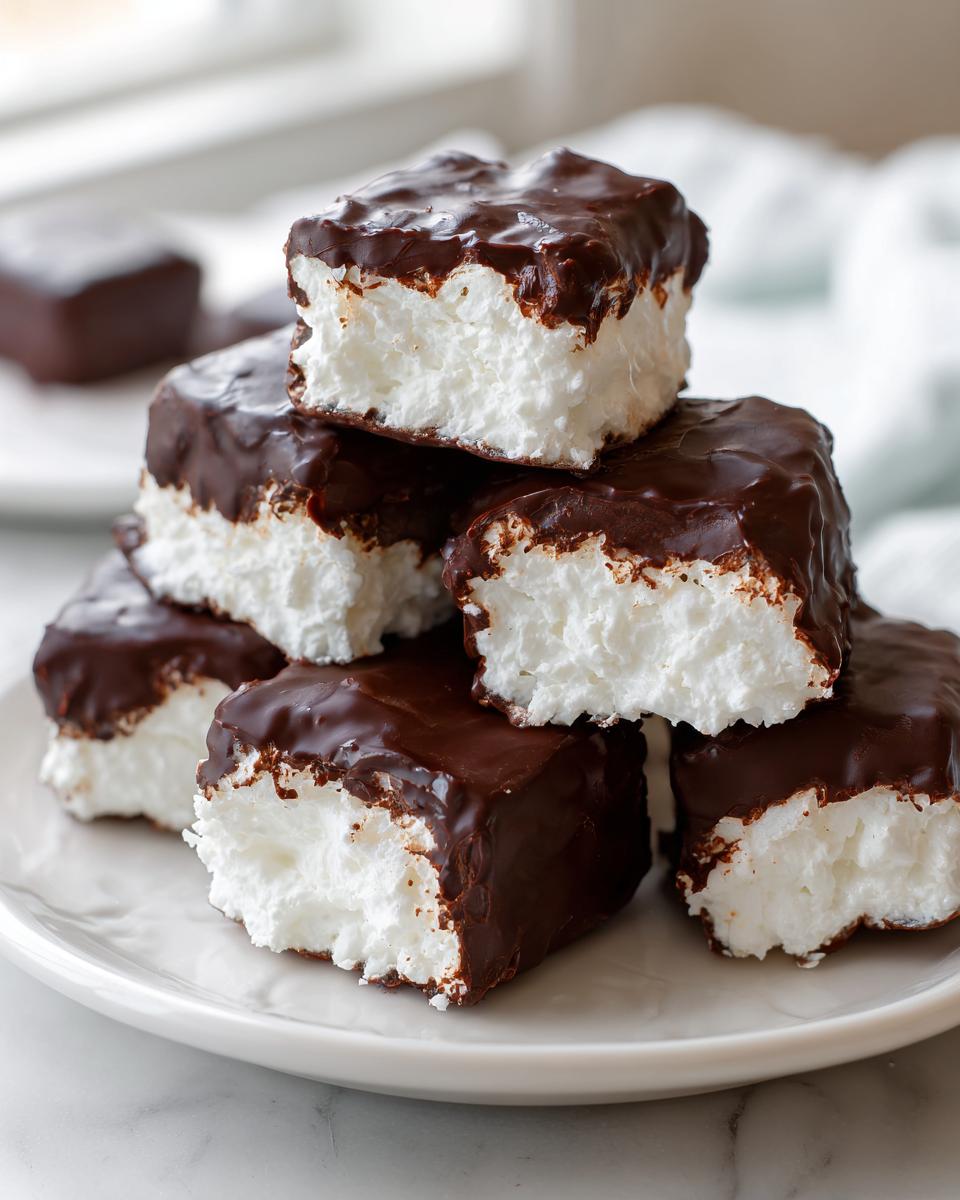
The real secret here is the air we beat into the whipped topping—or the heavy cream, if you’re feeling fancy! That fluffiness inside is what makes it instantly recognizable as a Melt in Your Mouth Candy experience, not dense or chewy. We’re mimicking that airy nougat texture, which is achieved simply by gently folding the powdered sugar in without crushing all those beautiful little air bubbles.
Gathering Ingredients for Your 3 Ingredient Cool Whip Candy
Okay, remember how I said this was simple? It totally is! We are using the absolute bare minimum here, which is what makes this recipe a financial lifesaver when you’re prepping for a big spread. You’ll need powdered sugar, your whipped heavy cream (or store-bought topping, no judgment here!), and chocolate chips for the coating. Get your chocolate chips ready near the microwave, because we’re using that later for the dipping part. Don’t skimp on the quality of your chocolate, because that’s the coating that holds everything together!
Ingredient Notes and Substitutions for Cool Whip Candy
This is where we build that crucial foundation of trust and expertise. If you use thawed topping, make sure it’s still really cold when you fold in the sugar; if it gets warm, it deflates instantly! If you opt for heavy cream, you really need to whip it until you get those stiff peaks—the candy won’t hold its shape otherwise. I always keep my bowl and whisk attachments chilled in the freezer for ten minutes before whipping the cream. Cold ingredients are your best friend when trying to keep this filling light and airy for that perfect, melt-in-your-mouth texture.
How to Prepare Your Easy No Bake Candy Instructions
Alright, let’s get down to business! Since this is a frozen candy, the process moves pretty quickly once we get past the freezing time. But trust me, the setup is key to avoiding a cracked, sticky disaster later. I’m going to walk you through exactly what I do to ensure I get perfectly shaped squares that actually come out of the pan cleanly.
Setting Up the Base for Creamy Homemade Candy
First things first: grab an 8×4 inch loaf pan. You *must* line this with parchment paper, and this is a crucial step only Ava knows: leave an overhang on the long sides. That overhang acts like built-in handles, making it so easy to lift the whole block out later. If you skip that overhang, you’ll be scraping for hours! Once the parchment is nestled in, dust the bottom lightly with powdered sugar. This small step prevents any moisture migration from the filling getting sticky right away.
Mastering the Chocolate Dipped Cool Whip Coating
Once your base has chilled for two hours—and yes, it needs at least two hours to get firm enough to cut—you can tackle the chocolate. I always use semi-sweet chips, but you can try milk chocolate if you like! When melting your chocolate, please, please, please, do it in 30-second bursts in the microwave. If you blast it for a full minute, you risk scorching the delicate sugars, and then you get that grainy, seize-y mess that nobody wants coating their light, fluffy center. Stir well after every 30 seconds until it’s perfectly smooth and glossy. Then, dip those chilled squares quickly! If you want more details on keeping your chocolate smooth, check out how I handle other chocolate recipes here. When you’re done dipping, you’ll be heading to this link for storage tips!
Tips for Perfecting Your 3 Musketeers Copycat Candy
When I first tried making this, I was so excited about the three ingredients that I totally rushed the main mixing stage. Big mistake! I folded the powdered sugar in too aggressively, and the whole filling deflated quicker than a leaky balloon. You need patience here, my friend. Remember, we want that airy, melt-in-your-mouth texture, so treat that whipped base like spun sugar!
My other rookie error involved the chocolate. I got impatient waiting for the candy block to freeze completely and tried to dip it after only an hour. The cold filling immediately started weeping moisture, and bam—my smooth chocolate seized up into a grainy mess right in the bowl. You truly need that block to be rock-solid before you cut it and dip it. That solid, frozen core keeps the coating crisp and clean.
Speaking of cutting, cutting while frozen is essential, but you need a very sharp, heavy knife. I wipe the knife blade clean and dip it into hot water between every couple of cuts; drying it off completely before slicing helps it glide right through without tearing the fluffy base. It’s a small step, but it makes the clean squares that make this look like fancy candy. For more pointers on achieving perfect chocolate dips, you can check out how I approach chocolate coating over at my cheesecake post. If you’re looking for another variation on this easy coating concept, take a peek at this other recipe for inspiration!
Storage and Reheating Instructions for Cool Whip Candy
Now that you have this amazing, easy no-bake candy made, we have to keep it perfect until it’s time to serve! The good news about this Quick Holiday Candy is that it’s designed to be made ahead. Because the filling uses whipped topping or heavy cream, the texture absolutely depends on keeping it cold.
If you think you’ll eat these squares within a week—which, honestly, I doubt—you can store them in the refrigerator in a truly airtight container. Make sure they have a layer of parchment paper between the layers so the chocolate coating doesn’t stick to the filling of the candy above it. But my real advice? Stick them in the freezer!
Freezer storage is my non-negotiable recommendation. Pop those chocolate-dipped squares into a sturdy, freezer-safe container. If you use quality airtight containers, these will stay fantastic for up to two months. They don’t really “go bad” since they are set by freezing, but the texture is best within the first month. I actually prefer them slightly firmer straight from the freezer for that ultra-firm nougat bite. When you want to serve them, just pull out the container about 10 to 15 minutes before your guests arrive, and they are ready to go. It’s so simple, just like making my freezer jam, it’s all about keeping things consistently cold!
Serving Suggestions for Your Simple Whipped Topping Dessert
We’ve made this amazingly simple, fluffy candy, and now it’s time to show it off! Because this Cool Whip Candy is so light and airy, I try to pair it with things that offer a bit of contrasting texture or richness. I never want to overshadow its delicate flavor, so we are keeping the accompaniments easy, just like the recipe itself.
The absolute classic way to serve these homemade treats is on a big, festive platter alongside other low-fuss holiday candies. Think about putting them next to some classic peanut butter balls or maybe some homemade fudge. The contrast between the dense fudge and this light, airy confection makes for a really satisfying dessert table. People always gravitate toward this one first because it looks so clean and perfectly chocolate-coated!
If you’re having a ladies’ afternoon coffee break or a casual evening get-together after dinner, these little squares are divine alongside a hot beverage. A strong cup of black coffee or even a rich mocha really cuts through the slight sweetness of the chocolate coating perfectly. It’s a wonderful pairing that lets the “melt in your mouth” factor really shine through.
Another presentation trick I love, especially if I’m using my fanciest holiday serving dishes, is to place just a few of the squares on a small, elegant plate dusted with a tiny bit of powdered sugar for that snowy look. Remember, we aren’t adding more dips or crazy sauces here—that defeats the entire purpose of keeping things simple! You can see how I apply simple elegance to other dips, like my whipped ricotta dip, which proves that even basic ingredients can look stunning with a little thoughtful presentation.
Frequently Asked Questions About Cool Whip Candy
I get so many questions when folks try this recipe for the first time, mostly because it feels a little too easy to be true! It’s natural to wonder about substitutions, especially when you’re hoping for that perfect 3 Musketeers Copycat Candy result. I’ve gathered the top things people ask me about to make sure your experience is just as successful as mine.
Can I make this Cool Whip Candy Recipe without freezing?
Oh, gosh, no, you really can’t sidestep the freezer on this one! This is what secures its spot as Easy No Bake Candy, but it relies entirely on freezing to set up. If you try to just chill this in the fridge, your filling won’t be firm enough to cut cleanly, and when you try to dip it in chocolate, the whole square will turn into soft goo! The deep freeze is what gives this its structure and locks in that light, airy texture. It needs to be frozen solid before cutting and dipping.
What is the best way to get a smooth chocolate coating?
This is where a tiny bit of insurance comes in handy for that perfect Chocolate Dipped Cool Whip look. If you just melt the chips alone, they can sometimes set up too thick or too crackly once they hit the cold candy. My best tip is to add a tiny bit of fat to your melting chocolate—I usually stir in 1 teaspoon of coconut oil, or sometimes even shortening if I’m making a big batch. That extra fat doesn’t change the flavor much, but it makes the chocolate flow smoothly, creating a gorgeous, thin coating that sets up beautifully. If you want to see my general philosophy on keeping things smooth, check out my guide on beer cheese dip!
Also, people often ask if they can swap out the powdered sugar for granulated sugar. Nope! That powdered sugar is key for creating a stable base for the filling, otherwise you just end up with sweet, fluffy milk! For more brilliant tips on keeping things simple but sweet, check out the great advice over at Delish Craze.
Estimated Nutritional Data for This Dessert
Now, I always want to be upfront with you all. Because this Cool Whip Candy is so simple and requires no time in the oven, the textures are delicate, and the ingredients are minimal. But, you know me—I believe in transparency! Since we are making these by hand, the exact count can vary slightly depending on how much chocolate you slather on each piece or how thick you cut the base.
The figures below are based on the standard measurements provided in the recipe and assume 24 yield pieces. Keep in mind these are just estimates, not something lab-tested, which is the reality of most home cooking! But it gives you a good idea of what you’re enjoying when you grab one of these decadent, Melt in Your Mouth Candy bites.
- Serving Size: 1 piece
- Calories: 110
- Sugar: 12g
- Sodium: 10mg
- Fat: 6g
- Saturated Fat: 3g
- Trans Fat: 0g
- Carbohydrates: 13g
- Fiber: 1g
- Protein: 1g
- Cholesterol: 5mg
See? Nothing scary here! It’s a straightforward indulgence built from simple components, perfect for letting loose on a holiday tray without worrying about complex chemical reactions or weird additives. It’s just good, clean sweetness!
Share Your Experience Making This Treat
This is truly where the joy of the Kitchenican community comes alive! We set out to bridge the gap between inspiration and accomplishment, and the only way to know if we succeeded is if *you* try it yourself. I really want to know what you thought of this super simple Easy No Bake Candy.
Did you whip your own cream, or did you use the thawed topping for the ultimate shortcut? Did you stick to the classic three ingredients, or did you sneak in a tiny bit of peppermint extract into the filling? Please, don’t keep those secrets to yourself!
Drop a comment below and let me know how those fluffy squares turned out for you. Rate this recipe with five stars if it helped you out of a last-minute treat bind! And if you snapped a photo of your beautifully Chocolate Dipped Cool Whip creations, tag me on social media. Seeing your success stories—especially when you thought you “couldn’t make candy”—is genuinely what fuels this whole journey.
If you want to read more about our philosophy on conquering kitchen doubts, you can always check out my story here. And if this recipe saved your holiday tray, share the good news with others by sending them the link to this post or checking out other simple ideas over at Breanna’s Recipes. Happy cooking—or in this case, happy freezing!
PrintEasy 3-Ingredient Cool Whip Candy (3 Musketeers Copycat)
Make this incredibly simple, no-bake Cool Whip Candy that tastes just like a fluffy 3 Musketeers bar. It requires only three ingredients and sets up fast, making it a perfect, budget-friendly treat for any party or holiday tray.
- Prep Time: 15 min
- Cook Time: 2 min
- Total Time: 2 hours 17 min
- Yield: About 24 pieces 1x
- Category: Dessert
- Method: Freezing
- Cuisine: American
- Diet: Vegetarian
Ingredients
- 1 cup powdered sugar, plus extra for dusting
- 1 cup heavy whipping cream, whipped to stiff peaks (or use 1 cup thawed frozen whipped topping)
- 1 cup semi-sweet chocolate chips
Instructions
- Prepare an 8×4 inch loaf pan by lining it with parchment paper, leaving an overhang for easy removal. Dust the bottom lightly with powdered sugar.
- In a large bowl, gently fold the powdered sugar into the whipped cream or thawed whipped topping until just combined. Do not overmix, or the mixture will deflate.
- Spread the fluffy mixture evenly into the prepared loaf pan. Place the pan in the freezer for at least 2 hours, or until firm.
- Once firm, lift the candy block out of the pan using the parchment paper overhang. Cut the block into small, bite-sized squares.
- Melt the chocolate chips in a microwave-safe bowl in 30-second intervals, stirring well after each interval, until smooth.
- Dip each candy square into the melted chocolate, allowing excess chocolate to drip off. Place the dipped candies onto a parchment-lined baking sheet.
- Return the chocolate-dipped candies to the freezer for about 15 minutes, or until the chocolate coating is set.
- Store the finished Cool Whip Candy in an airtight container in the refrigerator or freezer.
Notes
- For the best 3 Musketeers copycat texture, ensure your whipped topping is fully thawed but still cold, or whip your heavy cream until stiff peaks form.
- If you want a richer chocolate coating, add 1 teaspoon of coconut oil or shortening to the chocolate chips before melting.
- This recipe is excellent for making ahead of time for holiday candy trays.
Nutrition
- Serving Size: 1 piece
- Calories: 110
- Sugar: 12
- Sodium: 10
- Fat: 6
- Saturated Fat: 3
- Unsaturated Fat: 3
- Trans Fat: 0
- Carbohydrates: 13
- Fiber: 1
- Protein: 1
- Cholesterol: 5