
Stop reaching for that takeout menu tonight, because I promise you, this is the Chicken Satay recipe you’ll want in your rotation forever. We’re not just talking about some bland skewers; we’re making juicy, perfectly spiced chicken paired with the kind of unbelievably creamy, authentic Thai Peanut Sauce that ruins every other dipping sauce for you. As Ava Sinclair, I learned how to nail this flavor profile without any fancy culinary school—just real trials in my own kitchen. Believe me, mastering these flavorful chicken skewers is well within your reach, making it a fantastic addition to your easy weeknight dinners rotation. Forget the complexity; let’s focus on huge flavor right now!
- Why This Chicken Satay Recipe Delivers Better Than Takeout Flavor
- The Flavorful Chicken Marinade for Perfect Chicken Satay
- How to Make Homemade Peanut Sauce for Satay
- Step-by-Step Instructions for Assembling and Cooking Chicken Satay
- Ingredient Notes and Substitutions for Your Chicken Satay
- Tips for Success Making Authentic Thai Chicken
- Serving Suggestions for Your Chicken Satay Dinner
- Storage and Reheating Instructions for Leftover Chicken Satay
- Frequently Asked Questions About Chicken Satay
Why This Chicken Satay Recipe Delivers Better Than Takeout Flavor
I know you’re looking for that deep, complex flavor you usually only get at your favorite Thai spot, and that’s exactly what we deliver here. This isn’t just another passable recipe; it genuinely produces Better Than Takeout Chicken. Trust me, you’ll wonder why you ever bothered with delivery.
- Chicken thighs stay incredibly juicy, thanks to the coconut milk marinade.
- The spice blend hits that perfect balance of savory, earthy, and warm notes.
- Everything comes together faster than you expect!
Quick Weeknight Satay Dinner Ready in Under an Hour
Seriously, this is designed for you. With prep and cook time clocking in around 35 minutes total, this is a true Quick Weeknight Satay Dinner. You get amazing grilled chicken skewers on the table before the delivery window closes!
The Flavorful Chicken Marinade for Perfect Chicken Satay
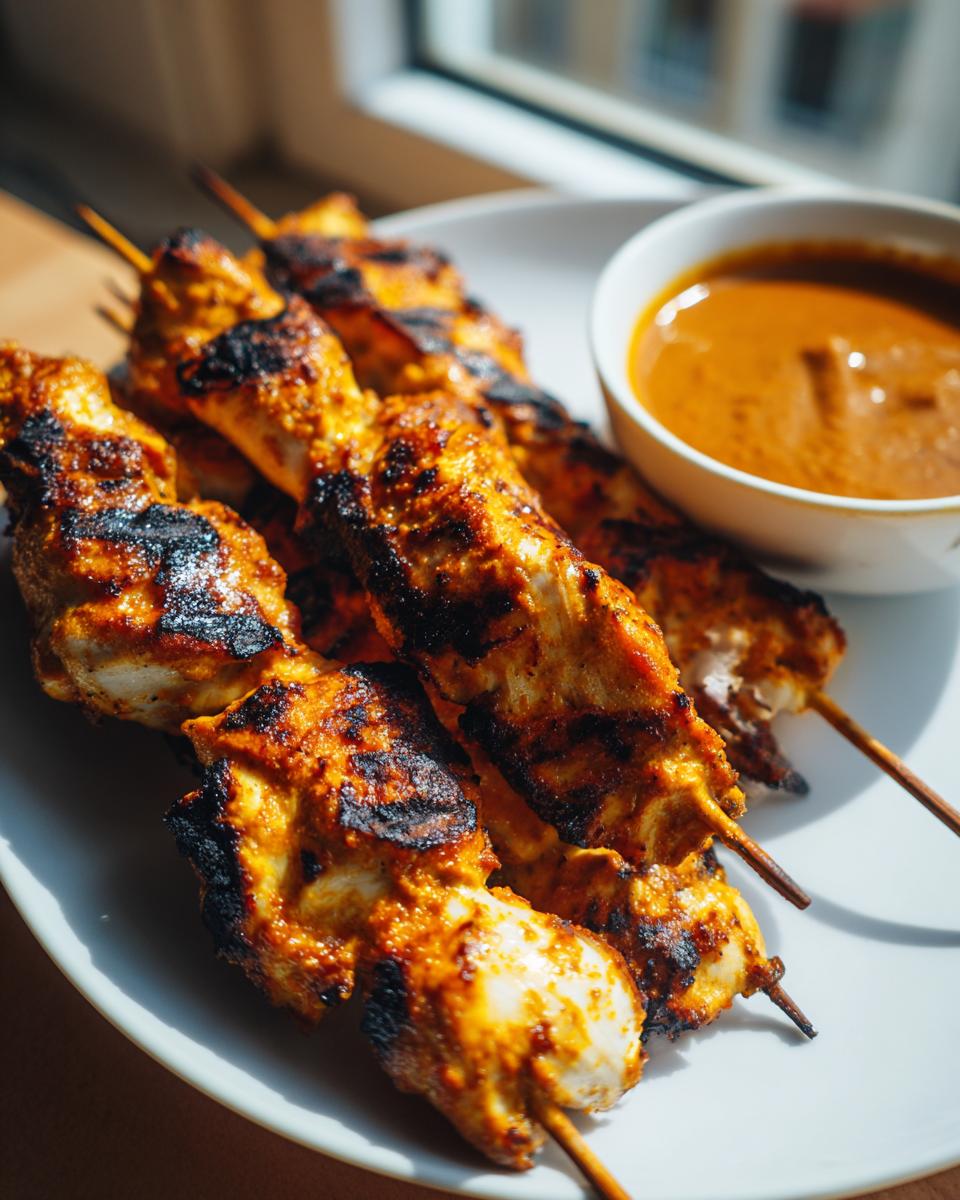
This is where the magic starts, long before the heat hits the grill. We need juicy, flavorful meat, and trust me, using chicken thighs is my top tip here. They hold up so much better than breasts and stay wonderfully tender—that’s something I learned early on when trying to achieve that restaurant-quality result. For that next-level juiciness, I always lean on techniques similar to what I use for my braised chicken thighs, even though satay is cooked quickly. The secret weapon in this marinade for our **chicken satay** isn’t just the spices; it’s the coconut milk!
Full-fat coconut milk tenderizes the meat beautifully and helps all those amazing spices—turmeric, cumin, coriander—really cling to the chicken. You’re coating every single piece in flavor, setting us up for perfectly cooked **grilled chicken skewers** later on. Don’t rush this part at all; letting it sit is crucial for success!
Ingredient Clarity for Your Flavorful Chicken Marinade
Here’s exactly what you need to whip up this potent marinade. Don’t skip the fresh ginger and garlic; they make a huge difference compared to powdered stuff. Remember that if you are using wooden skewers, you absolutely *must* soak them in water for about thirty minutes before you even think about assembling anything. This stops them from bursting into flames on the grill!
- We use 1/2 cup of that required coconut milk right in the marinade bowl.
- Don’t forget the soy sauce (or tamari if you need a gluten free chicken satay option) for that salty depth.
- Turmeric is essential—it gives you that signature golden color, too!
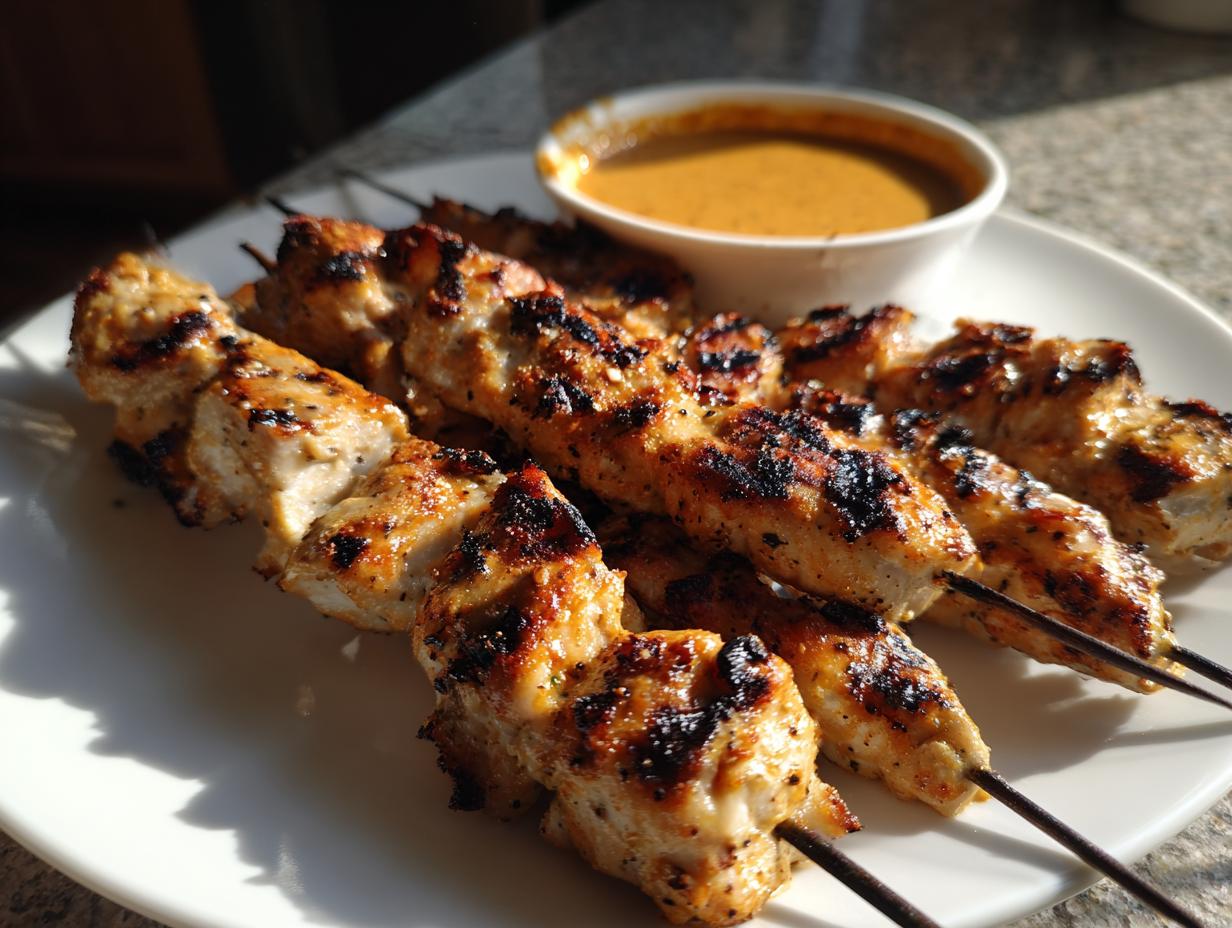
How to Make Homemade Peanut Sauce for Satay
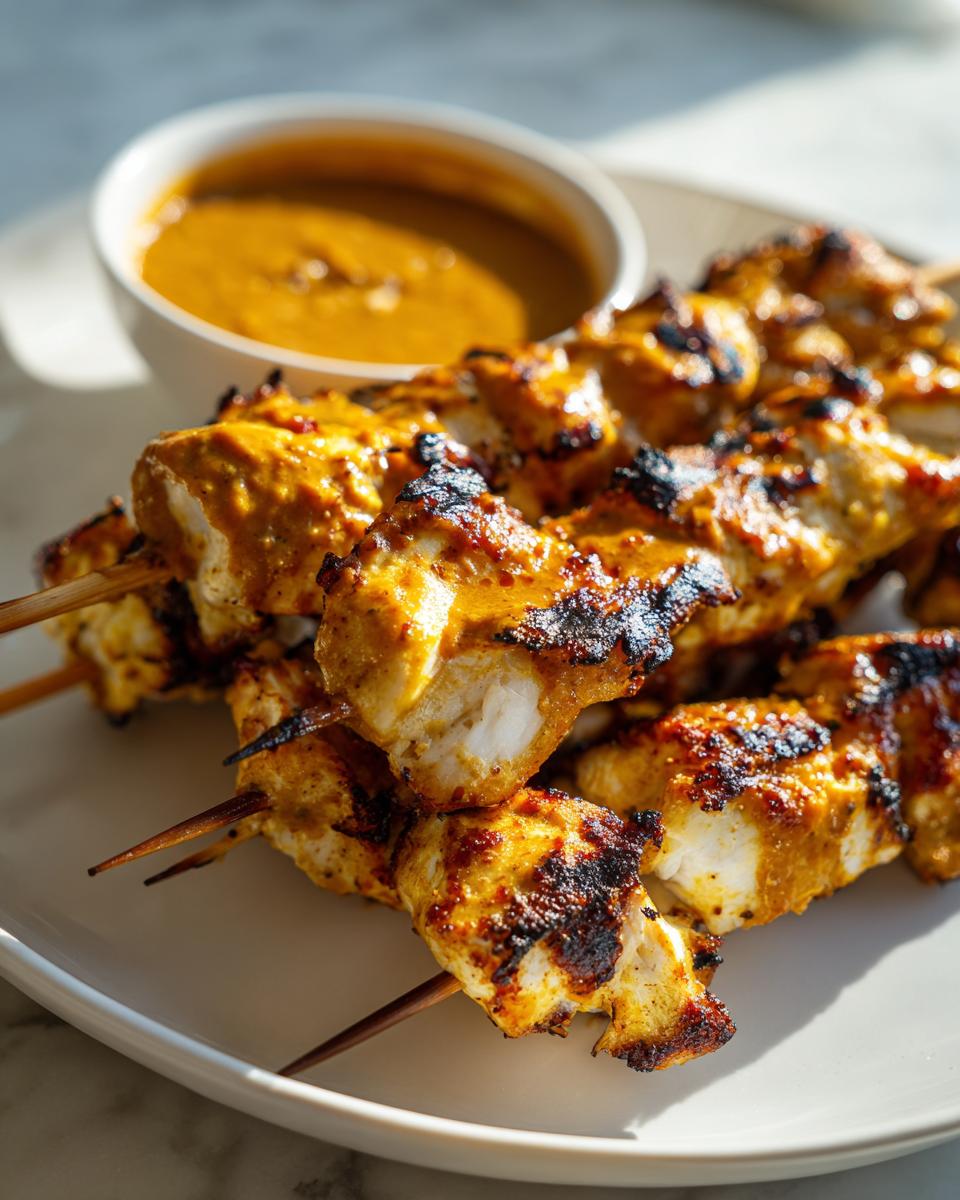
Listen, you can have the best-marinated chicken satay in the world, but if the dipping sauce flops, the whole meal suffers! This recipe for Homemade Peanut Sauce for Satay is what elevates this dish from great to absolutely unforgettable. We are aiming for a rich, deeply satisfying, and, most importantly, really **creamy peanut dipping sauce** you see at those amazing street food stalls. If you’ve ever tried making a sauce that turns gritty, don’t worry—we fix that right here!
The key here is gently heating everything together in one saucepan. You start with your peanut butter and then whisk in the liquids and flavor boosters like lime juice and fresh ginger. Don’t let it boil wildly! Keep that heat low to medium-low. This low, slow warming allows everything to emulsify properly, creating that luxurious, thick coating sauce. For the best results that match that incredible flavor profile you see in recipes like the one from Thai chicken satay with peanut sauce, keep whisking until smooth. If it gets too thick—and sometimes peanut butter can be stubborn—just thin it out slowly with a little hot water until you hit that perfect, dippable consistency for your **chicken satay**.
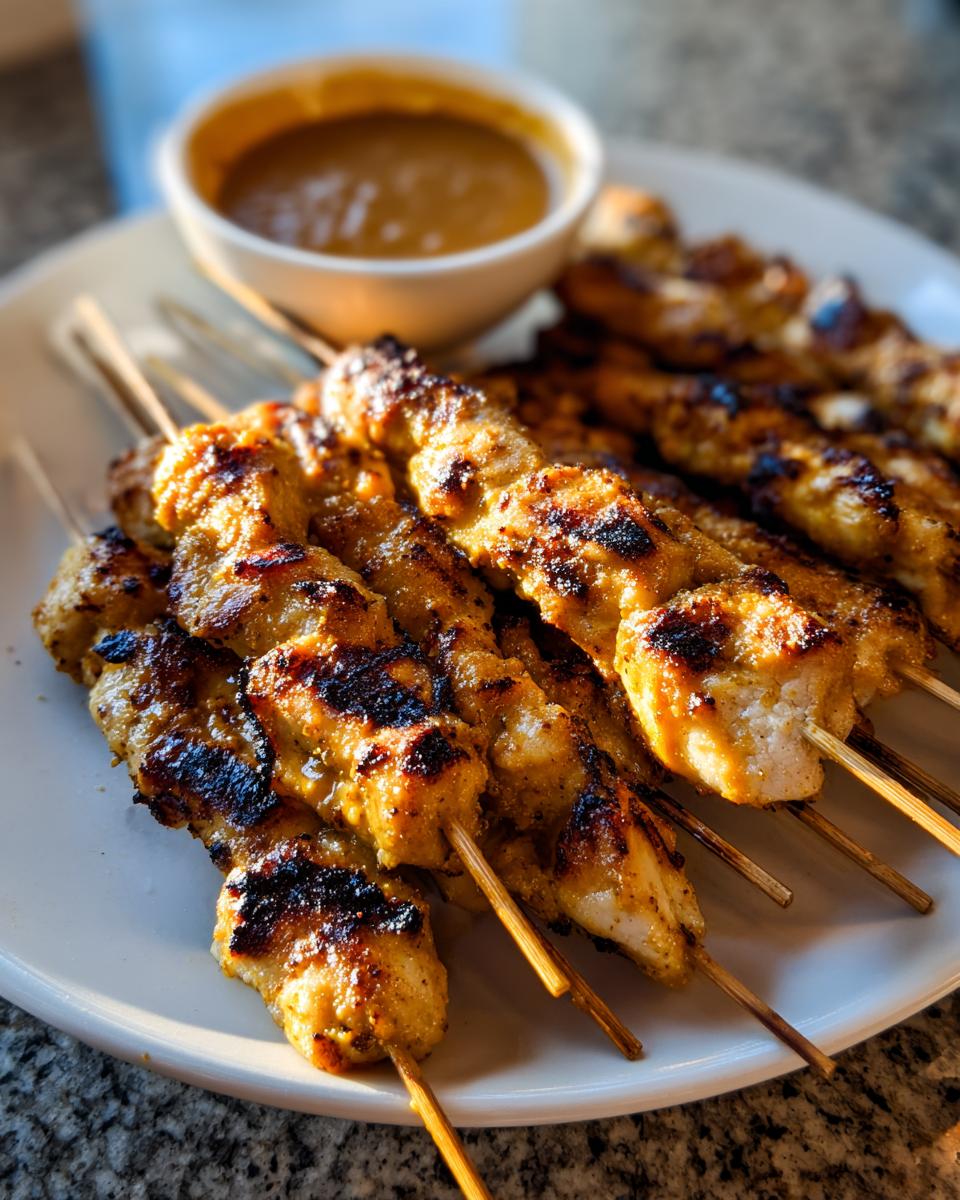
Step-by-Step Instructions for Assembling and Cooking Chicken Satay
Okay, we’ve got the spice-infused chicken ready to go, and the dipping sauce is warm and waiting. Now it’s time to put these **chicken satay** skewers together. Thread the marinated meat onto those soaked skewers—remember, don’t pack it on too tightly! You want space between the pieces so the heat can circulate properly; this helps you get that nice char we are looking for.
You have delicious options here depending on the weather or what equipment you have handy. Whether you choose the grill or the oven, the goal is the same: perfectly cooked, tender chicken that’s ready to dip. Pay attention when flipping, as this ensures even cooking. This whole process moves fast once you start!
Tips for Perfect Grilled Chicken Skewers
If you’re taking these babies outside, preheat that grill to a nice medium-high heat. You want it hot enough to sear and char quickly, but not so hot that the marinade burns before the inside is done. Before you lay down your **grilled chicken skewers**, always give those grates a good brush and a quick coat of oil. I usually cook mine about 3 to 4 minutes per side, turning them gently until they look beautiful and are fully cooked through. That little bit of char from the flame is irreplaceable!
Baking Option for Easy Chicken Skewers
If the weather’s bad, or you just don’t want to mess with the outside grill, the oven method works shockingly well. Preheat your oven to 400°F (200°C). The trick for getting decent texture when baking, similar to my juicy baked chicken breast method, is to use air flow. Line your baking sheet with foil (cleanup!), place a wire rack on top, and arrange the skewers there. Bake for about 15 to 20 minutes, flipping them halfway through. This slight elevation lets the air dry the outside a bit, stopping them from steaming.
Ingredient Notes and Substitutions for Your Chicken Satay
I always get questions about switching things up in this recipe, especially since we all shop at different places! Look, making great chicken satay is about making smart choices with the ingredients you have. For maximum flavor insurance, I strongly recommend sticking with chicken thighs. They’re more forgiving, absorb that spice blend deeper, and guarantee that juicy result we talked about earlier.
But what if you need options? If you have dietary restrictions, adapting this is simple. For a perfect gluten free chicken satay option, just swap out your standard soy sauce for tamari in both the marinade and the dipping sauce—it’s an easy switch that doesn’t sacrifice that critical salty depth.
If you absolutely must use breasts, just watch the cooking time like a hawk! Breasts dry out fast, so they don’t need as long on the heat as the thighs do. Either way, the flavor foundation we built in the marinade keeps this **chicken satay** recipe tasting amazing!
Tips for Success Making Authentic Thai Chicken
Getting that true, restaurant-level flavor in your **Authentic Thai Chicken** really boils down to patience and a few small tweaks I’ve picked up over the years. You can’t rush the absorption process! My biggest tip is to push your marinating time if you can; while one hour is fine for a quick fix, letting those flavors deepen for the full four hours is worth setting aside the time. Think of it like giving those spices a little vacation inside the meat!
When you’re tasting that peanut sauce right before serving, always check the balance. Does it need a little brightness? A squeeze of lime juice will wake everything up immediately. If the flavor feels flat, you might need a touch more sugar or maybe a splash of that homemade chocolate syrup idea—just kidding! Stick to the lime or a pinch of sugar. You want that complex flavor profile that makes you want to save the recipe, like this amazing version at Chicken Satay with Peanut Sauce. Keep tasting as you go!
Also, don’t be afraid to make your sauce slightly runnier than you think you need right on the stovetop. It thickens up as it cools, and we want a smooth coating for the **chicken satay**!
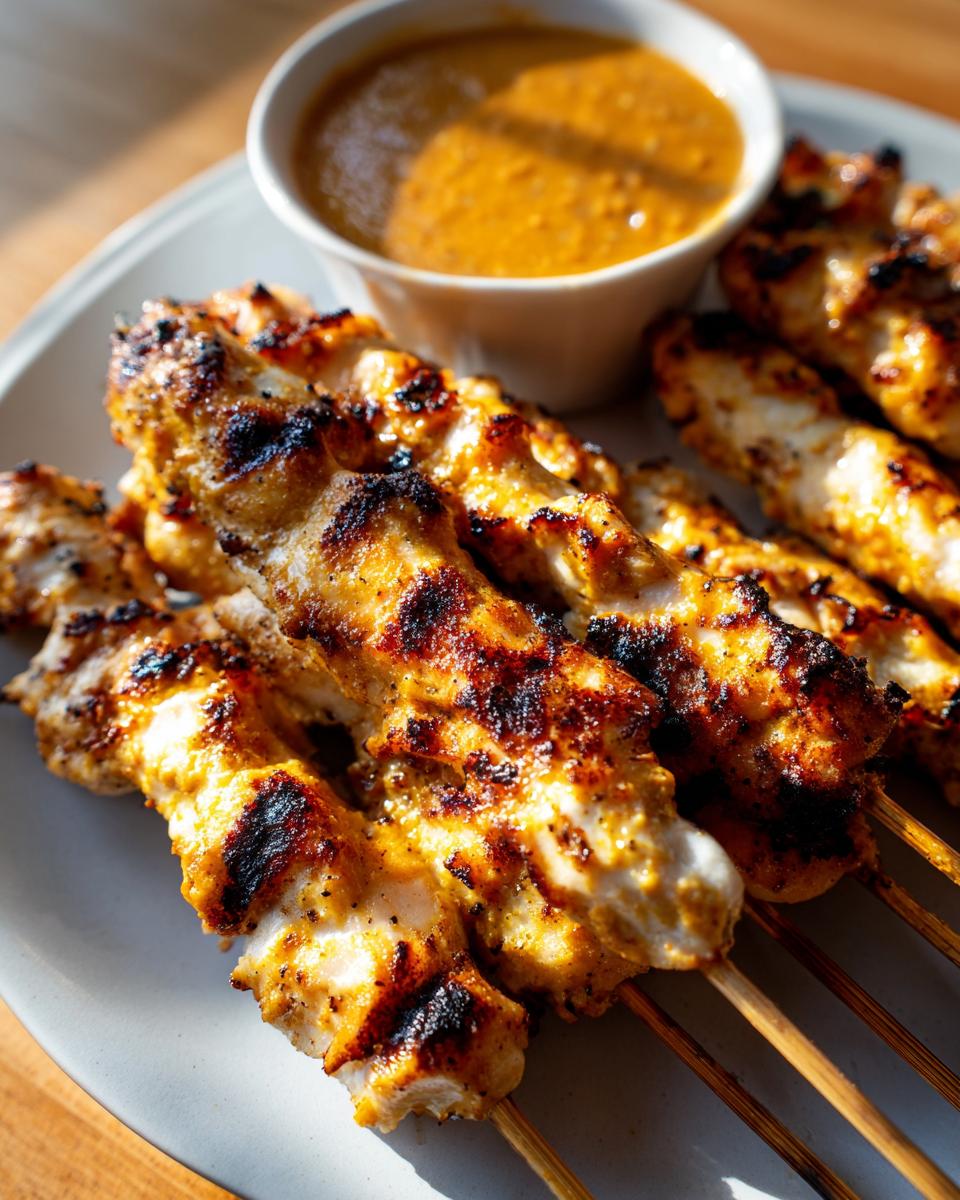
Serving Suggestions for Your Chicken Satay Dinner
Now that you have the best **chicken satay**—juicy skewers and incredible sauce—what do you serve it with? This dish is so flexible! It’s perfect as standalone Party Appetizer Skewers, especially if you set the sauce out in a big bowl for dipping, but it makes a fantastic main course too.
For a full meal, I usually pair this with something fresh to cut through the richness of the peanut sauce. A simple serving of fluffy white rice is always a winner, or you can make a quick, vibrant meal with some pineapple fried rice. Honestly, even just some sliced cucumber and lime wedges make a world of difference to brighten up the plate!
Storage and Reheating Instructions for Leftover Chicken Satay
If you somehow manage to have leftovers of this incredible chicken satay—which I highly doubt—storage is super simple. Always keep the cooked chicken skewers completely separate from the peanut sauce. The sauce will thicken up significantly as it chills, so don’t worry about that normal consistency change we discussed earlier.
To reheat the skewers, I strongly advise against the microwave if you can avoid it; that tends to make the chicken chewy. Instead, wrap them loosely in foil and warm them briefly in a 350°F oven for about 8 to 10 minutes. For the sauce, just whisk in a tablespoon or two of hot water or extra coconut milk until it loosens back up to that perfect dipping texture. Enjoy those savory leftovers the next day!
Frequently Asked Questions About Chicken Satay
When I started making **chicken satay**, I had a million questions swirling around, and I bet you do too! Trying to get that **Authentic Thai Chicken** flavor without sounding like a beginner is always the goal, right? Here are a few things I always get asked about making sure these **easy chicken skewers** turn out perfectly every single time.
Can I prepare the chicken satay marinade ahead of time?
Oh, yes, please do! This is one of my favorite ways to save time. While the recipe says an hour minimum, if you can let those chicken pieces sit in the **flavorful chicken marinade** for the full four hours, the flavor absorption is just unbeatable. Just make sure it stays covered in the fridge, and you’re golden for a super quick assembly later!
What is the best way to adjust the heat level in the peanut sauce?
That creamy dipping sauce needs to be just right for you! The heat comes from the sriracha or chili garlic sauce, which you can totally adjust. If you find your sauce ends up a little too fiery after stirring it together, don’t panic! You can always balance intense heat by whisking in just a tiny bit more brown sugar or a dash of fresh lime juice. That brightness cuts right through the spice and brings you back to that perfect creamy consistency.
I know people sometimes ask about making this a full meal, and these skewers are perfect for a **quick, flavorful chicken dinner** when served with rice. If you reach out to me through my contact page with any other questions, I’m happy to help!
PrintAuthentic Thai Chicken Satay Skewers with Creamy Peanut Sauce (Grill or Bake)

Make restaurant-quality Chicken Satay at home. This recipe delivers juicy, flavorful chicken skewers marinated in coconut milk and spices, paired with a rich, creamy Thai Peanut Sauce. It is simple enough for a quick weeknight dinner but impressive enough for entertaining.
- Prep Time: 20 min
- Cook Time: 15 min
- Total Time: 35 min
- Yield: 4 servings 1x
- Category: Dinner
- Method: Grilling or Baking
- Cuisine: Thai
- Diet: Low Fat
Ingredients
- 1.5 lbs boneless, skinless chicken thighs or breasts, cut into 1-inch strips
- 1 can (13.5 oz) full-fat coconut milk, divided
- 2 tablespoons soy sauce (or tamari for gluten free)
- 1 tablespoon brown sugar
- 1 teaspoon salt
- 1 teaspoon turmeric powder
- 1 teaspoon ground coriander
- 1 teaspoon ground cumin
- 1/2 teaspoon white pepper
- 1 tablespoon minced fresh ginger
- 2 cloves garlic, minced
- Wooden or metal skewers (soak wooden skewers in water for 30 minutes)
- For the Peanut Sauce:
- 1 cup creamy peanut butter
- 1/2 cup hot water
- 1/4 cup coconut milk
- 2 tablespoons soy sauce (or tamari)
- 2 tablespoons lime juice, fresh
- 1 tablespoon brown sugar
- 1 tablespoon rice vinegar
- 1 teaspoon sriracha or chili garlic sauce (adjust to taste)
- 1 teaspoon minced fresh ginger
Instructions
- Prepare the Marinade: In a medium bowl, whisk together 1/2 cup of the coconut milk, soy sauce, brown sugar, salt, turmeric, coriander, cumin, white pepper, ginger, and garlic.
- Marinate the Chicken: Add the chicken strips to the marinade, ensuring all pieces are coated. Cover the bowl and refrigerate for at least 1 hour, or up to 4 hours, for the best flavor.
- Make the Peanut Sauce: While the chicken marinates, combine all peanut sauce ingredients in a small saucepan. Heat over medium-low heat, whisking constantly until the sauce is smooth and creamy. If the sauce is too thick, add the remaining 1/2 cup of coconut milk or a little hot water until you reach a thick dipping consistency. Keep warm or set aside.
- Assemble Skewers: Thread the marinated chicken pieces onto the prepared skewers, leaving a small space between each piece.
- Cook the Satay (Grill Method): Preheat your grill to medium-high heat. Lightly oil the grates. Place the skewers on the grill and cook for 3 to 4 minutes per side, turning occasionally, until the chicken is cooked through and lightly charred (about 10-12 minutes total).
- Cook the Satay (Bake Method): Preheat your oven to 400°F (200°C). Line a baking sheet with foil and place a wire rack on top. Arrange the skewers on the rack. Bake for 15 to 20 minutes, flipping halfway through, until the chicken reaches an internal temperature of 165°F (74°C).
- Serve: Arrange the cooked chicken satay skewers on a platter. Serve immediately with the warm, creamy peanut dipping sauce.
Notes
- For extra juicy chicken, use chicken thighs instead of breasts.
- If you want a gluten free chicken satay option, ensure you use tamari instead of standard soy sauce in both the marinade and the sauce.
- Serve these flavorful chicken skewers with sliced cucumber or a simple rice pilaf for a complete dinner.
Nutrition
- Serving Size: 4 skewers
- Calories: 410
- Sugar: 8
- Sodium: 650
- Fat: 25
- Saturated Fat: 10
- Unsaturated Fat: 15
- Trans Fat: 0
- Carbohydrates: 15
- Fiber: 3
- Protein: 32
- Cholesterol: 95