
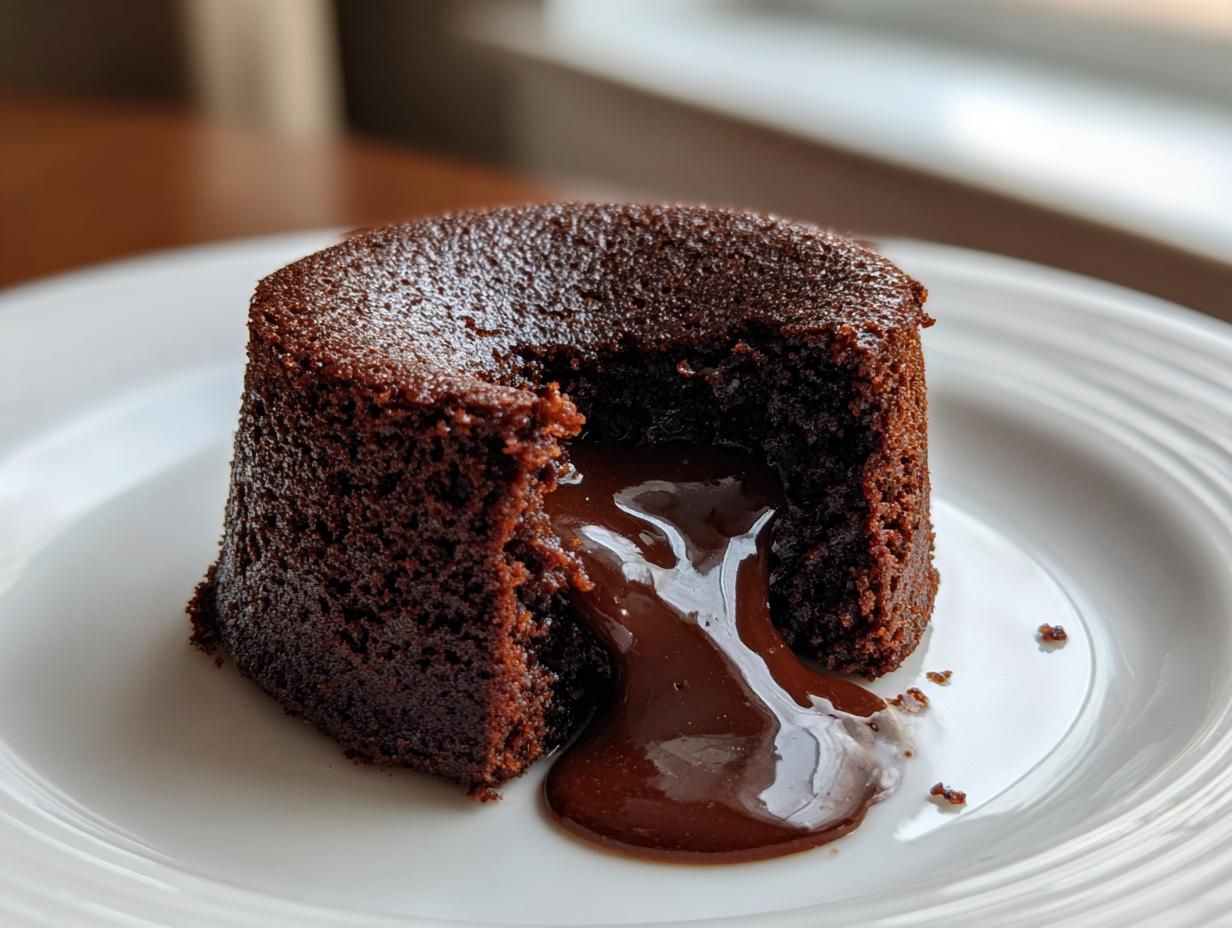
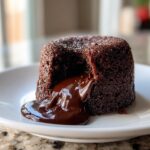
You know that moment when you take a fork to a dessert, and instead of a clean break, this impossibly rich, warm, silky fluid just oozes out onto the plate? That, my friends, is the magic of a truly great lava cake. For years, I thought those beautiful chocolate eruptions were reserved only for fancy restaurants, but I was wrong!
Honestly, I used to look at recipes for a decadent chocolate dessert like this and think, “Nope, too much pressure. I’m going to mess up the timing and end up with a dry puck.” But after a lot of late nights and, well, a few baked hockey pucks, I cracked the code. I’m Ava, and I’m a home cook just like you, and I can promise you, this is a foolproof, quick chocolate lava cake recipe that is absolutely perfect for date nights or celebrating a big win.
We are keeping this incredibly simple so you can achieve that ooey-gooey center every single time. Forget the stress; trust the process. This is dessert divinity, ready in under 30 minutes!
- Why This Classic Chocolate Lava Cake Recipe Works Every Time
- Gathering Ingredients for Your Gooey Center Dessert
- Step-by-Step Instructions to Make the Best Lava Cake Recipe
- Tips for Achieving the Perfect Lava Cake Molten Core
- Chocolate Lava Cake Variations: From Nutella to Dark Chocolate Molten Cake
- Essential Equipment for Making Individual Chocolate Cakes
- Serving Suggestions for Your Warm Chocolate Cake
- Storage and Reheating Instructions
- Quick Answers About This Decadent Chocolate Dessert
- Sharing Your Kitchenican Success
Why This Classic Chocolate Lava Cake Recipe Works Every Time
When I first started on my cooking journey, the idea of making a dessert that looked this impressive felt completely out of reach. I thought achieving that perfect melt meant having some secret chef skill. Nope! That’s the Kitchenican philosophy: if I can conquer this, you absolutely can too. This recipe strips away all the fuss so you can focus on the joy of making something amazing.
It sounds too good to be true, but this is genuinely the Best Lava Cake Recipe for home cooks who need satisfying results fast. You don’t need a full afternoon. Seriously, you won’t believe how quickly these come together!
- Quick Preparation: Total time is usually under 30 minutes. Perfect for unexpected cravings!
- Guaranteed Gooey Center: Follow my timing instructions exactly, and that molten core is yours. No more guesswork!
- Simple Ingredients: We are using kitchen staples; no fancy sourcing needed for this incredible individual chocolate cakes experience.
Once you nail this, you’ll feel so empowered to try my other favorite chocolate indulgences. Check out my growing collection of delicious dessert recipes if you’re feeling dangerous!
Gathering Ingredients for Your Gooey Center Dessert
Okay, listen up! Before we even think about turning on the oven, we have to talk about what goes into this masterpiece. The secret to getting that perfect melt isn’t just timing; it starts with the quality of what you put in the bowl. Because this Decadent Chocolate Dessert is so simple, every single ingredient has to pull its weight!
I know it’s tempting to grab whatever chocolate you have lying around, but trust me on this one: use high-quality bittersweet or semi-sweet chocolate. It melts smoother, and the flavor is just deeper. If you skimp here, it’s going to taste like a normal cake, and we are not making a normal cake, are we? We are aiming for pure, chocolatey nirvana!
Essential Components for the Perfect Lava Cake
Here is what you need in your little prep bowls. Making sure you have everything measured out before you start mixing keeps your stress—and your chances of overmixing—way down.
- 4 ounces bittersweet or semi-sweet chocolate, chopped (Get the good stuff!)
- 4 tablespoons unsalted butter, plus extra for those ramekins
- 2 large eggs
- 2 large egg yolks (These extra yolks are fantastic for richness!)
- 1/4 cup granulated sugar
- 1 teaspoon vanilla extract
- Pinch of salt
- 2 tablespoons all-purpose flour
- Cocoa powder, for dusting ramekins (This is non-negotiable for easy release!)
See? It’s nothing crazy! Just a few simple things, treated well, that turn into something truly spectacular. Now measure everything out, and we can move on to the best part: mixing!
Step-by-Step Instructions to Make the Best Lava Cake Recipe
This is where the magic happens! We’re going from simple components to a show-stopping dessert. The beauty of this lava cake recipe is that even though it’s fast—we’re looking at about 14 minutes of bake time—precision matters. Don’t rush the little details, and I promise you’ll get that perfect, liquid center every time. If you need a little sweet helper while you wait for the oven to heat up, try whipping up a batch of my homemade chocolate syrup!
Preparing Ramekins and Preheating
First things first: get that oven humming! You need a nice hot environment to set the outside quickly. Preheat it to 425 degrees Fahrenheit (that’s 220 Celsius). Now, the ramekins. This step is crucial because if your individual chocolate cakes stick, the whole ‘lava’ reveal is ruined. You absolutely must generously butter every single surface inside those ramekins.
Ava’s Expert Tip: After buttering, dust them heavily with cocoa powder instead of flour. Flour leaves a white residue when you flip it out, but cocoa powder blends right into your dessert. Tap out the excess cocoa until the inside looks velvety dark brown. Set those perfectly prepped little dishes on a sturdy baking sheet.
Melting Chocolate and Creating the Batter for Your Lava Cake
We need that chocolate and butter smooth as silk. Use a double boiler setup—a heatproof bowl sitting right over simmering water, making sure the water doesn’t touch the bottom of the bowl. Stir constantly until it’s totally melted and glossy. Take it off the heat right away and let it cool down for just a couple of minutes. If it’s scorching hot when it hits the eggs, you’ll end up with sweet chocolate scrambled eggs, and nobody wants that!
In a separate bowl, whisk those eggs, yolks, and sugar until they lighten up. Then, gently pour in the slightly cooled chocolate mixture. Here’s where you need patience: when you add the two tablespoons of flour, sift it over the top and use a light hand to fold it in. Seriously, fold! Overmixing develops gluten, and we want soft layers, not bouncy bread! We are making a Molten Chocolate Cake Recipe, not a baguette.
Baking Time: The Secret to a Molten Chocolate Cake Recipe Center
Divide that lovely batter evenly among your four prepared ramekins. Now, slide that baking sheet into that hot oven. The window here is tight, so set a timer for 12 minutes. You want the edges to look firm and baked through, but when you gently shake the pan, the very center should still have a slight, nervous jiggle. That wiggle means you’ve hit the jackpot for a liquid center!

If you bake it until it looks firm all the way across, you’ve made a lovely little warm chocolate cake, but you’ll miss out on that amazing ooze we are after. Remember, this time is the secret to a true Gooey Center Dessert.
Inverting and Serving Your Individual Chocolate Cakes
This is the moment of truth! Once the timer goes off, pull them out and let them rest for *exactly* 60 seconds. Not two minutes, just one. That tiny rest allows the structure to firm up just enough so it doesn’t collapse when you flip it, but the inside stays totally molten. Run a thin, flexible knife carefully around the inside edge of each cake, just teasing it away from the ramekin wall.
Place your serving plate upside down over the ramekin and, with a quick flip and a prayer, turn it over. Tap the bottom lightly if needed, and lift the ramekin straight up. If you prepped those dishes right, your beautiful little cake will slide right out, ready to be dusted and devoured immediately!
Tips for Achieving the Perfect Lava Cake Molten Core
Seriously, timing is everything with this dessert. If you walk away from your oven for even a couple of extra minutes, you risk losing that glorious river of chocolate. Don’t stress, though; once you understand what’s happening, you can dial this recipe in for *your* oven.
The biggest mistake I see people make is thinking that if the top looks done, the center must be too. At 425°F, we are cooking the outside shell aggressively so it sets up quickly, creating that structure needed to hold the liquid inside. You need to feel confident in what ‘soft and jiggly’ really means. It should look practically underbaked right in the middle. I like to check the edges for a slight pull away from the ramekin wall first, and if they look set, I trust the jiggle!
If you made these for the first time and ended up with a fully cooked cake, it means your oven runs hot or you went over the 14-minute mark. Next time, pull them out at 12 minutes. If you’ve already baked them a bit too long, don’t throw them out! You’ve just made a fantastic, individual warm chocolate cake, which is a win too. For next time, try pulling them out 1 to 2 minutes sooner. You can always bake them longer, but you can’t un-bake them!
If you want to see how one of my peers tackles a similar recipe and ensures that amazing texture, you can check out the tips over at My Foolproof Chocolate Lava Cake. They are all about making sure that center erupts perfectly!
Chocolate Lava Cake Variations: From Nutella to Dark Chocolate Molten Cake
So, you’ve mastered the classic! You know the drill, you nail that 13-minute bake time, and now you’re wondering, “What else can I do with this amazing technique?” Well, I’ve got you covered. This recipe is so adaptable; it’s like a blank canvas for any chocolate lover. We are definitely going to talk about using the best chocolate possible, which instantly elevates this to a Dark Chocolate Molten Cake experience, but the real fun comes when you start swapping things out!
If you love the idea of a different layer of flavor, I highly recommend you check out how I make my fudgy Oreo brownies—but let’s keep our focus here.
Tips for richer flavor and fun additions
First, let’s talk about intensity. If you want that super deep, almost bitter-sweet contrast to your sugar, stick to 70% cacao bittersweet chocolate for the melting step. It makes the whole dessert taste instantly more sophisticated and bakery-style.
But the real showstopper variation, and one I make often when I want something extra decadent, is swapping in Nutella. This turns it into a full-blown Nutella Lava Cake situation!
The swap is so easy: you just replace two ounces of the standard chopped chocolate with two tablespoons of that creamy hazelnut spread. You stir the Nutella right in with the butter and the rest of the chocolate while it melts. Those hazelnut notes blend beautifully with the molten core. Seriously, if you’re looking for an absolutely irresistible version, you have to test that one out. You can find a great recipe example over at Nutella lava cake guides if you need visual confirmation, but I promise, you can trust the simple swap written above!
No matter how you jazz it up, remember this foundational recipe for your lava cake is the best starting point. It guarantees that incredible contrast between the set edges and the warm, flowing center we worked so hard to achieve!
Essential Equipment for Making Individual Chocolate Cakes
Part of building your confidence in the kitchen is knowing exactly what tools you need so you aren’t scrambling mid-recipe, right? For this specific decadent chocolate dessert, you don’t need a professional setup, but a few items are non-negotiable if we want that perfect individual chocolate cakes presentation.
I don’t want you getting halfway through melting the chocolate only to realize you don’t have the right setup. So, let’s take a quick look at the gear that makes achieving that gooey center seamless. Having these things ready means you focus only on the fun parts!
- Ramekins (6-ounce size recommended): These are your secret weapons! Since we are baking individual portions that need to hold their shape and release cleanly, these little ceramic or glass cups are essential. If you don’t have true ramekins, you can use sturdy metal muffin tins, but you’ll need to adjust my bake time notes significantly.
- Heatproof Bowl and Saucepan: We need a gentle way to melt that chocolate and butter together, which means a makeshift double boiler. Just find a bowl that fits snugly over a saucepan (without touching the water surface) to melt that mixture slowly.
- Whisk: You need a good whisk for combining your eggs and sugar until they get pale and fluffy. A hand whisk works perfectly fine here, but if you have an electric hand mixer, it saves your arm during that egg-beating step!
- Sifter: I know, I know, a sifter seems old-fashioned, but for folding in that tiny bit of flour without overmixing the batter? It’s the easiest way to ensure you don’t get flour pockets. It keeps the batter light.
- A Sturdy Baking Sheet: This isn’t just for logistics; placing the ramekins on a sheet makes it much easier (and safer!) to slide them in and out of the very hot oven all at once.
That’s truly it! Simple items you probably already have for your Quick Chocolate Dessert. Assemble your tools, assemble your ingredients, and let’s get cooking!
Serving Suggestions for Your Warm Chocolate Cake
The second these individual chocolate cakes come out of their little homes, they look stunning all by themselves. But if you’re making these for a date night or trying to impress someone—and honestly, who isn’t sometimes?—a little dressing up takes this quick chocolate dessert to an impressive level instantly. Presentation makes the whole experience feel more special, even if it only took you 20 minutes!
My absolute favorite, classic way to serve it? A light dusting of powdered sugar right before it hits the table. It mimics that sophisticated dusting you see in bakeries and gives you a lovely visual contrast against the deep dark chocolate. It’s simple, quick, and zero effort.
The Ultimate ‘Melting Chocolate Cake’ Toppings
But if you want to go full-throttle decadent, we have to talk texture and temperature contrast. Nothing—and I mean *nothing*—beats the temperature shock of pouring something cold over a piping hot, gooey center. Since this is a Warm Chocolate Cake, you want toppings that stand up to the heat.
- Vanilla Ice Cream: This is my non-negotiable go-to. Place one scoop right next to (don’t put it directly on top right away!) the warm lava cake. As you cut into it, that molten chocolate flows right into the melting ice cream—it’s heaven.
- Fresh Berries: A handful of tart raspberries or sliced strawberries cuts through the richness perfectly. They add color, brightness, and an acidic little pop that balances the sweet. I often mix a few berries right into the powdered sugar I dust on top.
- A Touch of Cream: If you don’t want ice cream, a dollop of freshly whipped, lightly sweetened cream is fantastic. It’s lighter than ice cream but still provides that luxurious mouthfeel.
Honestly, you can serve this plain with a cup of coffee and it would still be amazing, but these little touches really elevate it into one of those Impressive Dessert Recipes without adding any extra time to your cooking schedule. If you’re looking for even more ideas for show-stopping sweets, take a peek at my main page of delicious dessert recipes!
Storage and Reheating Instructions
Look, I know these little cakes are best eaten the minute they come out of the oven, especially when you’re aiming for that perfect liquid center. But life happens! Sometimes you make an extra one (or two, because, you know, temptation). So, what do you do with leftovers if you don’t devour them all immediately?
Good news: it’s super easy to store and reheat these beauties to bring back that ‘Melting Chocolate Cake’ magic. Just remember, the texture will change slightly—it’ll be more like a very rich, fudgy cake when cold.
Tips for Keeping Your Lava Cake Gooey After Day One
Once your cake has cooled down completely from that initial glorious ooze, you need to protect it. Don’t leave them sitting on the counter if you want them to last more than a few hours. The top will dry out and the texture will definitely change for the worse.
- Cover Them Up: Place the cooled cakes on a small plate and cover them tightly with plastic wrap, or stick them in a small, airtight container. I’m aiming to keep the air away from them completely.
- Refrigerate Promptly: They can hang out in the fridge for about three days. Honestly, I’ve never tested them past that because they never last that long in my house when I make this quick chocolate dessert!
How to Reheat for That Molten Center Experience
This is the key step! If you just microwave a cold one, the edges get tough before the center even thaws. If you want that lava cake back to its warm, gooey state, you need low and slow heat application focused on the center.
My preferred method for reheating one of these individual chocolate cakes is the oven. Preheat your oven (or toaster oven, if you are only saving one) to a low temperature, maybe 300°F (150°C). Place the cake on a small baking sheet and heat for about 8 to 10 minutes. You want the edges to be warm, not crispy, and the center to be nice and soft again.
If you are in a total rush and honestly can’t wait, the microwave will work, but you have to be careful. Microwave the cake on 50% power for about 15 to 20 seconds. Keep a close eye on it! If you nuke it on high, you’ll lose the molten texture fast. You are aiming to warm it through, not re-bake it!
Serve it right away with a fresh scoop of ice cream, and nobody will ever know you made your decadent chocolate dessert yesterday!
Quick Answers About This Decadent Chocolate Dessert
Okay, I know you’re probably standing in your kitchen right now, hands covered in cocoa powder, wondering if you can just pop these in the freezer for later. That’s totally understandable when you’re working on an Easy Date Night Dessert recipe! Since we are all about building your confidence here at Kitchenican, let’s tackle the last few burning questions you might have about getting your molten chocolate cake recipe perfect.
Can I prepare the lava cake batter ahead of time?
Yes, you totally can! This is great if you’re planning a dinner party and want to do the heavy lifting earlier in the day. After you divide the batter into your prepared ramekins, cover each one tightly with plastic wrap and pop them straight into the fridge. They can chill for up to 24 hours. If you bake them straight from the fridge, you just need to add a little insurance time—I suggest baking for an extra 1 to 2 minutes. Keep an eye on those edges, though!
What if I want a truly liquid center, like a Chocolate Lava Cake?
If that silky, straight-up-flowing center is what you dream about, you have to be bold about underbaking them a little! For the absolute gooey-est texture (my personal favorite), pull them out right at the 12-minute mark. The edges should look barely set, and the center should look quite soft when you gently nudge that baking sheet. We are going for a true Desserts with Liquid Center experience here, so trust that jiggle when you see it!
Can I bake this in a muffin tin instead of ramekins?
You definitely can! If you are making these for a crowd or just don’t have standard ramekins, a lightly greased and cocoa-dusted standard muffin tin works fine. Just know that because the batter is spread thinner, the baking time drops considerably—we’re talking more like 8 to 10 minutes maximum. You’ll end up with smaller, individual chocolate cakes, but they will still deliver that amazing warm chocolate cake feel. Just watch them like a hawk!
If you need more general inspiration after mastering this one, don’t forget to check out my whole collection of delicious dessert recipes. Happy baking!
Sharing Your Kitchenican Success
Wow, you made it! You took simple ingredients—chocolate, eggs, sugar—and you created what I honestly think is the most impressive, yet easiest, dessert out there. You’ve proven that you absolutely can conquer a tricky recipe and serve up something bakery-style right in your own kitchen. That feeling, right after you invert the cake, is pure culinary victory!
Now that you’ve successfully created that beautiful, flowing, gooey center, I really want to hear about it! Don’t keep that success story to yourself. Part of what makes Kitchenican special is that we learn from each other right here in the comments section.
Did you nail that 13-minute timing perfectly? Did you serve it with strawberries or plain vanilla ice cream? Did you try the Nutella swap? Please drop a comment below and let me know how your lava cake turned out! Tell me if this recipe gave you that confidence boost you needed to try something new.
If you snapped a photo of that glorious, oozing center—and I bet you did!—I would absolutely love to see it. You can share your creations by reaching out to me through the contact page. Showing off your amazing work really inspires the next person who is standing in the kitchen thinking they “can’t cook.”
Thank you so much for baking with me today. Enjoy every last warm, rich, chocolatey bite!
PrintEasy Chocolate Lava Cake Recipe for a Gooey Center
Make this foolproof chocolate lava cake for a decadent dessert that always delivers a warm, molten center. This recipe is quick, uses simple ingredients, and is perfect for date nights or impressing guests.
- Prep Time: 10 min
- Cook Time: 14 min
- Total Time: 24 min
- Yield: 4 servings 1x
- Category: Dessert
- Method: Baking
- Cuisine: American
- Diet: Vegetarian
Ingredients
- 4 ounces bittersweet or semi-sweet chocolate, chopped
- 4 tablespoons unsalted butter, plus extra for ramekins
- 2 large eggs
- 2 large egg yolks
- 1/4 cup granulated sugar
- 1 teaspoon vanilla extract
- Pinch of salt
- 2 tablespoons all-purpose flour
- Cocoa powder, for dusting ramekins
Instructions
- Preheat your oven to 425 degrees Fahrenheit (220 degrees Celsius). Generously butter four 6-ounce ramekins. Dust the inside of each buttered ramekin with cocoa powder, tapping out any excess. Place the prepared ramekins on a baking sheet.
- Place the chopped chocolate and butter in a heatproof bowl set over a saucepan of simmering water (a double boiler). Stir occasionally until the mixture is completely melted and smooth. Remove from heat and let it cool slightly.
- In a separate medium bowl, whisk together the whole eggs, egg yolks, and granulated sugar until the mixture is pale yellow and slightly thickened, about 2 minutes. Whisk in the vanilla extract and salt.
- Gently whisk the slightly cooled chocolate mixture into the egg mixture until just combined.
- Sift the flour over the batter and gently fold it in until no streaks of flour remain. Do not overmix.
- Divide the batter evenly among the four prepared ramekins.
- Bake for 12 to 14 minutes. The edges should look set, but the center should still look soft and jiggly. This timing is key for a liquid center.
- Let the cakes cool in the ramekins for exactly 1 minute. Run a thin knife around the edge of each cake. Carefully invert each cake onto a small serving plate.
- Serve immediately while warm with a dusting of powdered sugar or a scoop of vanilla ice cream.
Notes
- For a perfect molten center, do not overbake. If you prefer a slightly firmer, but still gooey, center, bake for 15 minutes.
- To make this a Nutella lava cake, replace 2 ounces of the chopped chocolate with 2 tablespoons of Nutella, stirring it into the melted chocolate and butter mixture.
- Use high-quality chocolate for the best flavor in this decadent chocolate dessert.
Nutrition
- Serving Size: 1 cake
- Calories: 380
- Sugar: 25g
- Sodium: 150mg
- Fat: 24g
- Saturated Fat: 14g
- Unsaturated Fat: 10g
- Trans Fat: 0g
- Carbohydrates: 35g
- Fiber: 2g
- Protein: 8g
- Cholesterol: 150mg