
There is honestly nothing that whispers ‘home’ louder than the smell of a fantastic pot roast sizzling away on the stove. If you’ve ever looked at recipes and thought, “That seems too hard, I’ll just order takeout,” trust me, I’ve been right there with you. That’s why I developed this version of the ultimate pot roast recipe. My goal, as Ava Sinclair here at Kitchenican, is to show you that achieving that mythical fall-apart tender beef is totally accessible. Forget culinary school techniques! This straightforward method, which became my staple when I was balancing a busy job, proves that deep, savory flavor isn’t about complication—it’s about simple, confident execution. Get ready to transform a humble chuck roast into the hearty family dinner you deserve.
- Why This Ultimate Pot Roast Recipe Delivers Comfort Food Perfection
- Gathering Your Ingredients for the Perfect Pot Roast
- Step-by-Step Instructions for Your Dutch Oven Pot Roast
- Mastering the 5-Minute Stovetop Gravy for Your Pot Roast
- Tips for Success with Slow Cooker Pot Roast Variations
- Serving Suggestions for This Hearty Family Dinner Idea
- Storage and Reheating Instructions for Your Make Ahead Beef Dinner
- Frequently Asked Questions About Making a Classic Pot Roast Recipe
- Build Your Confidence: Start Making This Pot Roast Today
Why This Ultimate Pot Roast Recipe Delivers Comfort Food Perfection
This isn’t just another recipe tossed in a slow cooker; this is how you guarantee a show-stopping, deeply satisfying meal without ending up stressed out. When I switched from just dumping ingredients in the slow cooker to using my Dutch oven first, everything changed! Here are a few reasons why this method consistently yields what I call true easy comfort food meals.
- The Flavor Boost: We skip the bland route. By searing the beef first, we build a serious brown crust that adds depth the final gravy just can’t fake.
- Vegetable Integrity: We add the potatoes and carrots later in the process. This means you get soft, yielding veggies, not mushy sadness floating in your broth at the end of the day.
- Minimal Monitoring: While we use the oven here, once it’s covered and tucked away at 325°F, that oven is doing all the heavy lifting for you.
- True Homestyle Cooking Roast: Every element—the herbs, the wine reduction, the rich broth—merges perfectly into that soul-soothing texture we all crave.
Achieving Fall Apart Tender Beef Every Time
You absolutely need to start with a beef chuck roast if you want that fall apart tender reward. Leaner cuts just dry out under long cooking times. Chuck roast, on the other hand, has just the right amount of connective tissue and marbling. Our technique, which is essentially low-and-slow braising, breaks all that tough stuff down over four hours. It melts, I promise! It’s not about high heat; it’s about giving the meat the gentle, steady warmth it needs to completely transform into something that shreds beautifully with just a fork. This is the secret to homemade roast success.
The Foundation of Flavor: Searing Your Pot Roast
Okay, listen up, because this step is non-negotiable for a truly flavorful beef roast. You have to get that oil in your Dutch oven piping hot—seriously, let it shimmer a bit! Pat that seasoning-crusted roast dry, and then lay it in the hot fat. We’re looking for a deep, dark mahogany brown color on every single side. This browning step creates hundreds of new flavor compounds. If you skip this, your final broth tastes thin. If you nail this sear, your entire savory slow cooked beef will taste like it simmered for two days, not four hours!
Gathering Your Ingredients for the Perfect Pot Roast
Alright, before we even think about turning on the heat, let’s talk inventory. Getting the right bits and pieces together is half the battle won for any Classic Pot Roast Recipe. I’ve learned the hard way that when it comes to braising liquids and herbs, you have to be precise. A little too much salt or too little broth can throw the whole balance off! Grab a big bowl, check your fridge, and make sure you have everything ready for this beautiful, hearty meal before you start the sear. This prep step is what separates an okay dinner from the kind of hearty family dinner ideas everyone asks for later.
Ingredient Clarity: Specifics for Your Beef Chuck Roast Recipe
The star, that beef chuck roast, needs to be about 3 pounds. Make sure you pat it completely dry; those paper towels are your best friend here! We use a few classic dried herbs—thyme and rosemary—to give it that lovely homestyle cooking roast aroma. Now, for the liquid backbone: we need two cups of beef broth. If you want that extra layer of complexity—the kind that makes people ask, “What’s your secret?”—use about half a cup of dry red wine like Cabernet or Merlot. If you don’t cook with wine, just swap it out for extra broth, no drama!
But here’s where people often get vague, and we absolutely can’t be vague when aiming for pot roast with potatoes and carrots perfection. Your vegetables need specific cutting instructions so they cook evenly: the onion should be cut into large wedges, about four medium carrots cut into distinct 2-inch chunks, and those Yukon Golds quartered. This ensures they hold their shape just enough while absorbing all those incredible beefy juices. Trust me, cutting them uniformly is an essential step for success.
Step-by-Step Instructions for Your Dutch Oven Pot Roast
This is where the magic happens, friends! We are getting this beautiful hunk of meat ready for its long, slow, cozy bath. I prefer the Dutch oven method over the slow cooker pot roast every single time because that initial sear is just too important to skip. Don’t worry if your Dutch oven is big; it gives everything room to breathe and brown properly. We’re going to move through this fairly quickly for the first part, and then we settle in for the true slow cooking process. Just keep that oven preheated to 325°F, and you are golden!
Searing and Building the Liquid Base for Your Flavorful Beef Roast
First things first: season! Take that dried chuck roast and really massage the salt, pepper, thyme, and rosemary right into the surface. Don’t be shy; we want every inch coated. Next, get your oil hot in that Dutch oven over medium-high heat. I mean hot! When you lay the roast in there, it should sizzle loudly—that’s the sound of flavor being born. Sear it for about three or four minutes until it’s deeply browned, then carefully take it out and put it on a plate.
Now, we drop in the onions and let them soften up for barely three minutes. Add your garlic and cook until you can really smell it—usually just one quick minute. Here’s the critical flavor step: Pour in that optional red wine and immediately grab a wooden spoon. You need to scrape up every single little brown bit stuck to the bottom of that pot. That sticky brown stuff is pure gold. Once that wine has reduced by about half (give it two minutes), return your roast to the pot.
Pour in your beef broth and the Worcestershire sauce. Now, here’s a pro tip so you don’t drown the meat: you only want the liquid to come about halfway up the side of the roast. We aren’t boiling it; we are braising it slowly. Bring that liquid right up to a simmer on the stovetop, put the lid on tight, and immediately tuck that whole adventure into your {325°F} oven.
The Slow Cook: Braising Time for the Best Pot Roast Gravy
This is the hands-off period, so go put your feet up! We let that beef roast hang out, covered, for a solid 2.5 hours. This initial braise starts the breakdown process for that melt in your mouth roast texture we are aiming for. Don’t peek too much; let the steady heat do its work!
After that initial time, carefully pull out the oven rack. Add your quartered potatoes and 2-inch carrot pieces right down into the liquid around the meat. Cover everything back up snugly and slide it back into the oven. We need another hour to an hour and a half. You’ll know it’s done when you can pierce the beef with a fork and it basically falls apart with zero resistance. When you pull it out, scoop the meat and vegetables onto a platter and keep them warm under some foil. Don’t you dare throw away that liquid! We’re turning this into the best pot roast gravy next.
Mastering the 5-Minute Stovetop Gravy for Your Pot Roast
Okay, we are at the big finale! The beef is resting, the vegetables look gorgeous, and now we tackle what I think is the most intimidating part for new cooks: making gravy right in the pot. Trust me, this stovetop gravy only takes about five minutes, and it tastes a million times better than anything from a packet. This is where all that rich, herby, beefy goodness we cooked up becomes the perfect velvety topping for your pot roast.
First, take a look at the liquid left behind in your Dutch oven. You’ll probably see some solid bits and maybe a layer of fat on top. Use a spoon to skim off any large pools of excess fat you don’t want in your sauce; you can discard those drippings or save them for roasting potatoes later—your call! Then, put that pot right back onto the stovetop over medium heat. We need that liquid simmering gently.
Now, let’s talk slurry. This is the key to getting a thick, smooth gravy without lumps, and it’s so simple. In a separate small bowl, grab two tablespoons of cornstarch and whisk it together with two tablespoons of cold water. It needs to be completely smooth before it ever meets the hot liquid. If you dump dry cornstarch into hot broth, you get instant, golf-ball-sized lumps, and nobody wants that!
Once your pot liquid is bubbling lightly, slowly, slowly, whisk in that cornstarch slurry. Keep whisking constantly as you pour it in. You’ll see almost instant magic! The liquid will start tightening up right before your eyes. Let it come to a gentle boil for about two minutes while you keep whisking—this ensures the cornstarch cooks out and there’s no starchy taste left. Taste it then! Does it need a little more salt or a fresh crack of pepper? Adjust now. Once it coats the back of your spoon beautifully, your best pot roast gravy is ready to generously smother that tender beef!
Tips for Success with Slow Cooker Pot Roast Variations
I know I just raved about my Dutch oven method, but honestly, there are days when I need this meal to be truly hands-off, and that’s when the slow cooker steps in. If you are aiming for a Crockpot beef dinner or need a true set-it-and-forget-it solution, this recipe adapts beautifully. The final result is still incredibly tender, but we have to make a few small adjustments so the meat doesn’t end up swimming!
The most important thing to remember when moving this pot roast to the slow cooker is that searing still matters. Yes, you *can* skip it if you’re in a massive rush, but don’t! Do the sear on the stovetop first, just like in the main recipe, and then transfer everything to the slow cooker base. This builds the flavor foundation. If you skip the sear, at least add an extra tablespoon of Worcestershire sauce for a little funk.
When using your Slow Cooker Pot Roast, the cooking times change slightly. You’ll want to cook on LOW for about 8 hours, or on HIGH for about 4 hours total. Here’s my biggest tip for guaranteed tenderness in this version: Wait until about two hours before it’s done to add your potatoes and carrots. If you add the root vegetables right at the start, they’ll break down completely into the stew, and we want them holding their shape somewhat alongside that beautiful shredded beef.
Also, because you won’t be reducing the liquid on the stovetop, you might end up with a little more broth than usual. That’s fine! When you go to make your gravy at the end, just skim the fat off the top of the slow cooker insert and proceed with the cornstarch slurry right there. It’s so easy, and you get an amazing sauce to soak up some fresh bread for dipping!
Serving Suggestions for This Hearty Family Dinner Idea
We did it! That beautiful, fork-tender pot roast is ready. Now, the fun part: what do we serve with this ultimate Sunday dinner classic? Because this meal is already rich with beef flavor, tender carrots, and creamy potatoes, you don’t need to overcomplicate the sides. The goal is usually to sop up every last drop of that amazing gravy we worked so hard on!
My absolute go-to is something light and green to cut through the richness. A simple steamed green bean tossed with a squeeze of lemon, or perhaps some quick sautéed spinach with garlic, just cleanses the palate perfectly between big bites of roast. It takes five minutes, and frankly, it adds a nice bit of color to the plate, which is important when everything else is brown and tan!
If you need something starchier than the potatoes already in the pot—maybe you have extra hungry folks or just love a comfort food overload—I sometimes like to make a side of creamy mashed potatoes to catch extra gravy, or even a light, fluffy spoon bread. Hear me out on this one: if you happen to have a batch of creamy Southern cheese grits ready, they are practically begging for that rich beef gravy. It sounds unconventional, but the savory cheese mixed with the thyme-and-beef broth gravy is just heavenly.
For a true classic presentation, you can’t beat a simple side salad with a sharp vinaigrette, especially if you’re serving this during the warmer months. That bright, acidic dressing helps balance the heavy, savory notes of the slow-cooked beef. Honestly, though, if you have good, crusty bread on the table, you’re halfway there. Use that bread to wipe the plate clean of gravy—that’s mandatory!
Storage and Reheating Instructions for Your Make Ahead Beef Dinner
One of the greatest secrets about a truly great pot roast is that it often tastes even better the next day. Seriously! All those amazing herbs and savory notes have time to mingle overnight, making it the ultimate make ahead beef dinner. But we have to store it correctly so that glorious, melt-in-your-mouth texture doesn’t suffer. You can’t just throw the whole shebang—meat, veggies, and gravy—into one container and hope for the best. Trust me, you want to separate the components!
The absolute key here is keeping your gravy separate from the meat and vegetables. If you store leftover vegetables submerged in gravy for too long, they get overly soft and saturated. So, when you’re cleaning up, gently scoop the roast and the larger vegetable chunks into one airtight container. Then, pour the leftover gravy into its own small jar or container. This way, you can control the moisture level when you reheat everything the next day. This method keeps the whole thing tasting almost freshly made!
The Best Way to Reheat Your Savory Slow Cooked Beef
When you’re ready to enjoy the leftovers, stick to low and slow reheating, whether you use the stovetop or the microwave. If you rush it with high heat, that beautifully tender beef can seize up on you, and it’ll feel tough instead of soft! I always recommend using the stovetop if you have time.
For the stovetop method, take your gravy jar and pour it into a small saucepan over medium-low heat. Let it warm up slowly until it’s steaming gently. In a separate, microwave-safe dish, arrange your meat and veggies. Pour just enough warm gravy over the meat to coat it—not drench it! Cover that dish loosely with a paper towel or vented lid and microwave it in 45-second bursts, stirring gently between each burst. This gentle warmth brings it back to life without overcooking it.
If you’re using the oven for a bigger batch, combine the meat, veggies, and gravy back in your Dutch oven or a casserole dish. Cover it tightly with foil. Heat it at a very low temperature, like 300°F, for about 15 to 20 minutes. The low temperature gently coaxes the moisture back into the fibers without drying them out. Remember, moisture is your friend when reheating braised meats!
Frequently Asked Questions About Making a Classic Pot Roast Recipe
I know you put so much effort into cooking every detail of this meal, so let’s make sure you feel 100% confident before you even start slicing your onions. It’s super common to have questions pop up about timing, cutting, or substitutions when tackling a big comfort meal like this. Don’t sweat it! That’s why I put this little FAQ together based on the things I always ask myself when I’m making a Classic Pot Roast Recipe. We’re going to banish any lingering cooking doubt right now!
Can I skip searing the beef for my pot roast?
Oh, honey, please don’t! I know you might be tempted to skip that step if you’re in a hurry, but this is the one place where I have to insist you don’t take a shortcut. Searing the beef chuck roast isn’t just about making it look pretty; it is literally the base layer for all the flavor in the finished dish. That deep, dark crust we build through searing is called the Maillard reaction, and it adds an incredible amount of savory, roasted depth that no amount of broth or herbs can ever replicate later on. If you skip it, your final sauce will taste thin. For a truly flavorful version, you need that deep, beautiful sear.
What is the best cut of beef for a melt in your mouth roast?
Hands down, you want the beef chuck roast. This cut comes from the shoulder area of the cow, and it’s got a fair bit of tough connective tissue mixed in, which sounds bad, but it’s actually perfect for us! When we cook it low and slow for hours—the exact way we do it for a melt in your mouth roast—that tissue breaks down into luscious gelatin. That gelatin is what gives your gravy body and makes the meat feel soft and juicy. If you try to use a leaner cut, like a sirloin or eye of round, it will cook fine initially, but without that fat and connective tissue, it dries out fast and ends up stringy and tough, not tender!
How do I ensure my vegetables are tender in the Crockpot Pot Roast?
This is a great question, especially for friends using the Crockpot Pot Roast method, because those veggies can either be perfect or turn into baby food depending on when you add them. The secret is timing! If you add your potatoes and carrots at the very beginning, by hour five or six, they will completely dissolve into the crock, leaving you with just broth. In the instructions above, you saw we added them only for the last hour or so of cooking in the Dutch oven. You do the exact same thing in the slow cooker: cook the meat low and slow for most of the time, and then add the chopped vegetables in for the final two hours. They’ll cook through beautifully and absorb the flavor without disintegrating into mush.
If you want to try another comforting side that pairs well with slow-cooked meals, you should definitely check out my recipe for twice-baked potatoes! They handle gravy like champs.
Build Your Confidence: Start Making This Pot Roast Today
Look, I know what it feels like to stand in front of a big roast, wondering if you accidentally bought a shoe instead of a cut of beef. But here’s the truth I want you to walk away with today: You absolutely have the skill set to make this pot roast. We stripped away the fancy language and focused only on the steps that deliver that rich, savory flavor and that incredible tenderness you’re dreaming about. This recipe isn’t about following rigid rules; it’s about understanding that a little patience in searing and a long, gentle cook time are your true secret weapons.
You don’t need a fancy culinary degree to create a meal that fills your house with the scent of a perfect Sunday dinner. This is achievable, delicious, and entirely yours. Take the recipe, find a quiet afternoon, and just commit to the process. I bet you’ll find, just like I did when I first started, that the greatest satisfaction in cooking comes from serving something truly wonderful that *you* made. If you succeeded with this roast, imagine what you can tackle next! You might even find these recipes perfect for easy weeknight dinners next time you’re short on time.
I’m so excited for you to try this! If you nail the sear and get that beef fork-tender, please, snap a picture and tag me. Hearing about your success with this meal is what Kitchenican is all about. Go on, get that chuck roast and start building your culinary confidence today. You’ve got this!
PrintThe Best Pot Roast Recipe: Fall-Apart Tender Beef for Sunday Dinner

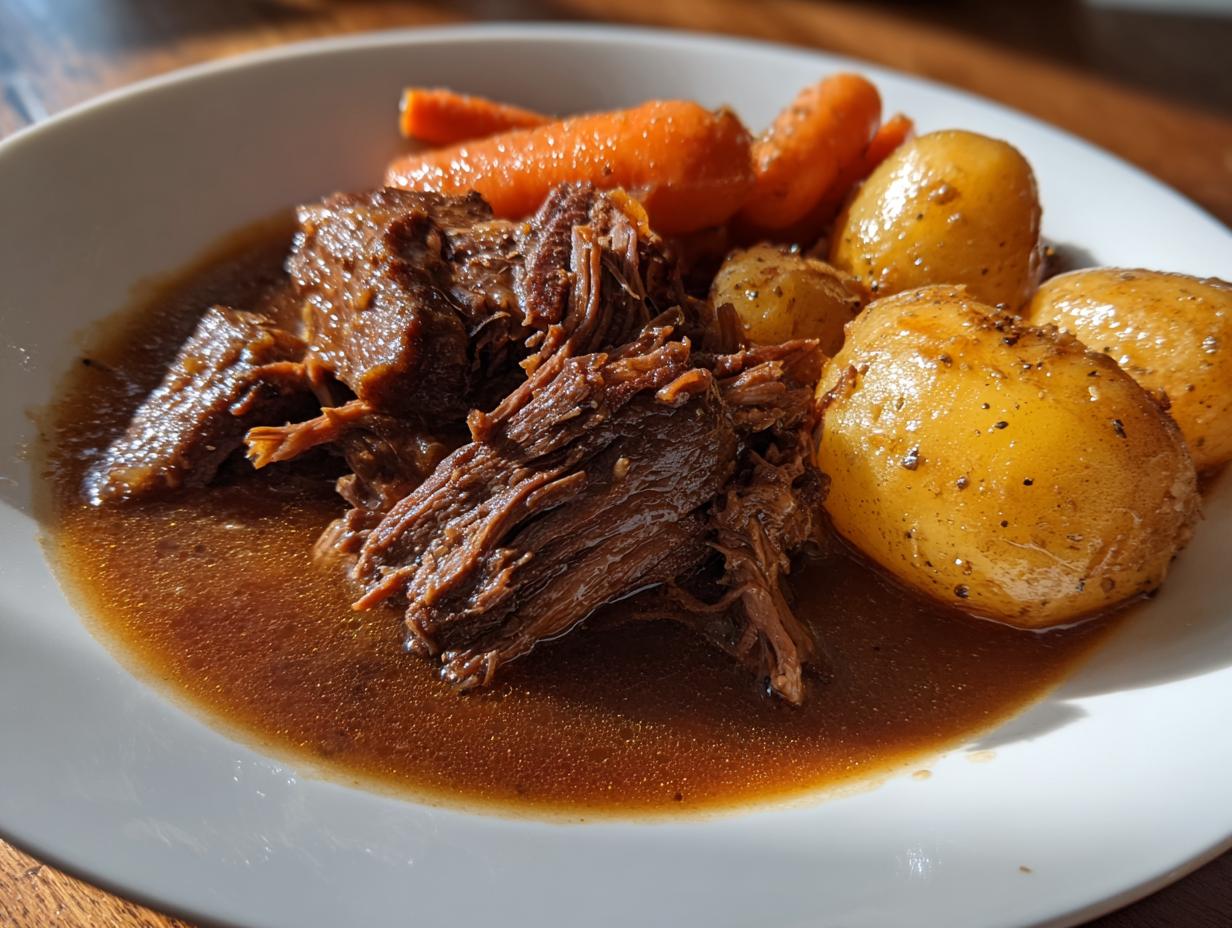
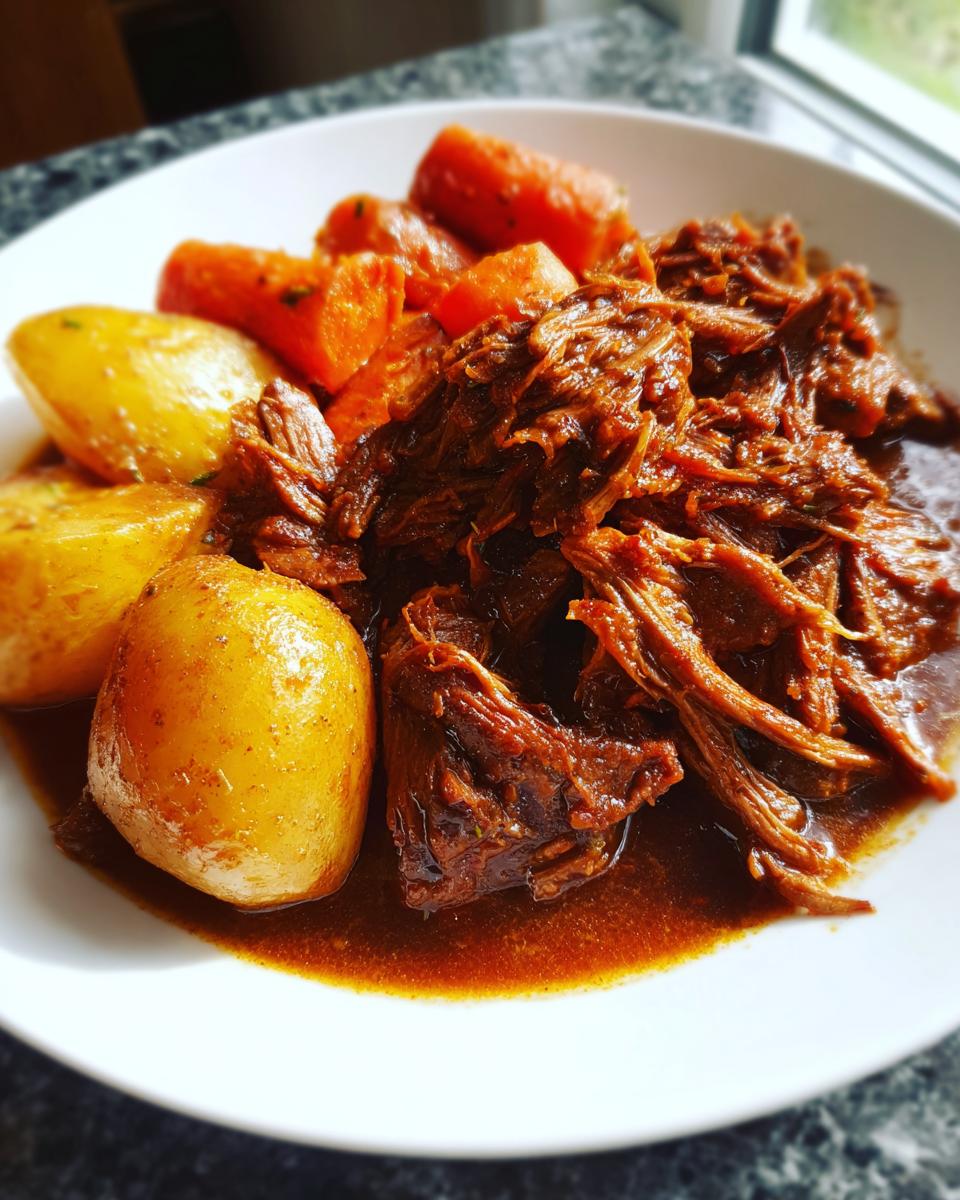
You can create a truly comforting, fall-apart tender beef pot roast using simple steps. This recipe focuses on achieving deep, savory flavor with classic root vegetables, making it the perfect hearty family dinner.
- Prep Time: 20 min
- Cook Time: 4 hours
- Total Time: 4 hours 20 min
- Yield: 6 servings 1x
- Category: Dinner
- Method: Braising/Oven
- Cuisine: American
- Diet: Low Fat
Ingredients
- 3 lb beef chuck roast
- 2 tablespoons olive oil
- 1 large yellow onion, cut into large wedges
- 4 medium carrots, peeled and cut into 2-inch pieces
- 1.5 lbs Yukon Gold potatoes, quartered
- 4 cloves garlic, minced
- 1 teaspoon dried thyme
- 1 teaspoon dried rosemary
- 1 teaspoon salt
- 0.5 teaspoon black pepper
- 2 cups beef broth
- 0.5 cup dry red wine (optional, substitute with more broth)
- 2 tablespoons Worcestershire sauce
- 1 tablespoon cornstarch (for gravy)
- 2 tablespoons cold water (for gravy)
Instructions
- Pat the beef chuck roast dry with paper towels. Season all sides generously with salt, pepper, thyme, and rosemary.
- Heat the olive oil in a large Dutch oven or heavy-bottomed pot over medium-high heat. Sear the roast on all sides until deeply browned, about 3-4 minutes per side. Remove the roast and set it aside.
- Add the onion wedges to the pot and cook for 3 minutes until they start to soften. Add the minced garlic and cook for 1 minute until fragrant.
- Pour in the red wine (if using) and scrape up any browned bits from the bottom of the pot. Let the wine reduce by half, about 2 minutes.
- Return the roast to the pot. Pour in the beef broth and Worcestershire sauce. The liquid should come about halfway up the side of the roast.
- Bring the liquid to a simmer, then cover the pot tightly with a lid. Transfer the Dutch oven to a preheated 325°F oven. Cook for 2.5 hours.
- After 2.5 hours, add the carrots and potatoes around the roast. Cover the pot again and return it to the oven. Cook for another 1 to 1.5 hours, or until the beef is completely fork-tender and easily shreds.
- Carefully remove the roast and vegetables from the pot and cover them loosely with foil to keep warm.
- To make the gravy, skim excess fat from the liquid remaining in the pot. Place the pot on the stovetop over medium heat. In a small bowl, whisk together the cornstarch and cold water to create a slurry.
- Bring the pot liquid to a gentle boil. Slowly whisk in the cornstarch slurry. Continue to whisk until the gravy thickens, about 2-3 minutes. Taste and adjust salt and pepper if needed.
- Slice the pot roast or shred it with two forks. Serve immediately with the vegetables and spoon the savory slow-cooked beef gravy over everything.
Notes
- For the best sear, make sure your Dutch oven is hot before adding the meat. A good sear builds the foundation for deep flavor.
- If you are using a slow cooker, sear the meat first, then place it in the slow cooker with the liquids and cook on low for 8 hours or high for 4 hours before adding the vegetables for the last 2 hours.
- This melt-in-your-mouth roast is excellent for making ahead; cool completely, store the meat and gravy separately, and reheat gently the next day.
Nutrition
- Serving Size: 1 serving (approx. 6 oz meat + vegetables)
- Calories: 480
- Sugar: 8
- Sodium: 650
- Fat: 24
- Saturated Fat: 9
- Unsaturated Fat: 15
- Trans Fat: 0
- Carbohydrates: 25
- Fiber: 4
- Protein: 40
- Cholesterol: 110