

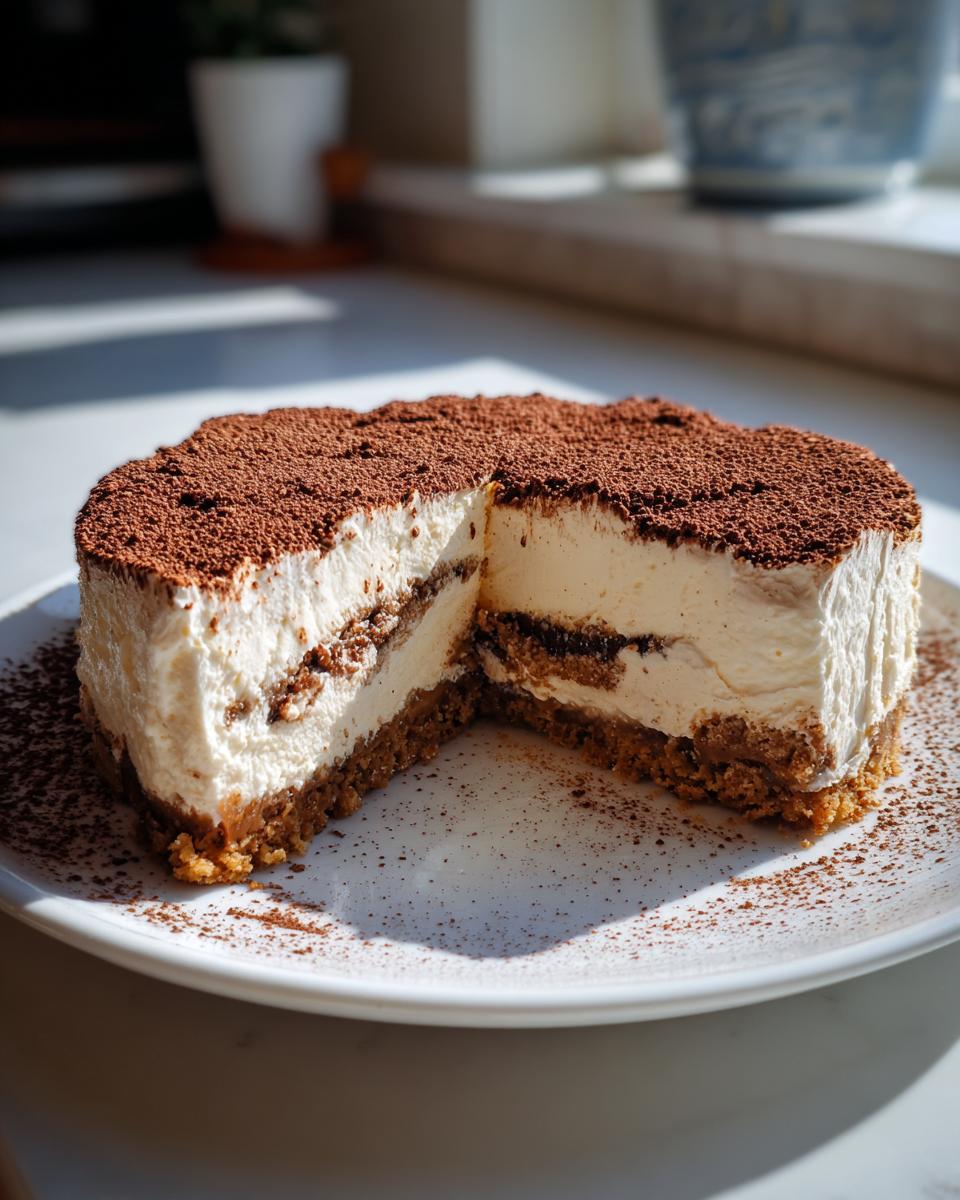
Okay, listen up, because if you love two amazing desserts but can’t decide which one to make—say, the tangy richness of cheesecake and the heavenly coffee kick of tiramisu—I have solved your dessert crisis. We are making the ultimate fusion: the tiramisu cheesecake. When I first started cooking, I thought something this stunning, two desserts in one glorious creation, must be incredibly complicated. But trust me, as Ava Sinclair, I learned that the best recipes aren’t about professional skills; they’re about smart assembly. That’s why this version is absolutely fantastic: it’s a no bake tiramisu cheesecake. You get that unbelievably creamy texture and flavor, and you don’t even have to turn on the oven. It’s my go-to for an impressive treat you can easily make ahead!
- Why This No Bake Tiramisu Cheesecake Recipe Works for You
- Gathering Ingredients for Your Tiramisu Cheesecake
- Step-by-Step Instructions for No Bake Tiramisu Cheesecake
- Expert Tips for the Best Tiramisu Cheesecake
- Variations on the Classic Tiramisu Cheesecake Recipe
- Serving Suggestions for Your Italian Coffee Dessert
- Storage and Reheating Instructions for Your Make Ahead Desserts
- Frequently Asked Questions About Tiramisu Cheesecake
- Nutritional Estimates for Creamy Cheesecake Desserts
- Nutritional Estimates for Creamy Cheesecake Desserts
Why This No Bake Tiramisu Cheesecake Recipe Works for You
When you’re staring down a big family dinner or a potluck invitation, the last thing you need is a fussy dessert that demands attention right when everyone is sitting down to eat. That’s why I love this tiramisu cheesecake recipe so much. It’s built for people who want serious wow-factor without the stress of baking a temperamental custard.
It hits all the right notes, giving you that amazing Italian Coffee Dessert experience without ever having to hover near an oven. You can find more of my favorite sweet indulgences over at my collection of delicious dessert recipes!
Impressive Dinner Party Treats Made Simple
You get all the elegance of a layered cake with zero baking required! Because this is a make ahead dessert, you just whip it up the day before, and it sets itself perfectly in the fridge. It looks incredibly sophisticated when you dust it with cocoa powder, making it one of the best impressive dinner party treats around. Guests always think it took hours, and I just smile!
Achieving Silky Smooth Cheesecake Texture
The secret to that dreamy mouthfeel is twofold. First, we use both cream cheese AND mascarpone—that’s where the authentic richness comes from. Second, instead of baking, we fold in stiffly whipped heavy cream. This incorporates air gently, guaranteeing that you get that perfect, silky smooth cheesecake texture instead of a dense, baked block. It’s truly heavenly.
Gathering Ingredients for Your Tiramisu Cheesecake
Okay, before we even think about assembly, we have to talk ingredients. The beauty of this Tiramisu Cheesecake Recipe is that it relies on a few key players to deliver that unmistakable Italian flavor. Since this is a no-bake version, getting your dairy just right—softened, not melted—is super important for that smooth blend. You can find my guide on making easy rich homemade chocolate syrup if you wanted to add a drizzle, but honestly, this recipe shines with just coffee and cocoa!
Crust Components for the Tiramisu Cheesecake Recipe
We’re keeping the base easy and reliable. You’ll need just a few things here to create a sturdy foundation for that creamy top:
- 1 1/2 cups graham cracker crumbs
- 1/4 cup granulated sugar
- 6 tablespoons unsalted butter, melted
- 1 teaspoon instant espresso powder (Trust me on this addition—it wakes up the base!)
Mascarpone Cheesecake Filling Ingredients
This is where the richness comes from. Make sure your dairy components are truly at room temperature so they blend without lumps. We need:
- 16 ounces cream cheese, softened
- 1 cup powdered sugar
- 8 ounces mascarpone cheese, softened (Don’t skip the mascarpone; it defines the tiramisu flavor!)
- 1 teaspoon vanilla extract
- 1 cup heavy whipping cream (This needs to be whipped separately before folding in!)
The Essential Espresso Soak for Ladyfingers
This step is what makes it feel like the Best Tiramisu Recipe fused with a cheesecake. These guys absorb liquid fast, so be quick when dipping; we want flavor, not a soggy mess!
- 1/4 cup strong brewed espresso or coffee, cooled
- 2 tablespoons coffee liqueur (like Kahlua, if you want that adult kick!)
You’ll also need about 1/2 cup of ladyfingers and plenty of unsweetened cocoa powder for dusting right before serving. That’s it! Simple, right?
Step-by-Step Instructions for No Bake Tiramisu Cheesecake
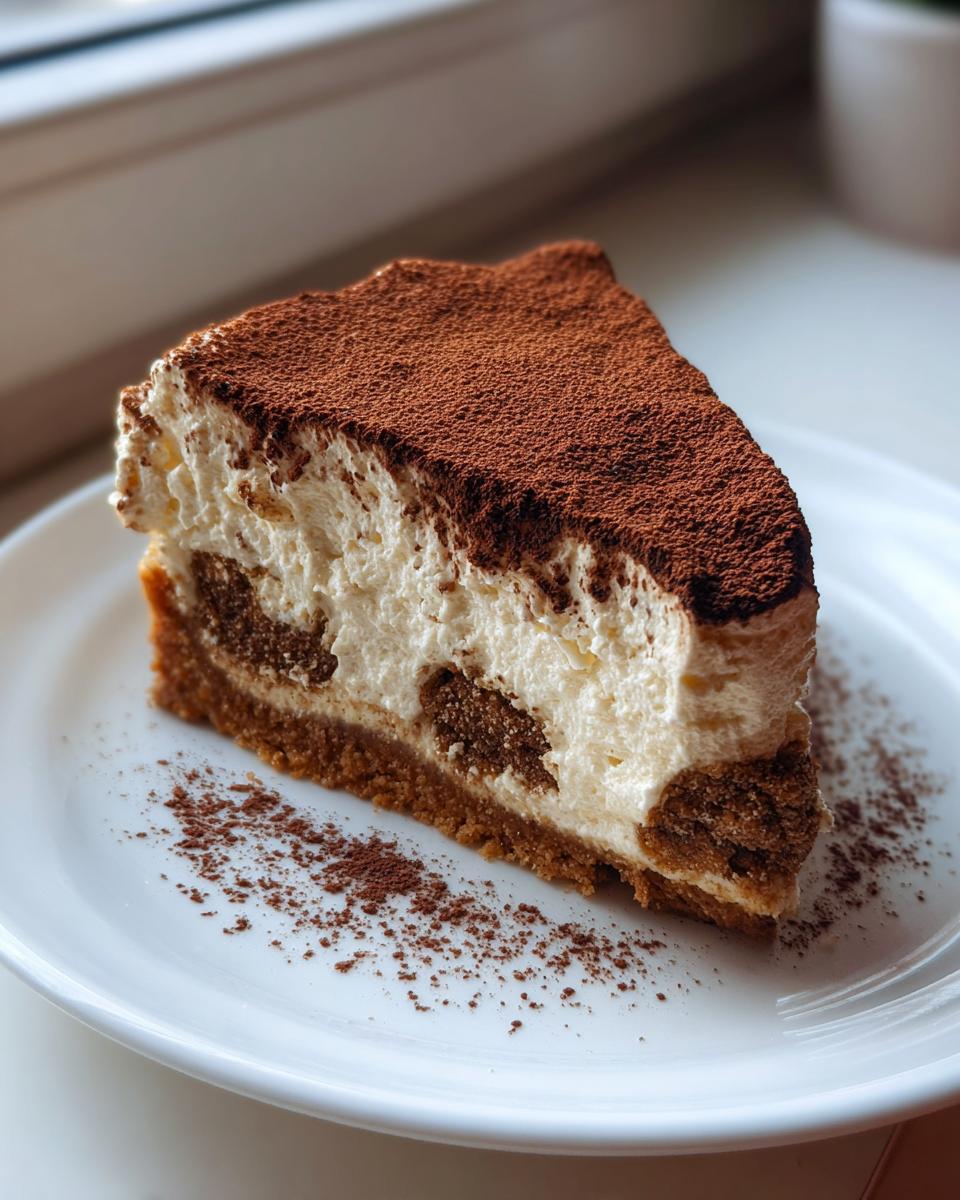
This is where the magic happens, and let me tell you, the assembly of this tiramisu cheesecake is so satisfying. Since there’s no baking fuzz, we move fast through the steps. Remember, we are aiming for those beautiful, distinct layers you see in truly creamy cheesecake desserts, so speed matters when things are soft!
Preparing and Chilling the Crust
First things first: the base. You just mix up those graham cracker crumbs, a bit of sugar, and the espresso powder if you haven’t yet. Pour in that melted butter and smash it all together until it looks like wet sand. Press it evenly and firmly into the bottom of your 9-inch springform pan. I mean really press it—use the bottom of a measuring cup for a flat surface. Pop that pan straight into the freezer right now. This chilling step is non-negotiable; it locks the crust in place while we move on to the smooth filling!
Creating the Creamy Mascarpone Filling
Get your electric mixer out for this part! Beat the room-temperature cream cheese until it’s totally smooth, then mix in the powdered sugar until there are no lumps left. Don’t rush this! Next, add your softened mascarpone and vanilla. Once that’s combined, you need to whip your heavy cream separately in another bowl until stiff peaks form—you know, when you pull the whisk out and the peaks stand straight up. Gently, gently fold that beautiful whipped cream into the cheese mixture. You want to keep all that air in there! That’s the secret to that wonderful no-bake fluffiness.
Assembling the Layered Cheesecake Fusion
While your crust is chilling, mix your cooled espresso and liqueur (if you’re using it) in a small bowl. Now, work fast! Quickly dip both sides of your ladyfinger halves into the coffee mixture—quick in, quick out! Place half of those soaked ladyfingers right over the frozen crust. Top that layer evenly with about half of your creamy filling. Repeat the process: another layer of dipped ladyfingers, and then cover it all up with the remaining filling. Smooth the top beautifully with a spatula. Cover it tightly and get it back in the fridge for at least six hours, but seriously, aim for overnight for the absolute best results.
Expert Tips for the Best Tiramisu Cheesecake
Now that you’ve assembled this beautiful tiramisu cheesecake, I want to chat about the little things that turn a good dessert into an unforgettable one! I learned these tricks through a few messy attempts, so save yourself the bother and listen up. We want that gorgeous, firm structure and deep coffee flavor that sings Italian dessert!
Coffee Strength and Flavor Boosts for Your Tiramisu Cheesecake
Since this is a no bake tiramisu cheesecake, we rely on the coffee soak for most of our deep flavor, so let’s maximize it! Did you notice that little bit of instant espresso powder in the crust ingredients? Use it! It helps bring out a fantastic roasted note even before you get to the creamy filling. And if you skipped the optional Kahlua? No problem. Just dissolve an extra half teaspoon of that instant espresso powder into your cooled coffee before you dip your ladyfingers. I also use a fantastic homemade creamy garlic aioli recipe when I’m needing a flavor punch in savory dishes, but for this dessert, the espresso powder is your absolute best friend for intensity!
The Critical Chilling Time for Setting
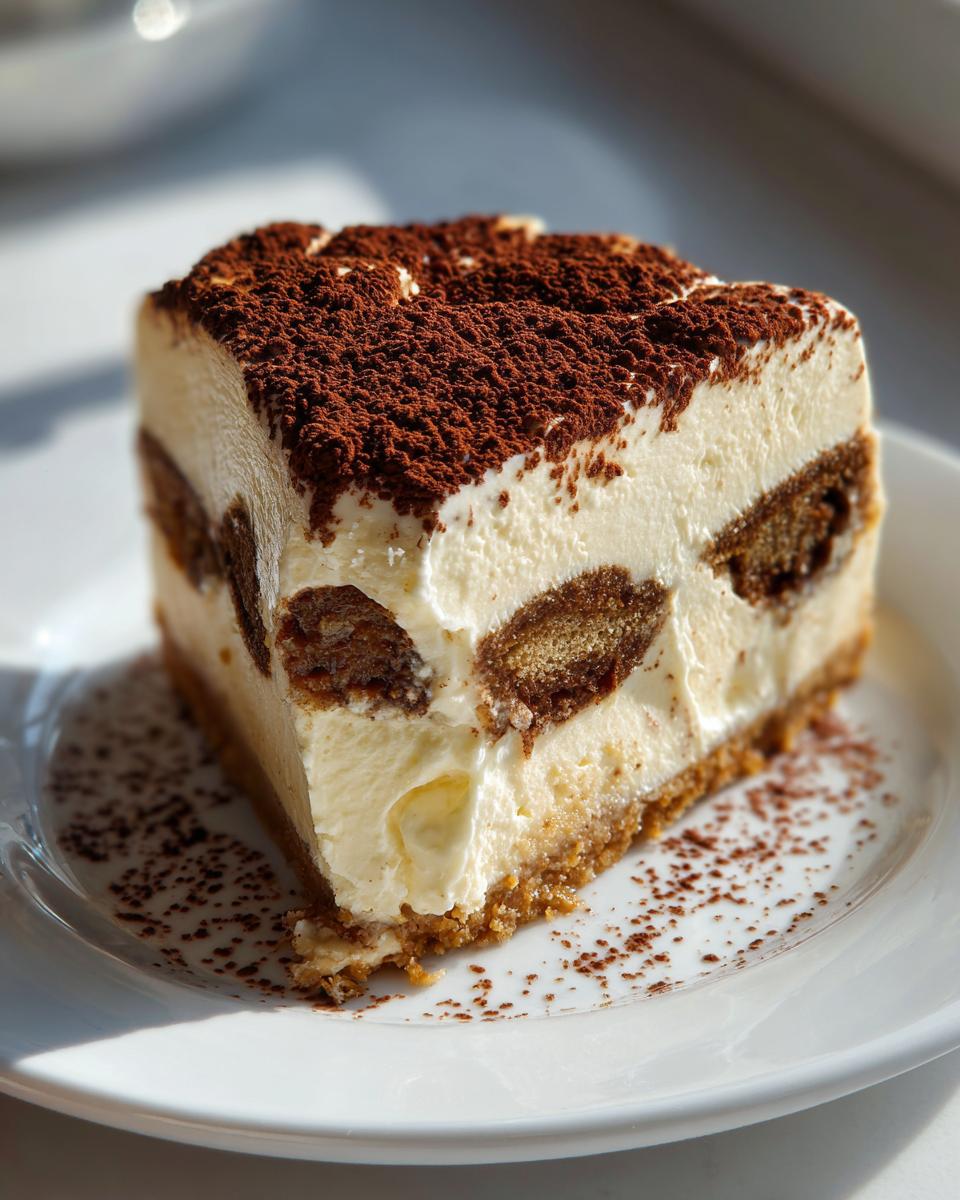
Listen, I know you want to slice into this decadent fusion dessert immediately, but resist that urge! The recipe says a minimum of six hours, and sure, that will slightly firm it up. But if you want that perfect slice—the one that holds its shape beautifully when you lift it out—you absolutely must leave this in the fridge overnight. Over-chilling works wonders for no-bake recipes; it solidifies the fats and gives you that truly luxurious, silky smooth cheesecake mouthfeel. Patience pays off!
Variations on the Classic Tiramisu Cheesecake Recipe
I love that you’re thinking about customization! While this no bake tiramisu cheesecake is my personal favorite—because who doesn’t love a rich, creamy dessert that skips the oven?—it’s fun to know how you can tweak things based on what you have or what mood strikes you. We can turn this into different layered cheesecake ideas in minutes!
Making a Baked Tiramisu Cheesecake Alternative
So, maybe you’re searching for a true Baked Tiramisu Cheesecake experience. That’s totally different, flavor-wise, but still delicious! If you go that route, you typically skip the whipped cream folding step, use slightly less liquid for the soak, and, obviously, bake it low and slow in a water bath until the center is just set. The flavor profile changes from light and fluffy to dense and incredibly rich, more like a New York style base that absorbed all that gorgeous coffee goodness. The bake takes finesse, but the flavors are unbelievably deep!
Easy Cheesecake Variations: Chocolate or Nutty Crusts
The crust is the easiest part to swap out if you want some easy cheesecake variations. If you’re a chocolate fanatic, ditch the graham crackers and crush up about 24 or 25 chocolate sandwich cookies—you know, the Oreos! Just make sure to scrape out some of the filling first, or use the whole cookie if you want it extra sweet. Also, if you have some leftover pecans or walnuts lying around after making my red velvet cheesecake recipe, pulse a quarter cup in with the crumbs. It adds a fantastic little crunch against the smooth filling—a little nutty background note is always welcome in my book!
Serving Suggestions for Your Italian Coffee Dessert
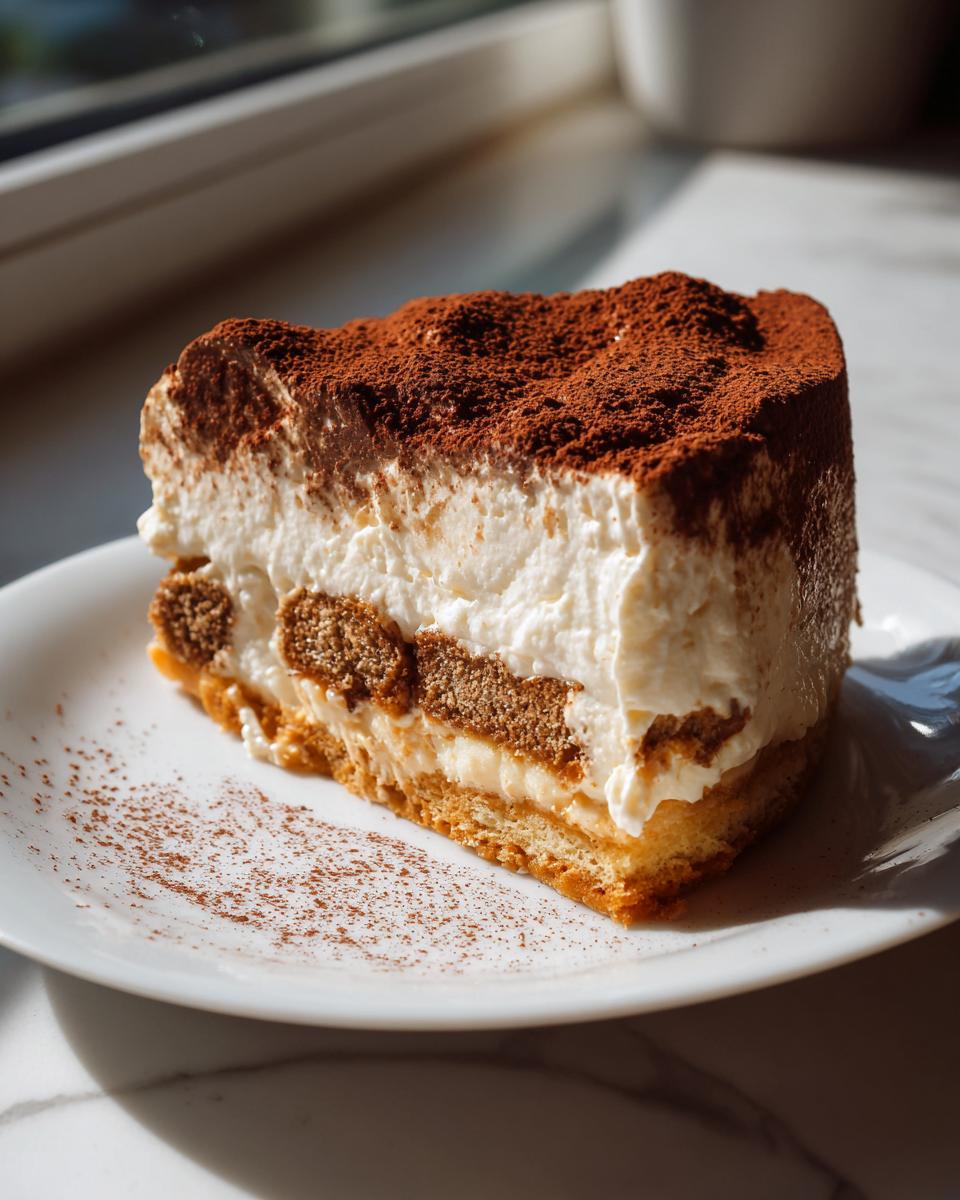
Once you’ve wrestled this beauty out of the springform pan and dusted it with that final cloud of cocoa powder, it’s time to think presentation! While this Italian coffee dessert stands totally on its own, sometimes a little extra flair makes it feel truly special. I always think serving it slightly chilled is best for that creamy bite.
- A light drizzle of chocolate sauce—maybe from one of my easy cool whip candy recipes if you make a slight modification—really ups the decadence factor for those who want more sweetness.
- A few perfectly placed chocolate shavings on top of the cocoa dust look incredibly professional.
- For a touch of green (because who doesn’t love color?), a couple of fresh mint sprigs placed right on top can provide a beautiful contrast against the dark espresso and cocoa.
Honestly, though, sometimes I just cut a big slice, grab a spoon, and call it a day. It’s that good!
Storage and Reheating Instructions for Your Make Ahead Desserts
This is honestly one of the best things about making a no bake tiramisu cheesecake: it is inherently a make ahead dessert! You truly need that chilling time for it to set up properly anyway, so I often make this the day before I plan to serve it. That frees up my entire day of the party!
You need to keep this beauty refrigerated the entire time it’s setting up and afterward if you have leftovers. Cover the springform pan really well—plastic wrap tightly tucked around the edges is key to stopping it from absorbing any weird fridge smells. It stays wonderfully fresh for up to three or four days in the refrigerator. I find the texture holds up perfectly!
Now, here’s a super important tip for presentation: Do NOT dust it with cocoa powder until you are literally ready to serve it. If you dust it ahead of time, the moisture from the cheesecake will absorb the cocoa powder, and instead of a beautiful, snowy top layer, you’ll end up with a dull, dark brown surface. Keep the dusting for the very last second. It’s the finishing touch that makes this coffee and cream dessert shine. If you ever need tips on storing heartier meals, you can check out my thoughts on how to keep easy bean soup tasting fresh for days, but for cheesecake, airtight and cold is the way to go!
Frequently Asked Questions About Tiramisu Cheesecake
Whenever I share this tiramisu cheesecake recipe, people always have a few questions because it feels so rich and special. I get it! You want to make sure you nail that perfect texture since this is one of those truly decadent desserts. I’ve gathered the most common things I hear from other home cooks right here, so you can feel totally confident stepping into the kitchen.
Can I substitute the mascarpone cheese in this Tiramisu Cheesecake Recipe?
If you absolutely *must* substitute the mascarpone, know that you’re losing the key element of that classic flavor profile. Mascarpone is rich and slightly sweet, making up that luxurious Italian feel. If you can only find cream cheese, you can technically substitute it, but you should add back some of the richness by whipping a half-cup of extra heavy cream just for the filling, or mixing your cream cheese with a spoonful of heavy whipping cream. However, for the best results, try to find the mascarpone for this mascarpone cheesecake recipe; you won’t regret the authentic creaminess!
What is the best coffee substitute for the espresso soak?
Espresso powder is amazing because it’s super concentrated, but if you don’t have that on hand, don’t sweat it! The goal is intense coffee flavor without adding too much extra liquid, which would sabotage our no bake tiramisu cheesecake structure. Your second best option is brewing a really, really strong cup of coffee—think French press strength or using two tea bags in a small amount of water. If you still feel like it needs more punch, just add a tiny splash of coffee extract mixed into the water. It delivers the flavor without the volume.
How do I prevent my No Bake Tiramisu Cheesecake from collapsing?
This is a very common fear for anyone making creamy cheesecake desserts that don’t go into the oven! It all comes down to two things: air incorporation and chill time. First, when you whip that heavy cream, you must get it to stiff peaks. If it’s soft, it will weep liquid when it sits. Second, and I can’t stress this enough, you need that full chilling time. That minimum of six hours is structural engineering time! If you let it chill overnight, covered snugly, you’ll get a slice that comes out perfectly clean—no leaning tower of cheesecake here! Check out my tips for easy weeknight dinners for more ideas on prepping smarter!
Nutritional Estimates for Creamy Cheesecake Desserts
I always like to give you a rough idea of what’s in the slice, though homemade creations can vary wildly depending on exact brands and serving size! Since this is such a rich, decadent dessert, it’s definitely one meant for savoring. These estimates reflect one generous slice of our creamy cheesecake desserts, made without any extra boozy additions to the soak:
- Serving Size: 1 slice
- Calories: 450
- Sugar: 35g
- Fat: 32g
- Protein: 7g
Remember, this is just an educated estimate, but it certainly proves why this indulgence is best saved for special occasions!
Nutritional Estimates for Creamy Cheesecake Desserts
I always like to give you a rough idea of what’s in the slice, though homemade creations can vary wildly depending on exact brands and serving size! Since this is such a rich, decadent dessert, it’s definitely one meant for savoring. These estimates reflect one generous slice of our creamy cheesecake desserts, made without any extra boozy additions to the soak:
- Serving Size: 1 slice
- Calories: 450
- Sugar: 35g
- Fat: 32g
- Protein: 7g
Remember, this is just an educated estimate, but it certainly proves why this indulgence is best saved for special occasions! If you’re looking for lighter fare, you might want to check out my guide to healthy dinner recipes!
PrintNo-Bake Tiramisu Cheesecake: Simple, Creamy Fusion Dessert

Create this decadent Tiramisu Cheesecake without baking. This recipe combines a creamy mascarpone filling with espresso-soaked ladyfingers over a graham cracker crust for an impressive, make-ahead Italian coffee dessert.
- Prep Time: 30 min
- Cook Time: 0 min
- Total Time: 6 hr 30 min
- Yield: 10 servings 1x
- Category: Dessert
- Method: No-Bake
- Cuisine: Italian Fusion
- Diet: Vegetarian
Ingredients
- 1 1/2 cups graham cracker crumbs
- 1/4 cup granulated sugar
- 6 tablespoons unsalted butter, melted
- 1 teaspoon instant espresso powder (for crust)
- 16 ounces cream cheese, softened
- 1 cup powdered sugar
- 8 ounces mascarpone cheese, softened
- 1 teaspoon vanilla extract
- 1/4 cup strong brewed espresso or coffee, cooled
- 2 tablespoons coffee liqueur (like Kahlua, optional)
- 1 cup heavy whipping cream
- 1/2 cup ladyfingers, halved
- Unsweetened cocoa powder, for dusting
Instructions
- Prepare the crust: Mix graham cracker crumbs, granulated sugar, and instant espresso powder in a bowl. Pour in the melted butter and mix until the crumbs are evenly moistened. Press the mixture firmly into the bottom of a 9-inch springform pan. Place the pan in the freezer while you prepare the filling.
- Make the cheesecake filling: In a large bowl, beat the softened cream cheese and powdered sugar with an electric mixer until smooth. Add the mascarpone cheese and vanilla extract. Beat until fully combined and creamy.
- In a separate bowl, whip the heavy whipping cream until stiff peaks form. Gently fold the whipped cream into the cream cheese mixture until just combined.
- Prepare the coffee soak: In a small bowl, mix the cooled espresso (or coffee) with the coffee liqueur, if using.
- Assemble the layers: Dip the ladyfinger halves quickly into the espresso mixture, ensuring they are moist but not soggy. Arrange a single layer of the soaked ladyfingers over the chilled crust.
- Spread half of the cheesecake filling evenly over the ladyfingers. Top with another layer of espresso-soaked ladyfingers. Spread the remaining cheesecake filling over the top layer.
- Smooth the top with a spatula. Cover the pan tightly with plastic wrap.
- Chill the Tiramisu Cheesecake for at least 6 hours, or preferably overnight, to allow it to set completely.
- Before serving, carefully remove the springform ring. Dust the top generously with unsweetened cocoa powder. Slice and serve this creamy cheesecake dessert.
Notes
- For an even richer coffee flavor, dissolve 1 teaspoon of instant espresso powder into the cooled espresso before soaking the ladyfingers.
- If you skip the coffee liqueur, add 1/2 teaspoon of extra espresso powder to the cream cheese filling for depth.
- This no bake tiramisu cheesecake is best made one day ahead to achieve the firmest texture.
Nutrition
- Serving Size: 1 slice
- Calories: 450
- Sugar: 35g
- Sodium: 250mg
- Fat: 32g
- Saturated Fat: 19g
- Unsaturated Fat: 13g
- Trans Fat: 0g
- Carbohydrates: 35g
- Fiber: 1g
- Protein: 7g
- Cholesterol: 95mg